Hoo boy.
My story begins in April, after I had the "genius" idea to make a magnetised display base.
That didn't work, but it did use all of my proprietary sand blend, leaving me unable to base my miniatures with a similar texture to the previous 60+ green marines. It also didn't help that I had been spotty with my recordkeeping, and as a result ended up with a documented series of recipes, but no nuance as to the application of those recipes.
The net result was a week and a half of meltdowns, awful sleep, trashed mental health, and a vicious downward spiral that saw me in tears of frustration at my hobby desk. No, I don't feel proud writing that, or broadcasting it on a publicly-available platform, but part of ending the stigma is talking about it, so here I am.
I have discovered that perfectionism and an inability to move past minor imperfections in my little toy soldiers has infected my work. I don't know why or how it got in, but it's here now, and I had best make peace with my newfound inner daemon, or be corrupted by it. At least once I considered giving the whole thing away, which is not a helpful or healthy thought.
So what's all of this got to do with a basing tutorial?
Well, simply put, this article is not actually for YOU, dear reader, it's for me. You are welcome to copy the ideas, techniques, and colours in this tutorial, but this hobby article (and the others I will soon write) exist for me to quickly recall my basing method for my Salamanders, in exacting detail, down to the materials used.
Let's start from the top:
You Will Need:
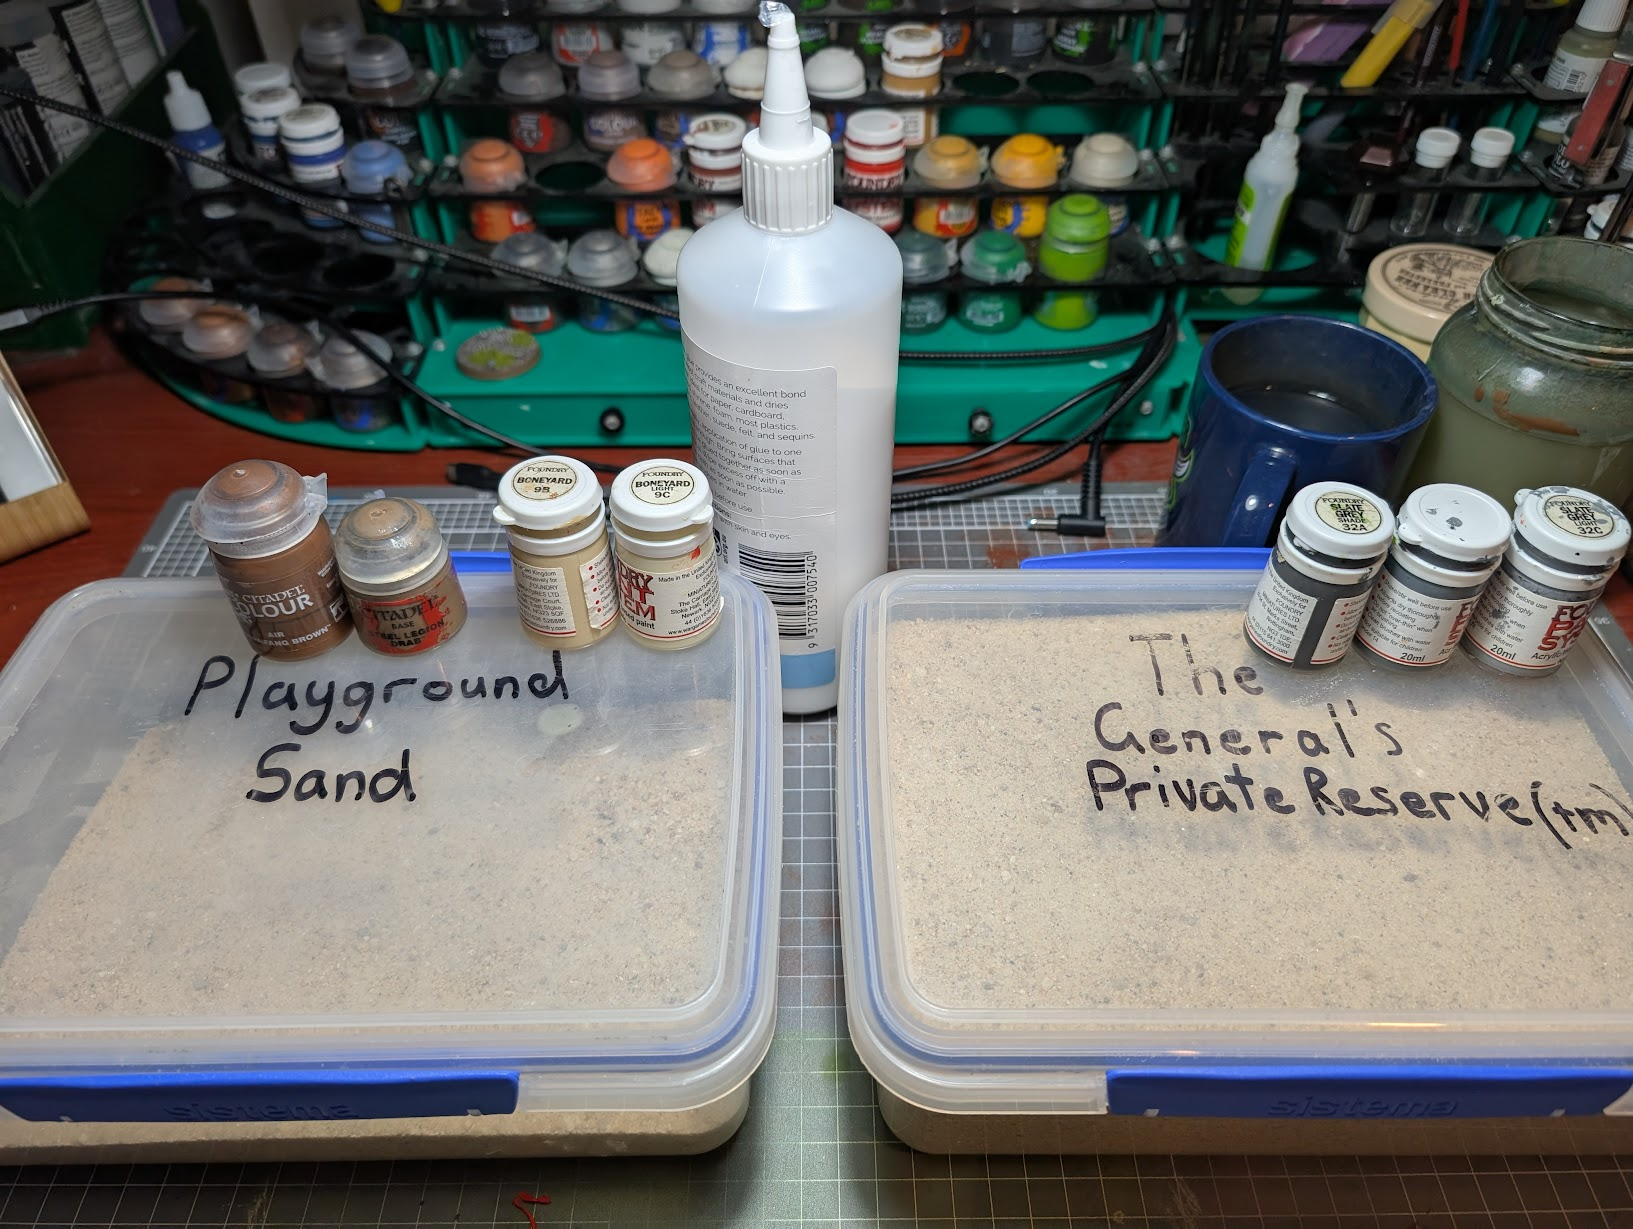
- Sand - A bit of nuance here, I have used two different types of sand - $8 Playground sand from Bunnings, which comes in a big fuckoff 20kg bag, which has been dried out in the sun, and a bag of aquarium substrate which comes in a smaller 5kg bag. The idea here is you want some chunky texture and some smaller texture.
- Cork Rocks - A rule of thumb for me is if the model already has a tacticool rock, I will not glue rocks onto the base. If there are no rocks, I will pick 1-3 small rocks that I got from the army painter, and stick them on with super glue.
- Static Grass - Again, from the army painter range.
- PVA Glue - Mercifully, PVA is cheap and plentiful and unlikely to fuck over your hobby project by choosing the marginally wrong one.
- Paint. Der.
- Mournfang Brown, preferably the Air version for reasons I will explain later.
- Steel Legion Drab. That's it, that's the paint.
- Foundry Boneyard - this could be substituted for Ushabti Bone and Screaming Skull, but your mileage may vary.
- Foundry Slate Grey - there'll be some GW or Vallejo Triad you can use, but this is for me, not you, so I'm not going to look it up.
- Nuln Oil. GW's washes are the only thing I really couldn't do without from the mothership, so whilst I'm sure something from a different range would do a comparable job, for physical practicality reasons, I don't bother, and neither should you.
Before you ask, no, those aren't affiliate links, and I wouldn't expect them to be, considering you will never purchase more than one $8 20kg bag of sand, as that's enough to base enough miniatures for 10 lifetimes.
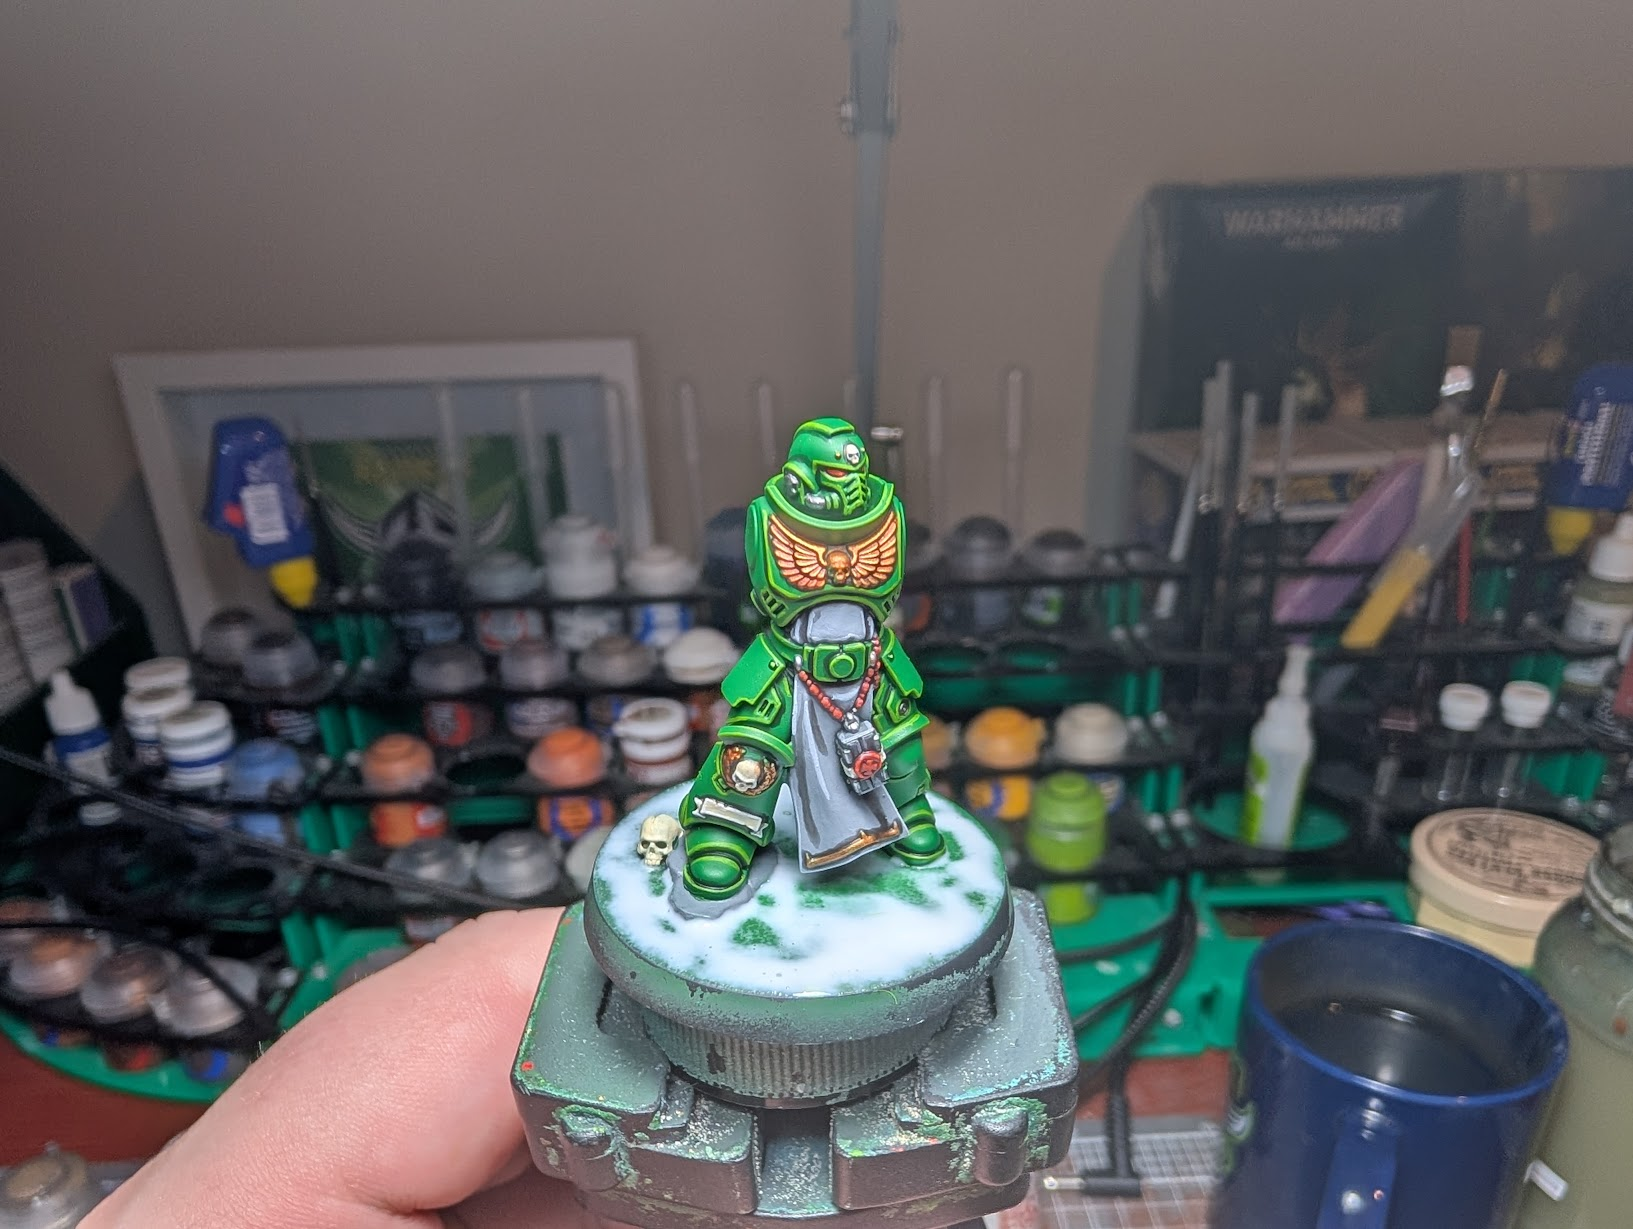
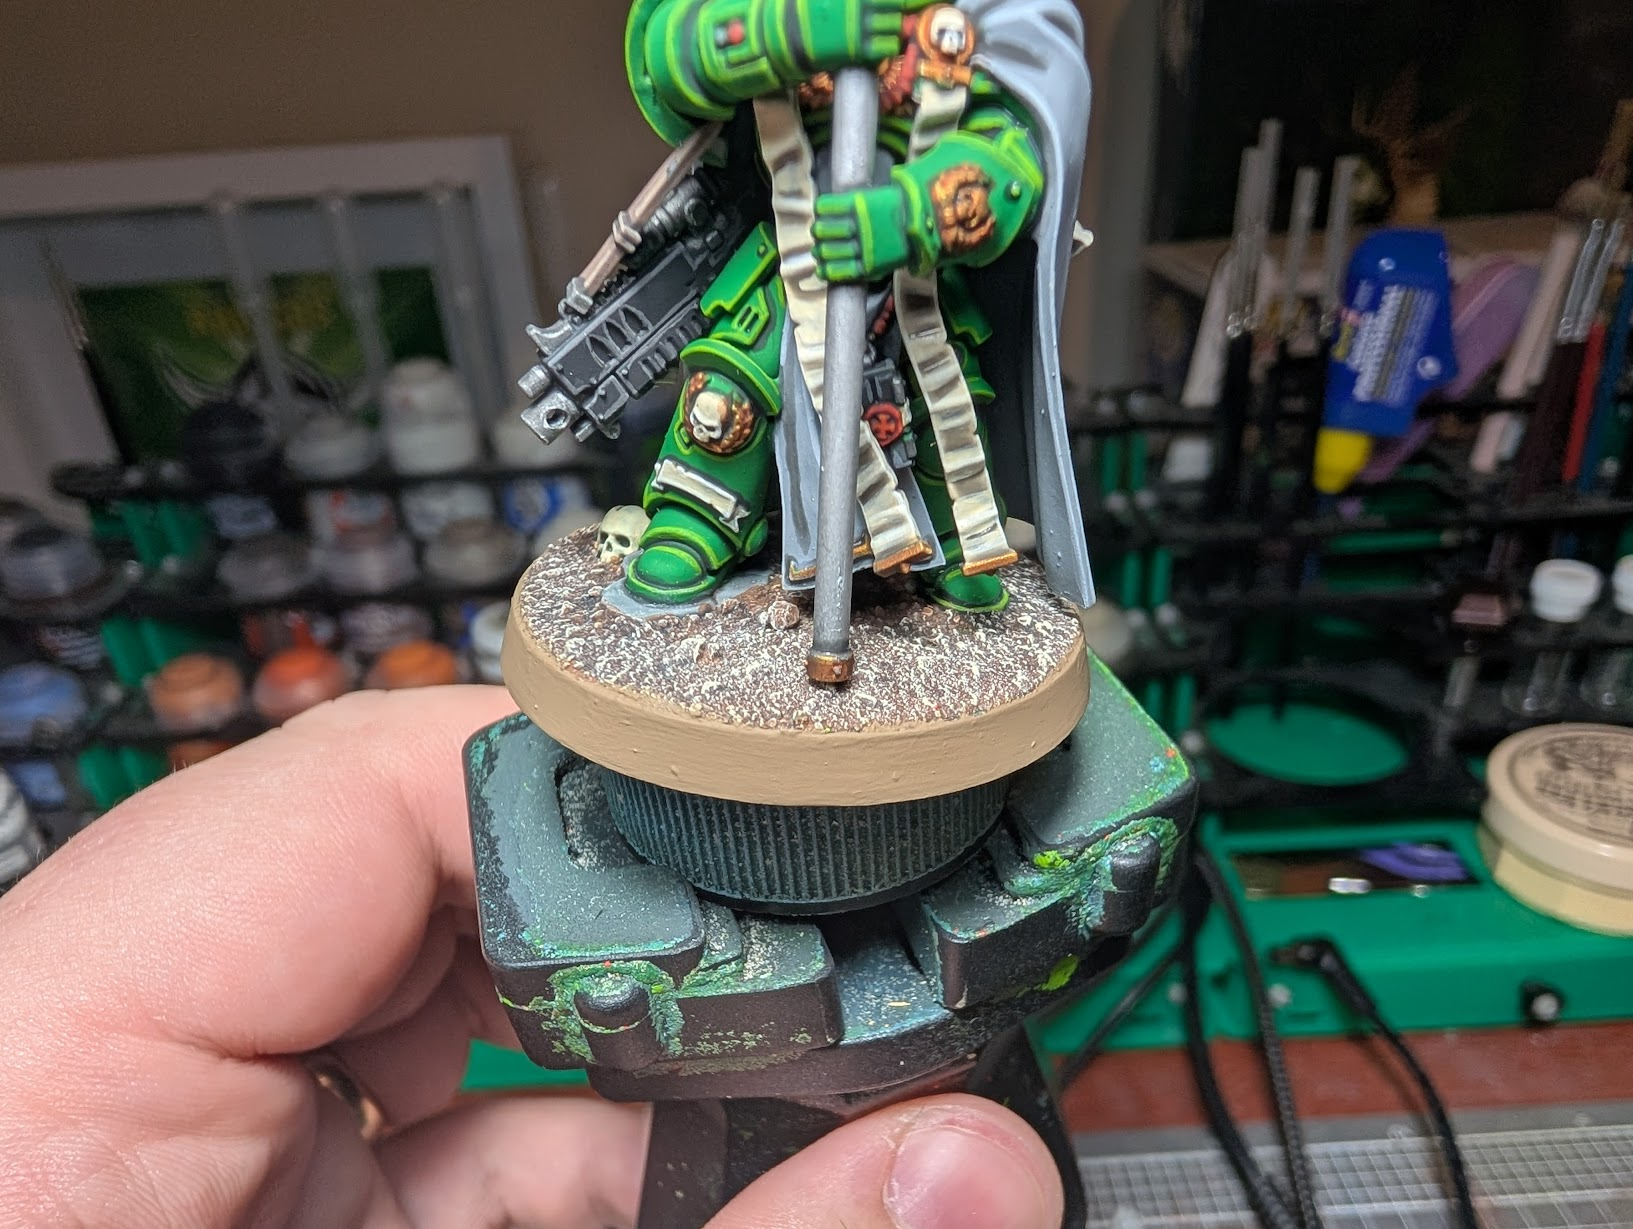
Now we've gathered all of our materials, let's rip in. I'm using my Salamander ancient already on the base.
Now you can paint the base first and it should be fine, however you might notice some weirdness with miniatures not sitting square on the base, and it will be a weaker overall join due to less surface area. Here's a sample I did where I painted the bases first:
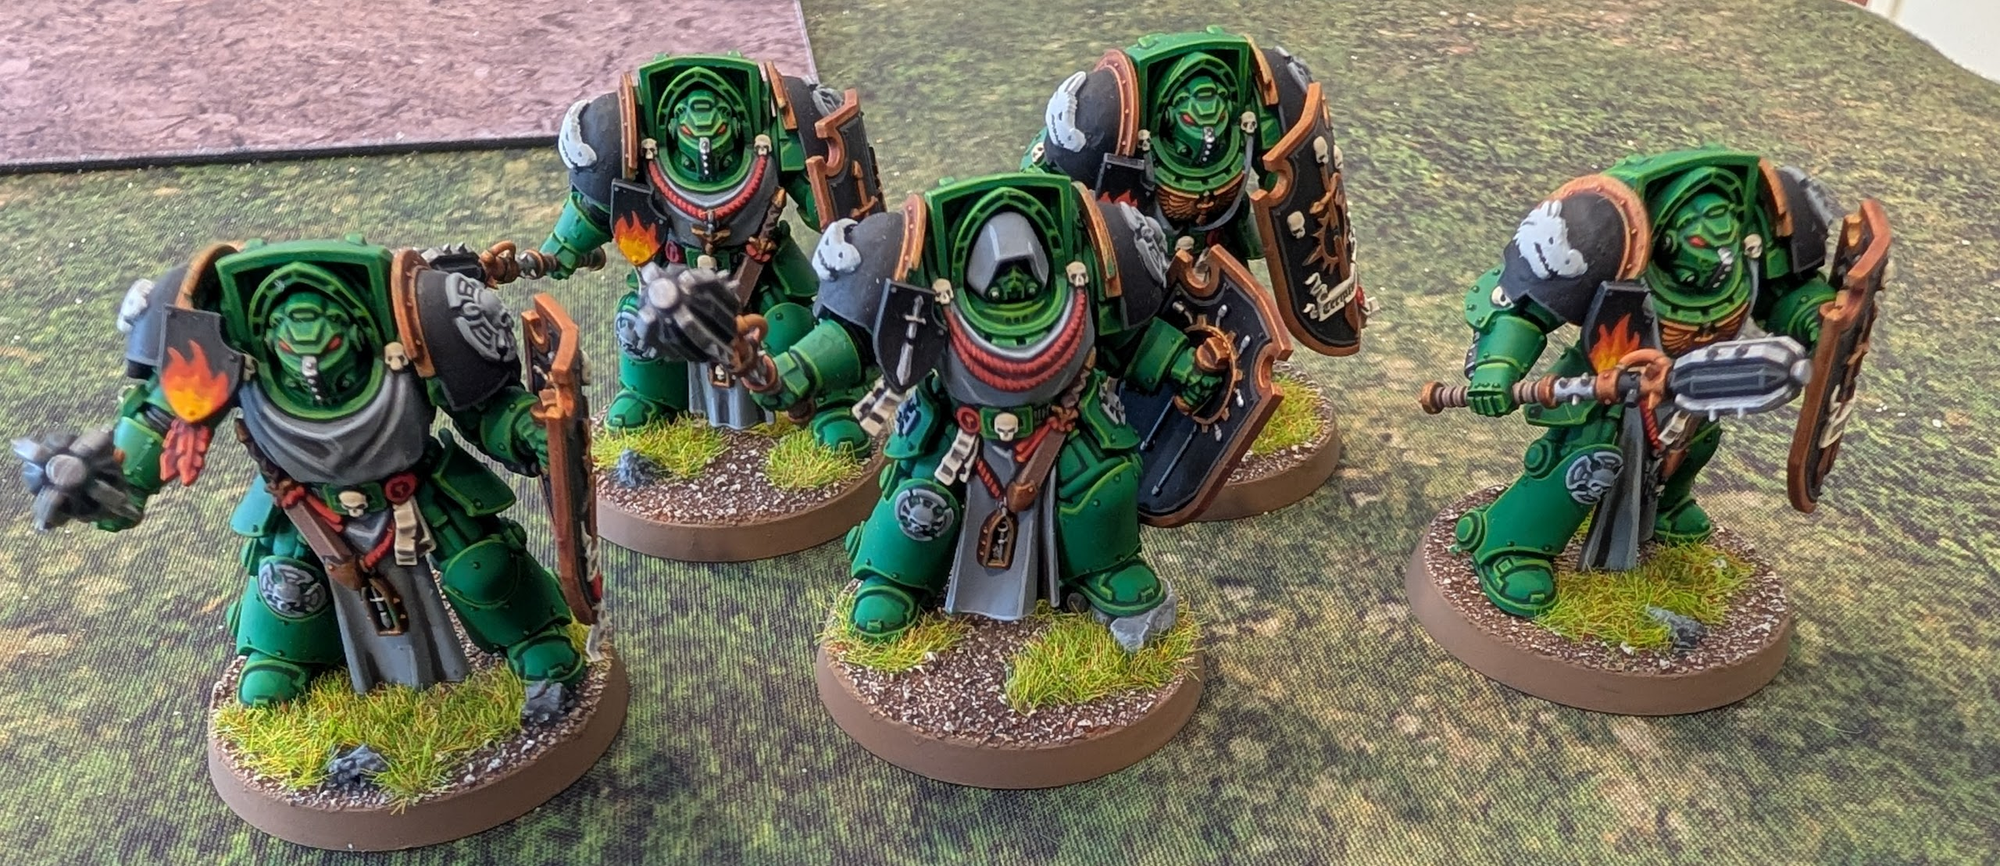
(Eagle-eyed readers will note that this unit of terminators was based differently in the showcase article. It's very difficult to notice the difference, but... I do. And therein lay the problem. It's fixed now.)
Step The First - Coat the Base in PVA
This feels like a simple step, but remember that nuance? Too thick, and it'll clump and fuck the sand up, too thin and nothing will stick. Ideally for a nice middle ground you should squirt a bit of PVA onto the base, not too much, and move it around, instead of putting it on a palette or paper towel. This will give you a nice, middle of the road coat.
This is definitely too thick, but can be saved later.
Step Two - Apply the Sand
Hi there, nuance man again. Yes you can dip and shake, however my method doesn't work like that because I hate myself, and you.
My new exciting way to do this is to take a small scoop (normally a bottle lid) and sprinkle the sand onto the base. I like to put the chunky stuff on first, and then the fine stuff second - this means you end up with the fine stuff filling gaps, and not disappearing under bigger chunks of sand and/or rock.
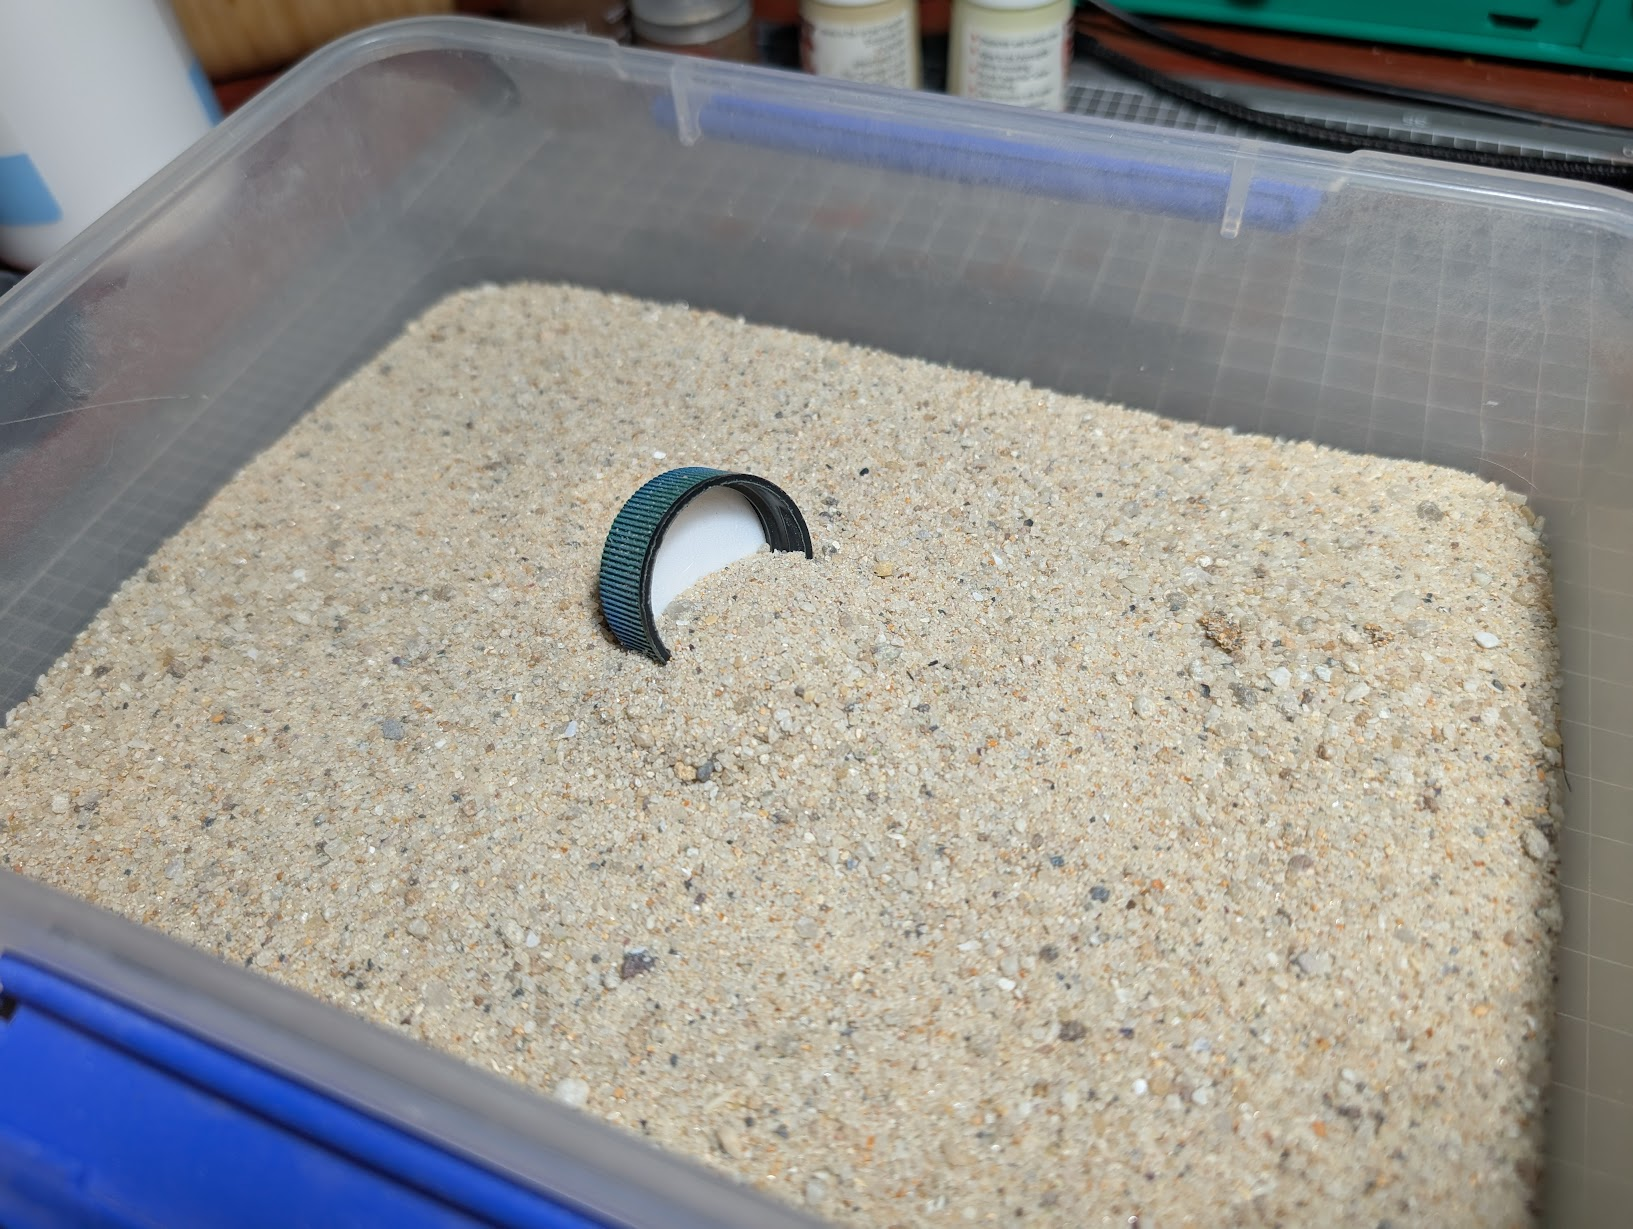
Now for the finer stuff. Because I'm a moron and mixed the substrate with the chunkier sand during a fit of madness, I always have to stir it to bring the finer stuff to the top:
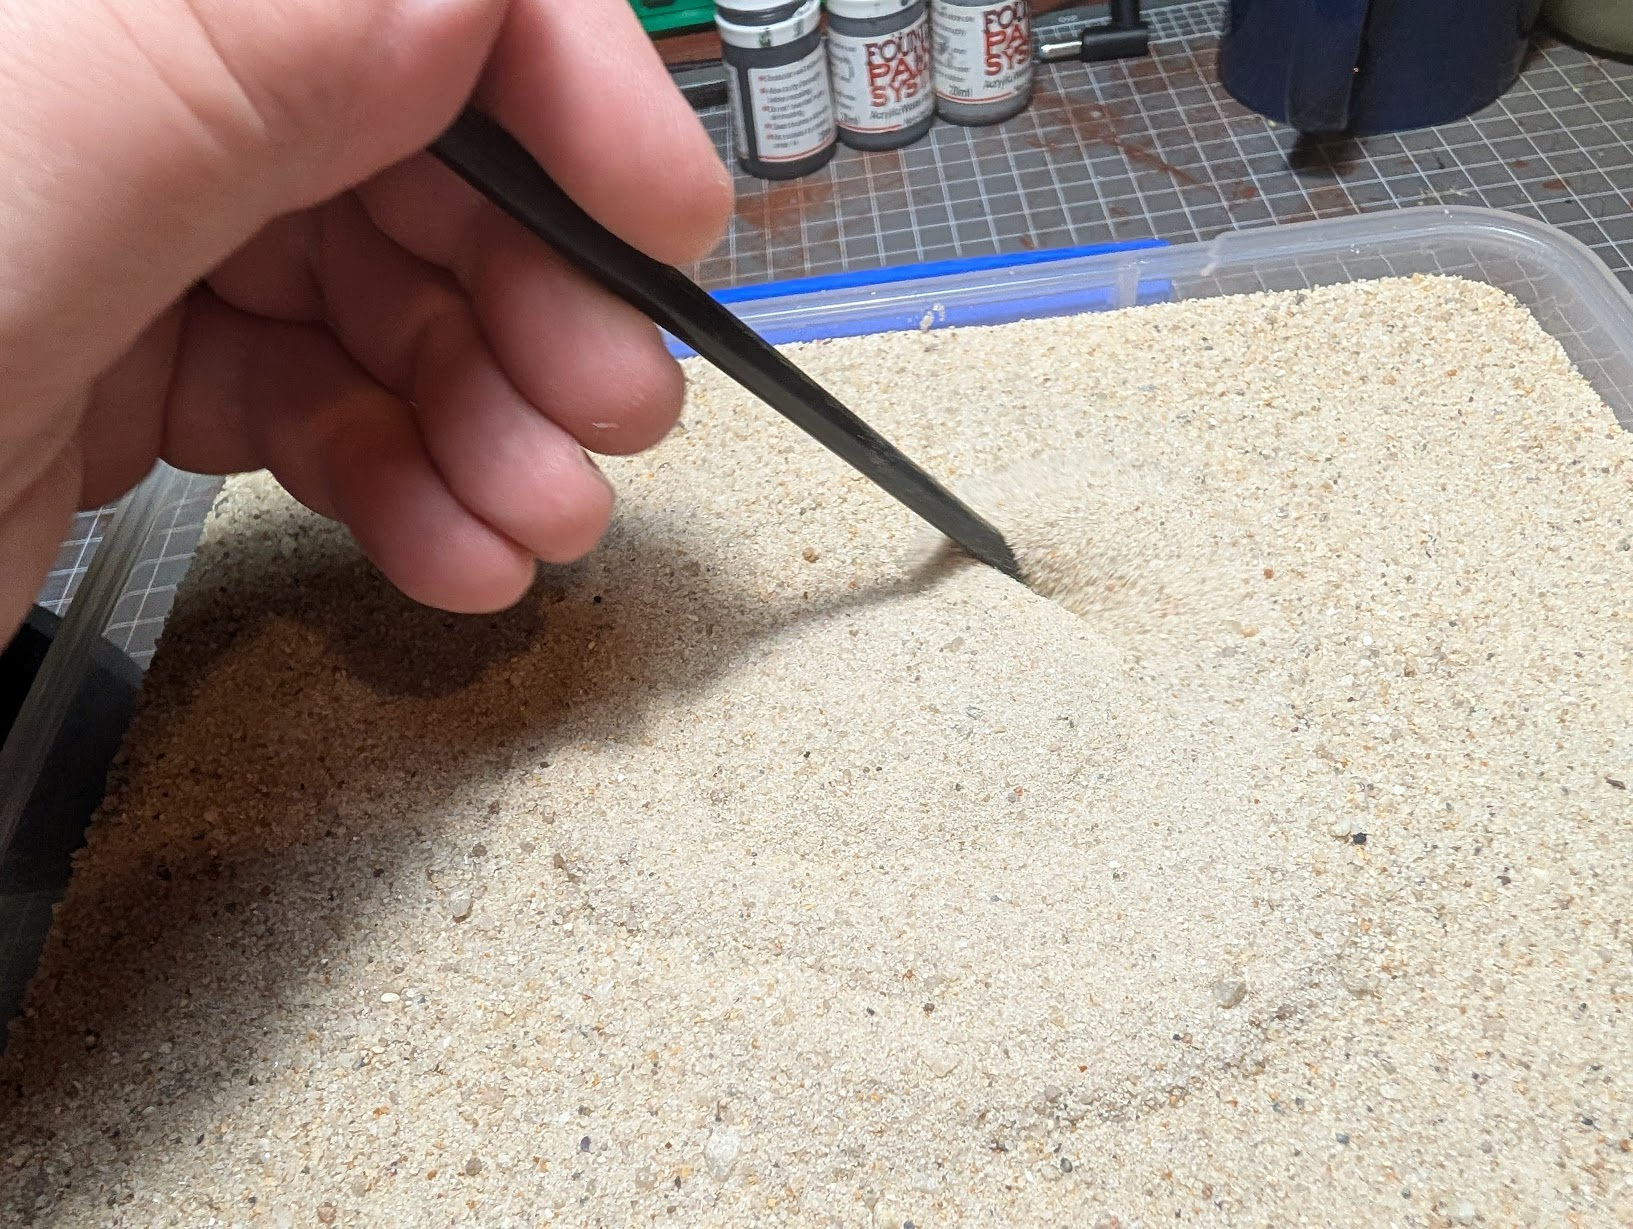
Sprinkle until it's covered, then sprinkle some more, then give it a shake to make sure everything ends up filtering onto the base. Run your grotty finger around the base rim, and you've successfully textured your base.
Step Thrizzy - Seal The Sand
I never did this prior to my meltdown but with a mix of finer and chunkier sand particles this is no longer optional. Get in loser, we're hardening the sand on the base.
This part needs a long time to dry, don't fuck with it. Leave it overnight at least, possibly longer. If it looks even the slightest bit damp, DON'T FUCKING TOUCH IT.
Or do, they're your bases you're going to ruin, and then you'll have to buy more, after peeling the miniature off of the base.
Where was I. Oh yes, sealing the deal.
For this you'll need a paint palette or very tiny mixing receptacle - my wet palette comes with this cute children's paint palette which is very d e e p and so is perfect for my needs.
Put a dollop of PVA glue in there - you want a ratio of 1:4 or lower for this, but if maths is as hard for you as it is for me, it's easy to eyeball. You want to make a sort of PVA soup, that's ultra thin:
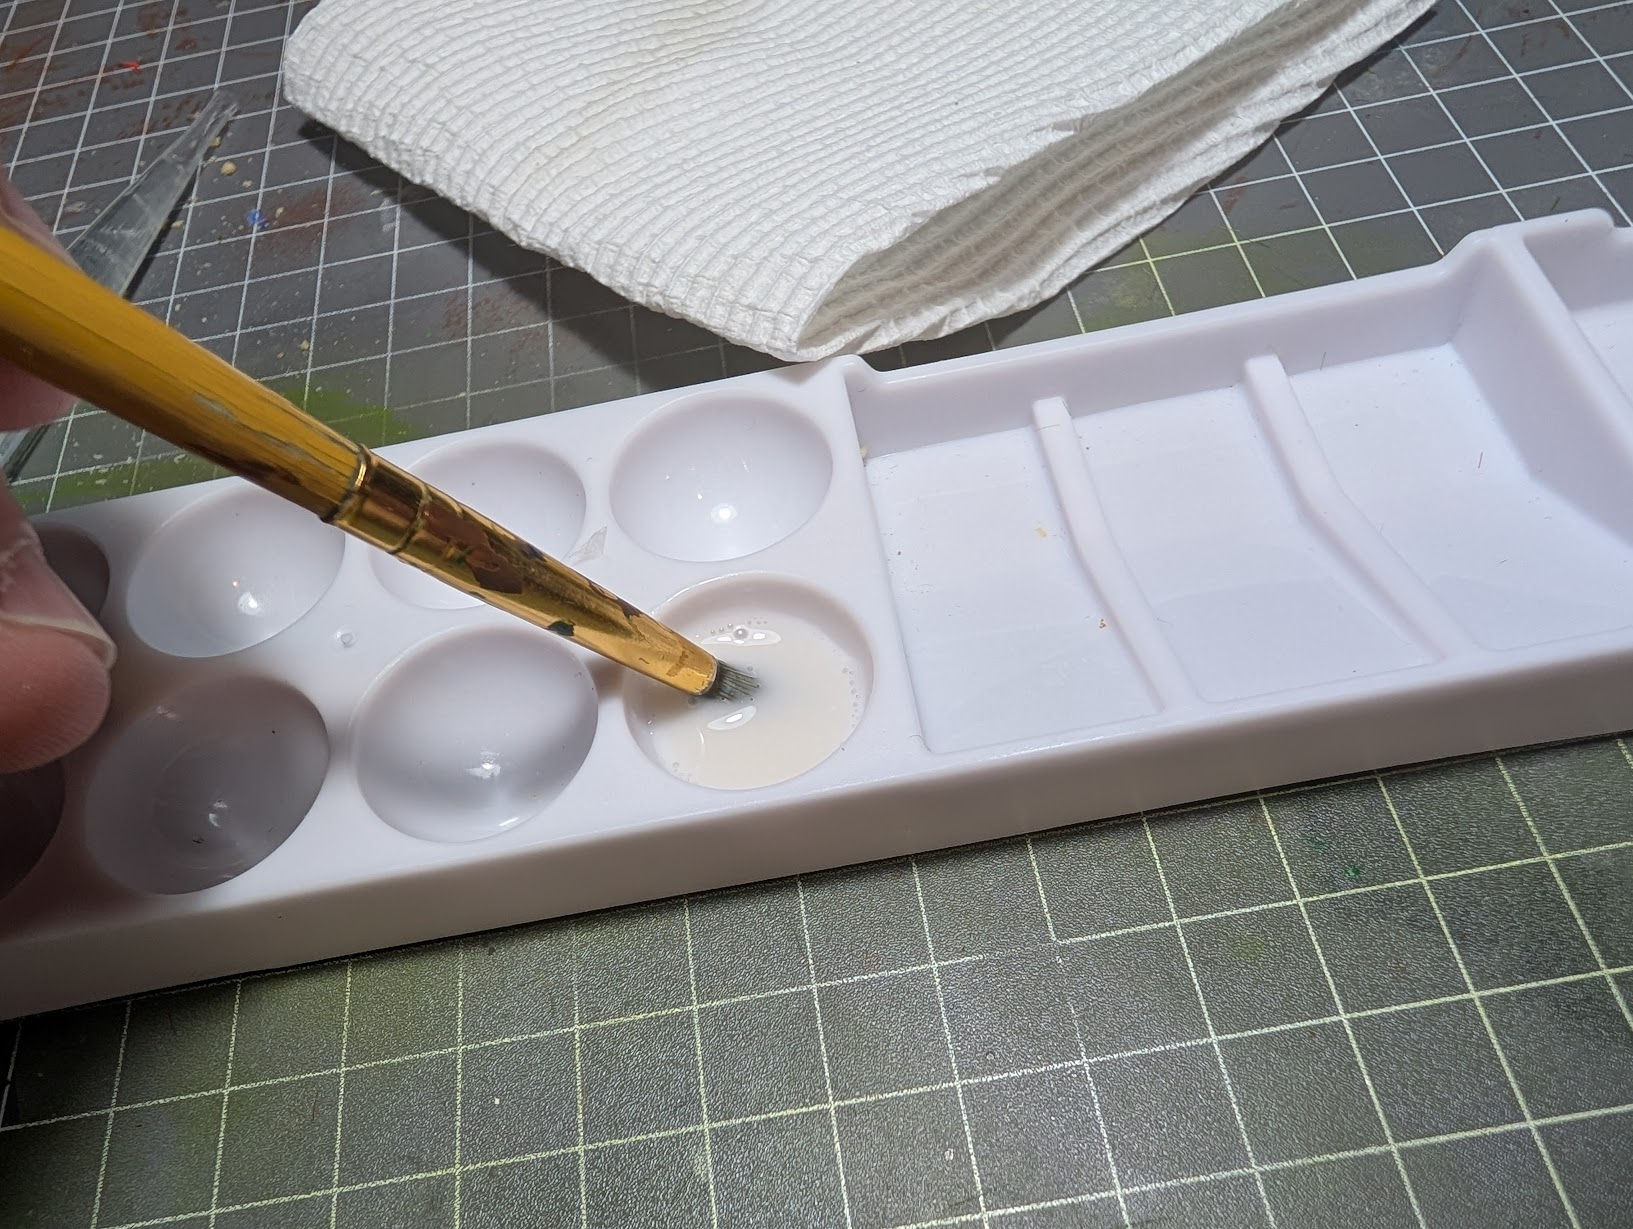
"MaKe iT LoOk lIkE MiLk"
Next you want to take the brush you hate the most but keep around as an act of aggression and thanks to the magic of capillary action (thanks boffins), you want it to be drawn up into the bristles, and then you want to gently touch it to the sand.
And by "gently" I mean, "really, really gently". You want to decant the glue soup onto the sand without disturbing it - if it's not flowing easily onto the base, thin your soup down some more.
After that, it's time to play the waiting game. Paint something else, play something else, consider touching grass, just don't touch the sand.
Once it's dry, you're ready to add colour.
Step Four - Basecoat
Paint the rocks Foundry Slate Grey. This includes any tacticool rocks included with the model. For the sand, use Mournfang Brown.
Remember the sand is absorbent - so it'll suck up paint like nobody's business - this makes air paints ideal, as they are thin but strong in pigmentation. You could also use a rattle can or airbrush. I don't, though, because airbrushing a base when there's a miniature on it is a bad idea, and it is very difficult to guarantee your precious base will never have a miniature on it.
Just like the previous step, let it dry, and don't touch it. It might look a little patchy, but don't panic because we're going to shade the base and highlight the raised edges with drybrushing.
Step Five is Alive - Shading
This is an optional step for some bases, it's not optional for mine. Although during base-a-palooza I did discover some bases work fine without shading, but that's for a different article.
Now to be clear, too much shading is bad. So what you want to do is take the wash, and then mix it with a bit of water to thin it down so it doesn't turn the base black. And as Dad was fond of saying when I put too much milk in my cereal bowl - "Don't drown it."
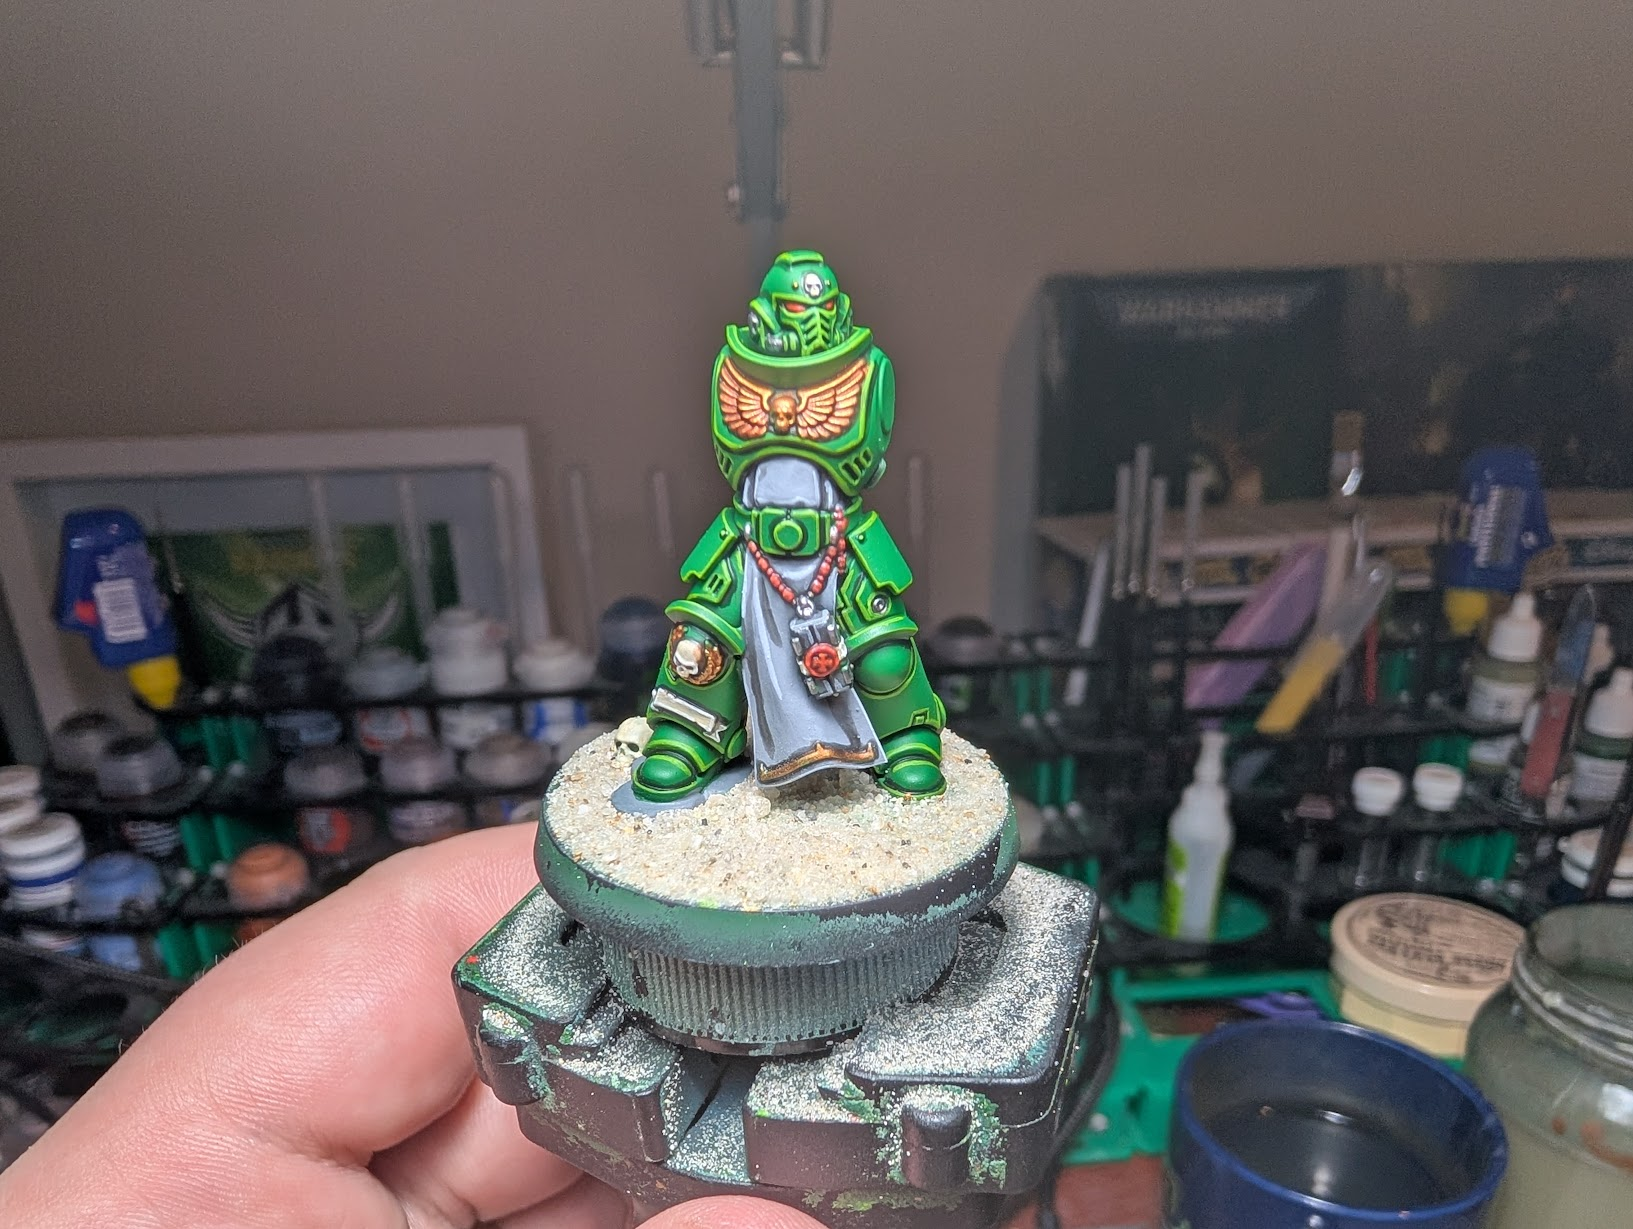
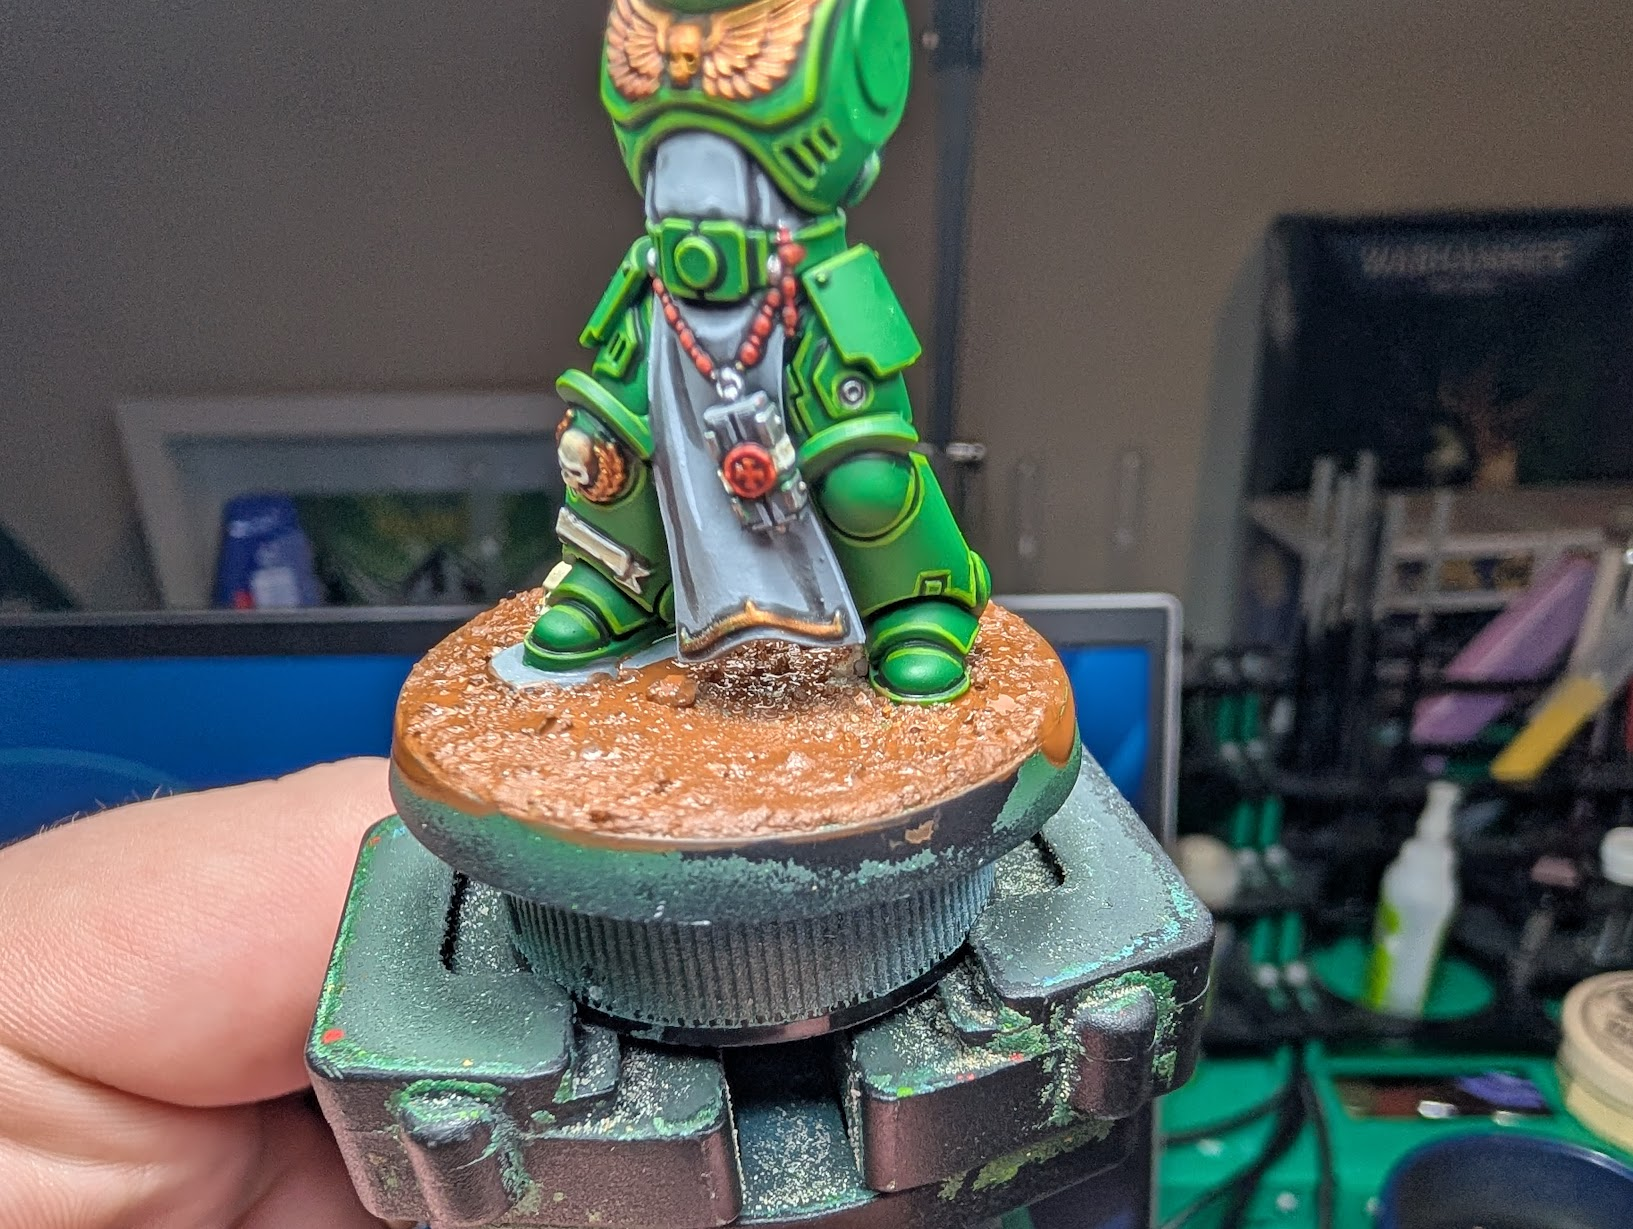
Leave it to dry completely, and the result should look something like this:
Step Six-Shooter - Highlights
This last part you can get through fairly quickly. Drybrush the sand with Steel Legion Drab, then Boneyard Mid, then Boneyard light. If you can, get your mum, wife, or girlfriend to go to the makeup section and buy you one of these sweet brushes.
They're nice and soft, narrow, and perfect for drybrushing. Just make sure you don't wash them between colours, as you'll need to wait for them to dry completely which will slow the process to a c r a w l.
Now, something you might want to do is back off the sand after drybrushing with Boneyard mid. I did not, because it doesn't fit my existing miniatures, but I think this is just as nice of an effect:
When you've finished dry brushing the first colour onto the base, it's ok to not clean the brush, and just apply the next paint in to create a more gradual transition from light to dark.

Now you'll note there's a difference in texture and it's not uniform - that's fine, as variety is the spice of life. It also helps my formulaic brain find organic places to put down static grass.
You will also notice there's some unshaded brown stuff in between the model's legs, don't worry, we will cover our sins later.
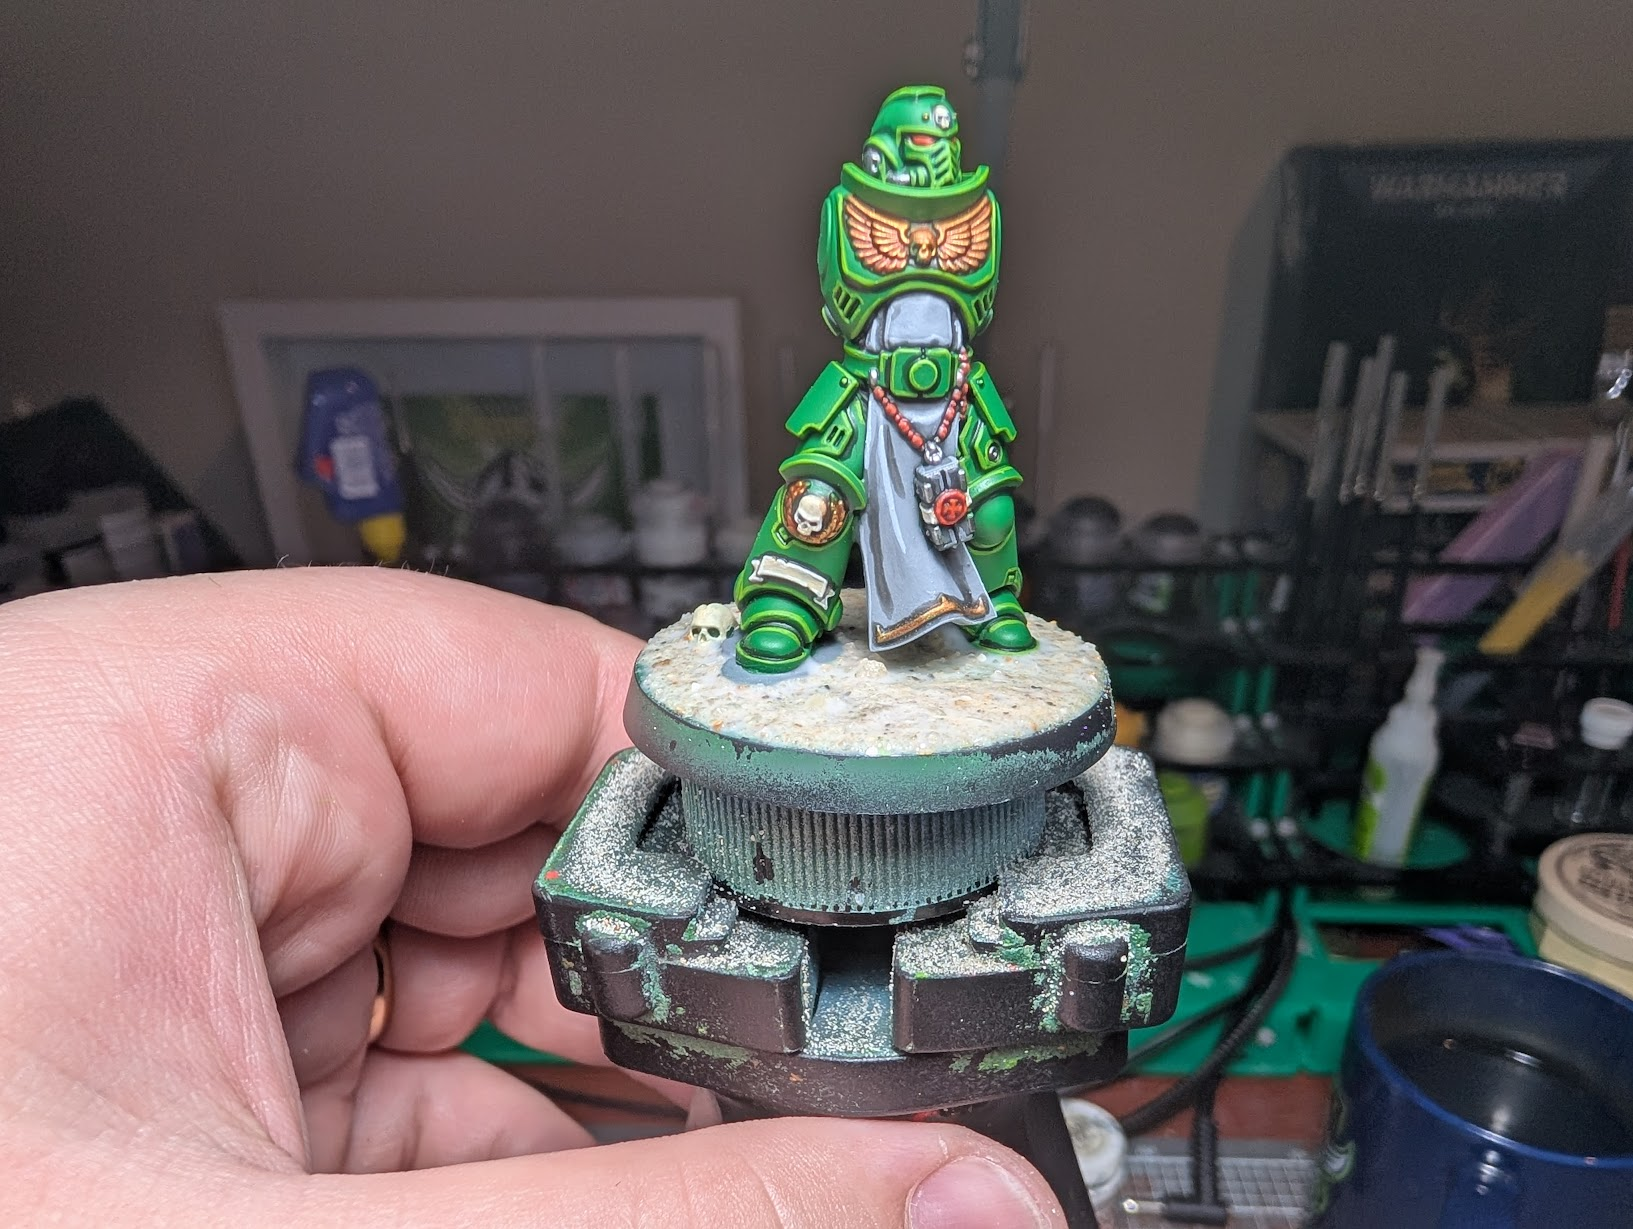
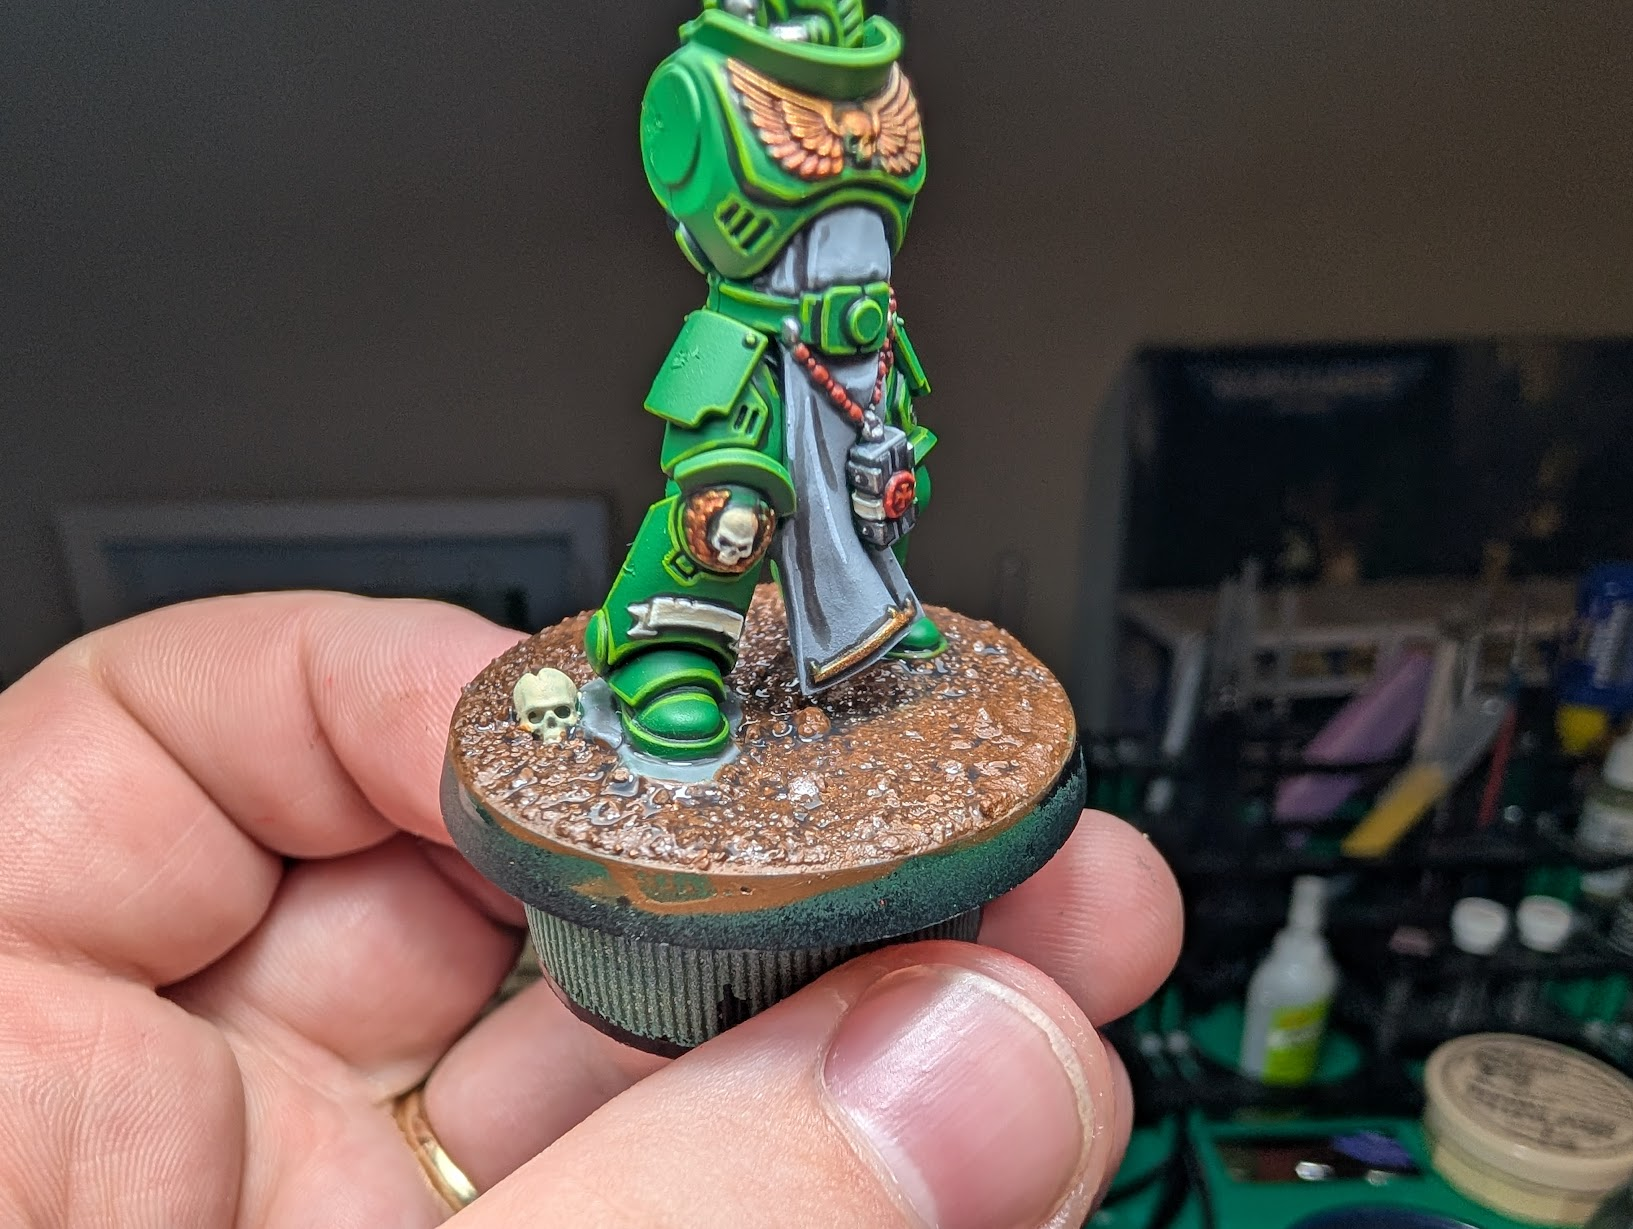
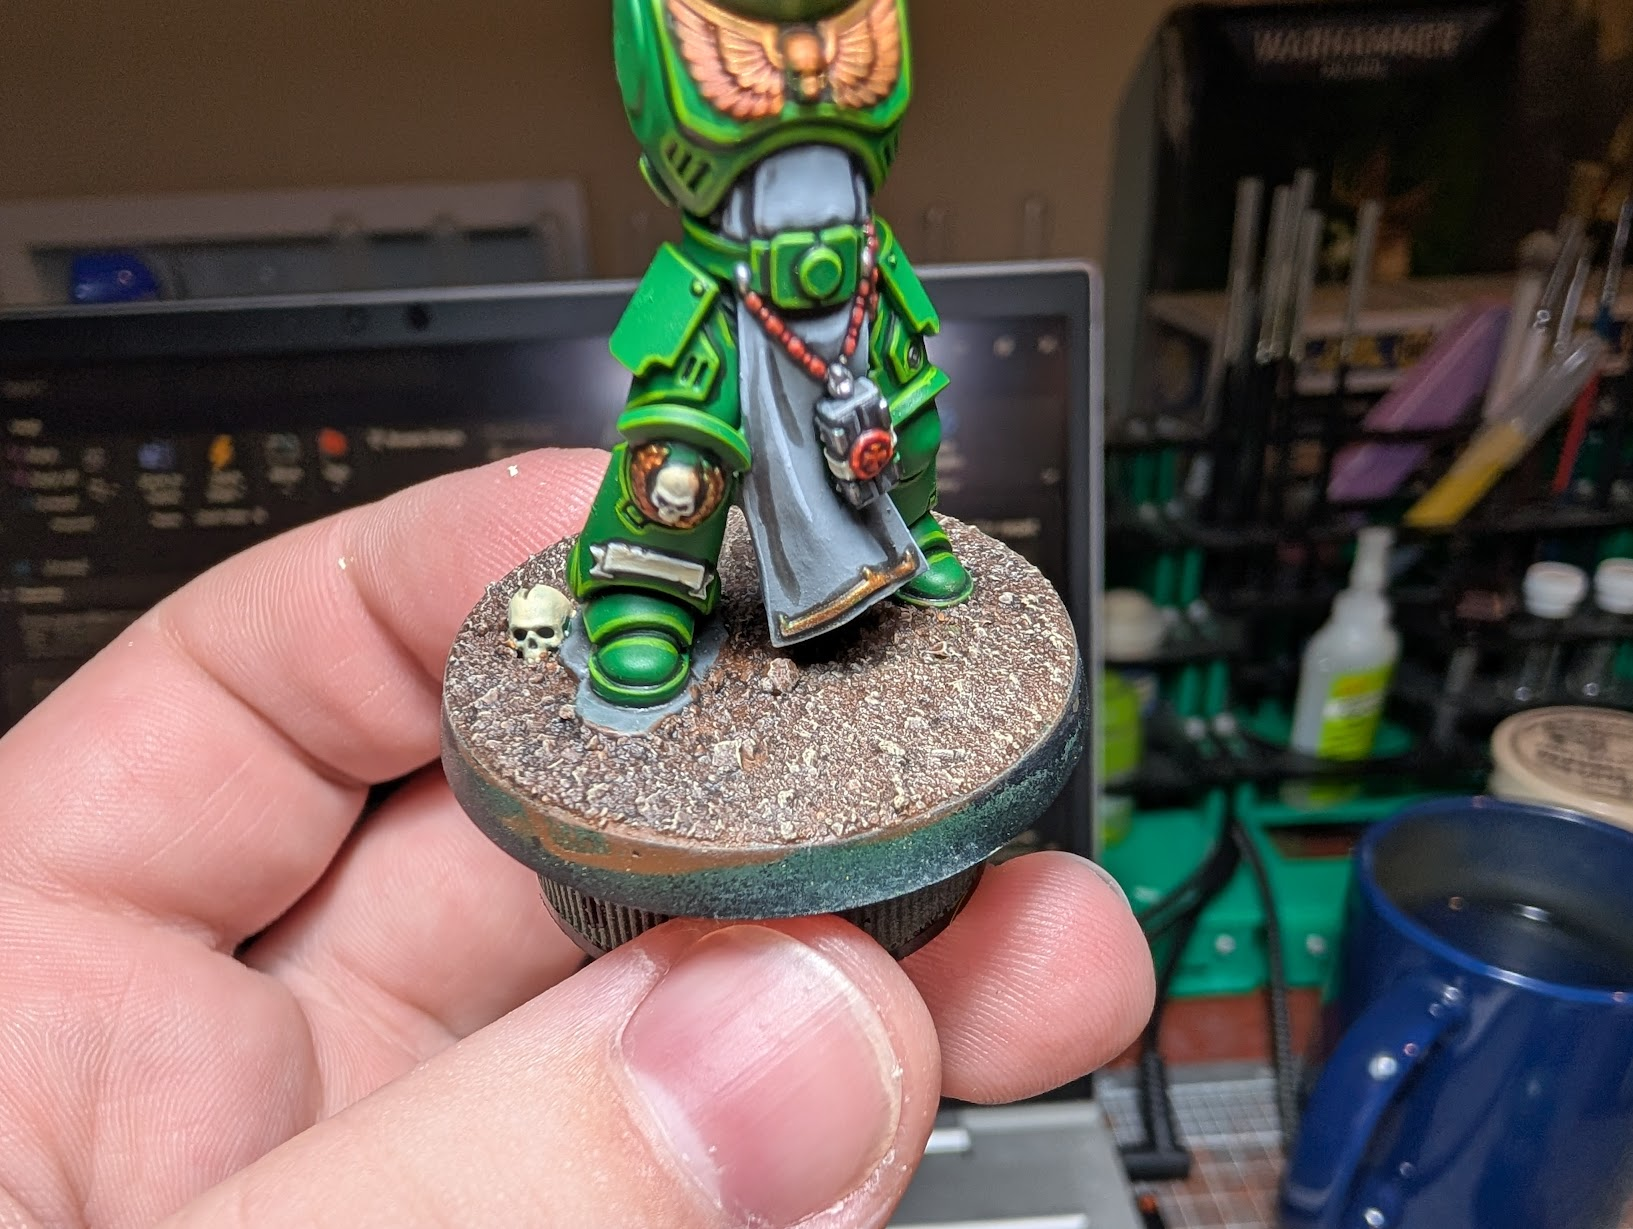
Step Seven - FINISH THE JOB
We're going to skip ahead a bit here, as the mini wasn't completed, but through the magic of television, it is now completed - kind of.
You want to paint the base with Steel Legion Drab - it is a base paint, so you want it to be as thin as possible. If it looks like this it's workable, but, not great:
The way I like to do it is using a wet palette to thin the paint almost to water, then applying coats in alternating directions. If I've got the mini on a hobby holder I will tilt the mini left and right and apply the paint in the same direction to ensure the coats are applied in different directions.
Which inevitably doesn't work because my brain is mush.
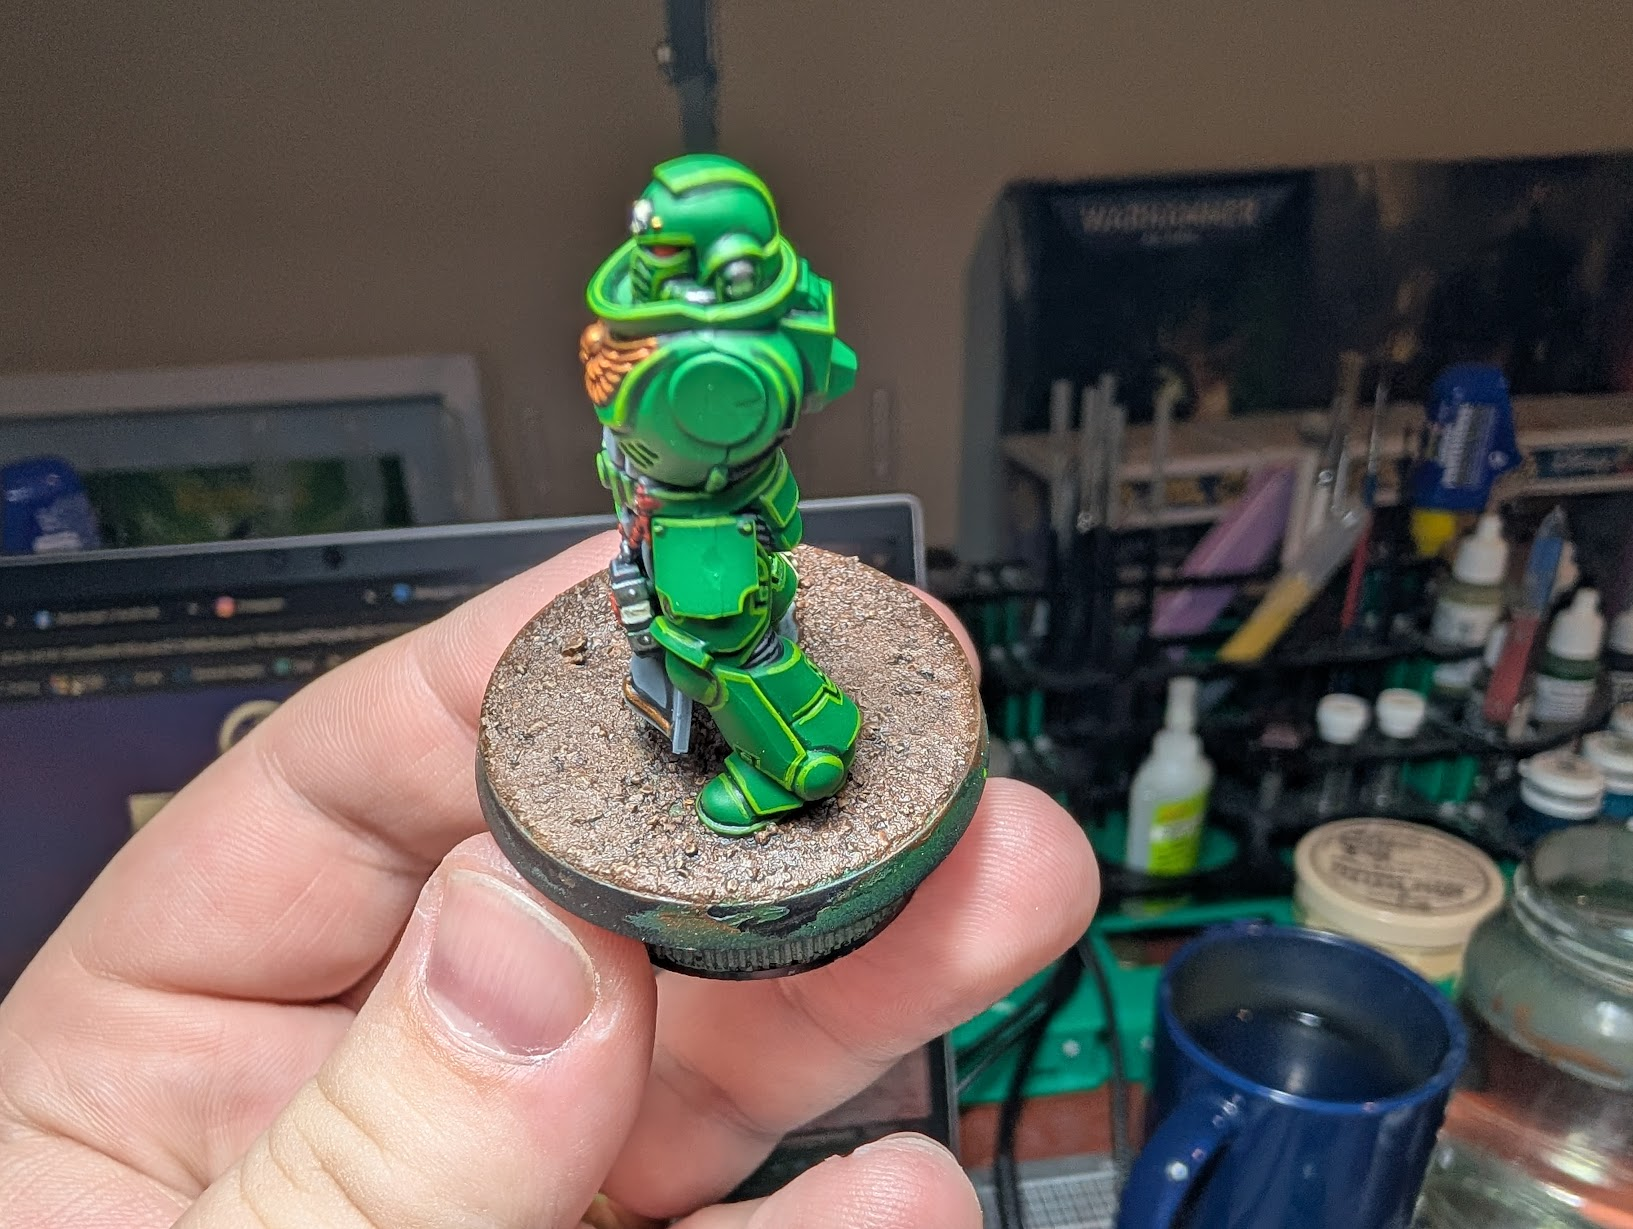
Step Eight - FINISH THE JOB - AGAIN
We're going to skip ahead again with the miniature having been varnished with AK Ultra Matte. Accept no substitute.
Don't add static grass before a varnish, otherwise it'll get everywhere and ruin your miniature. If you're desperate, provided you leave enough time to dry, you can do it afterward, but the grass needs a long time to dry.
Find the areas on the base that are super problematic, coat them with PVA glue, and then apply static grass. Leave it for thirty minutes, shake off the excess, and then give it a blast with some compressed air or a little go with your airbrush.
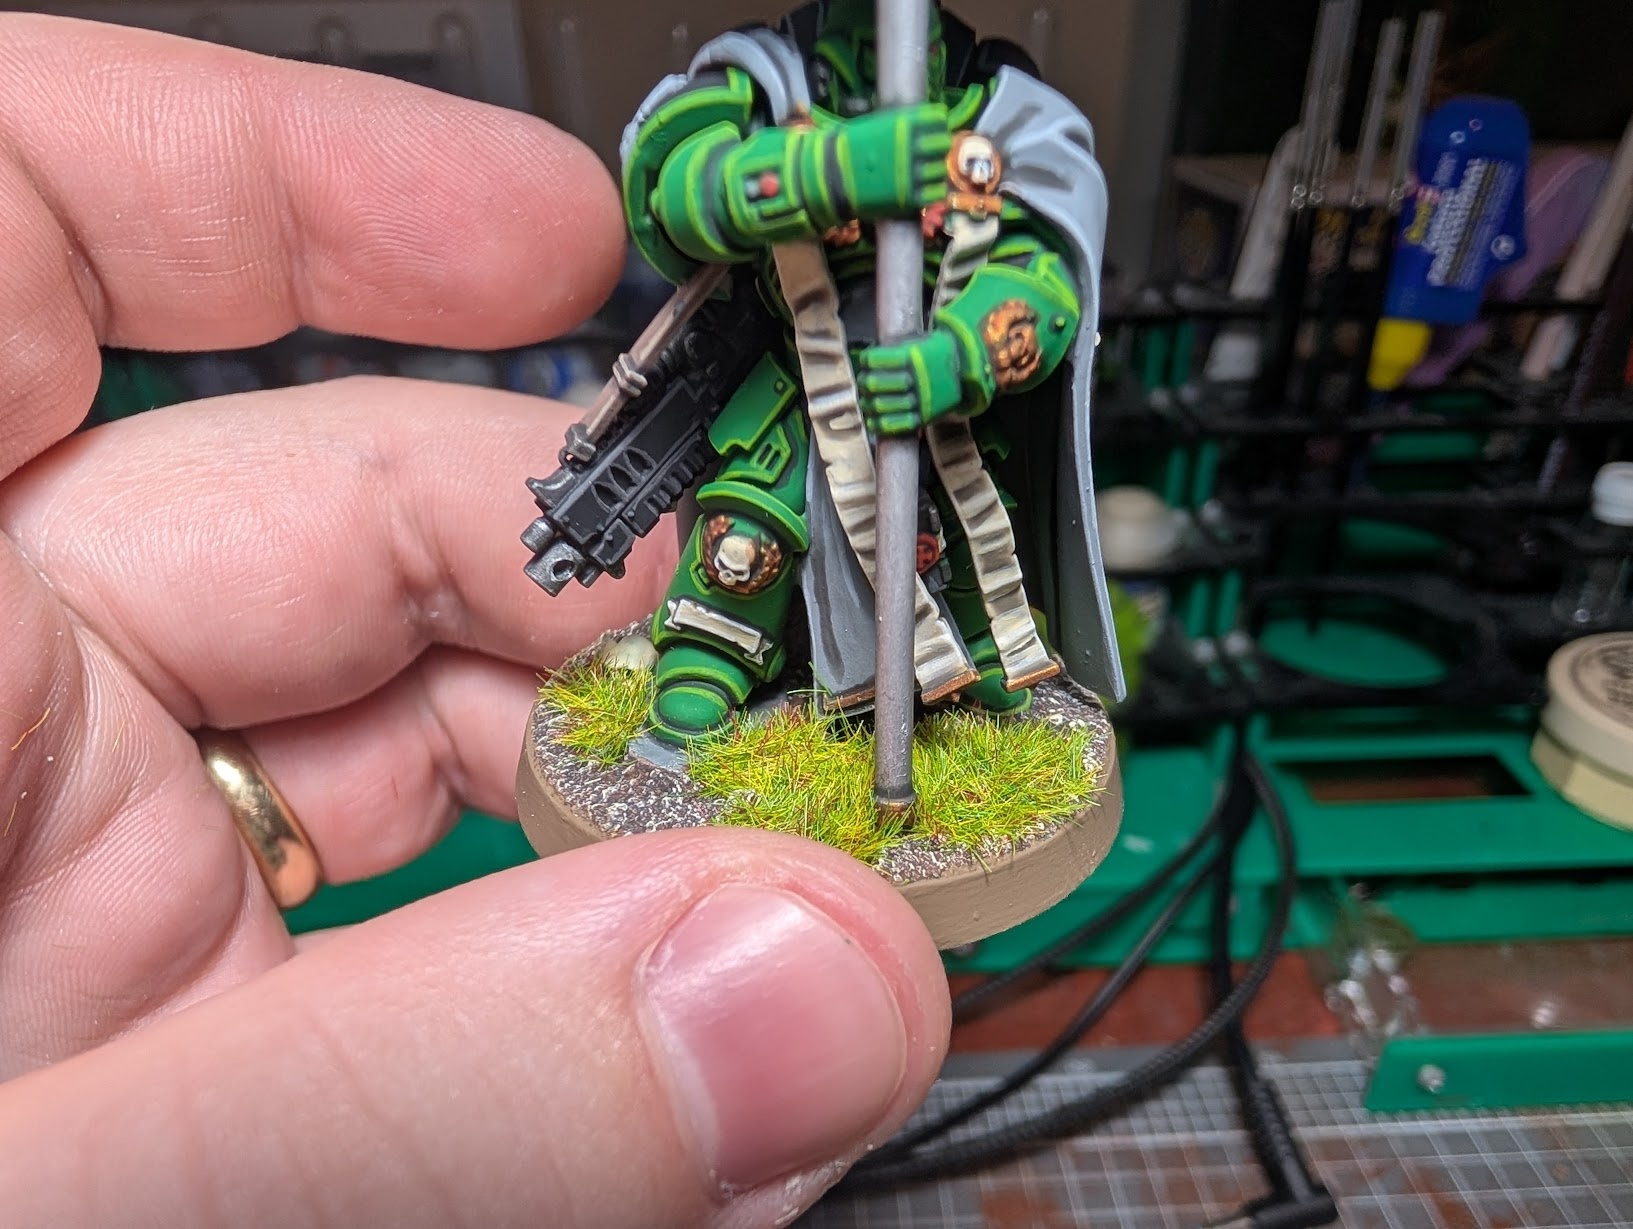
Pick any stray bits of grass off with tweezers, and you're all done! This concludes the educational part of the program.
I hope you learned a lot, dear reader, but if you did not, have no fear, because this article isn't for you. It's because I have another 100+ green marines to base, and I'd rather not leave it up to the capricious hands of google keep.
Catch you next time,
Vulkan
Did you like this article? Did you hate it? Go over and keep the discussion going on the official Vulkan's Corner facebook page! - whilst you're at it, leave a like!
