A very long time ago, in a galaxy far, away, a teenage kid watched his big sister play a mysterious game called world of warcraft. One sunny afternoon, the big sister skipped through the house, loudly exclaiming:
"I get to go to Serpenshrine Cavern! I get to go to Serpentshrine Cavern!"
So I abandoned this dumb third person writing style to watch as my big sister took on the Naga from Coilfang Reservoir. I was in awe at the size of the enemies, the bosses. I was intrigued by the design - an underground lair of pumps and machines working to drain the water from Zangarmarsh.
But my most enduring memory is when, after three hours, my big sister arrived at the last boss.
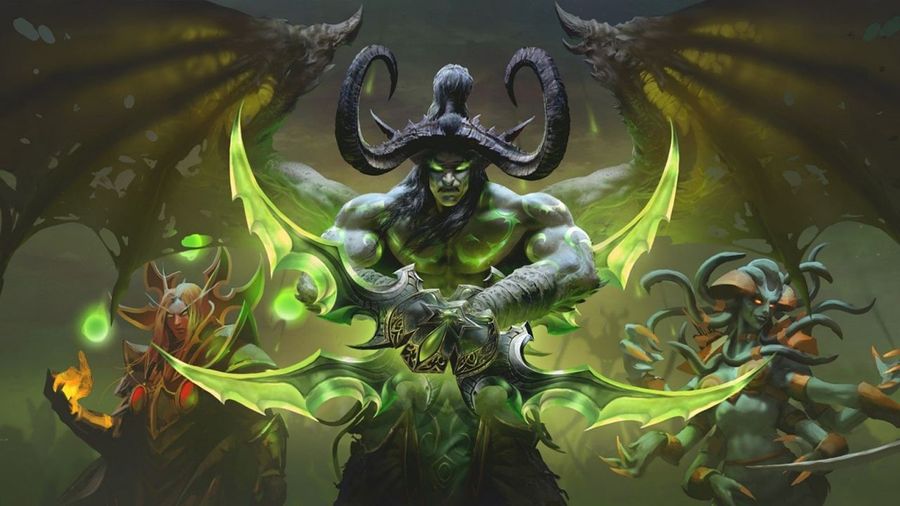
And there, sitting on a platform, waiting for the good guys to come and get her, was Lady Vashj.
Unfortunately luck was not on my sister's side that day as Lady Vashj's complicated mechanics, combined with the latency that comes with early broadband, conspired and prevented the plucky heroes from defeating her. But I was captivated. Hooked. I knew I wanted to come back and go one further and beat the iconic villain from Warcraft III.
But I was a kid with no time, no money, and in the end I had to give the game away without ever setting foot in a raid instance. More than fifteen years later, I found myself in the position to return and go one better than my sister did all those years ago.
Let me utterly crystal clear with you. I love Serpentshrine Cavern. Personally it has the perfect mix of aesthetics, bosses, atmosphere and stakes. You know it's serious business from the moment you step in until the moment you leave. Everything in there wants you dead and the only thing preventing the army of Naga, Broken, Bog Colossi and so much more, are your wits, your skill, and your raid's teamwork.
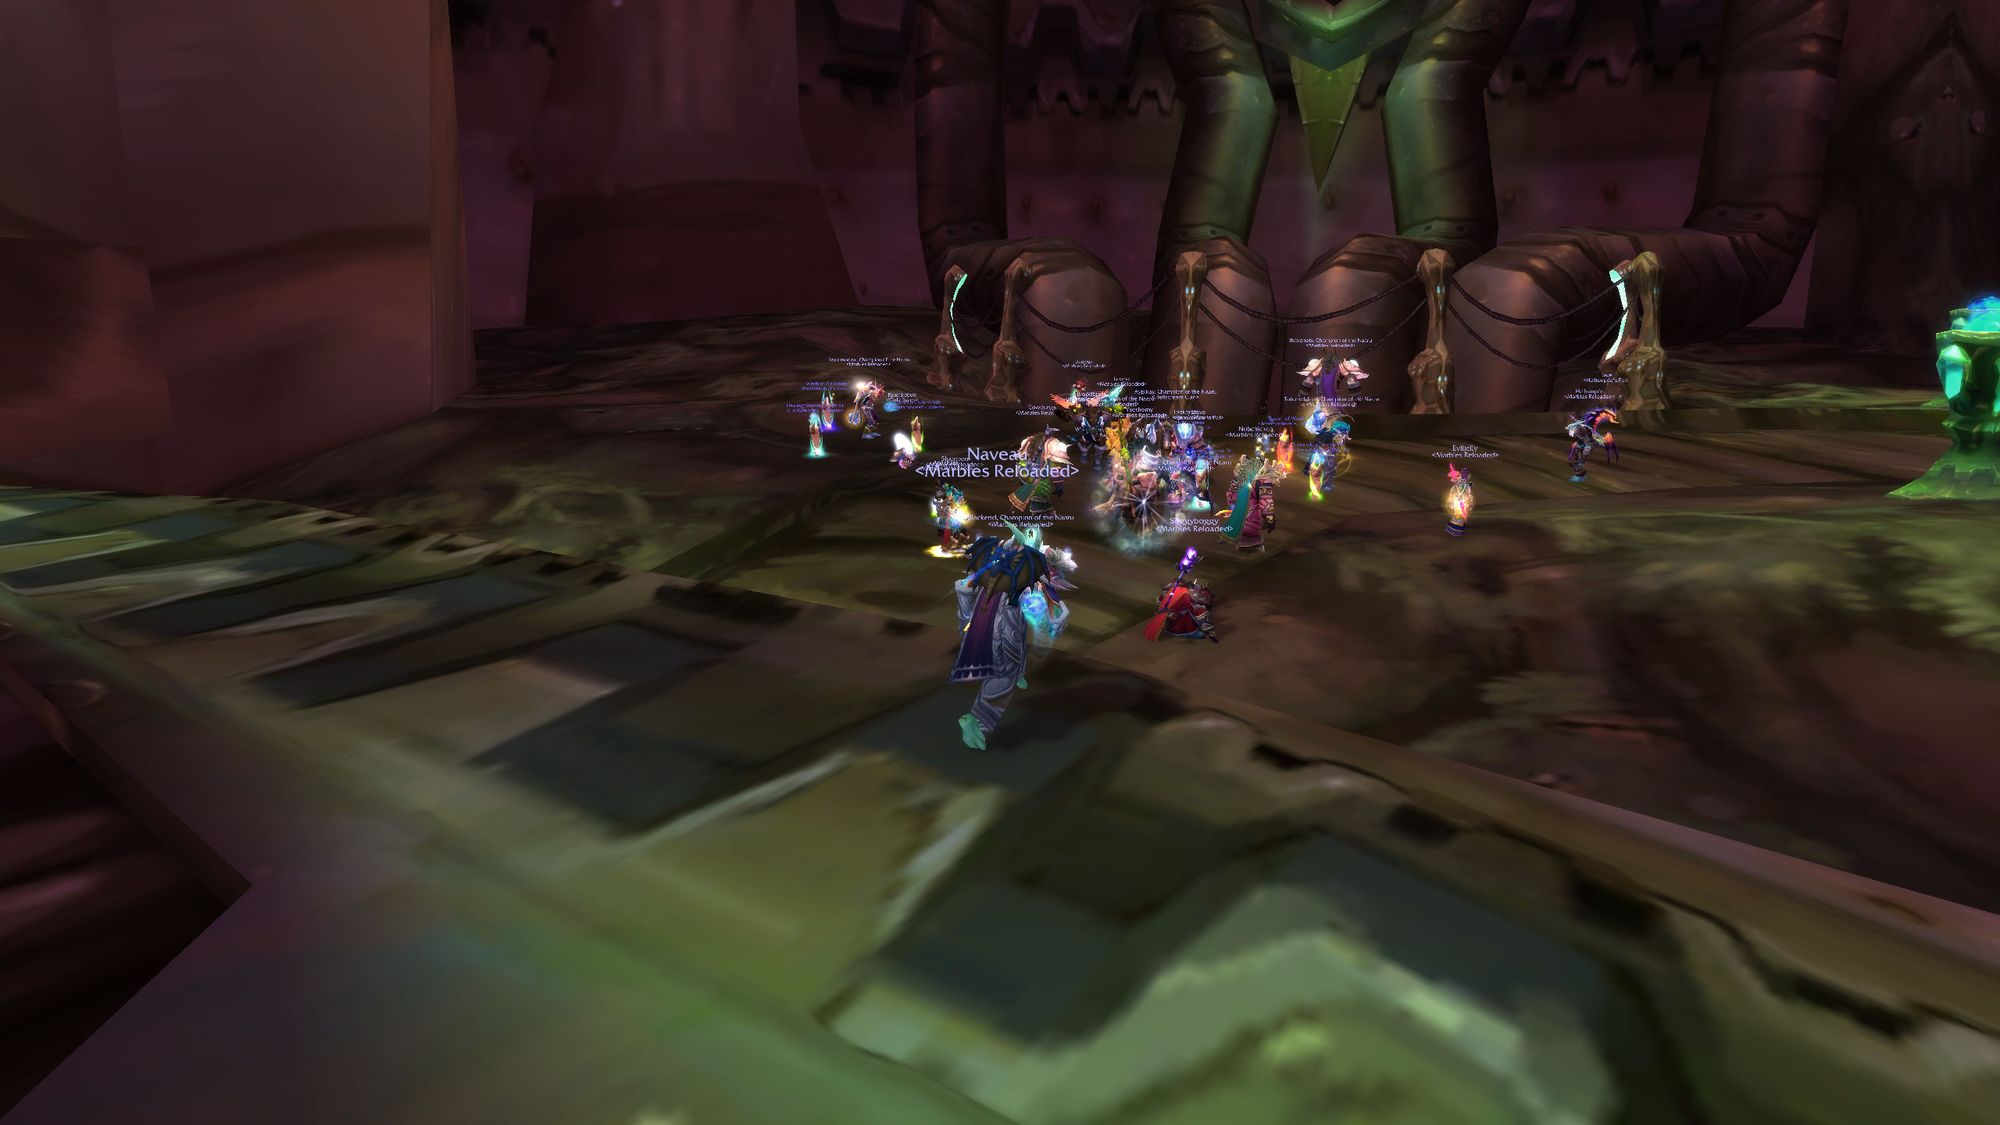
This is, of course, the time when I joined the Mighty Ducks. When I realised I wasn't going to be able to make the next step with Marbles. I still don't regret making that choice.
But, as with Karazhan, before we set foot in Serpentshrine Cavern, we have to get attuned.
Attunement Process

At a glance, attunement to Serpentshrine Cavern requires two items - the Blazing Signet and the Earthen Signet. It then requires you to turn those two items into a quest giver inside a heroic dungeon.
Compared to the multi-layered attunement process of Karazhan, that's quite straightforward. The difficulty comes from the difficulty of the raid bosses you have to kill and the heroic dungeon you need to grind reputation for, then clear.
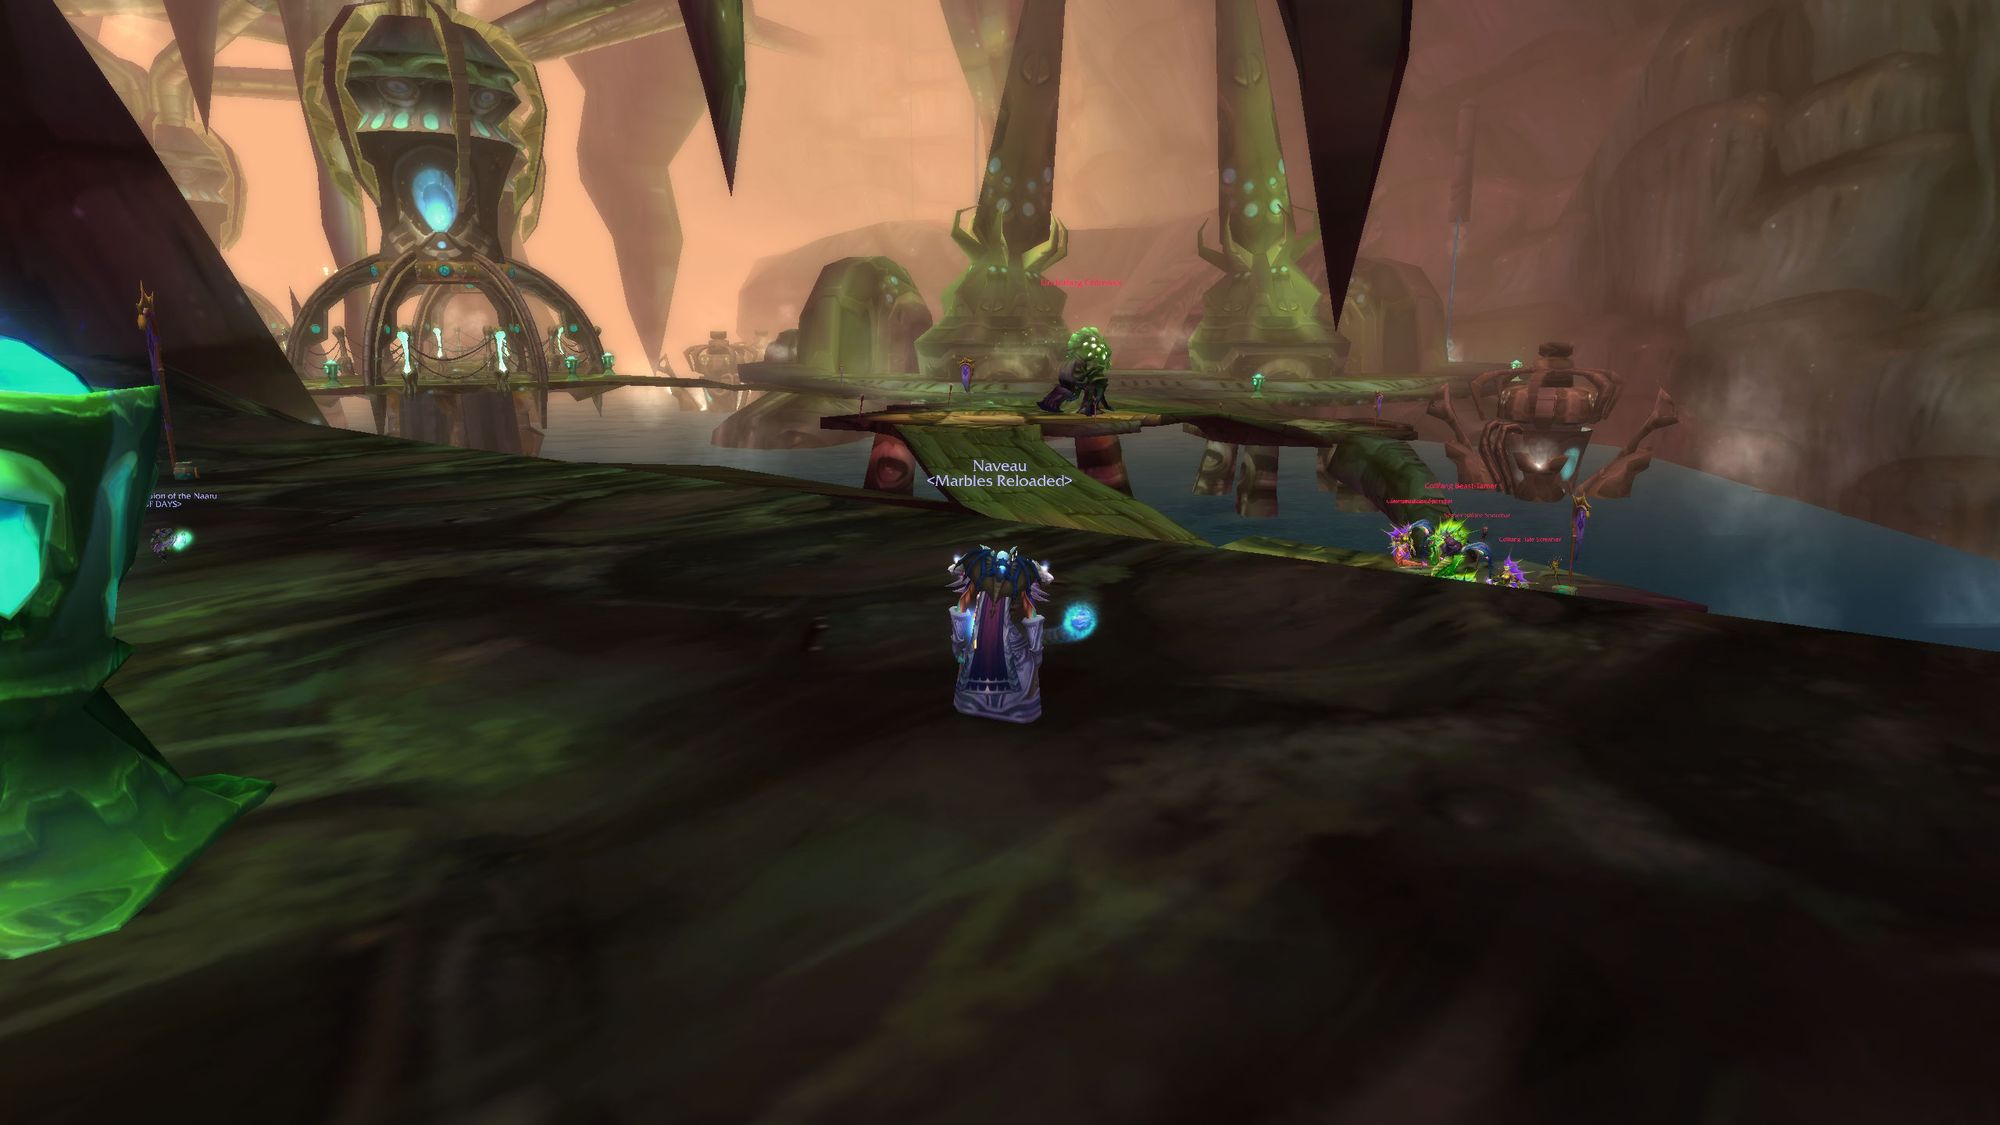
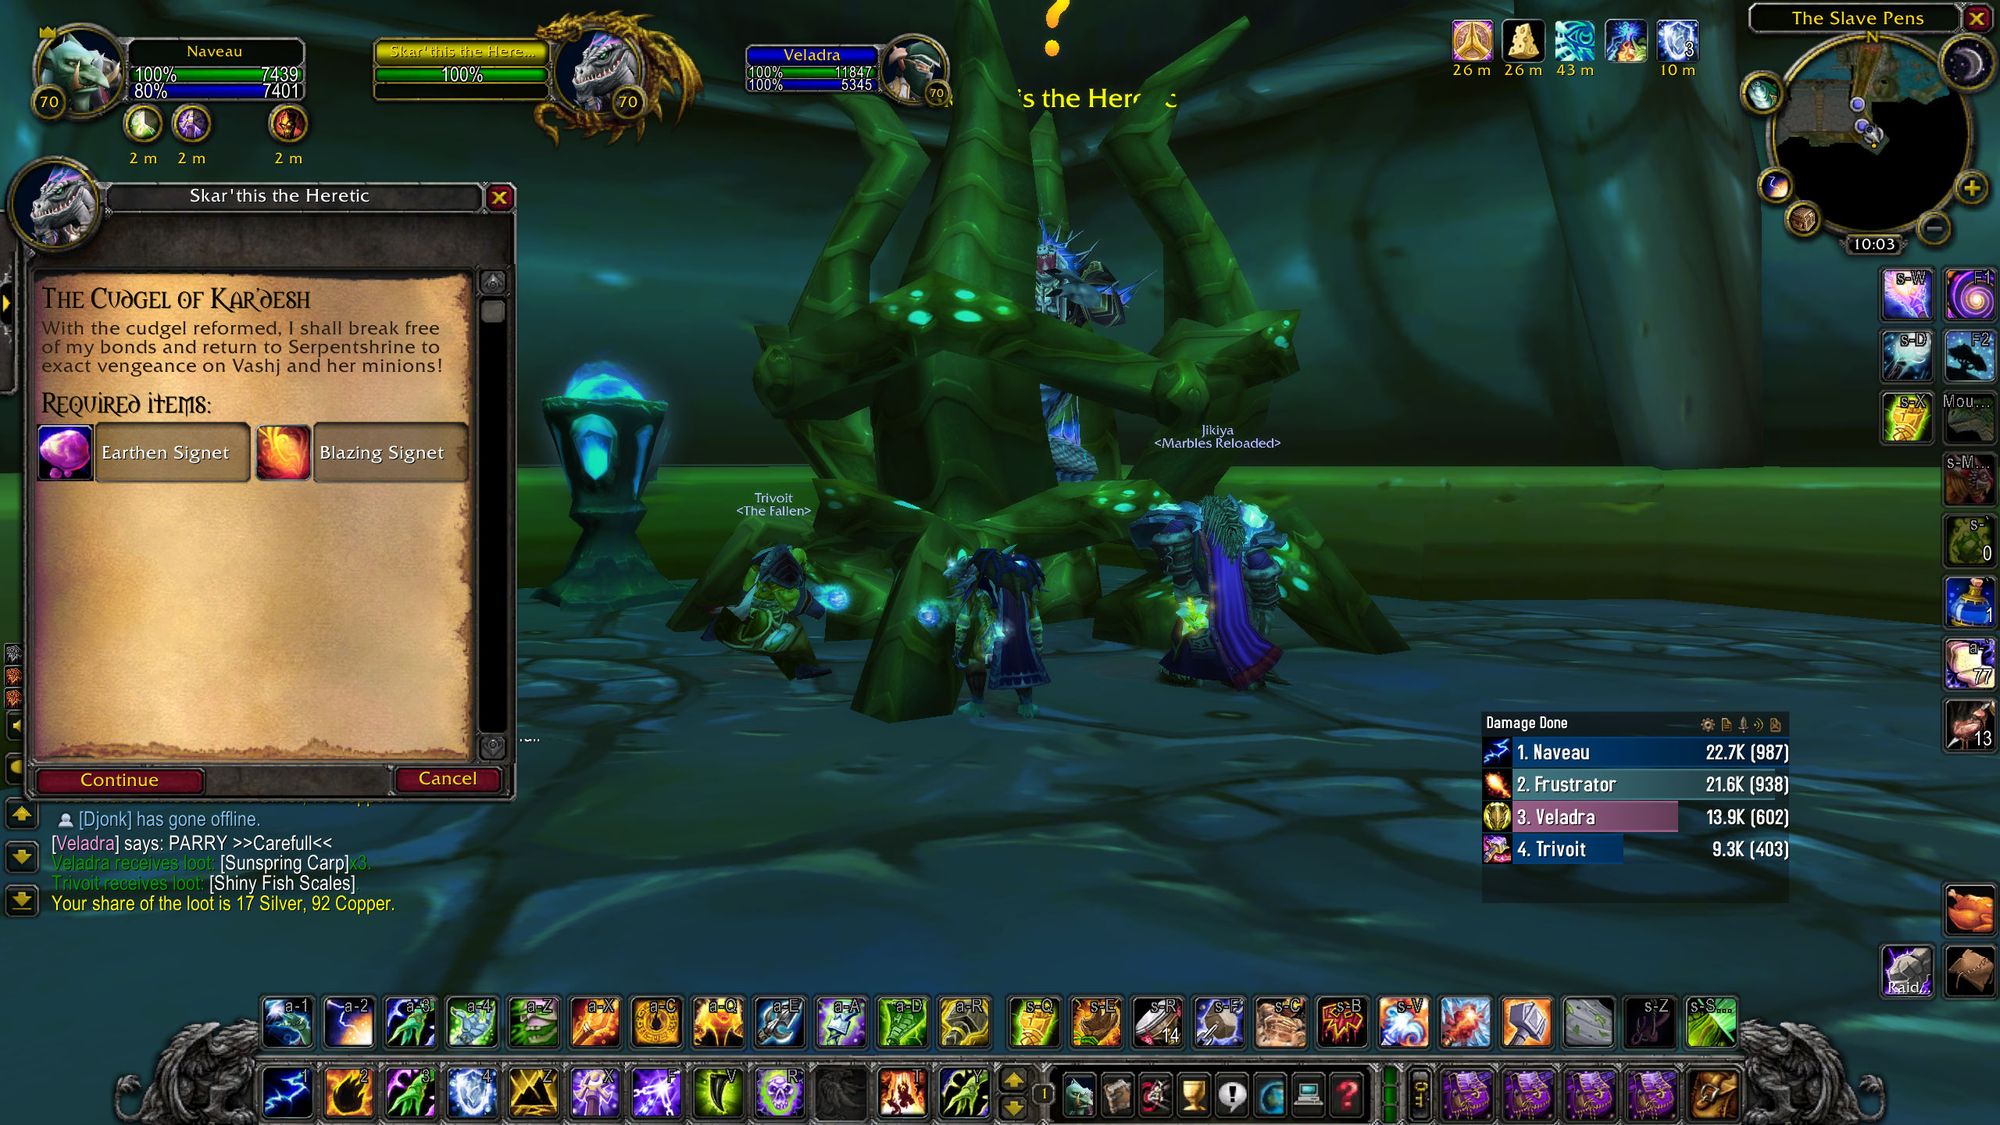
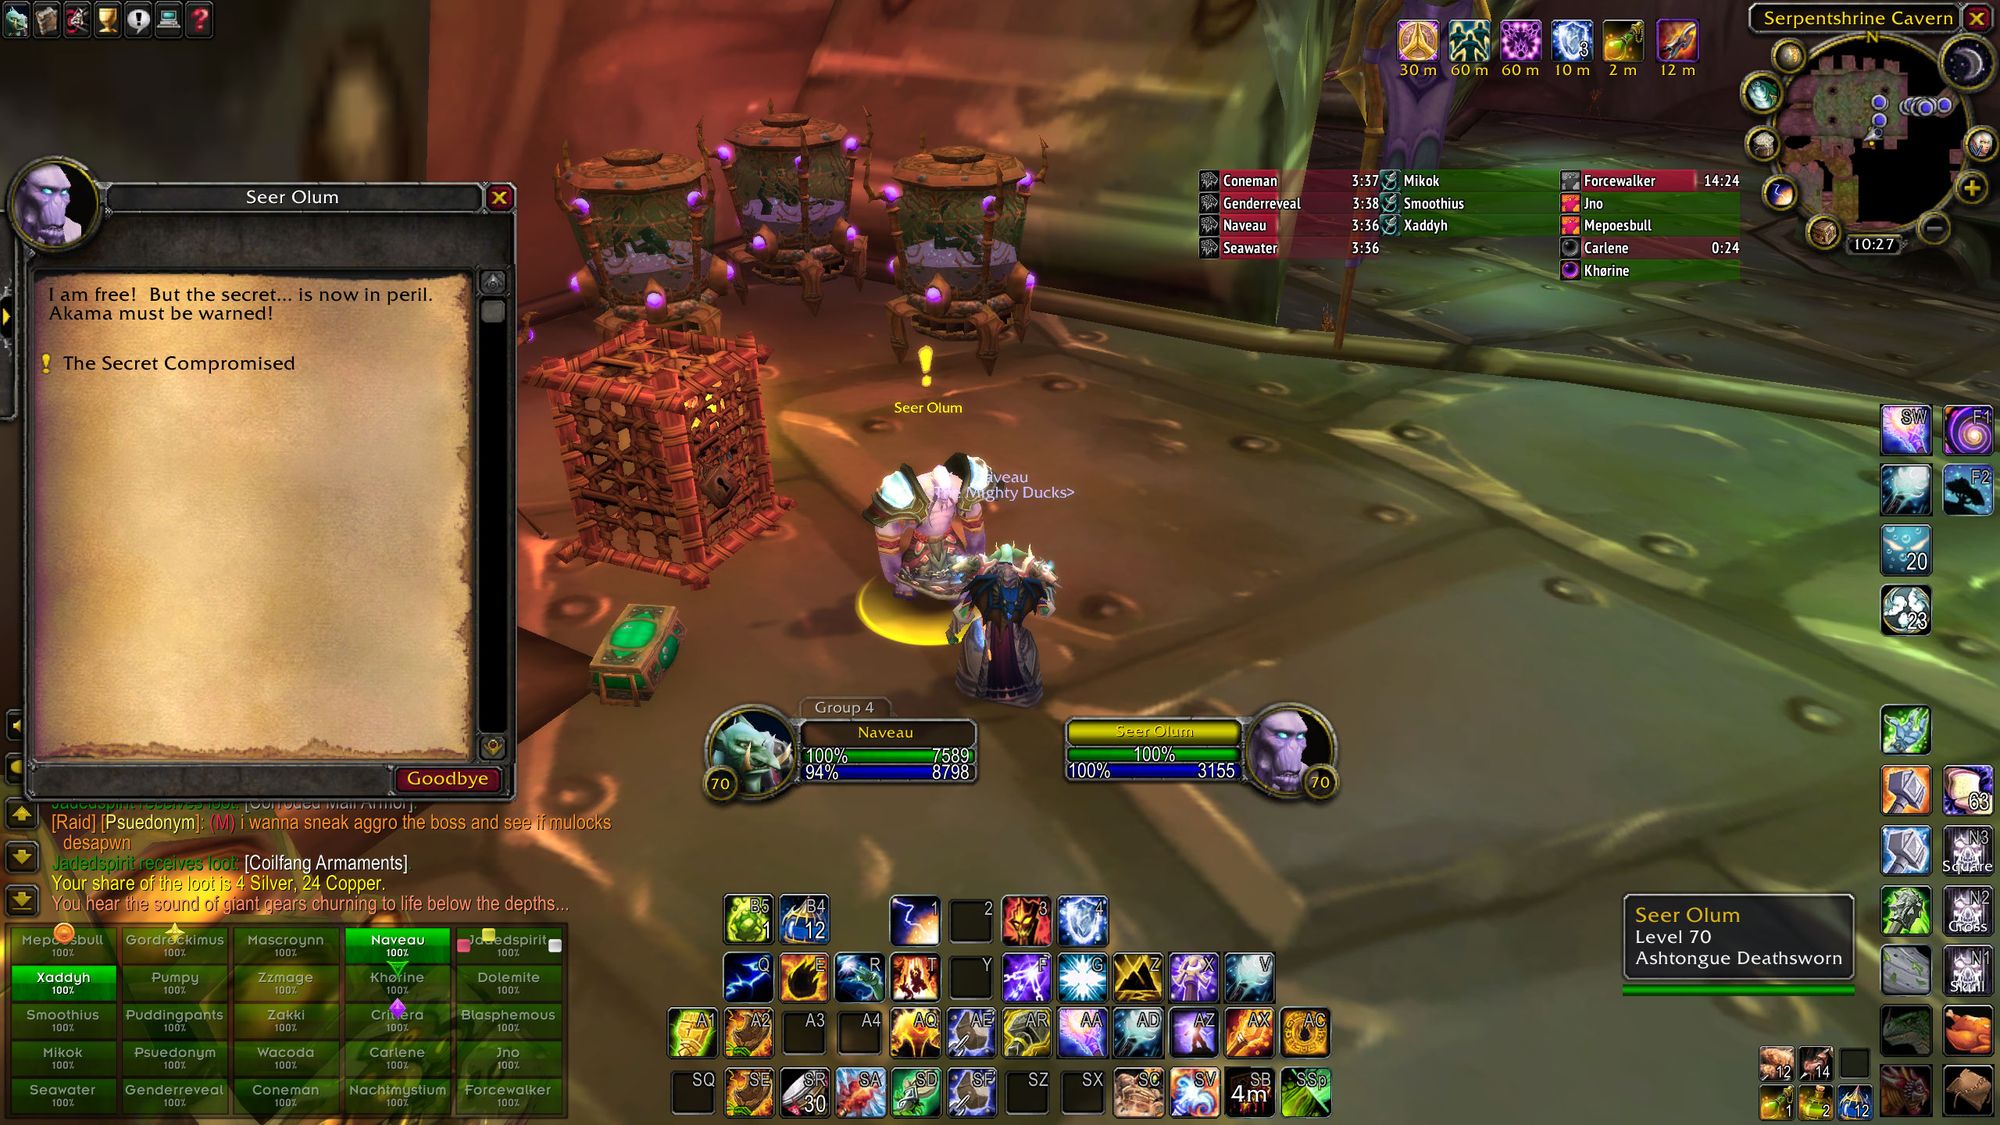
First, you needed to clear to Skar'this the Heretic in Heroic Slave Pens. You could not do this quest on normal, you'll find the cage is empty. He'll give you a quest to go and get the two signets.
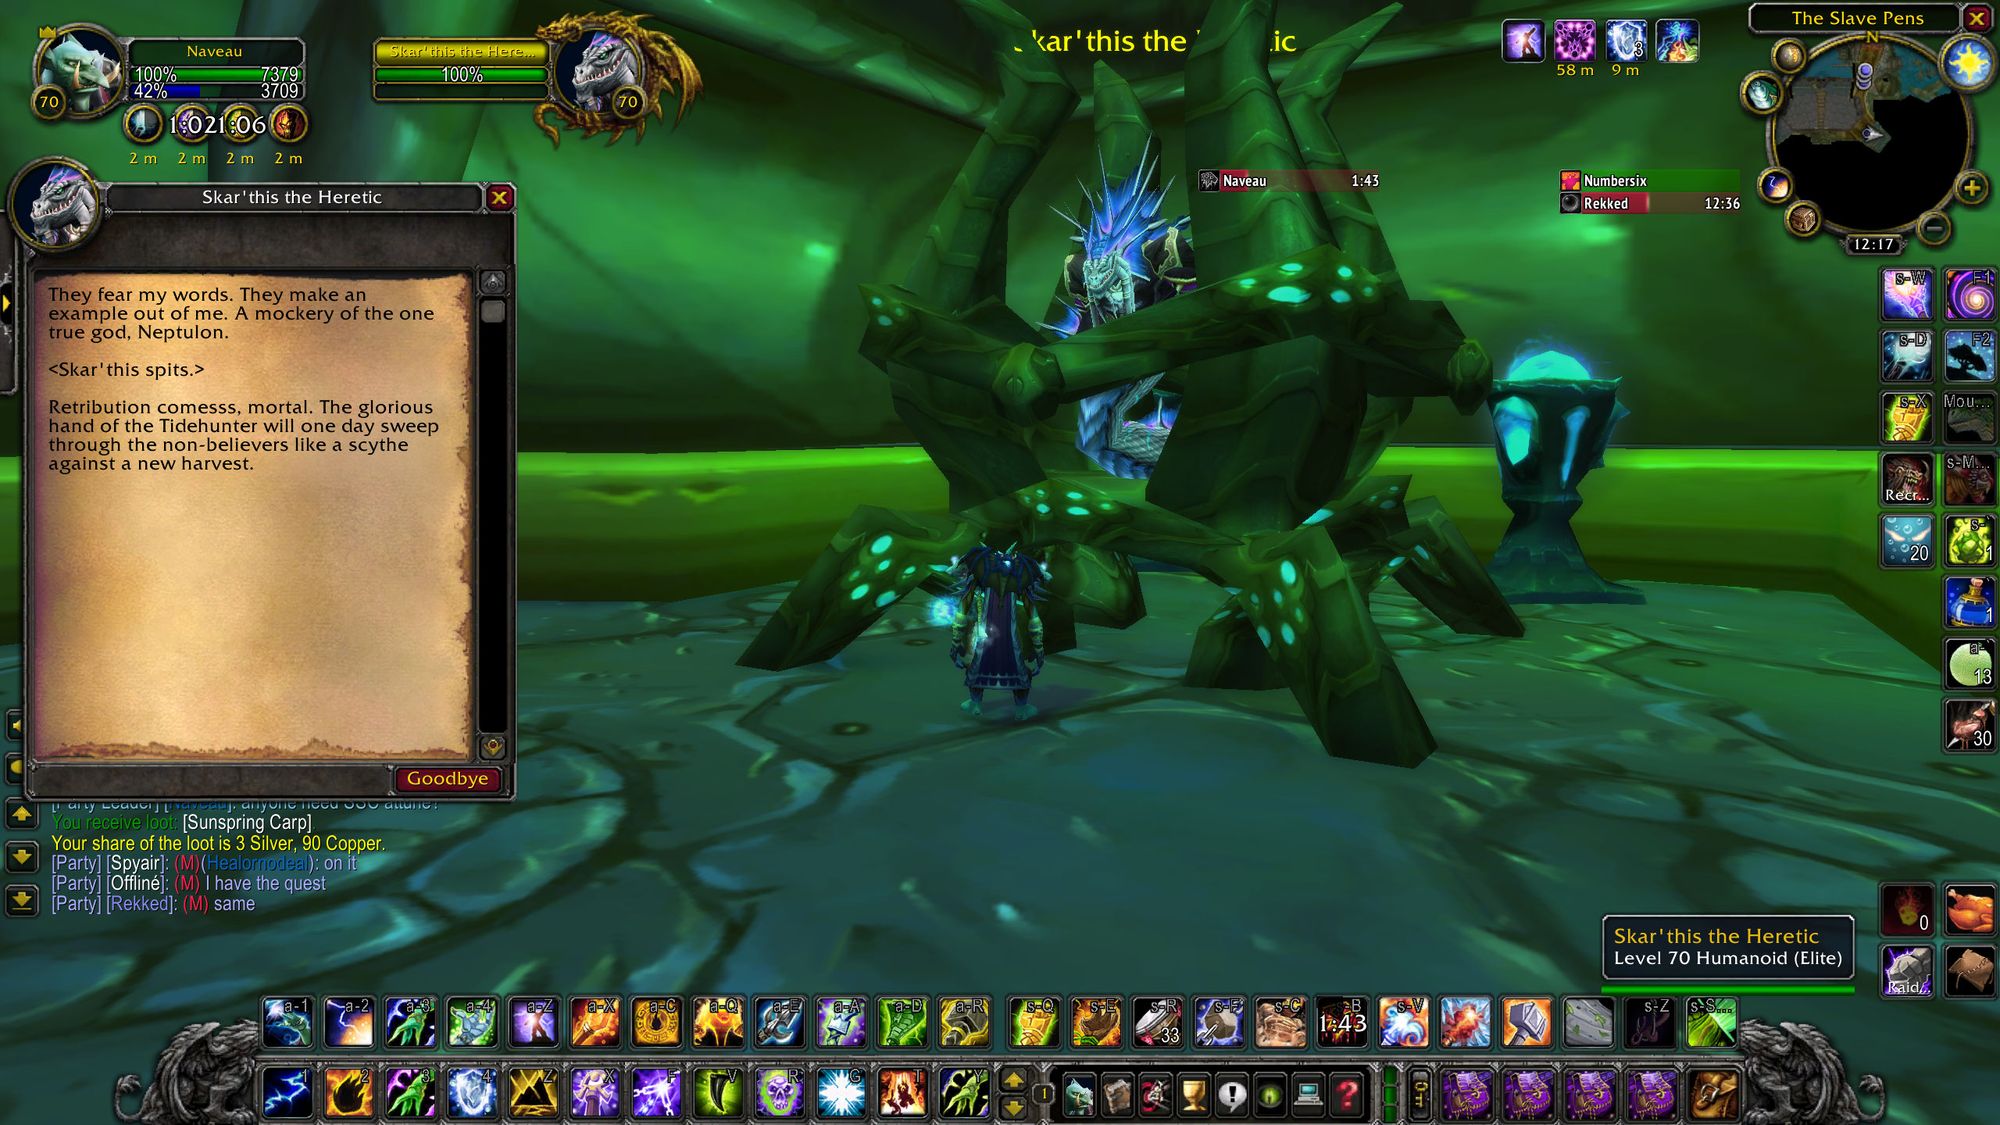
The first raid boss gives the Earthen Signet. That would be Gruul. The good news is that Gruul got the first of two nerfs in phase two, turning him into a relatively simple exercise to clear. If you were trying to attune your raid to go into SSC on day dot, you would've found it much harder. Marbles did have some members (including me) that were attuned to SSC prior to phase two launching.
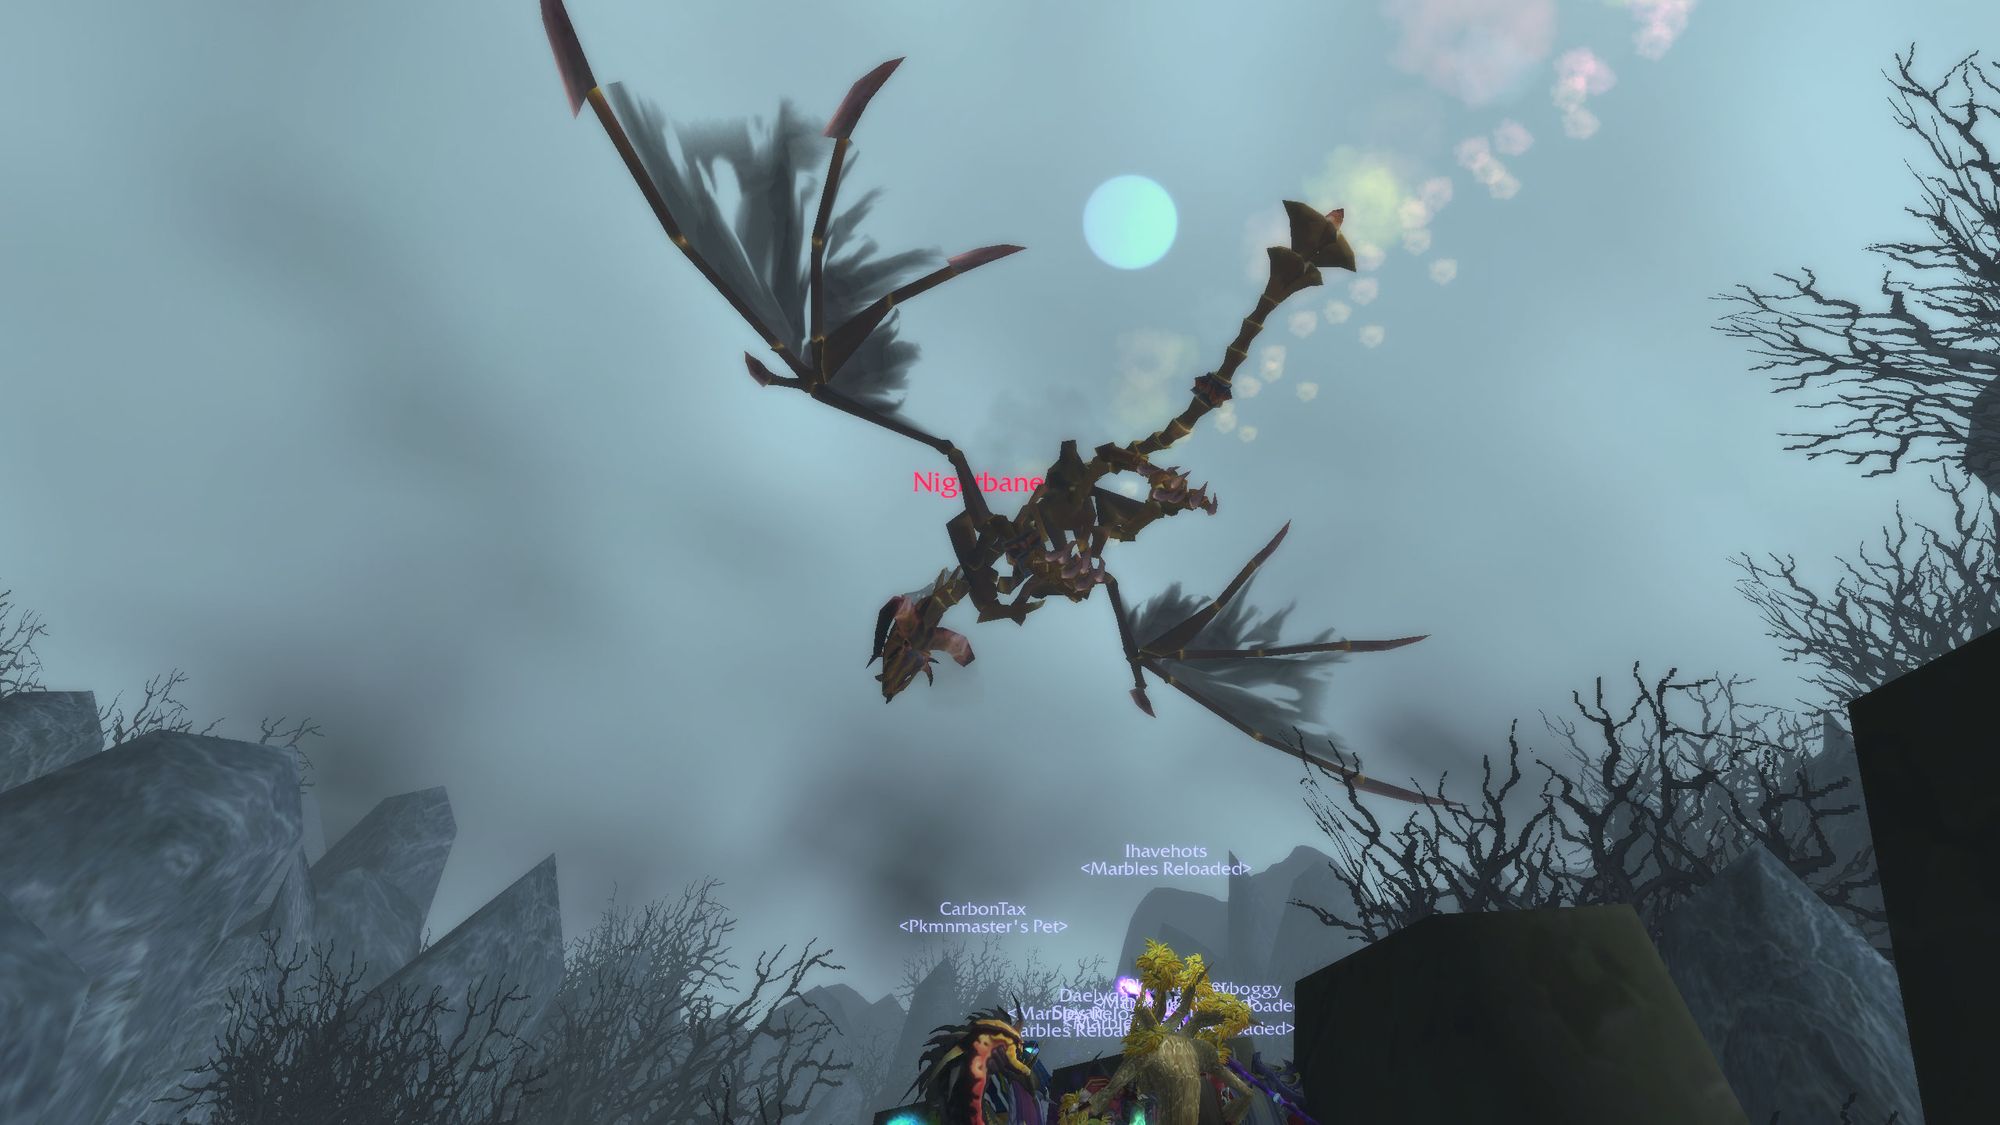
The second boss? Why, Nightbane, of course! This adds a layer of complexity because 10 does not divide evenly into 25. Meaning you had to rotate people through Karazhan to all get the Blazing Signet. Or hope they could find pick-up raids. Nightbane in phase two did get nerfed and was easier, but could still smash unsuspecting (and undergeared) raid groups. In phase one you had better bring your S-game to bring him down.
Once you've got both signets, just re-clear heroic Slave Pens (at least 5 goes into 25, but that means that you need to work your tanks really hard to get there...) and turn the quest in. Robert's your father's brother, you're ready to enter...
Overview
Serpentshrine Cavern is home to six bosses. Four are mandatory, as each one guards a lever which provdes access to the last boss, Lady Vashj. One boss is optional, the Lurker Below (boss two), which requires a player with sufficient fishing skill. In future phases, you can go straight to Lady Vashj, but we're pretending the content is current.
In terms of composition, chad well-equipped raid groups ran five or six healers, three tanks and DPS, heavy on carry classes like hunters and warlocks, with enough support classes for those who need them.
Phase 2 also marks the point where Arcane starts to become very powerful and almost mandatory with the combined damage it can produce. Once your mages have access to two pieces of tier 5, their single target damage jumps through the roof.
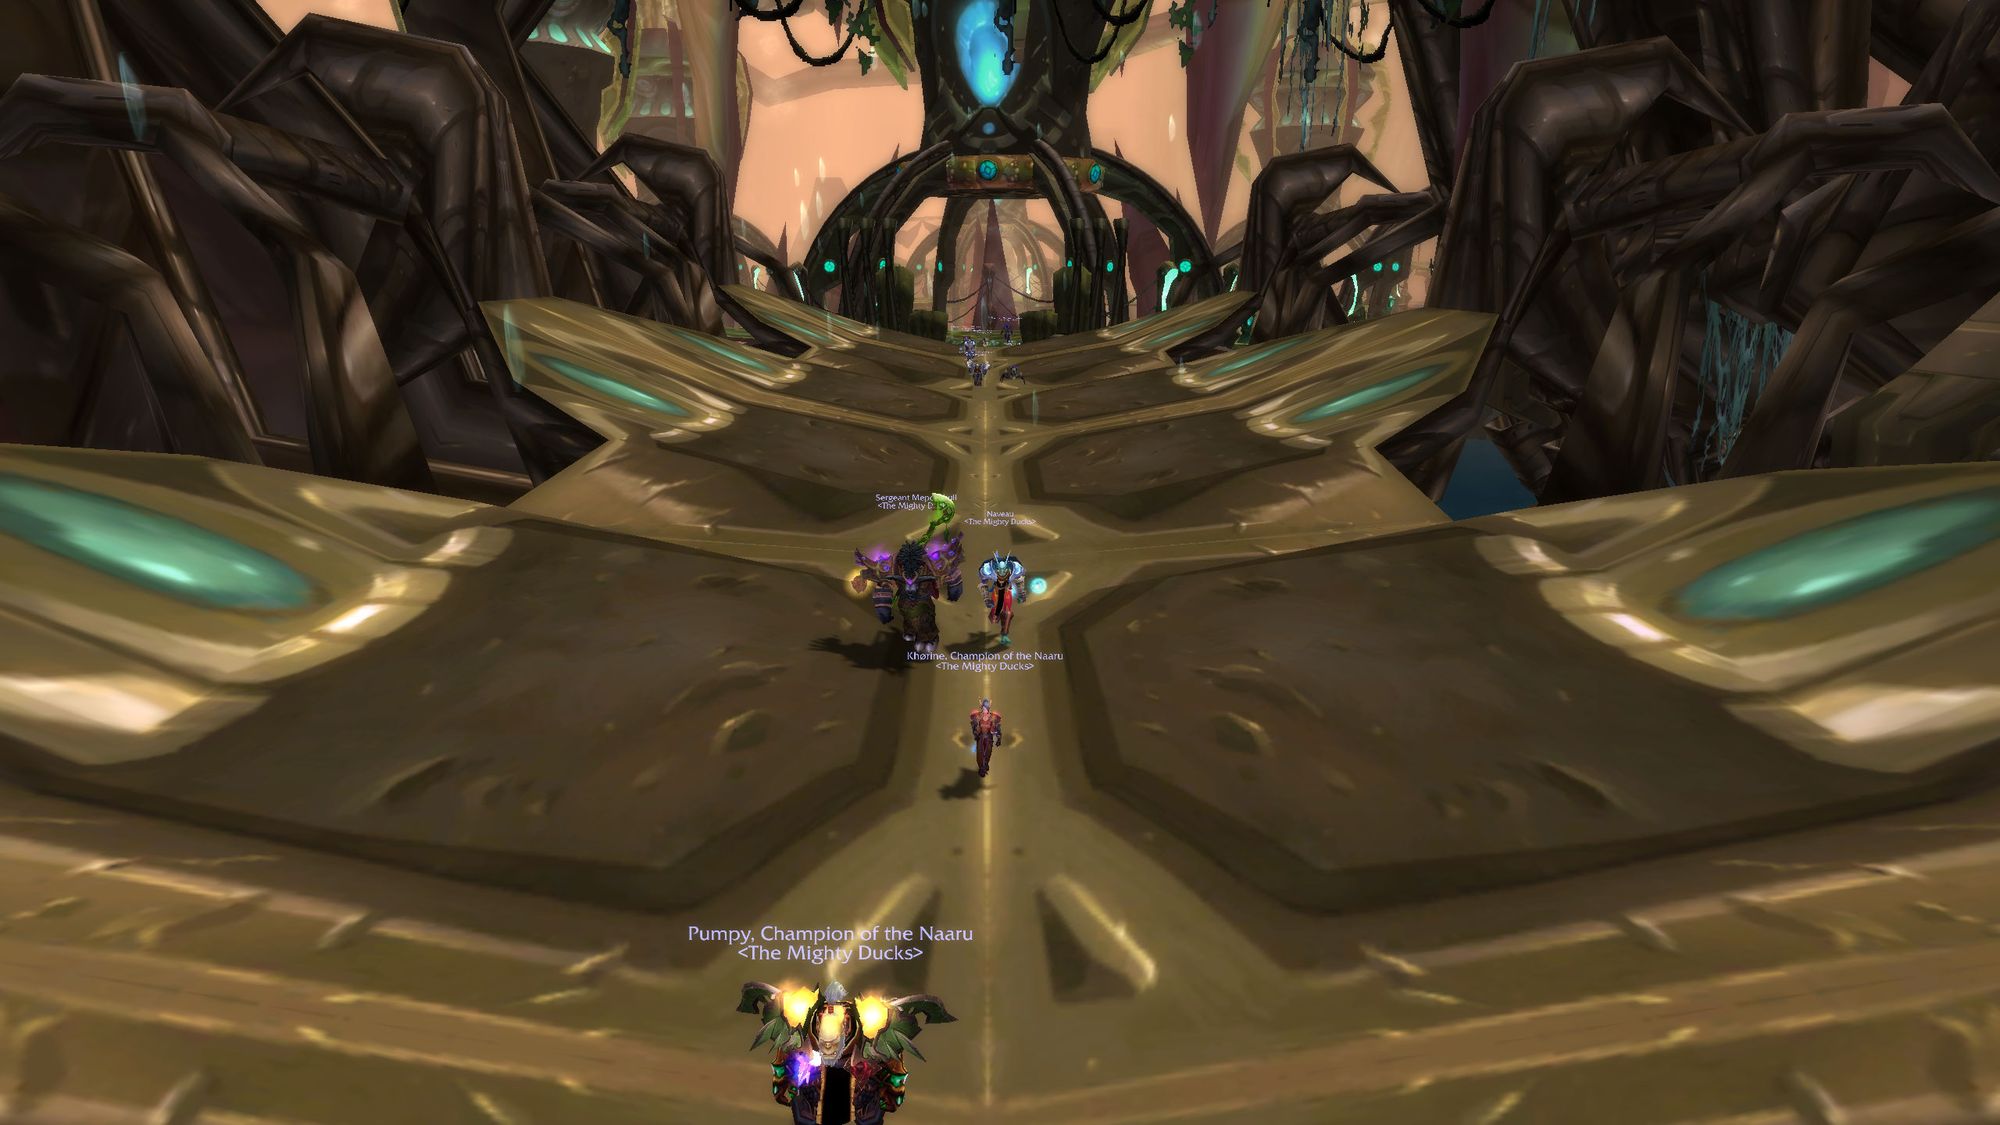
Once you get onto the huge elevator (that'll kill you if you jump down, so just wait, ok?) you'll start to work your way into the Cavern proper.
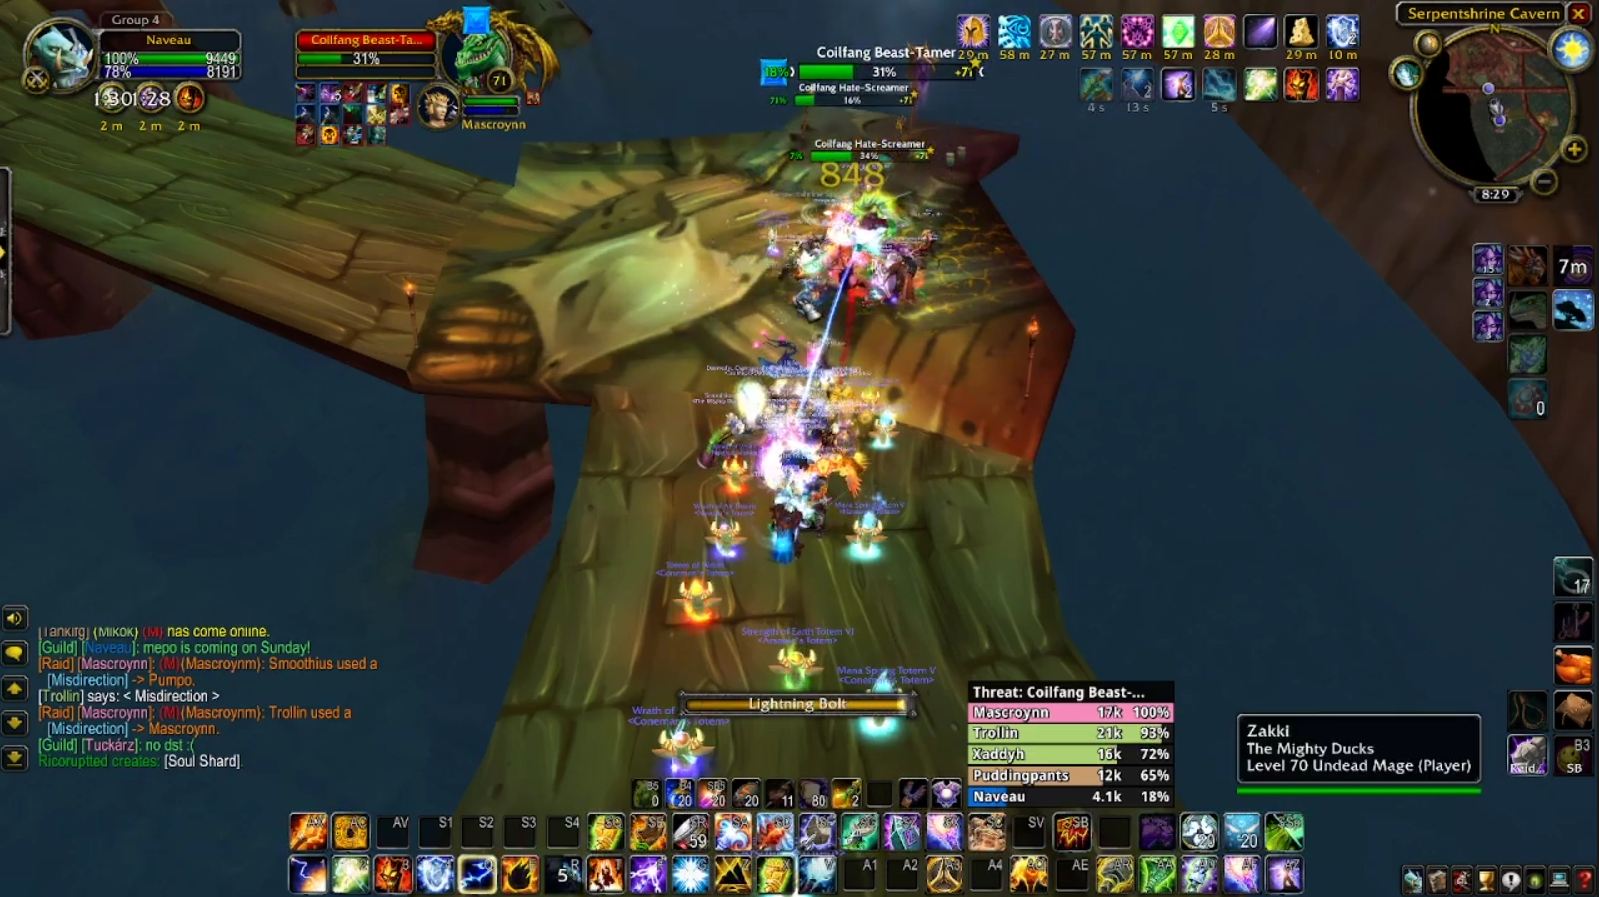
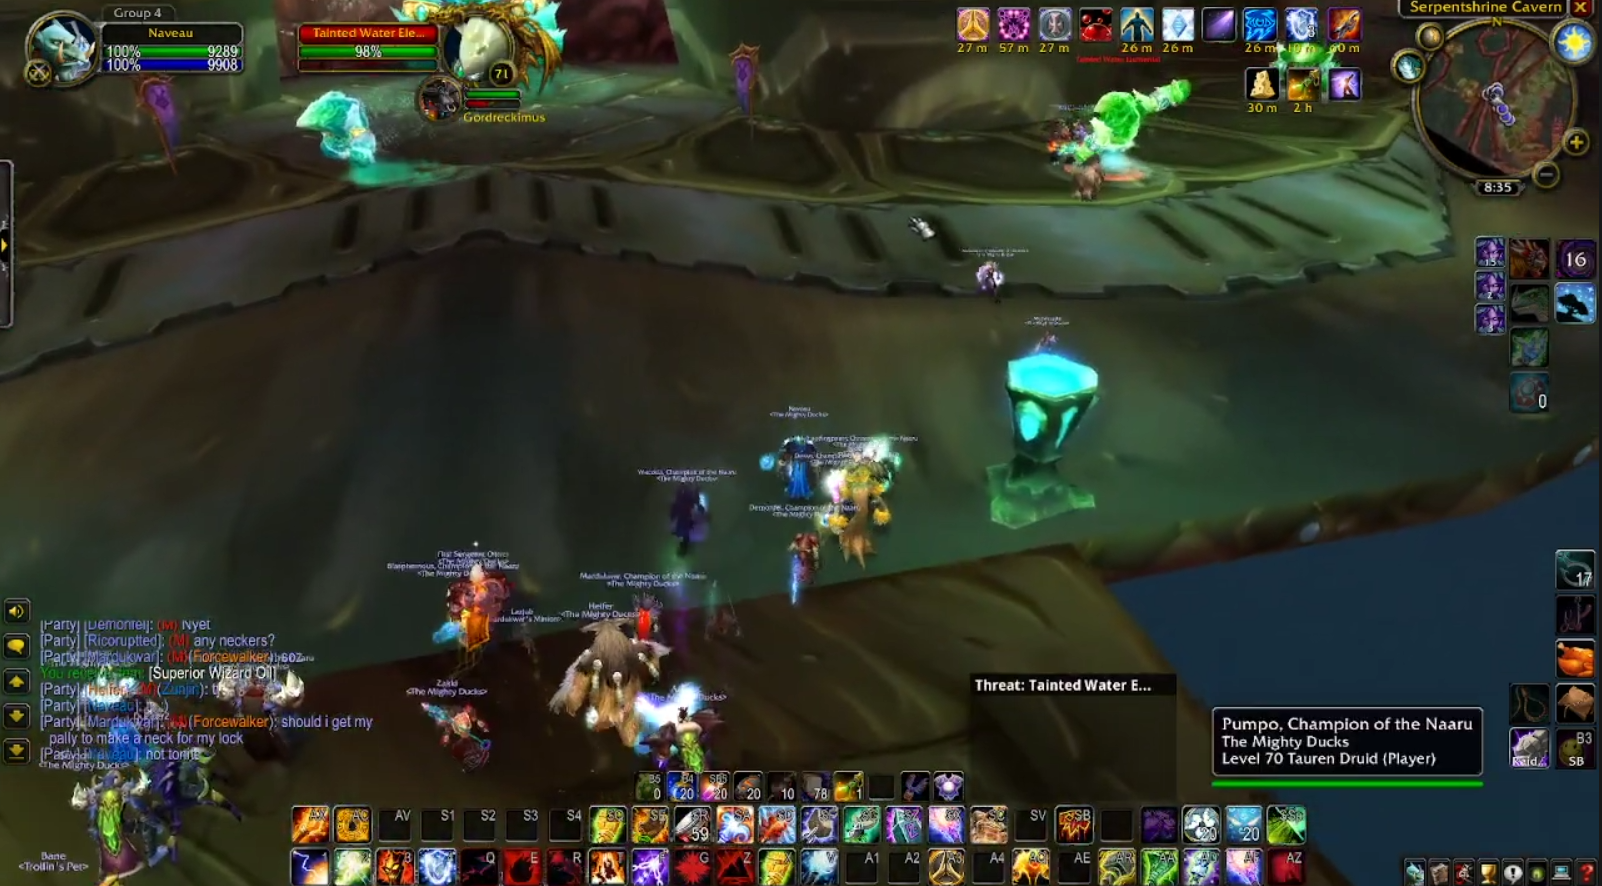
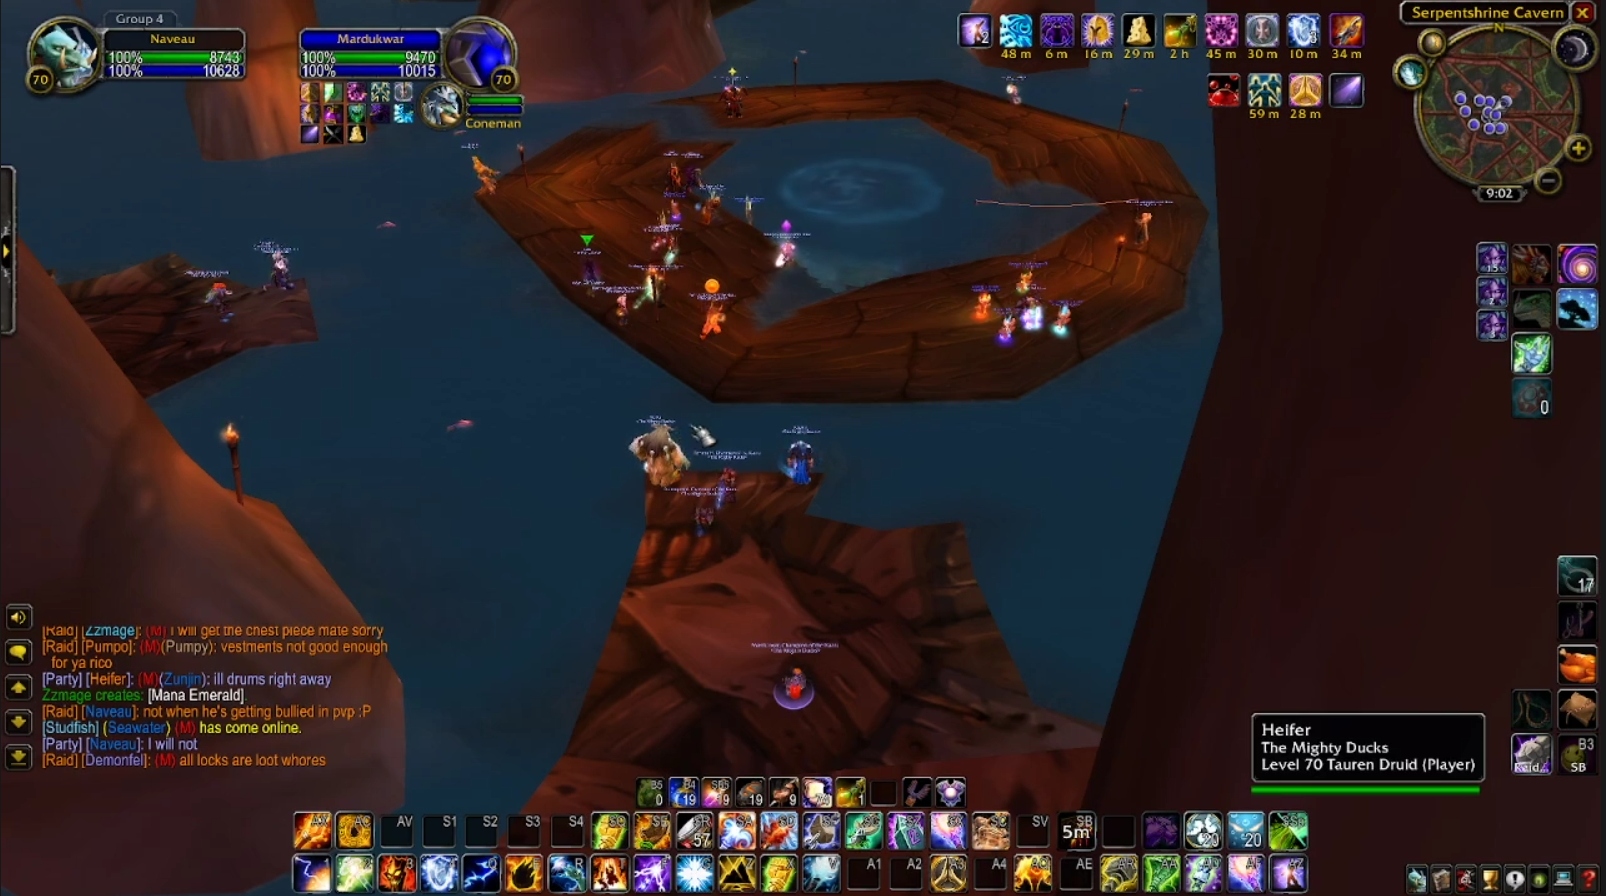
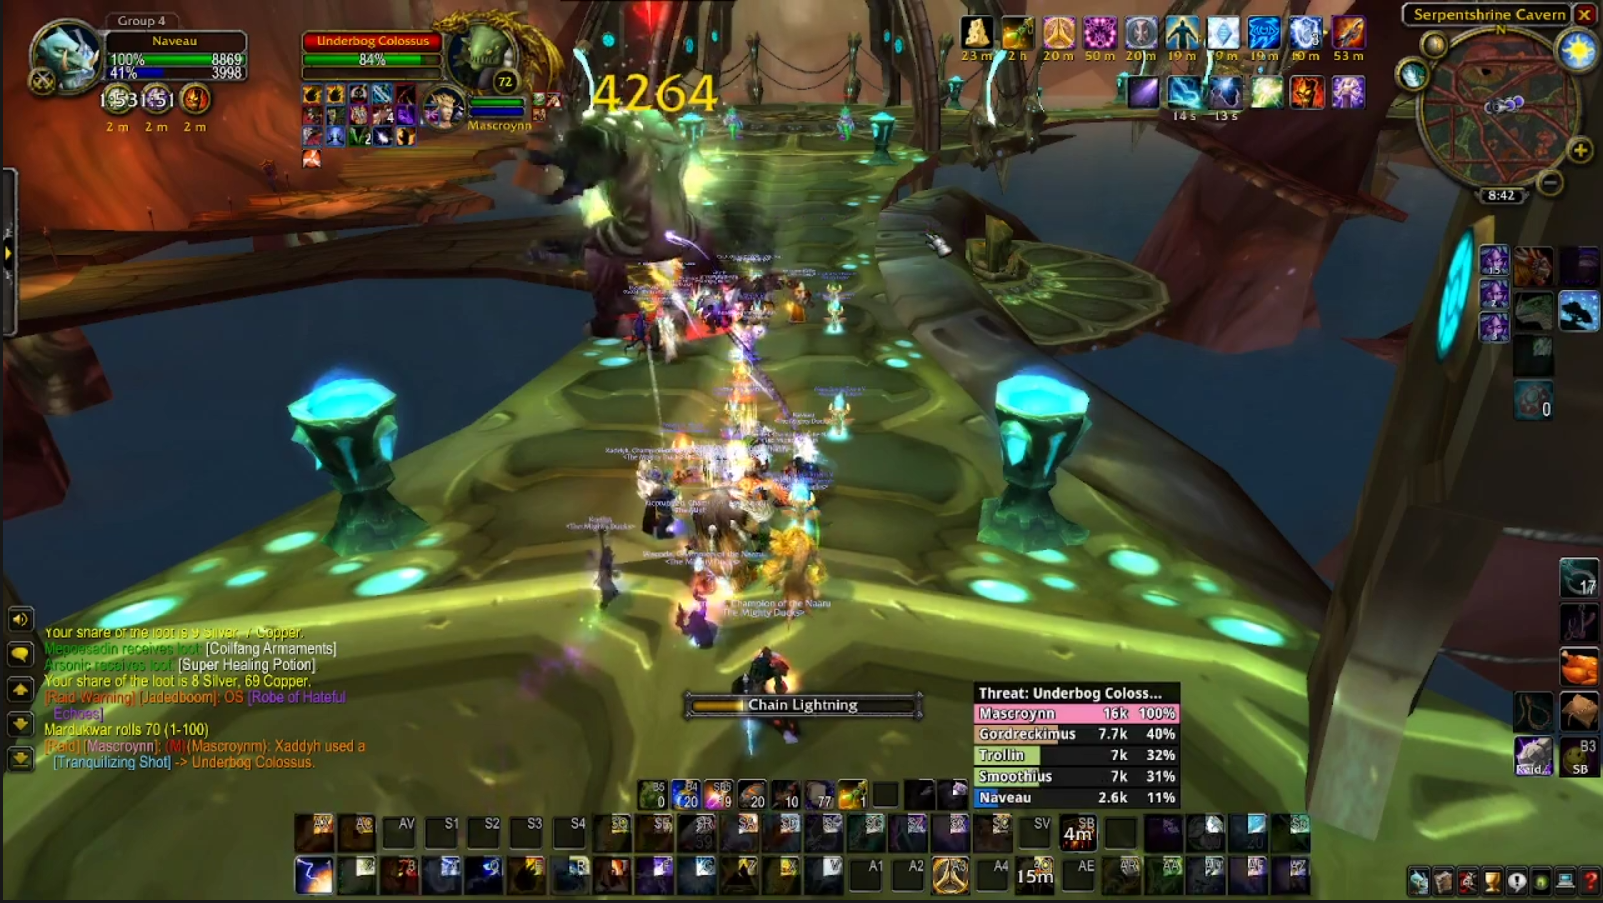
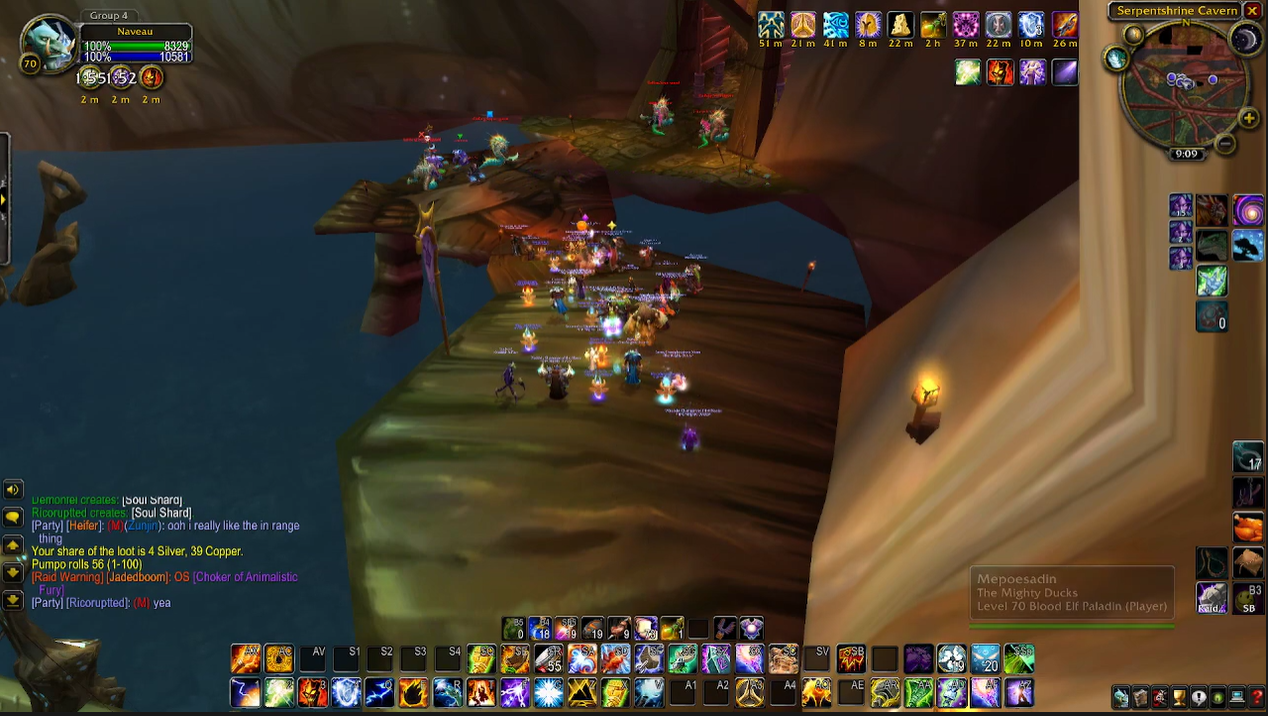
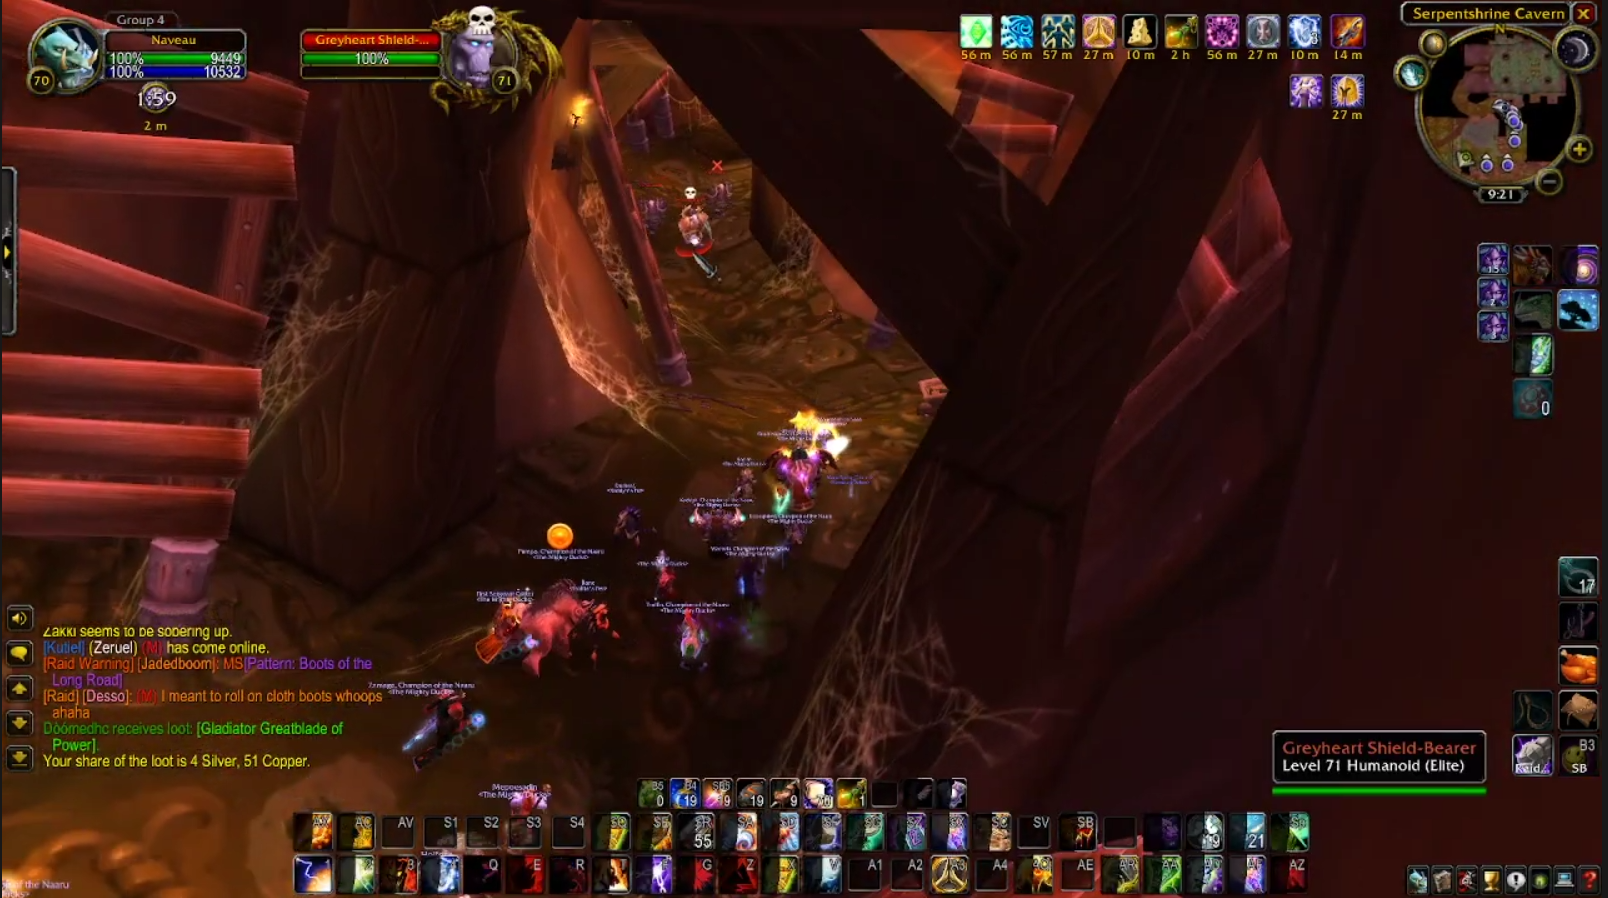
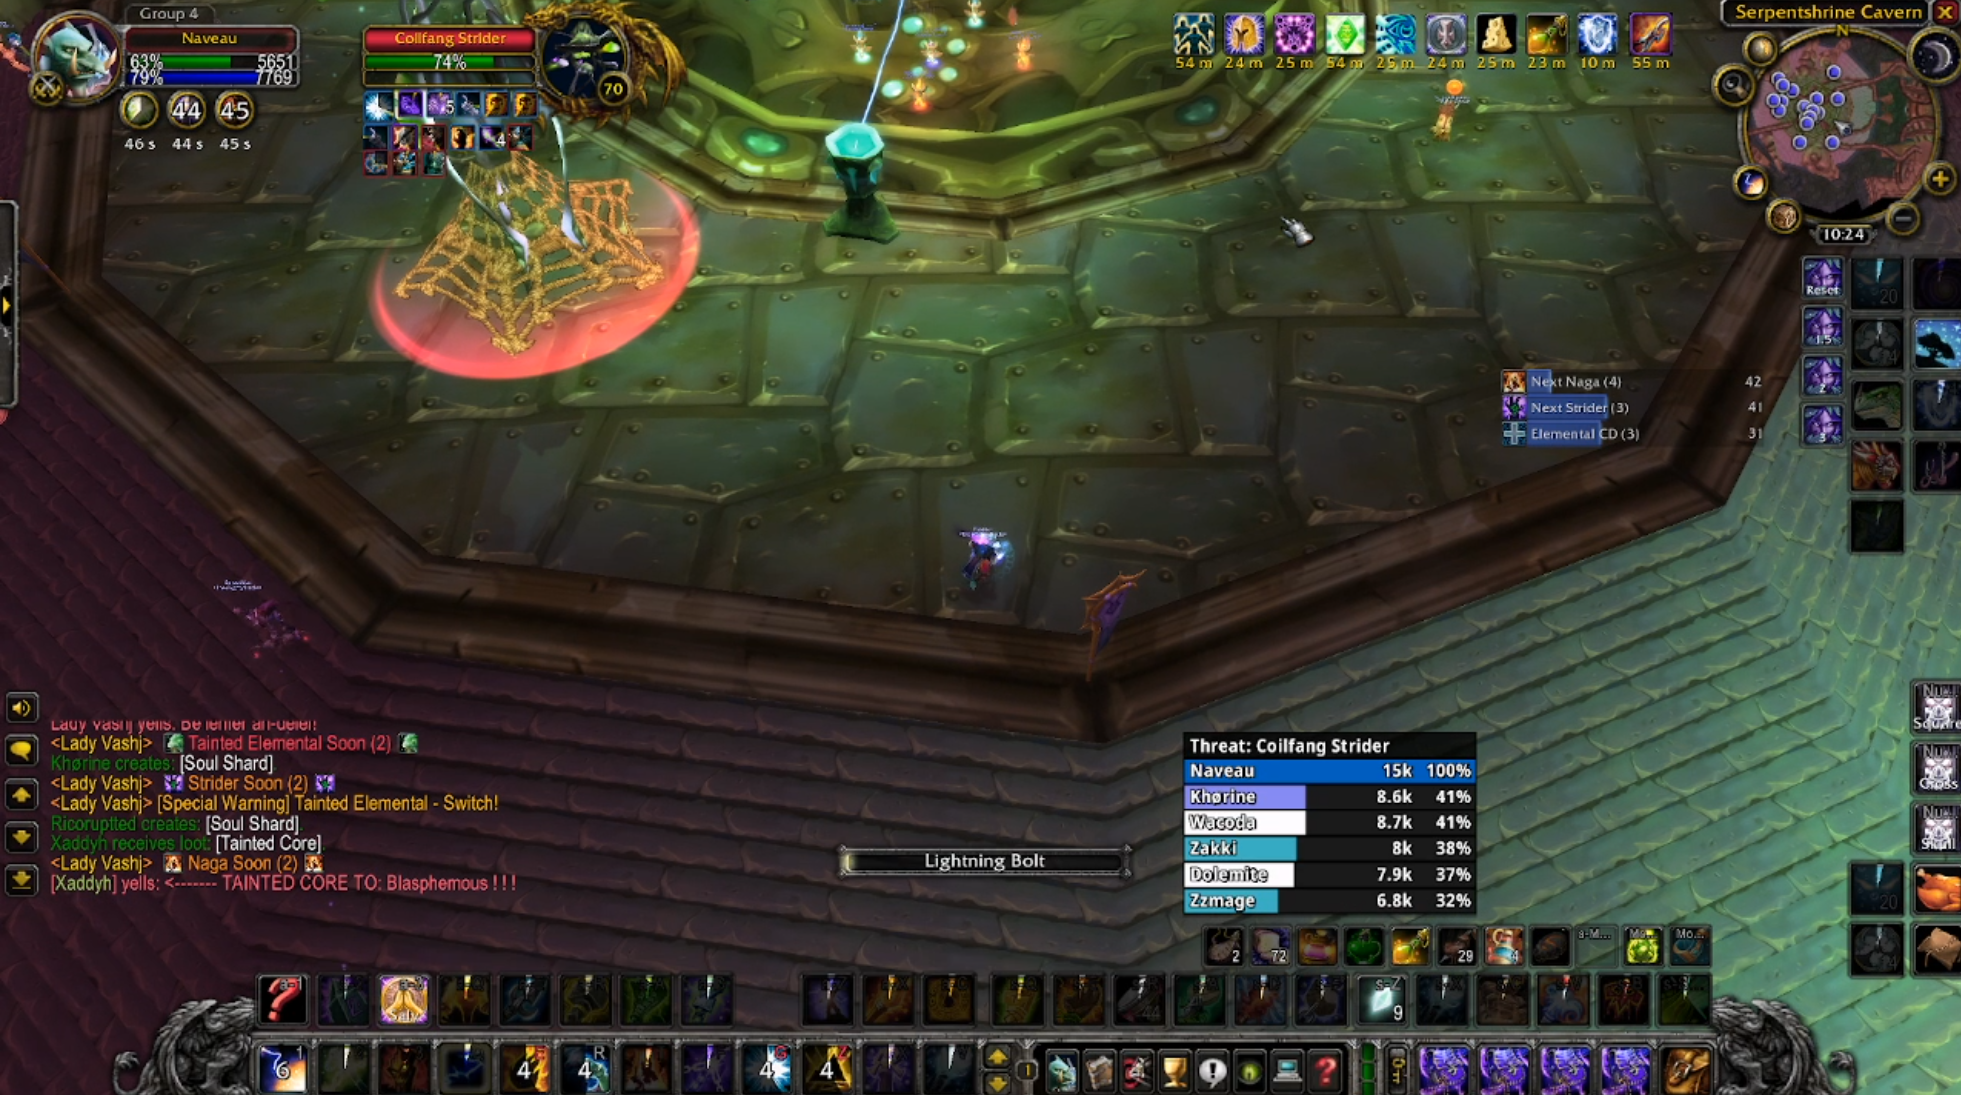
Starting at a large open platform looking across a series of ramps, You'll need to clear alternating packs of Naga and Underbog Colossi. Each Naga pack consists of two screamers, two sporebats and a beast tamer.
You'll want your bear and warrior (or two bears, I 'ain't judging) to tank a sporebat each and have your raid group focus them down. Your paladin will gather up the beast tamer and two screamers away from the raid and build threat when he can, as the screamers silence.
Periodically the beast tamer will enrage a sporebat which breaks the crowd control, so, don't bother - just smash them with damage before they kill a caster, as they charge and can do a lot of damage in a short period of time. If you're finding your damage is too low to clear them both before they charge a clothie at the back of the raid, have a hunter or shaman with mail gear stand at the back to eat the charges.
Once the Sporebats go down, that's the hard part over. Optimal AoE rotations can be employed to clear the screamers and beast tamer.
Between each Naga pack, there is a Underbog Colossus. These require strong individual situational awareness to minimise damage and can wipe unsuspecting raids, and sometimes even suspecting raids. Take care not to engage the next Naga pack when pulling a Colossus, and vice versa, as a Naga pack and a Colossus simultaneously is an almost guaranteed wipe.
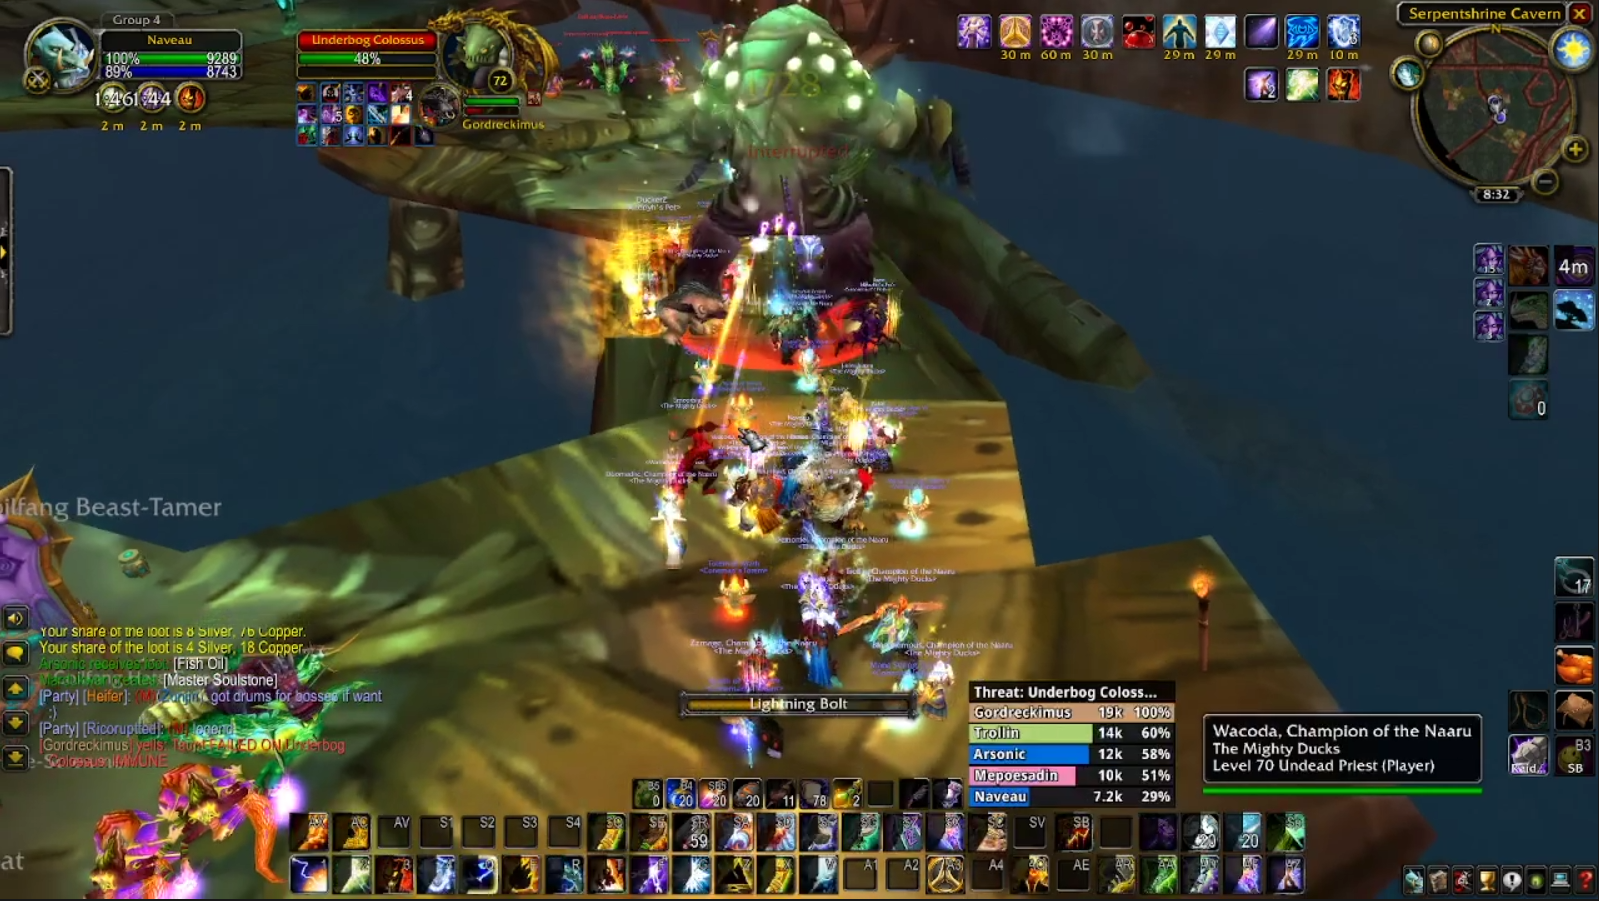
The Colossi come in variants - some will spit acid in a wide cone at a player, which will require the targeted raider to run to the tank whilst the everyone else stacks directly behind. Sometimes the Colossus will use Spore Quake, an AoE which deals heavy damage to the raid and will require all non-tanks to move more than thirty yards away from the boss. Sometimes this spell will go beyond it's max range, so everyone needs to be switched on and move early. Sometimes even using a health stone or healing potion will be necessary, as the damage can be oppressive.
Once the Underbog Colossus goes down, a random additional effect can occur. If you're lucky, blue mushrooms will appear on the corpse, healing and restoring mana. Normally though there will be either a big green acid pool which takes about three ticks to kill someone, lots of little adds that your Paladin tank will need to pick up, or two larger adds that your non-paladins will need to pick up. Again, stay on your toes - I wasn't kidding when I said everything in here wants you dead.
Once you clear two Colossus and three Naga packs, you have arrived at the first boss:
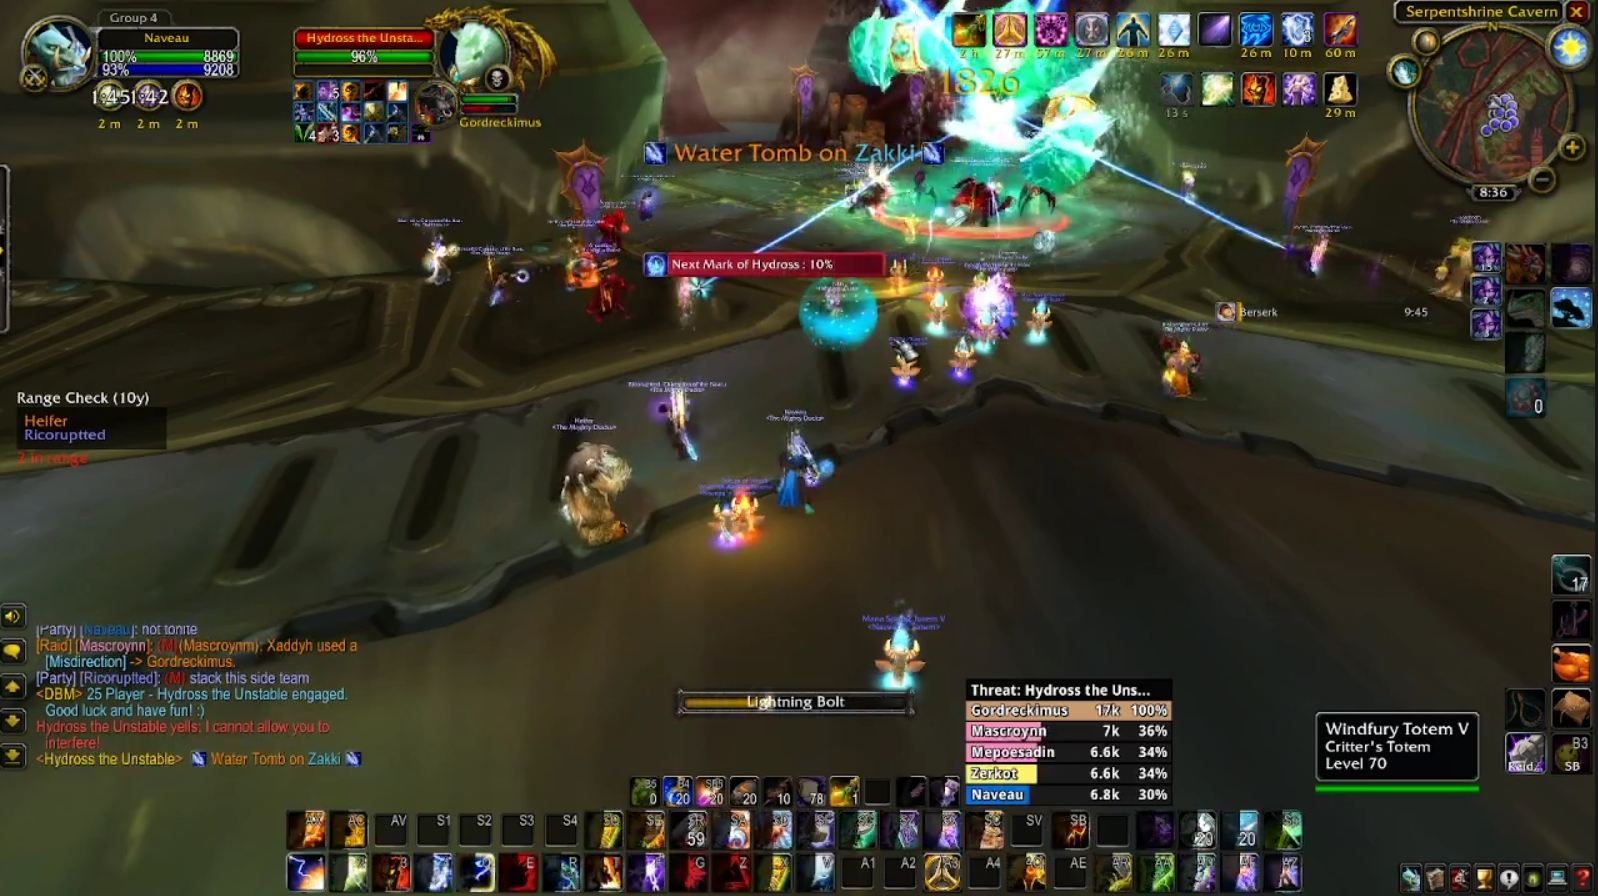
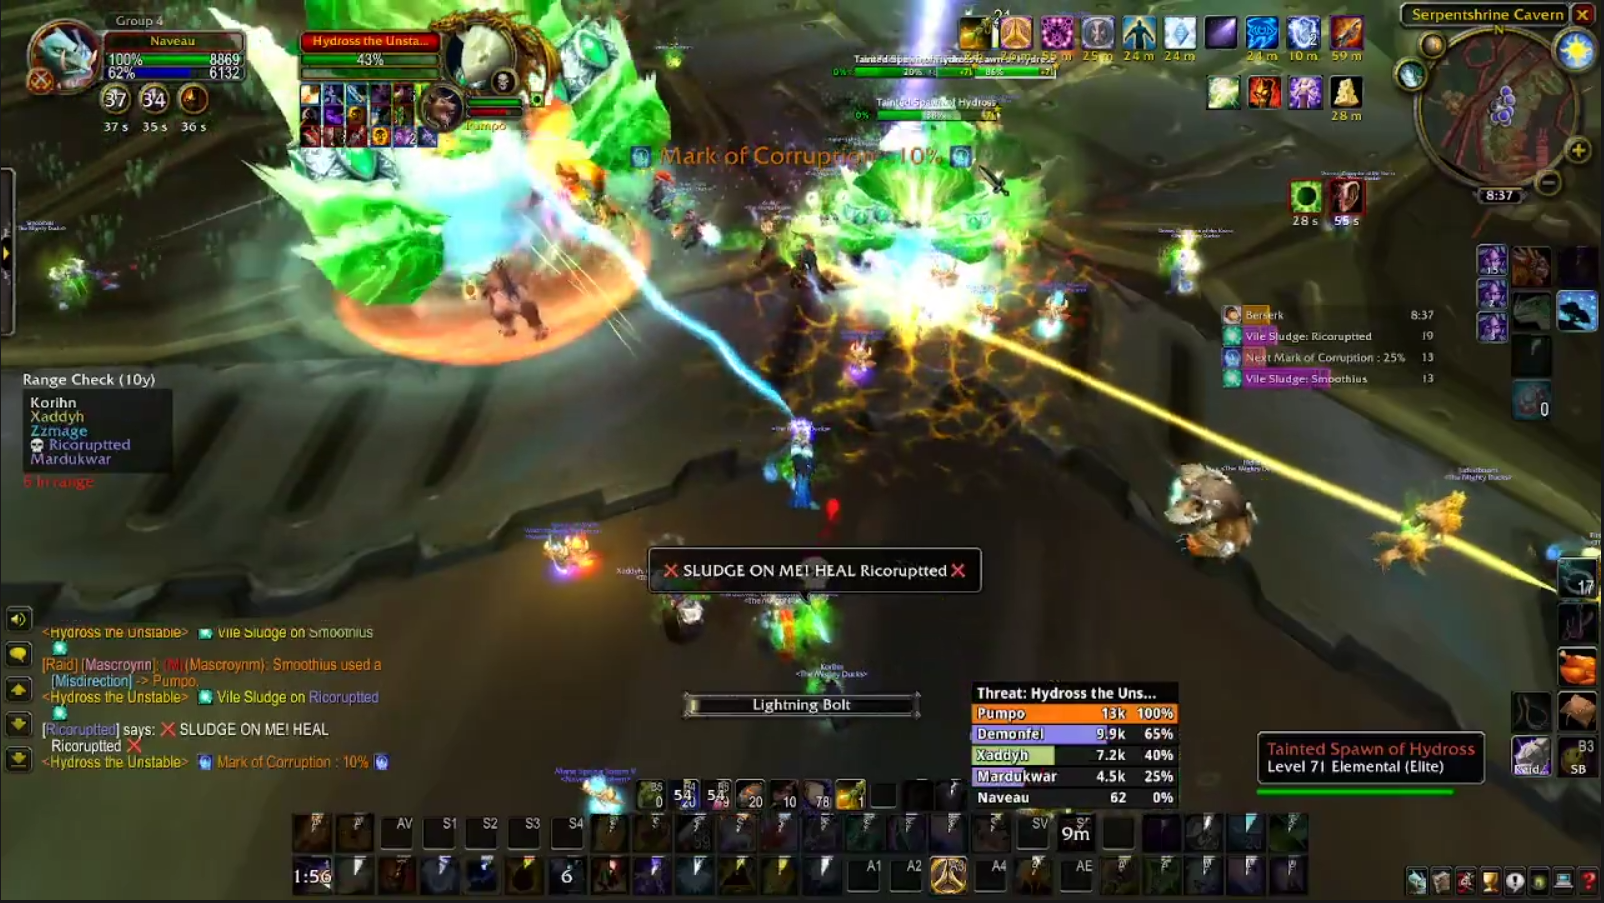
Boss One - Hydross the Unstable
Before you even think about taking on Hydross, you need to make sure you have one tank with maximum (365 buffed, 270 unbuffed) frost resistance and one tank with maximum nature resistance. That player also needs to be uncrittable (the magical 490 defence rating, or something else for bears) but does not need to be uncrushable.
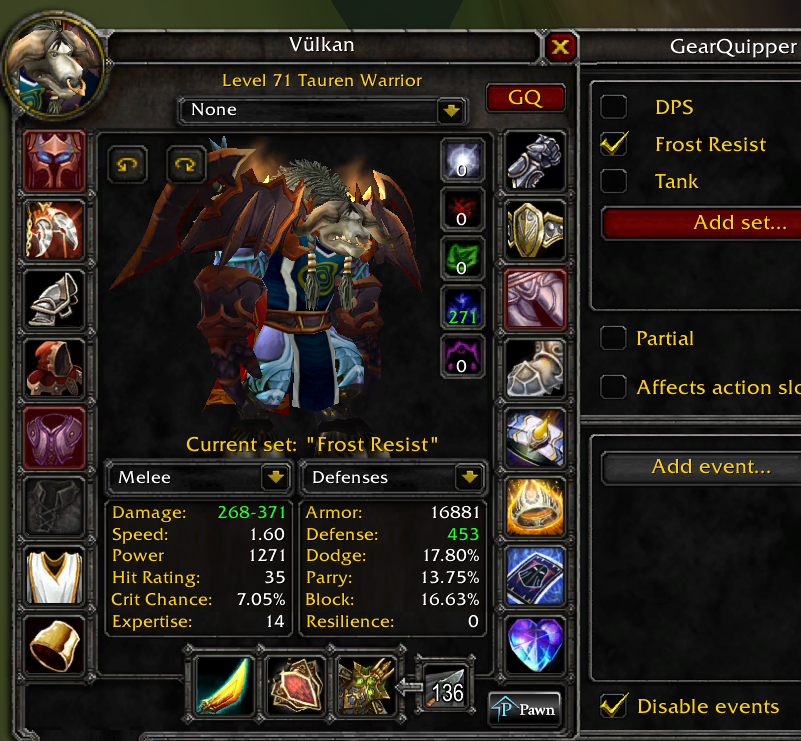
It's recommended here that you shuffle a Shaman into each resistance tank group for the resistance totem. You can also use a Hunter for the nature tank as they have a resistance aura.
Also, whilst it's "easy" for plate wearers to gear up with resistance pieces, Druids will find it harder as there are no crafted epic leather items with resistance - you're basically hoping for random greens. It's still recommended that you make your bear one of the resistance tanks, as the Paladin will be able to affect the most threat on the adds that spawn during the fight.
Just to make things more complicated, there's a conveyor belt of elementals prior to pulling the boss. Once Hydross is engaged, these adds stop spawning. This can be used to your advantage, however. Have your bear and warrior build up rage on the adds, then have your frost tank pull Hydross.
Tactics
Hydross the unstable is relatively simple. It's about maximising your damage and keeping threat under control. But, whilst we're stating the obvious, I would be an excellent person if it weren't for my personality.
Hydross has two forms - frost and nature. Shocking no-one, Hydross deals elemental damage that corresponds with his form. So frost for frost, nature for nature. I'm hoping at this point you understand which resistance tank has to tank which form.
In frost form, Hydross will cast Water Tomb at players in the raid, excluding the tank. This stuns in an eight yard AoE around the target, so you want to spread out. The catch here is the arena is not big enough to allow everyone to remain eight yards apart and the boss must remain on the platform where the fight is initiated. Most raids use a buddy system and have DPS pair up to prevent the healers or tanks from being stunned.
If your frost tank gets stunned, it's oneshot time, so melee DPS need to make sure that they are as far away from the tank as possible. Never be within 8 yards of the frost tank.
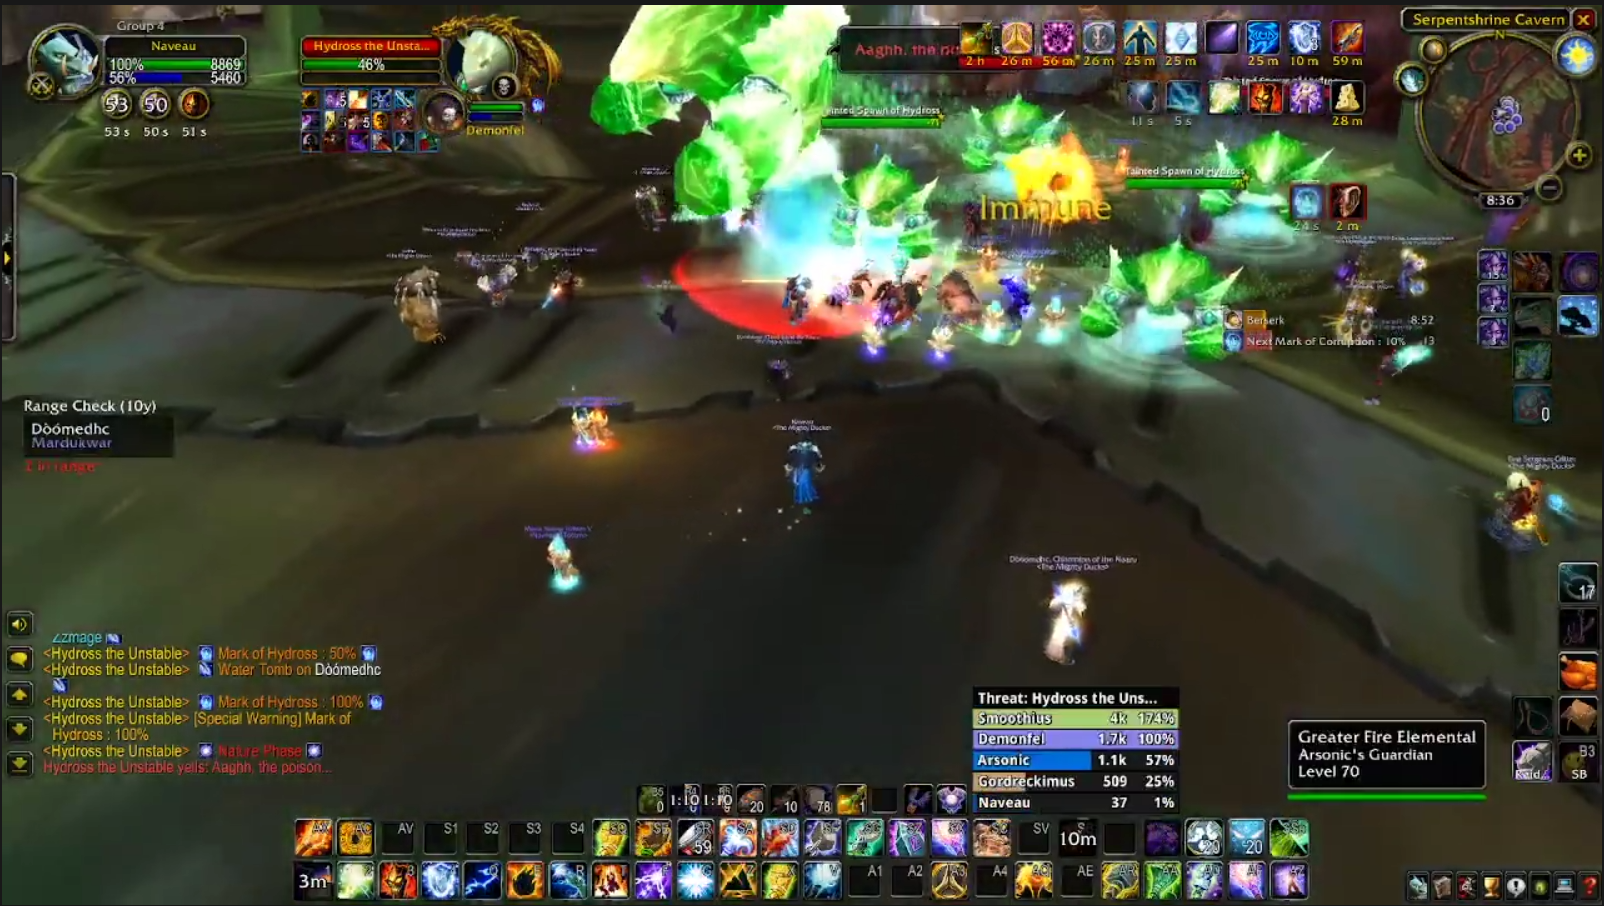
In nature form, the boss casts a dot which reduces healing and damage by 50%, so you want to stack under Hydross to maximise healing. This is the easier phase, but some classes (like, I dunno, Elemental Shamans...) might struggle in this phase as Hydross is immune to the same type of damage as his form. So as an Elemental Shaman throwing out nature damage, you're pretty much limited to twisting fire totems, and fire and frost shock.
Every fifteen seconds, Hydross debuffs your tank with a "Mark of Corruption" which increases damage for the corresponding form by 25%, 50%, 100%, 250% and 500%. Once your tank gets the 250% debuff, they're dead as soon as Hydross touches them, so you need to transition the boss before this happens.
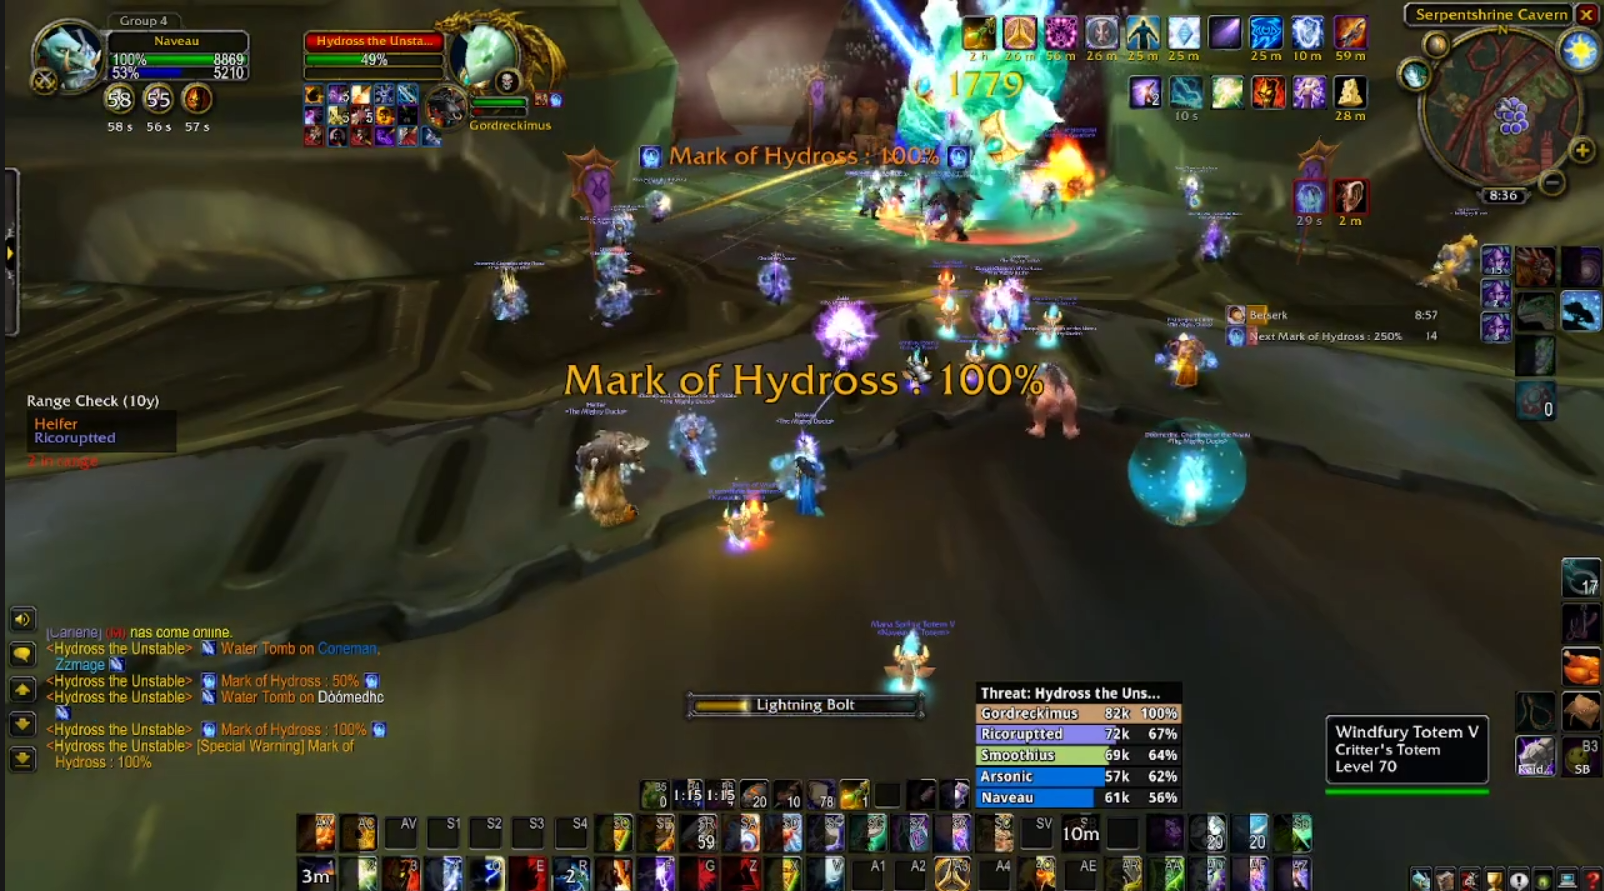
The big catch here is in the transition. Once you tank hits the 100% damage debuff, there's a line marked by two flags which switches the boss' form. The current tank needs to walk the boss over this line and let the opposite tank pick Hydross up. As many a raid leader will tell you, this clears the boss' threat table. That means if you dump out a big heal, don't stop casting or hitting the boss, or have a damage over time effect rolling as the boss switches form, there's a good chance chance you end up first on the table, and Hydross punches you in the face.
To make matters worse, every time Hydross switches form, he spawns four adds in the same form. So if players don't mind their positioning in transition, the boss can very well target someone back across the invisible line marked by the flags, and spawn another set of adds, which is, 99 times out of 100, a wipe. It normally ends with the person that pulled aggro getting a sandblast for not paying attention.
Once the boss transitions, have your Paladin (you DO have a Paladin, right...?) pick up the four adds. They'll hit him very hard, so your heal team needs to be aware that he's going to get obliterated and will need cooldowns and help. Once your Paladin has them all wrangled, park them under the boss and cleave them down. You have sixty seconds to clean the adds up, so use it all. Don't waste time focusing them down, let the healers keep your tank up and maximise uptime on the boss.
Yes, Marbles is still the only raid team I know that couldn't kill this boss in ten minutes, which is the hard enrage timer, and wiped. The primary reason being, too much time on adds, not enough time on the boss.
Once you have the rhythym of the fight down, this is an easy fight. Spread in frost, stack in nature, cleave the adds once gathered up in transition, control threat, kill boss, Earl Z. Moade.
Things that can help are using bloodlust and DPS cooldowns on pull as there are no adds, allowing fifty seconds of maximum attack on the boss. To help with threat, have your hunters (you DO have more than one hunter, right...?) queue up misdirects to generate as much threat as possible. The frost form, and in particular the first phase, where everyone is going as hard is possible, presents the highest risk of a wipe, because of where the raid is in relation to the boss:
If a ranged DPS pulls aggro in the frost phase, it's a guarantee unless your tank has cat-like reflexes and was sitting on a big cooldown, that the boss will cruise over and punch that person in the phase, triggering a transition, which spawns adds and then it's anybody's game as Hydross rolls around with a clean threat table smashing up healers and trigger-happy damage classes.
Once you've mastered the transition and your raid can keep their primal urge to zug the boss under control, you'll have cleared your first boss of phase two. Nice job.
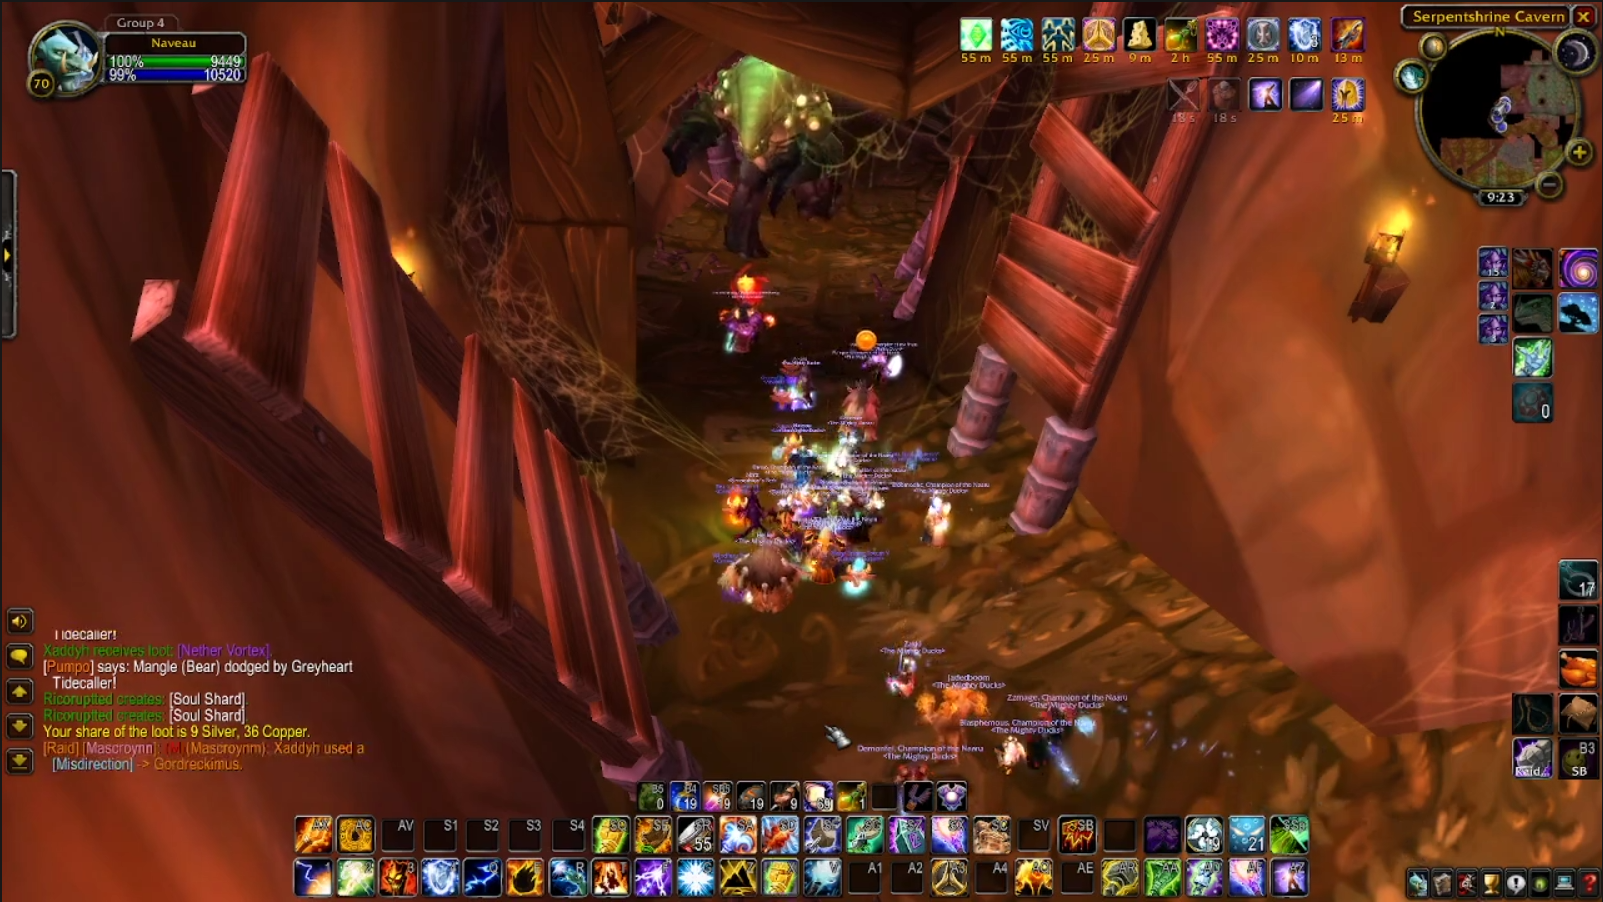
There's no time to rest now, though, because you have a lot of trash between the next four bosses. It's very easy to get bogged down and lose momentum in SSC. The same effort players apply to bosses also need to apply to trash, or there's a very real risk that Hydross is the only boss you clear.
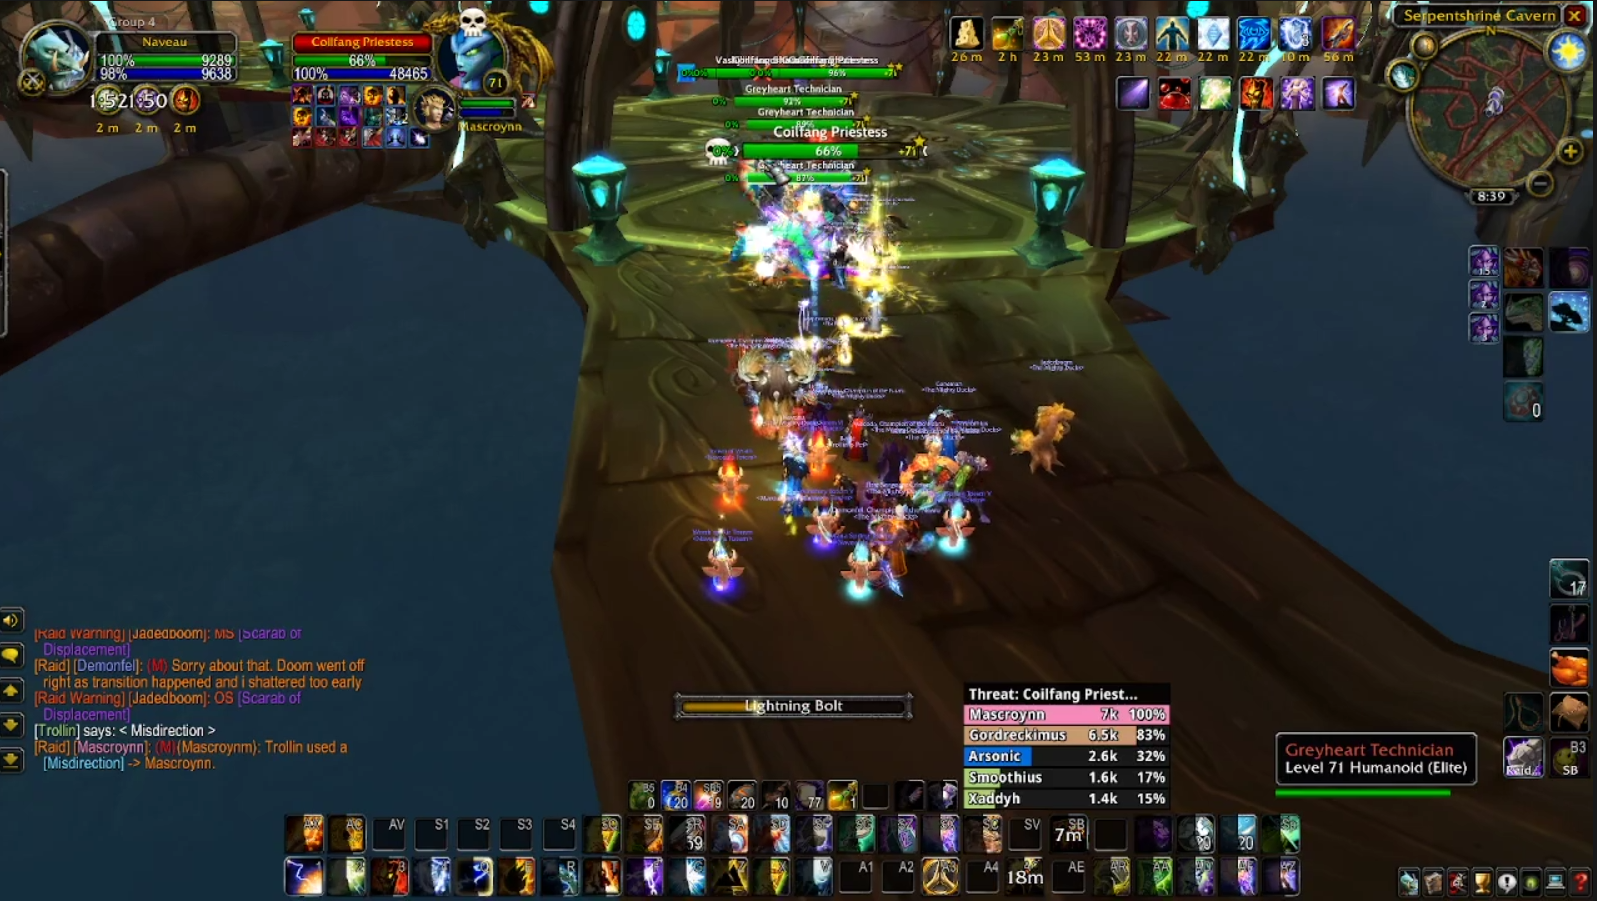
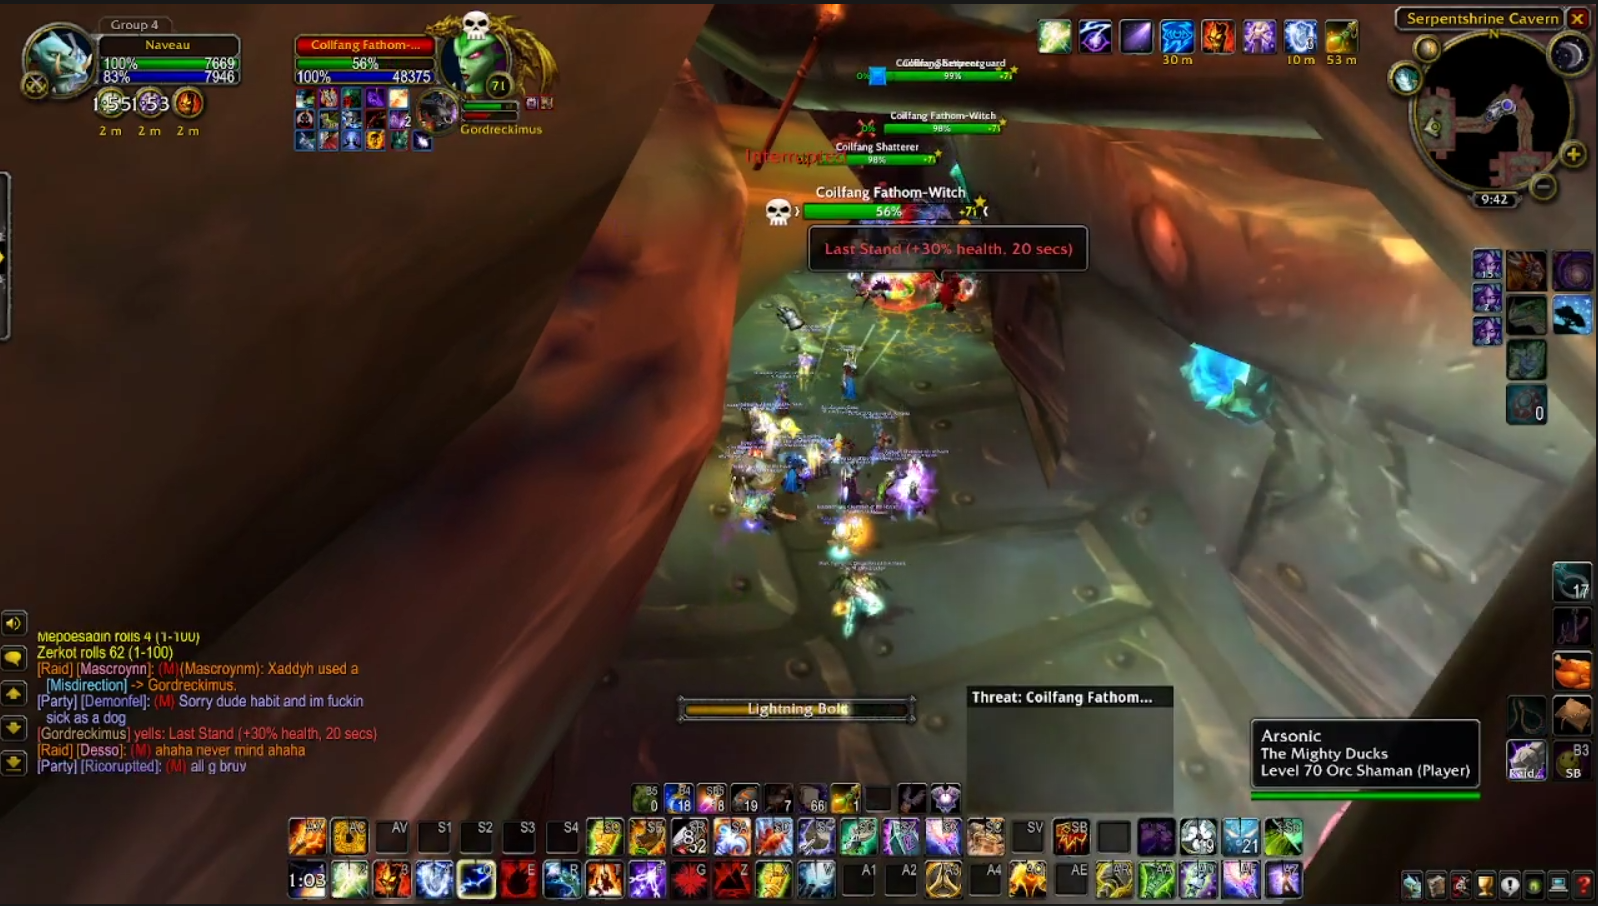
Before you can take on the optional boss, you first need to clear the water of the coilfang frenzies, level 70 elite fish that swarm over players who fall in. The way you do this is by clearing the six platforms in the next area. Each platform has a large pack consisting of four technicians, two priestesses, two shatterers and an honor guard.
This is the part of the expansion where Paladins keep being amazing and the other two classes are basically stuffed. At least as far as AoE threat is concerned.
Have your Paladin tank (you DO have a Paladin tank, right...?) initiate contact with the priestesses, have your bear take the honor guard, and have the warrior attempt to pick up both shatterers. If your warrior tank is good, your Paladin tank only has some non-elites and two casters attacking him. If your warrior sucks (like I do) then you'll run the risk of your Paladin tank having shatter armor cast on them and they subsequently explode.
Warriors should also know that they can spell reflect shatter armor, because that's based as heck.
As a damage class, you want to single target one priestess to allow threat to smoothly ramp up on the other targets. Then, once all the mobs are safely angry at their correct targets, drop the hammer on them. Because of the large health pools (pre nerf, anyway...) of these packs, it is advisable to use all non-consumable DPS cooldowns - yes, including Bloodlust, and mow them down as quickly as possible. Have your mages and warlocks use their AoE power for good and you'll get through at a reasonable, if not blinding, pace.
Once you have downed all six packs, you'll notice all the fish in the instance are floating on top of the water - it's now somewhat safe to hop down and swim toward the donut-shaped wooden island in the middle of the cavern.
Beware though, the water is still boiling, and will remain so until you clear the next boss. It is imperative that when swimming to the island, you do not jump as this resets the timer and you'll kill yourself much quicker, as the water ticks for 1000 health every two seconds.
Once everybody makes it to the next island, it's time to talk about the optional fishing boss:
Boss Two - The Lurker Below
The Lurker Below is perhaps the least interesting, but also least stressful fight in the instance. For starters, there's no enrage timer. Provided your raid has enough resources to keep going, the fight will keep going. However, it is by no means easy and can be quite composition dependent.
The first thing you will spot as you reach the island in the middle are the three smaller islands. You'll want to split your ranged DPS onto those three islands. If your group composition is reasonable and tubby on ranged DPS, this is fairly straightforward - warlocks on island, hunters on another, mages on the island with the hole in it. There's a very good reason for this - it's a lot harder to get help over onto the third island.
The second thing you'll notice is that there's no boss. Well, that's why he's optional. You need a fishing skill of 300 or more (so, well below Outland mastery) to fish him up. It's not a guarantee either - each attempt has a chance to spawn the Lurker - so sometimes it can take three, five or even ten minutes if your luck is terrible.
Once you're all in position and your fishermen are going hammer and tongs on the "strange pool" in the center of the island, it's time to stand back (because otherwise he'll one shot you when he emerges) and wait for old mate to come out and play...
Tactics
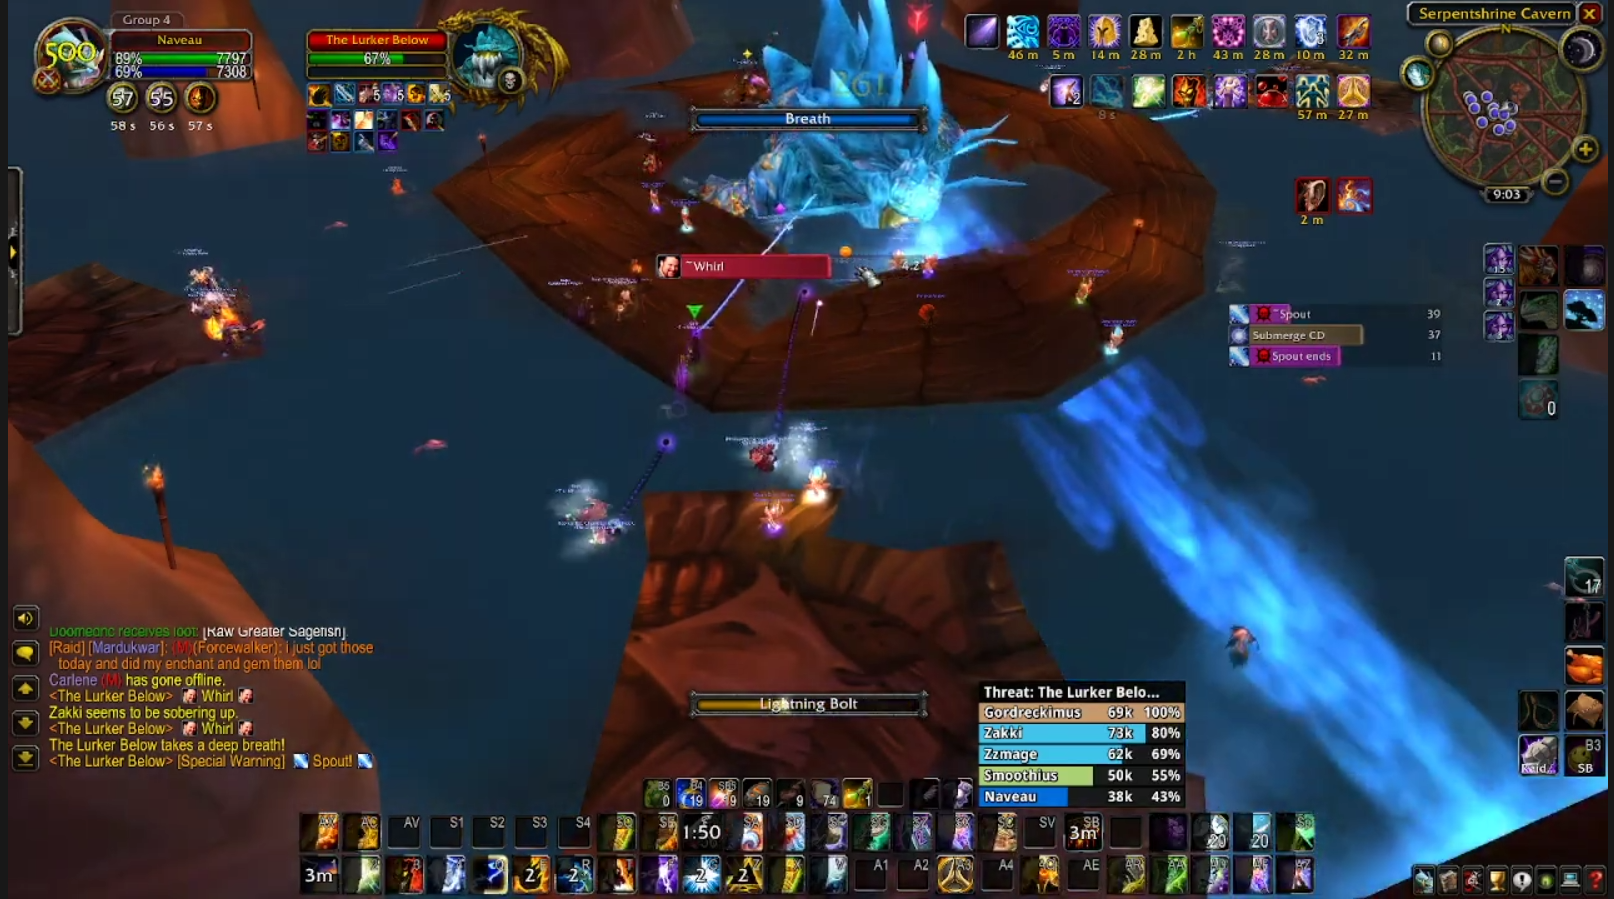
This fight consists of two phases - the first is his emerged phase, the second his dive phase. Each phase lasts for a minute.
In the emerged phase, the Lurker has three key abilities. Whirl, a melee range knockback. Geyser, a targeted spell which does a knockback in an AoE around the target, and the big one, Spout.
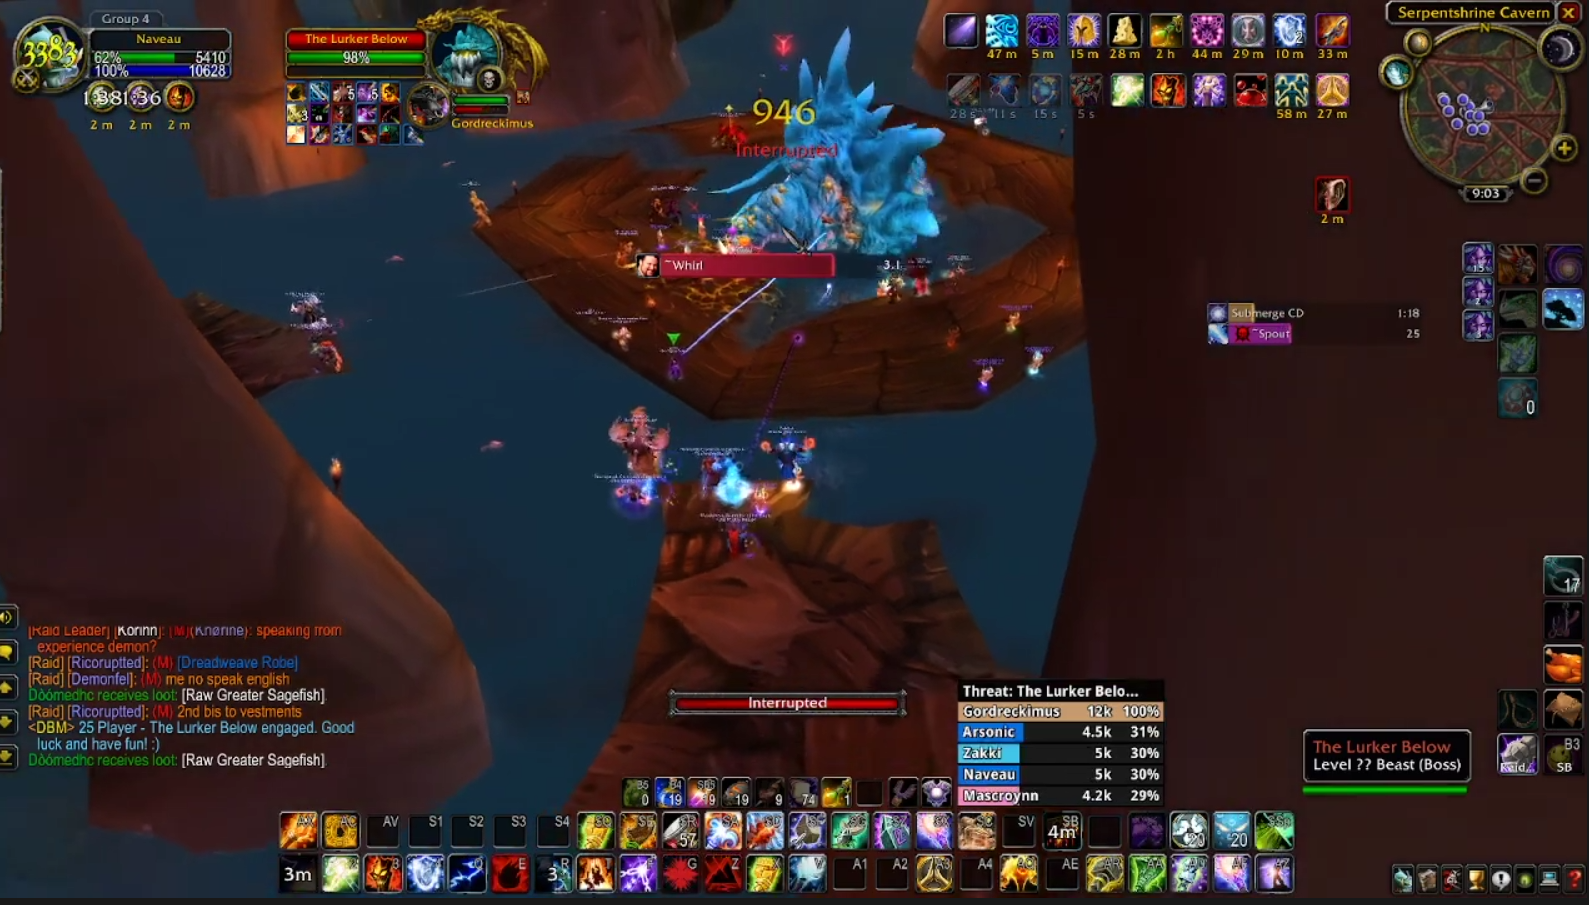
The first two spells are largely harmless, however it is important to note that the main tank must remain engaged with the Lurker at all times. In the event the main tank is not in melee range of the boss after getting whirled, the Lurker will immediately target and slap down the melee DPS with the highest threat.
Spout is the critical ability here - every thirty seconds or so, the boss will cast a big blue beam and spin around the entire arena. Anyone hit will take a chunk of damage and be punted into the boiling water. Barring a miracle, the combination of spout and ticking damage will usually kill a player long before they make it back to safety on the platform, even with a defensive cooldown and a potion.
Avoiding spout is a simple matter (Editor's note: I have been hit by spout twice, fuck you Black.) Players need to move into the boiling water until the Spout passes overhead, then return to their platforms. Melee DPS can outrun the beam as it spins relatively slowly. The key here is awareness and not being greedy with finishing spell casts. If you know you're not good at dodging spout, there's nothing wrong with moving into the water early to minimize the risk of being hit. As a raid leader, there's nothing more frustrating than seeing players not paying attention and getting ejected into the water to their inevitable deaths.
A popular tactic for the main tank is for the player to spend the entire emerged phase in the water. This prevents being whirled out of range and also stops them from being hit by spout. This is more healing intensive though, so an undergeared healing team may be unable to perform this strategy. Also, it's a good idea to have a Shaman cast waterbreathing on the main tank so they don't accidentally drown whilst tanking Lurker.
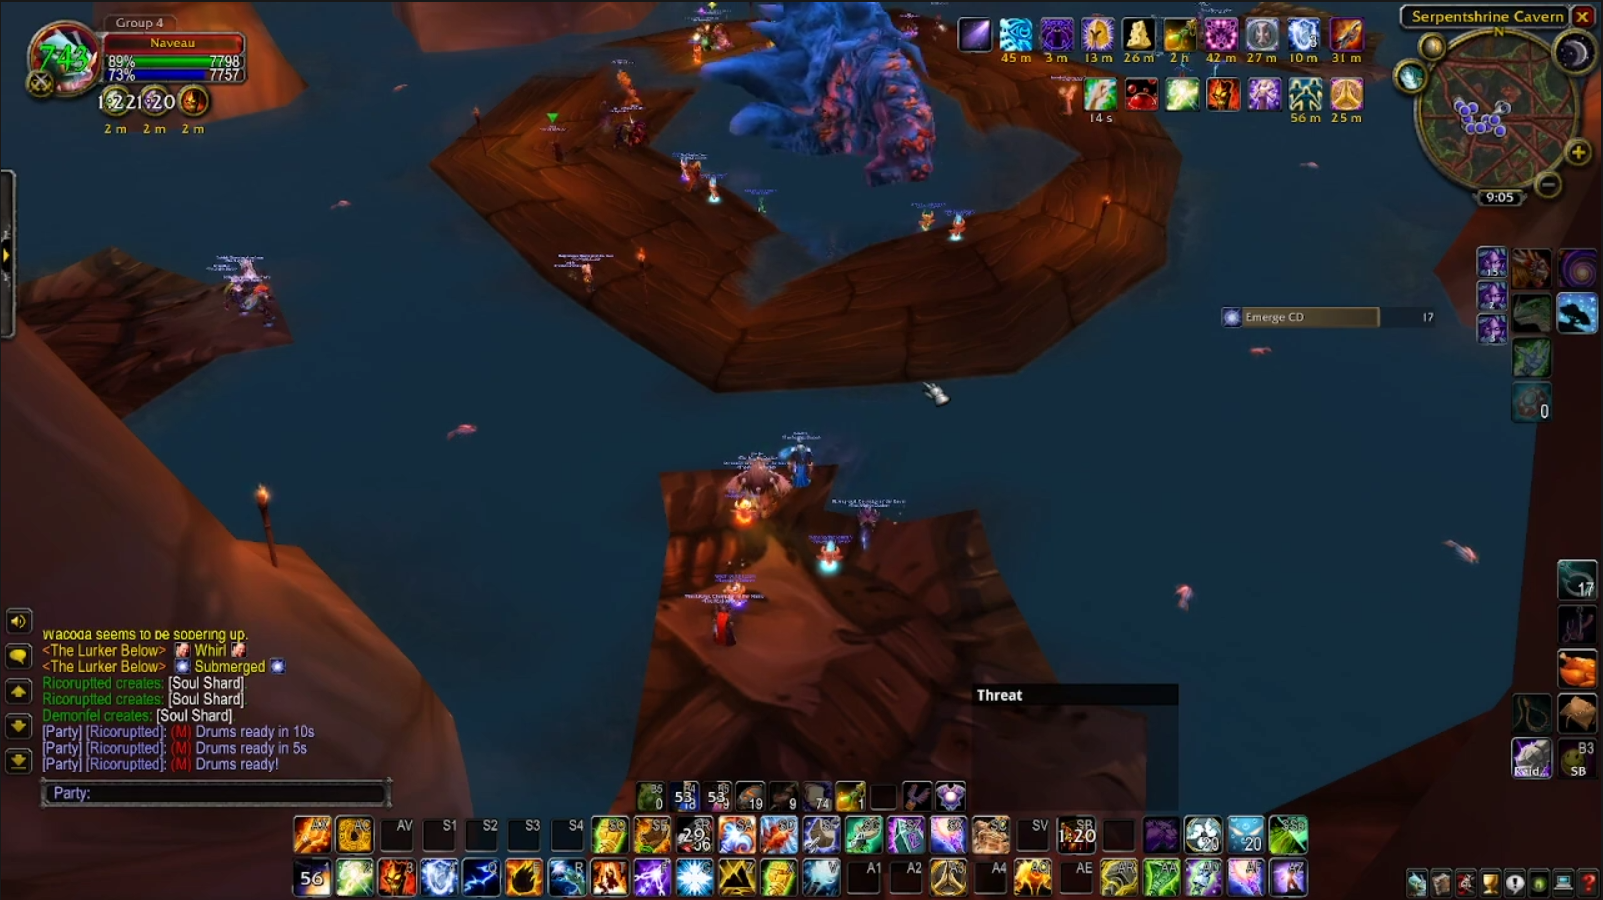
After a minute of letting you beat him up, the Lurker will dive into the water, starting the add phase.
During the add phase, Naga reinforcements will appear - each platform will have two ranged Naga adds, for six Naga in total. In addition, three melee Naga adds with a frontal cleave will attack the central platform - one north, one south and one to the east.

The ranged DPS on each platform will need to deal with the ranged adds. To reduce the pressure of damage on each group, it's recommended that one Naga (usually the one on the left if you're facing the central platform) be crowd controlled. It's worth mentioning that in subsequent dive phases, if there are already two adds on a platform, additional adds won't spawn. So that means the mage platform can polymorph two adds and not have to deal with this mechanic in subsequent phases.
(Editor's note: Of course, if one of your mages is a pompous braggart who doesn't know how mechanics work and gets hit by spout anyway, then acts surprised in discord comms, then this strategy now has a mage-sized hole in it. Good job, Black.)
For the melee adds, you want to have one tank stand at each spawn point (as they don't change) and stack the naga up together for the melee DPS to cleave them down. Ranged DPS can help, but be aware their priority is the naga on their platform and neighbouring platforms.
The tanks need to be very clear about which melee add they'll be tanking, as the spawn points are off center to where the boss is tanked. If there's miscommunication, the Nagas will quickly peel off and start to snipe out healers. They also cleave, so melee DPS should position accordingly.
The boss stays in the dive phase for a minute. So if you're on the ball, you'll have plenty of time to get set for the emerge phase.
In the second emerge phase, Lurker will immediately cast spout in the direction of the highest threat. Hopefully, this is your tank, but if your main tank is undergeared, or a caster manages to sneak over them, then the spout's going that way. This can be incredibly dangerous if your casters were not aware they had taken threat and can clean out a platform.
Players can ensure they don't get caught by looking at the direction the boss is facing when he emerges. If he's facing you, it's time to get in the water before Lurker punts you in.
Much like on the pull, the Lurker can also slap anyone too close to the inner edge on the platform and instantly kill them when emerging. Make sure you're not too close to the center pool to avoid this.
If everyone steers clear of spout and doesn't get cleaved down by melee adds, you'll clean up the oversized fish without much hassle.
You'll also notice that the water is no longer boiling - just in time for you to leave the main cavern.
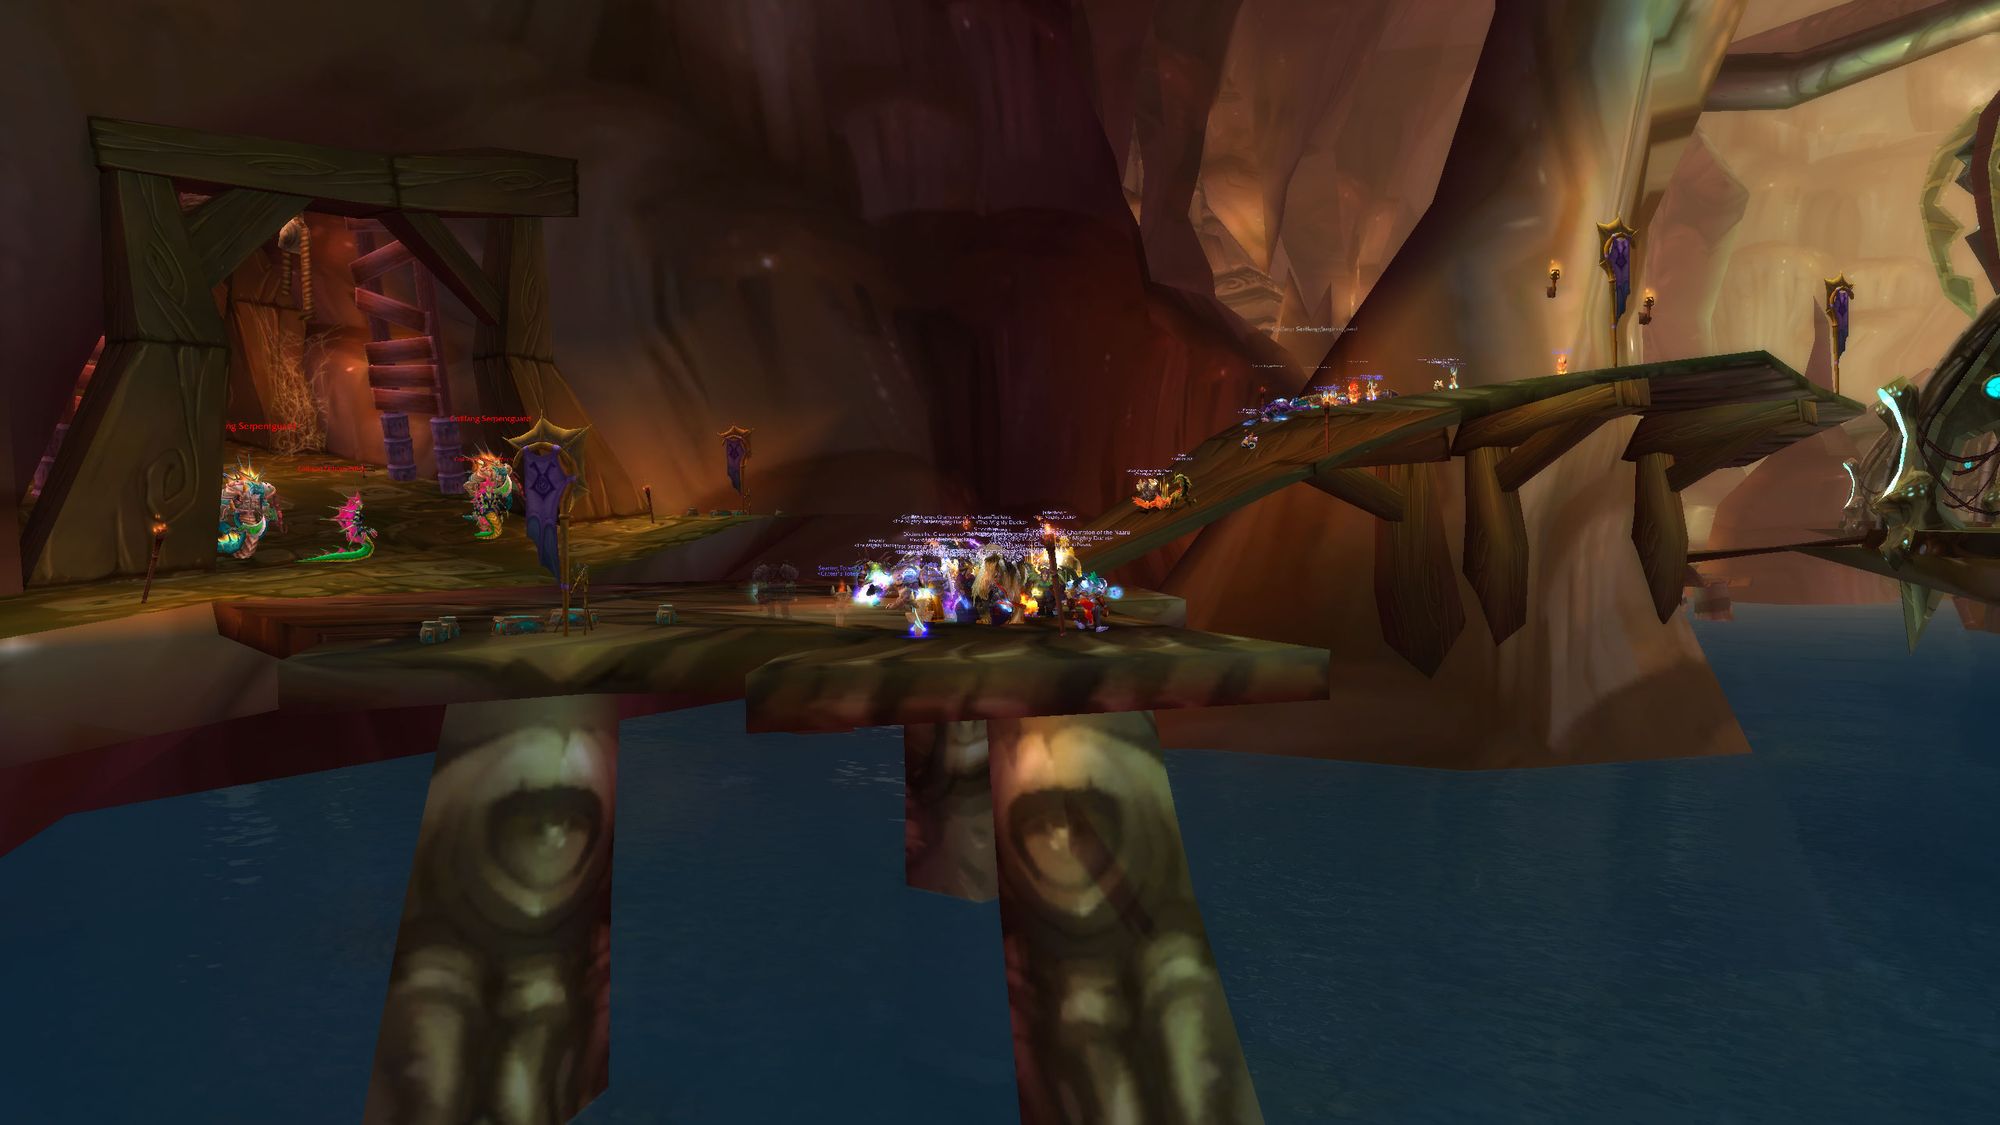
Hitch a ride on one of the pipes leading back up to the platforms above Lurker's arenas and make your way to the wooden walkway between platforms three and four.
On the way, to speed the process, it's recommended that you tag the Underbog Colossus on the raised walkway from platform three. He won't pull any other packs and can be safely engaged at the mouth of the walkway. Otherwise he can be a bit of a pain to deal with due to the tight confines and his pull radius can overlap with the next pack.
Then it's time to kill a whole bunch of broken Draenei.
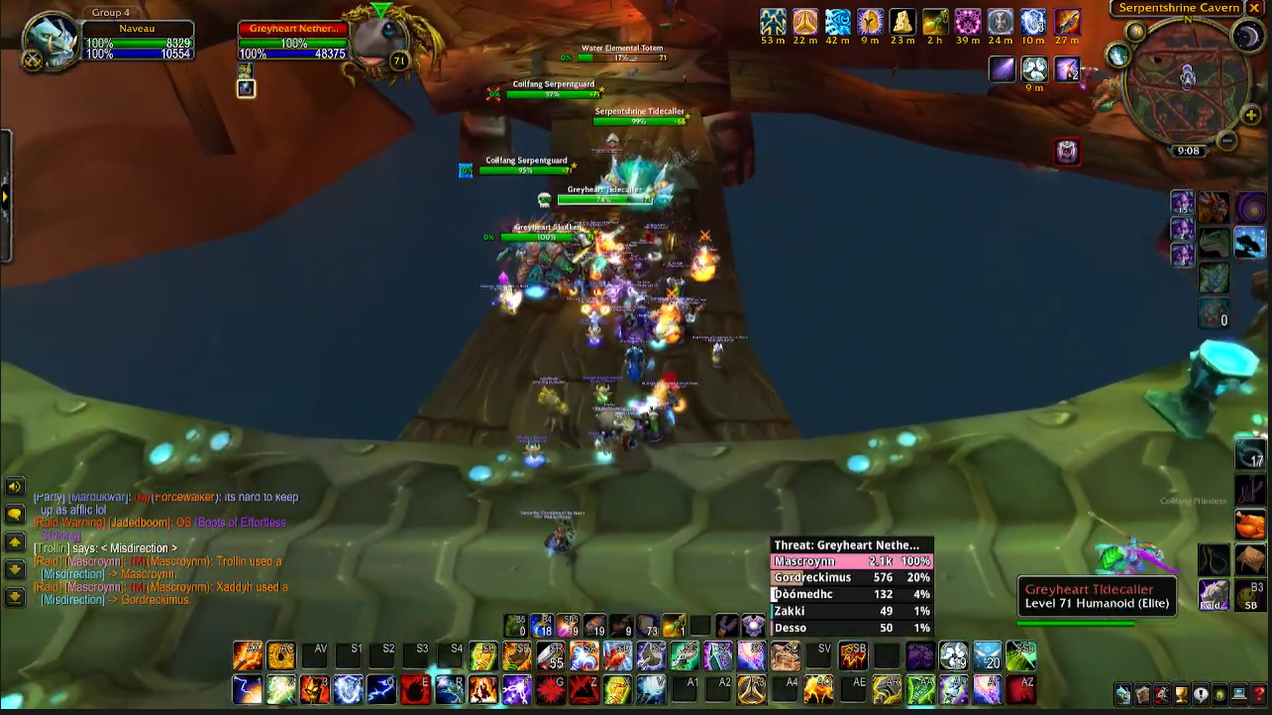
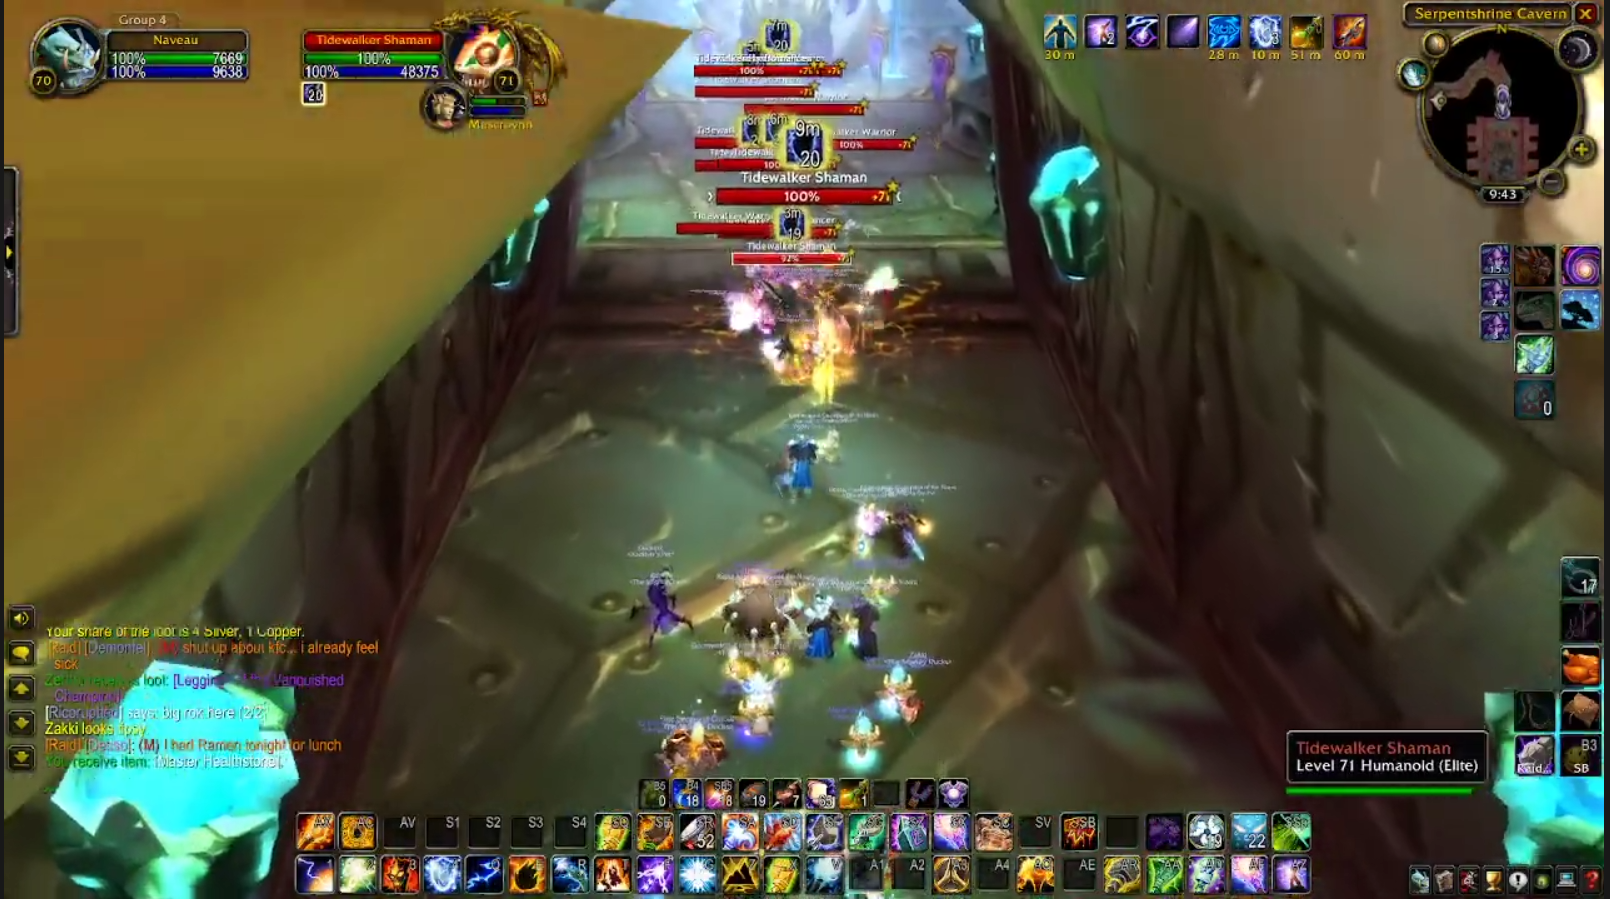
The next two packs are identical. There's a Skulker, two Tidecallers, three Nethermages and two Serpentguards. You'll want to make use of crowd control here, particularly on the nethermages. If your tank gets belted by the Skulker, you'll want to use crowd control on him too.
For this first pack you'll want to pull it back to the wide walkway you originally came from, to avoid the patrolling Colossus to the right. This will also let you use hunter traps if you're really hard up for crowd control.
Your Paladin should pick up the Nethermages, Skulker and Tidecallers, whilst the Serpentguards are tanked individually by your warrior and druid. Ranged DPS, in particular hunters, need to make sure they're targeting down the totem spawned by the Tidecallers, which in turn spawn elite mobs which can overwhelm the raid. The Serpentguards will also instantly cast a spell reflect, so Warlocks, Mages and Shamans should be careful they don't kill themselves with a spell crit.
It can be difficult to spot the totem in the scrum of mobs, so a threat plate addon is recommended, if you're a tryhard.
Your target priority past this point are Nethermages, which come in three flavors. Fire, which does a rain of fire; move out of it. Frost, which do an AoE cone of cold; stay behind them. Or the worst of the bunch, Arcane, which will teleport around the joint, resetting threat, and arcane exploding. The damage that can be pumped out by fire and arcane Nethermages is absurd, so either you need to have strong healers, or strong DPS, or stop after every pack to scrape people off the rickety wooden walkways.
Take the walkway leading up to the left, being careful to avoid the patrolling Colossus on the right. You'll reach another pack identical to the one you just battled, which you'll need to pull up onto the high ground and deal with, ideally with a misdirect or a shield. You can face pull, this pack, but you run the risk of pulling the next Naga pack, which, as you can imagine, is pretty close to a guaranteed wipe.
The next pack is simpler, but no less dangerous - it consists of two Serpentguards and two Fathom-witches. The Serpentguards you already know, but the Fathom-witches do an AoE knockback (which can and will eject you from the platform) and a mind control, which can be mitigated with a Shaman's grounding totem. As with all MC effects, single target damage should be used until the mobs are down.
To pull this pack, have your tanks run up the tunnel and engage the mobs against a wall. Have your DPS stand at max range, to avoid the Fathom-witch knockback. Again, mind getting caught by the spell reflect as well.
Head up the tunnel. In front of the exit will be two Nethermages and a Tidecaller. Terminate them with extreme prejudice. Just to the right of the center pillar is another small group. Use a body pull or misdirect to engage and remove them and open up the right corner of the room.
The next two packs are heavily reliant on crowd control. There's all your favourite annoying mobs - Tidecallers, Nethermages and Skulkers. They're accompanied by two new threats - a Colossus Lurker and a Shield-bearer.
(Editor's note - in post nerf SSC, you can banish the Colossus Lurker as it's an Elemental. It is immune to crowd control in the pre-nerf version.)
You'll want to crowd control the Shield-bearer, as it does a hefty charge on the furthest member of the raid. Have your raid spread out and steer clear of the rancid mushrooms spawned by the Colossus Lurker and make it your target priority. You should have the bottom half of the room to use from clearing out the two smaller packs, so make sure you use every single millimetre of it.
Once the Colossus goes down, deal with the Nethermages, Tidecallers and Skulker. Once the mushrooms have despawned, have everyone stack and have a tank stand out to soak the Shield-bearer charges.
With the lower part of the cavern cleared out, the next pack is a bit of a skilltester. It has two nether mages, three shieldbearers and a tidecaller. To make things just a little trickier, as they're on the high ground, your mages can't use crowd control without pulling the pack.
Have your raid make a tight stack around the corner, then have one tank step out. Your mages will need to polymorph the Nethermages as they come around the corner and you'll need to have a tank stand out again to soak the charges - just make sure the soak tank is on the threat table of all three Shield-bearers, or they'll charge the mages or DPS in the stack. It's all in the pull here. If it's nice and clean, you'll blast through it. If not, a wipe is pretty common, particularly if the Nethermage crowd control doesn't go off, as arcane and fire spells will quickly rip apart your raid.
The last pull before you get to the boss requires a hunter with balls of steel - it consists of a Tidecaller, Nethermage and four Shield-bearers. It also needs to be timed to perfection as the pack patrols all the way to the tunnel leading to boss four.
Have a hunter (you DO have a hunter, right...?) misdirect to your Paladin (you ARE getting sick of this, right...?) then as soon as the pack comes to beat the hunter to death, have them hit the deck with feign death. If everything goes as planned, you can have an off-tank stand out to soak charges whilst your raid smokes the Nethermage, Tidecaller and Shield-bearers. In that order.
With the cavern cleared out, you'll see three more broken channeling a banish spell on a blood elf. This is your next assignment.
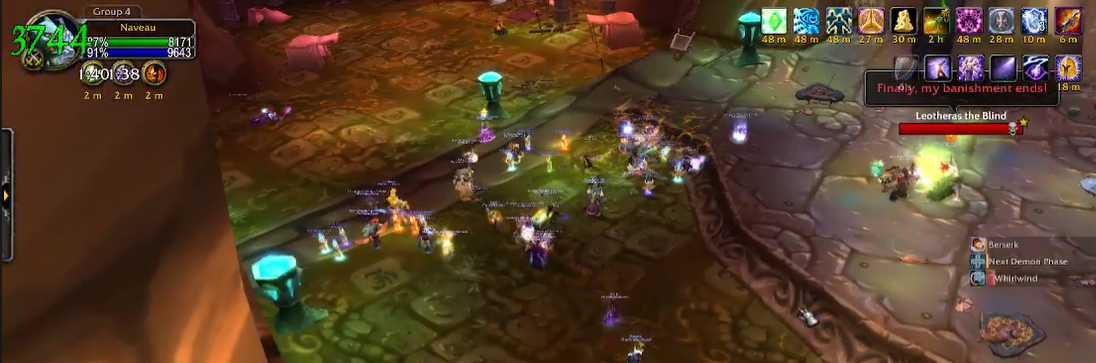
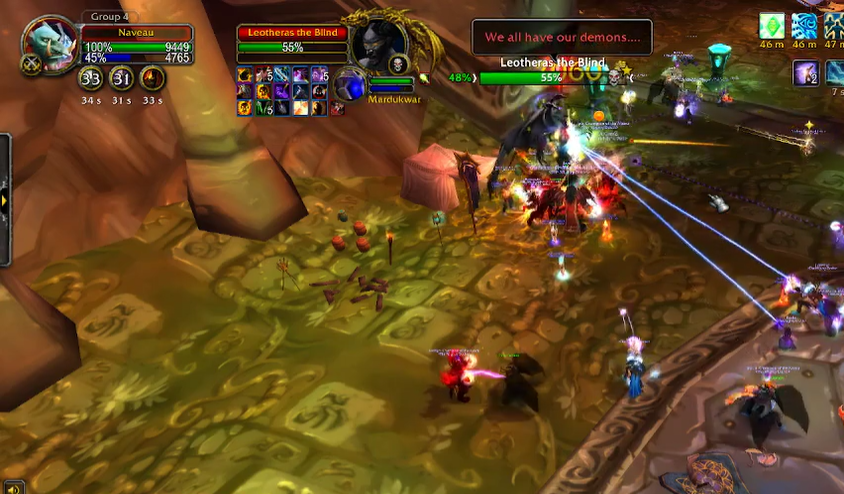
Boss Three - Leotheras the Blind
A blood elf in the service of Kael'thas that went insane whilst training as a demon hunter and ended up possessed by a demon himself, Leotheras is a challenging bossfight that requires your DPS to have excellent trigger discipline, positioning skill and an ability to keep themselves alive when the healers can't (or won't.)
To defeat Leotheras, you will need either a warlock or an off-tank, preferably a druid, with high fire resistance. It's recommended to aim for about 200 before buffs, but honestly, the sky is the limit here. The more fire resist you pile on, the easier the demon phase is for your healers, which can be critical.
Before you can even get to Leotheras, he's banished by three Greyheart Spellbinders. These die quickly, but if you stack them all up together they'll destroy the raid with their mind blast cast, which isn't interruptible and does damage in an AoE around the target. If you don't tank these properly you'll wipe out your entire melee core in one shot.
Simplest way around this is tank two Spellbinders together and tank the third far enough away that it can't be spell cleaved, as you'll need time to get into position.
Spread out in a circle around the boss - make sure no-one's within ten yards of the fire resistance tank, provided it's a warlock. If it's an off-tank, you'll want to buy your melee DPS a box of chocolates, as they're going to have to take some serious risks to do damage. But some loot and dead melee is better than no loot and alive melee.
Leotheras pops out after the last Spellbinder dies - so you'd best be ready by then.
Tactics
Leotheras (or "Leo" as I will no doubt use through this section) is a two phase fight. He starts in human phase - have your tanks fight for threat and whoever wins should centre Leo (told you) in the middle of the room. Without warning, he will instantly start channelling a whirlwind and move around the room targeting the five highest players on the threat table, one after the other.
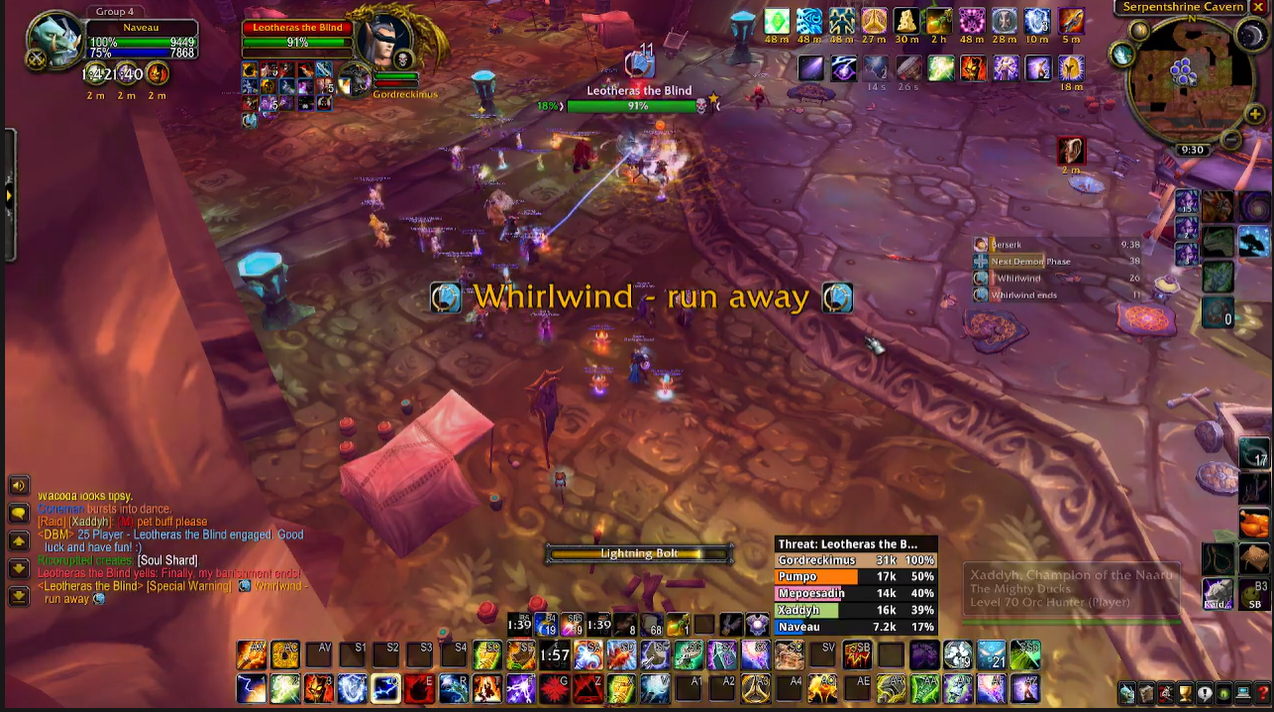
In addition to the whirlwind damage, getting hit also puts a hefty bleed on each person hit. If too many people get hit by this, it'll overwhelm the healers quickly. Melee are pretty much stuffed, so should use personal healing cooldowns like Healthstones, Health Potions, and any defensives they may have.
Whilst Leotheras moves quite quickly whilst whirlwinding, if you run straight back (mouse turning, obviously) and you should put just enough distance between yourself and the boss that he'll fixate to someone else before he gets to you - hence the circle around the boss that your tank should've centered Leo in.
Immediately after the boss stops whirlwinding, he will drop all his threat and your tanks, who should be chasing Leotheras, get to fight for threat and re-center him. This is where it's important your DPS have good trigger discipline. It is extremely easy to hit the boss after he stops, shoot to the top of the threat table and get instantly killed.
This is another point of raid leader frustration, because you can't mitigate someone being a moron and getting cleaned up because they lost track of the boss.
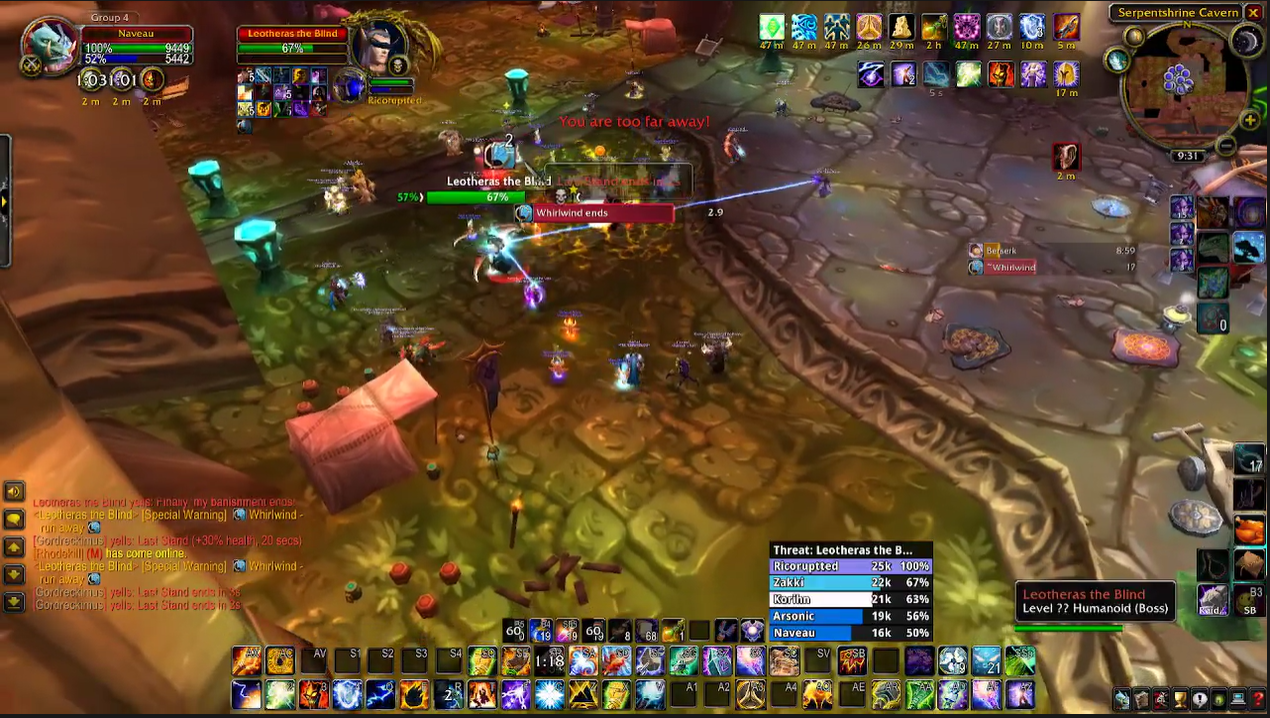
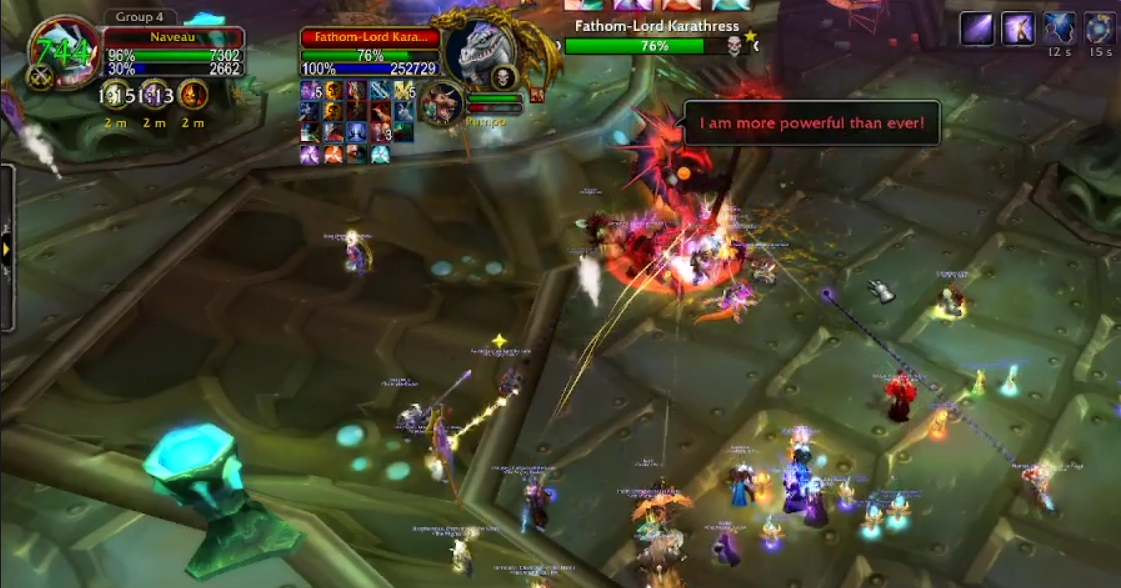
After 45 seconds of killing loose DPS and spinning on the melee, the boss will transition into his demon form.
This is - you guessed it - another threat drop. The boss will have a ranged spellcast now, which increases fire damage taken and does damage in an AoE around the target. Have your warlock use Searing Pain (which has a high threat modifier) and draw aggro. Again, if your DPS can't keep it in their pants, they'll run the risk of getting blasted - it's not likely Leotheras' first cast will kill them, but the second one will.
If you have a melee fire resistance tank, this is where your DPS need to be careful. Have them stand at maximum range from the fire resist tank, and be prepared to duck in and out between casts to do damage.
The demon phase is where you want to use cooldowns and push. The first phase is when you use bloodlust, hopefully with a full grip of raiders unless someone's been extraordinarily dumb. It also helps to use cooldowns for the demon phase because of the second big mechanic: Inner Demons.
Leotheras will pick five players and spawn a demon that only they can attack (geddit). If the player fails to kill the demon by the end of the demon phase, they'll get mind controlled permanently and need to be killed. Healers need to be vocal if they get a demon so they can fully focus on killing the demon, rather than healing. At risk are tanks, healers, and, oddly enough, hunters that neglected to skill up their weapons.
If you are going to be mind controlled, it's important to call it out so the raid knows to jump on your sorry ass as soon as the phase ends. Yes, it's embarassing, just, try harder next time.
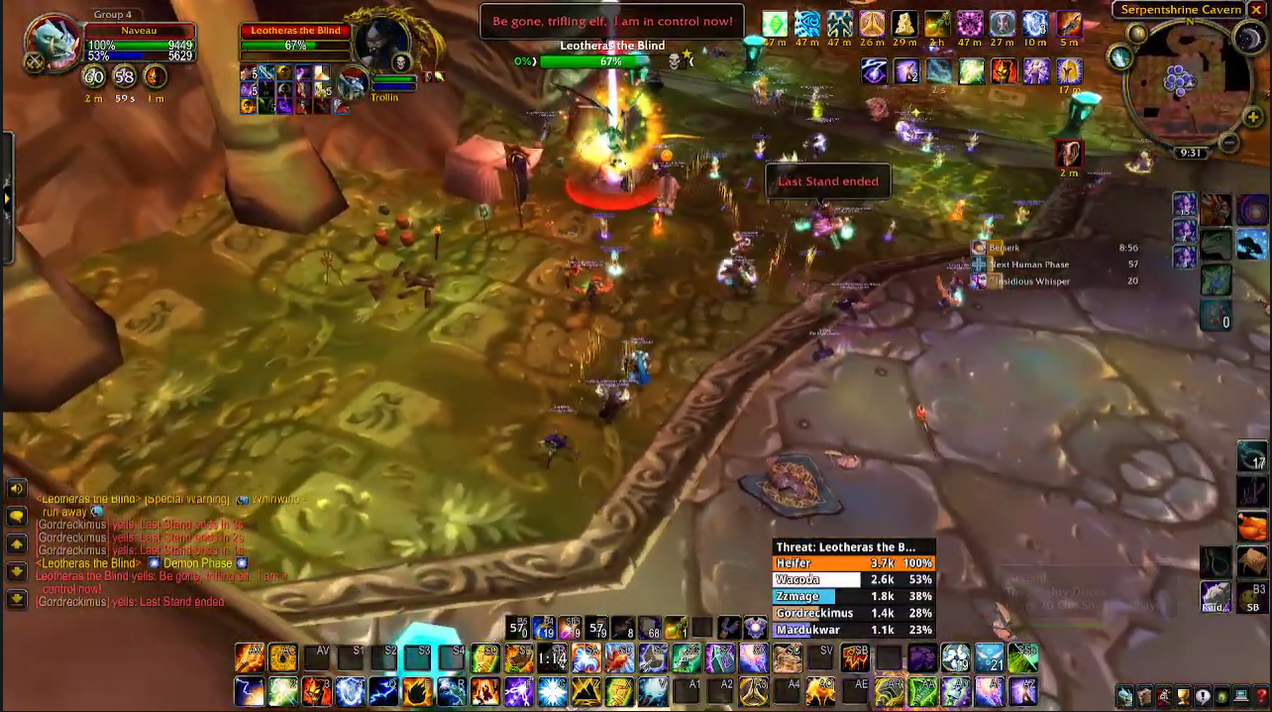
Once the boss goes from demon form to human form he will immediately threat drop, then whirlwind, and then the human phase starts again.
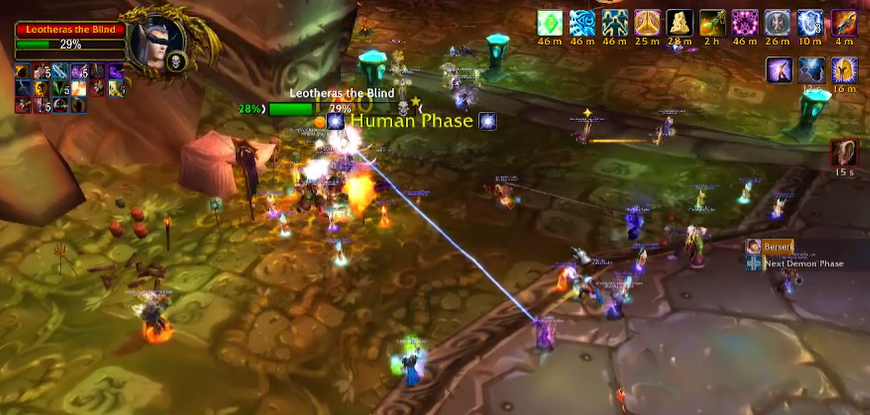
In case you haven't figured it out, this boss fight is all about the somewhat narrow windows to DPS safely in. The human form, after the tanks have picked the boss up. Whilst whirlwinding, but factoring in projectile travel time so you don't pull threat. The demon phase, after the warlock tank (or melee tank) has aggro. Muck up your timings, and you'll get a glaive to the back of your head for your troubles and censure from your raid leader.

Once the boss hits 15%, you have to fight both his human form and his demon form. Leo will take a knee and tell you all about how much he hates you for beating him up. If you're lucky, whilst he's complaining bitterly, you'll get free damage and his threat table will be frozen. It can be a bit of a lottery, though, so don't count on it.

You need to kill the human form in this final phase. There's no more inner demons, but the boss still whirlwinds and the demon still needs a warlock tank. So have your tanks fight for threat on the human, being aware of DPS windows between whirlwinds and have your fire resistance tank build up infinite threat on the demon.
Once human Leo hits the deck, it's all over. Make sure your healers top up people who have the whirlwind debuff on them, collect your loot, and move on.
There's still plenty of garbage to wade through - a good assembly point is the corridor just beyond the boss' room, but before the tunnel leading down to the next area. Depending on your raid's timings, this might also be a good place to take a break, stretch your legs, etc. etc.
The next two packs are easy - two Tidecallers and a Shield-bearer. Make sure your raid stays stacked and either have a tank stand out, or just let some schmuck take the charges, there's only one in each pack.
Once you get to the next room, things start to get a bit tricky. The entire room is filled with patrolling Underbog Colossi. Having a hunter (or team of hunters if your DPS is good enough) carefully misdirect one at a time to your tank. The first three or so should be moved into the tunnel to avoid pulling multiples. If you're geared enough and your raid is good enough, you can probably get away with pulling two, but it'll give your healers a brain aneurysm.
Something to be mindful of, the acid pool graphic can go under the tunnel when it spawns. So if you dial up an acid pool after killing a colossus, make sure you keep one eye on your health bar, even if you think you've run far enough away.
Once you've cleared the room, it's also best practice to kill off the patrolling Naga pack in the next tunnel. This consists of two Serpentguards, two Fathom-Witches and a Shatterer. You'll want your Paladin to take the Serpentguards and Shatterer whilst your off-tanks take a Fathom-witch each. It's best practice for everyone to push into the corner whilst dealing with this pack because of the knockback and mind controls.
Once you've cleaned up that pack, it's time to take on the next boss. Or, should I say, boss(es).
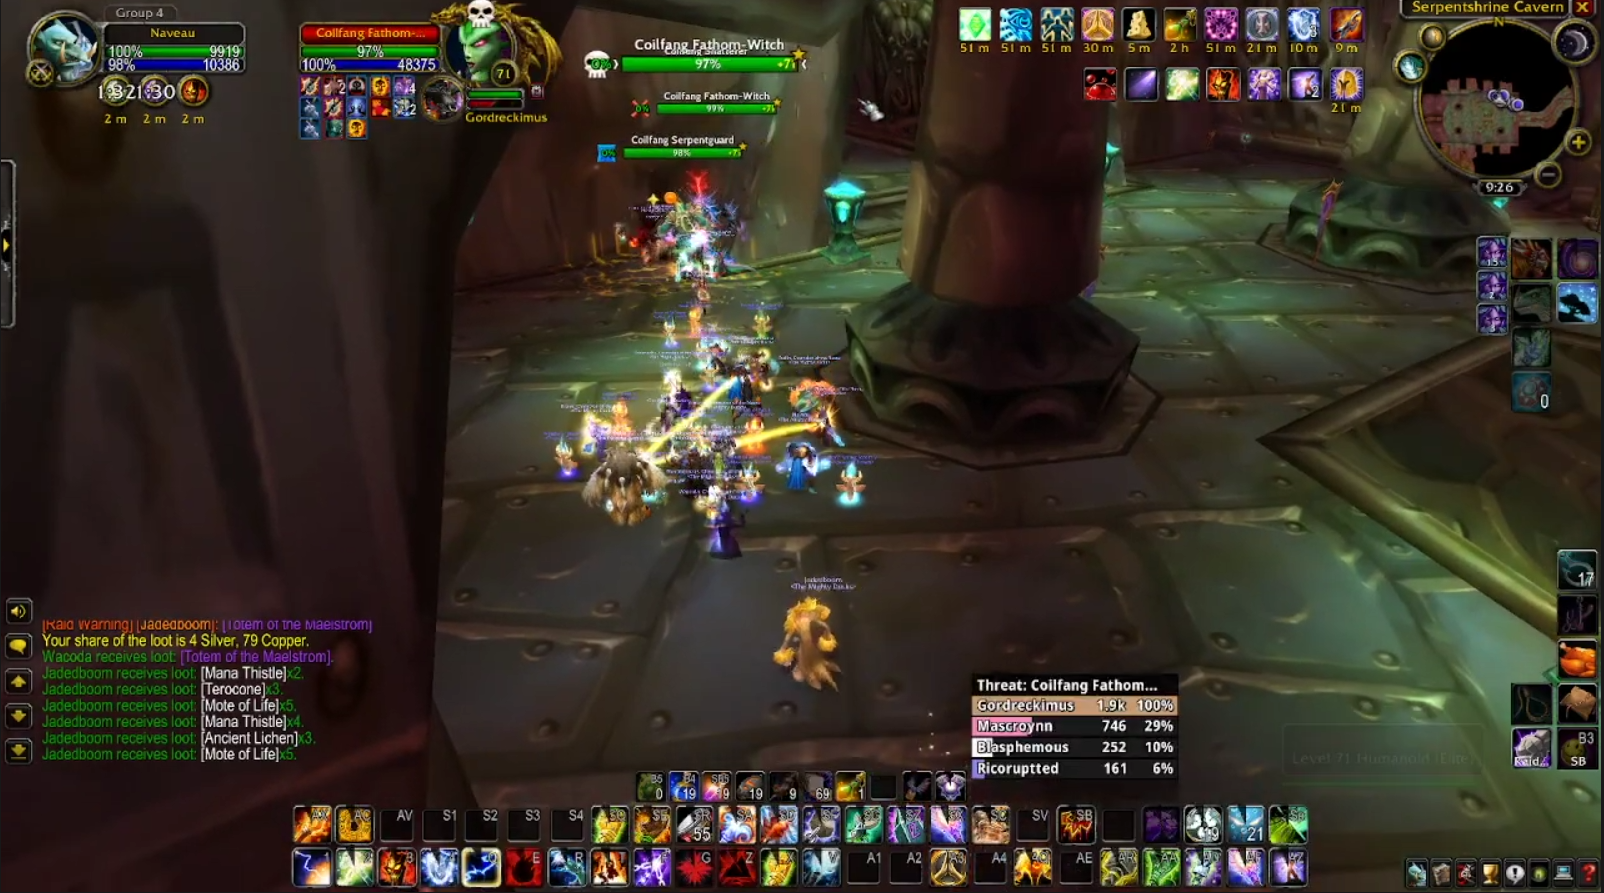
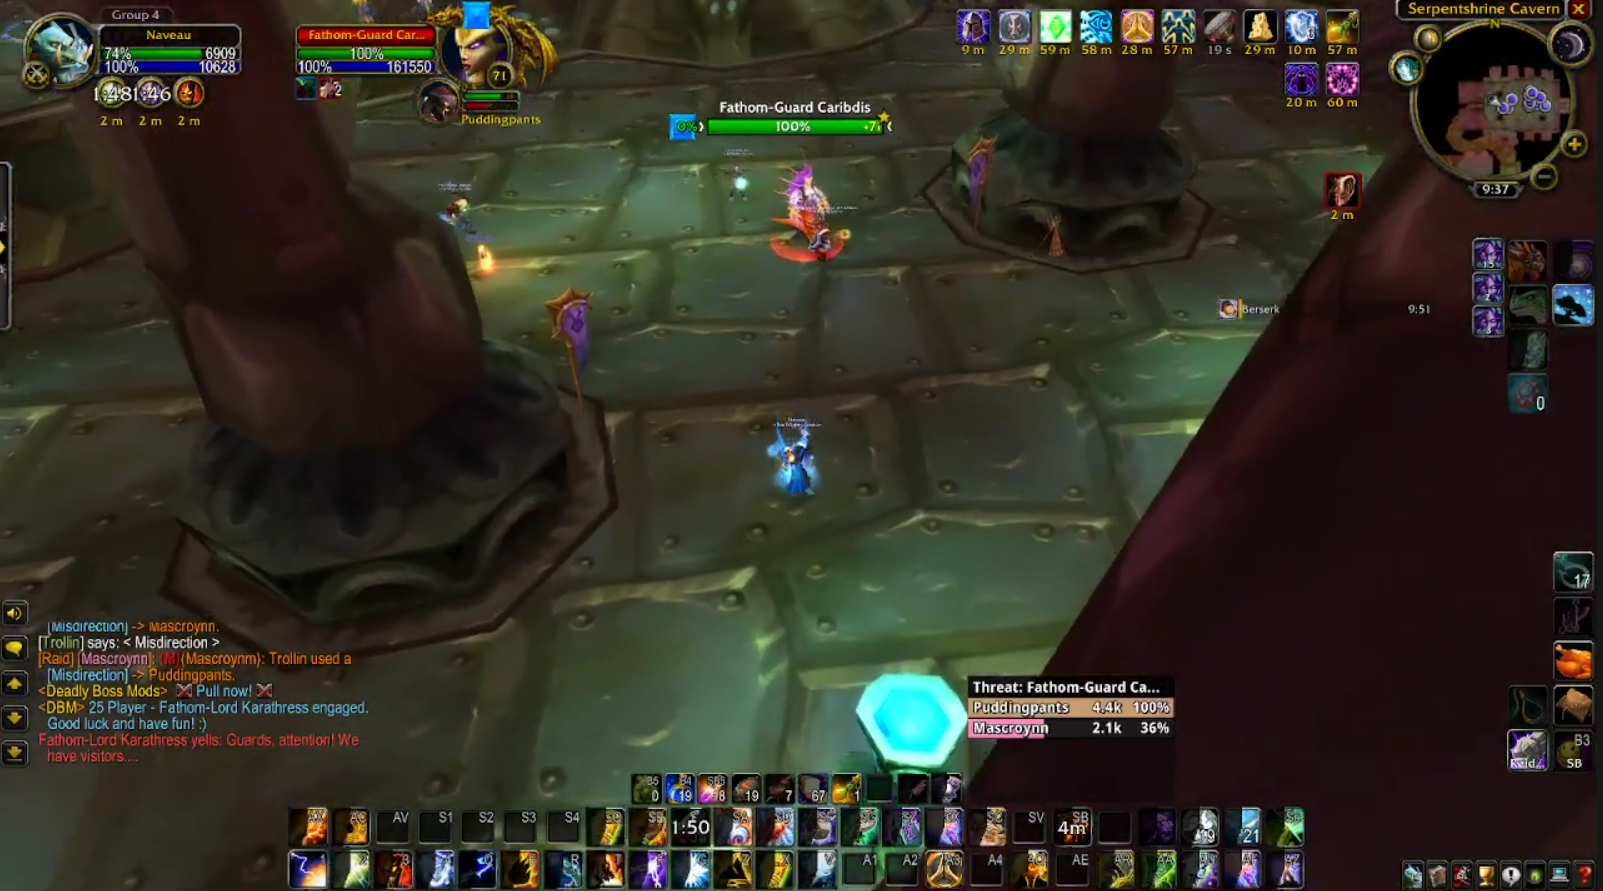
Boss Four - Fathom-Lord Karathress
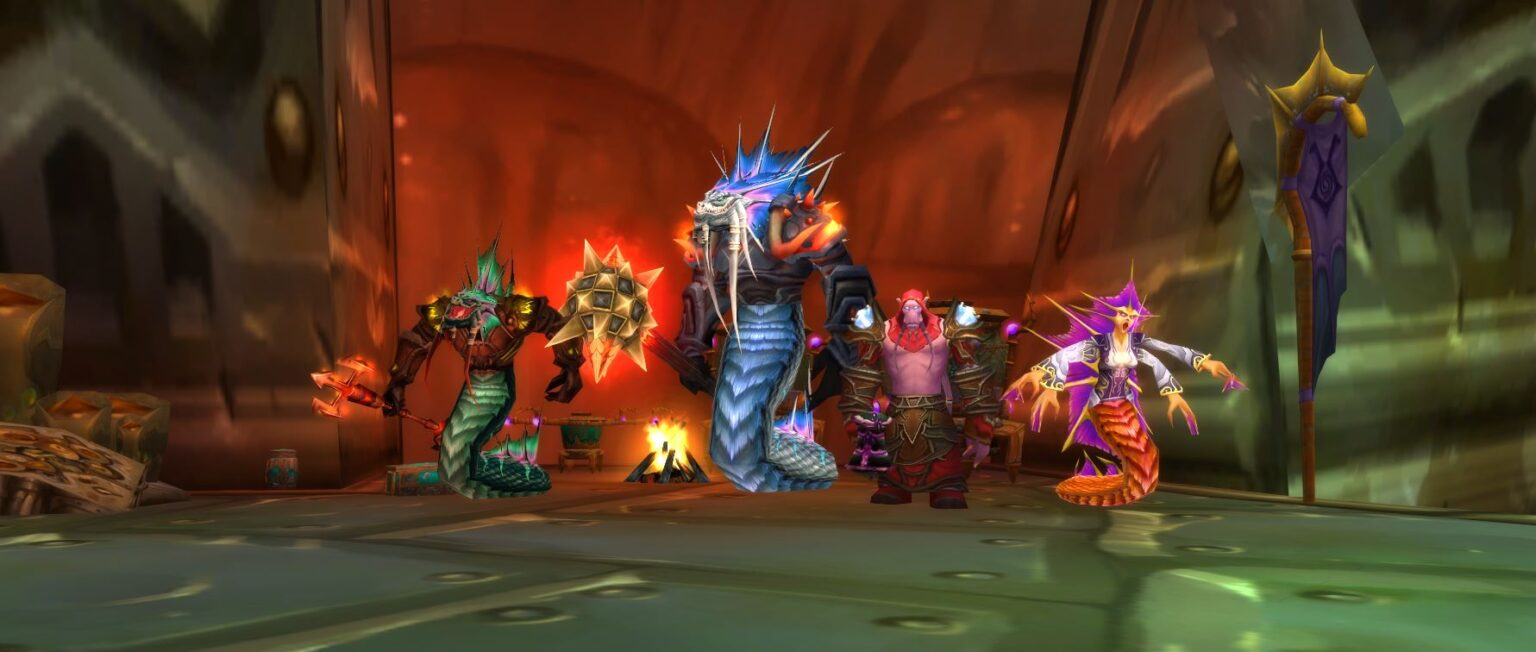
Fathomlord (or, FLK, as he's known) is a council-style boss. There's the big man himself, Tidalvess, Sharkiss, and Caribdiss. Note that you cannot kill Fathomlord first - once he gets to 75%, as a countermeasure, he'll recieve a 60% damage bonus for each sub-boss still alive. So if you try and kill him first, you'd better be able to deal with him getting 180% bonus damage.
There are a number of different methods to tackle this boss, so I'll give you the one the ducks used in Phase 2. I've seen variations on this and I've even seen methods where all four are gathered up and cleaved down in record time.
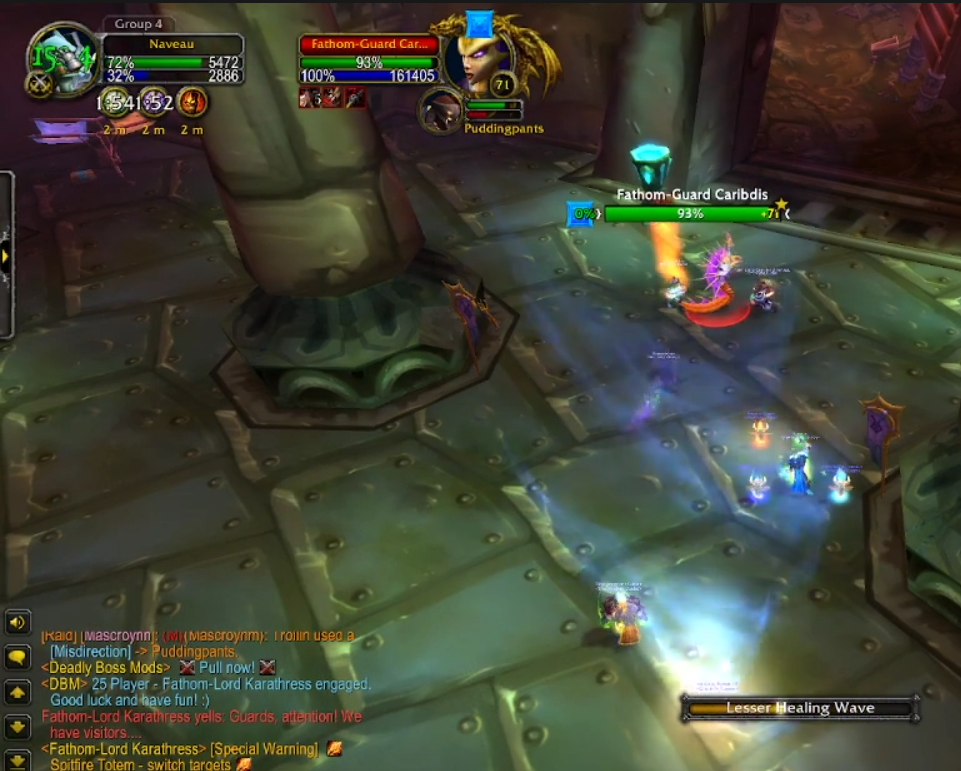
To start with, you'll want one of your DPS warriors to chuck on a shield, along with any tanking gear they may have. They don't have to worry too much about threat, just staying alive. Their job is to take Caribdis to the back of the room so she can't nuke the raid down with her instant cast frostbolt volleys.
You'll also need a melee interrupter, preferably a rogue, and a ranged interrupter, such as a Shaman, as a backup, as Caribdis will also periodically stun in a small AoE around her, whilst also casting a heal. It can help to have mind-numbing poison and curse of tongues active as well, to maximise the chance on an interrupt.
You'll also need to have one of your healers dedicated to keeping this motley crue alive.
That leaves three targets to be tanked. Normally your bear gets the job on Fathom-lord, your warrior (or second bear) gets Tidalvess, as Tidalvess can purge off a Paladin's buffs and can dump out a big spike of damage with Frost Shock, and your paladin gets Sharkiss as they'll be able to tank Sharkiss and the random adds Sharkiss spawns with minimal effort.
As with High King Maulgar last phase, the magic is all in the pull. Hunter misdirects are mandatory - if you don't have enough, prioritise getting Caribdis to your ertsatz tank, and let your bear and warrior engage first, so your paladin doesn't get smoked.
Tactics
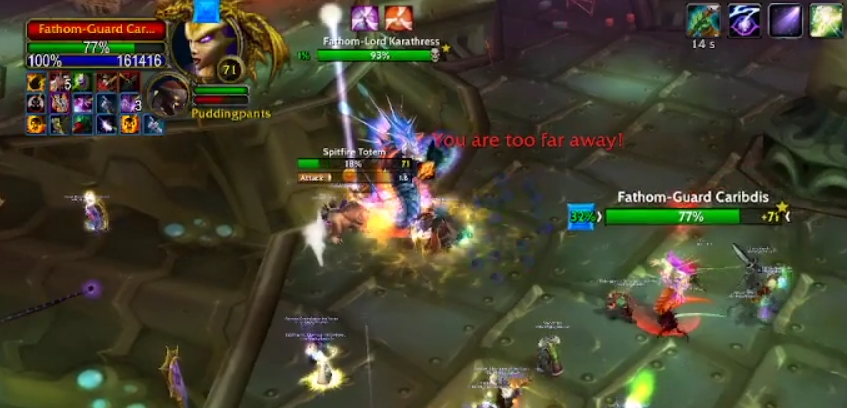
Assuming you didn't screw up the pull, the kill order is fairly straightforward. Sharkiss, then Sharkiss' pets, then Tidalvess - when Tidalvess gets low, move Caribdiss to the bottom of the ramp, kill her, then clean up Fathomlord Karathress.
Of course, whilst that's going on, there are a few things to keep in mind.
Every time you kill one of the council members, Fathom-lord Karathress gains one of their abilities. Killing Sharkiss gives him a temporary enrage, killing Tidalvess causes him to spawn spitfire totems which must be killed before they cast, or in a pinch, before they cast twice, and killing Caribdiss gives him an AoE stun in a small radius around him.
Sharkiss is the most mundane of the council - he spawns additional adds, so it's best practice to kill him first so he doesn't spawn too many. Cleave onto the pets he spawns if it's convenient, but keep an eye on your threat. Past that point, he doesn't do anything too scary.
Tidalvess is a big risk early whilst everything's going everywhere. He has windfury on his weapon, allowing him to swing twice, and can smash your warrior tank out of nowhere with a frost shock for up to 6k. He'll also spawn one of three totems. Spitfire you must kill immediately, but you can safely leave the earthbind and poison cleansing totems active. Your Tidalvess tank should be piling on the mitigation gear and rolling ironshields so they don't get squished out of nowhere.
Apart from the exciting stuff mentioned earlier, Caribdiss also spawns a whirlwind which will chase random players. When it hits them, it'll punt them up into the air for a random period of time. It has unlimited range, and will switch targets periodically. It also doesn't have a unit, so there's no way of knowing where it's going. Just, mind your positioning and be prepared to move.
FLK himself isn't that scary, but will periodically cast Cataclysmic Bolt, which will blast people for half of their maximum health. He will also belt the tank, particularly whilst under Sharkiss' temporary enrage. In case I haven't mentioned it enough, the key is really blasting down the Spitfire totems he spawns to mitigate the raid damage they do, and topping people up after Cataclysmic Bolt.
Once you've put down Fathom-lord and friends, collect your phat lewt, and head for the exit. If you need to do the attunement for Black Temple, make sure you speak to the Broken in the cage behind the boss. He's only there for twenty minutes, and once he's gone, he's gone for the week.
Heading down the tunnel to the next boss room, there'll be another pack of Fathom-Witches, Shatterers and Serpentguards. Make sure you tank the Fathom-witches against a wall, keep an eye out for mind controls and you'll be fine. The patrol range is deceptively long, though, so mind that an over-eager healer or DPS doesn't pull them whilst loot is being distributed, or your tanks are not ready.
The next room has patrolling packs of Murlocs around the boss - their routes will overlap with each other, so if your group (or your Paladin tank) are a bit thin on gear, a double pack can overwhelm your tanks and healers. Have your bear and warrior pick up what they can, particularly the Tidecaller Warriors, which will enrage, which can be tranquilized by a hunter. In multipack engagements, you'll need to have your hunters coordinate so they don't all tranquilize one target.
Some packs will have a Depth-seer, which cast an uninterruptible version of the Druid AoE heal, Tranquility. Surprising no-one, you'll want to focus these down first, as they will out-heal even a well-geared raid's damage potential.
There are five packs in total, but one pack is at the rear of the room and can be removed by resetting the next boss with a hunter pet - which is highly recommended.
Once the pack at the rear of the room has been removed, it's time to pull the boss for real.
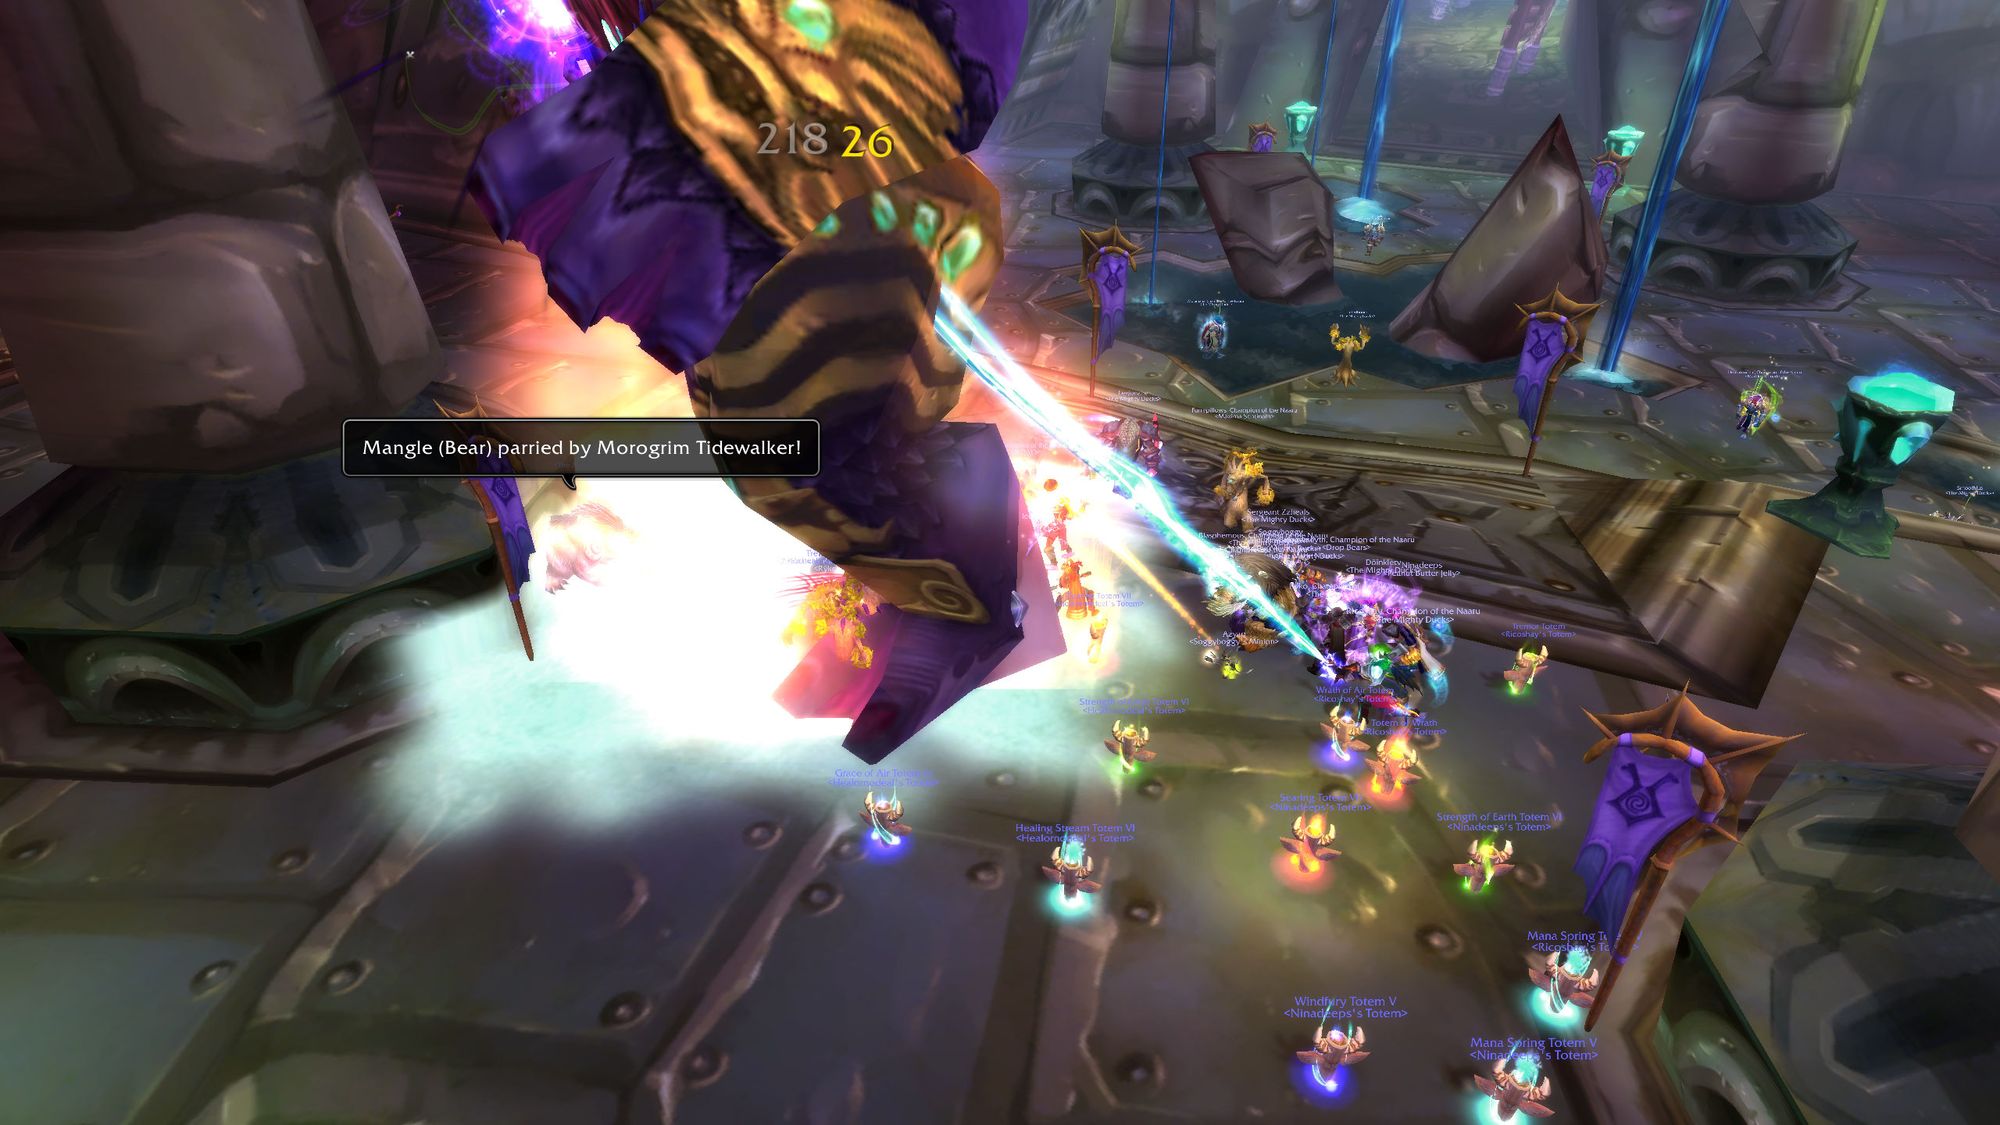
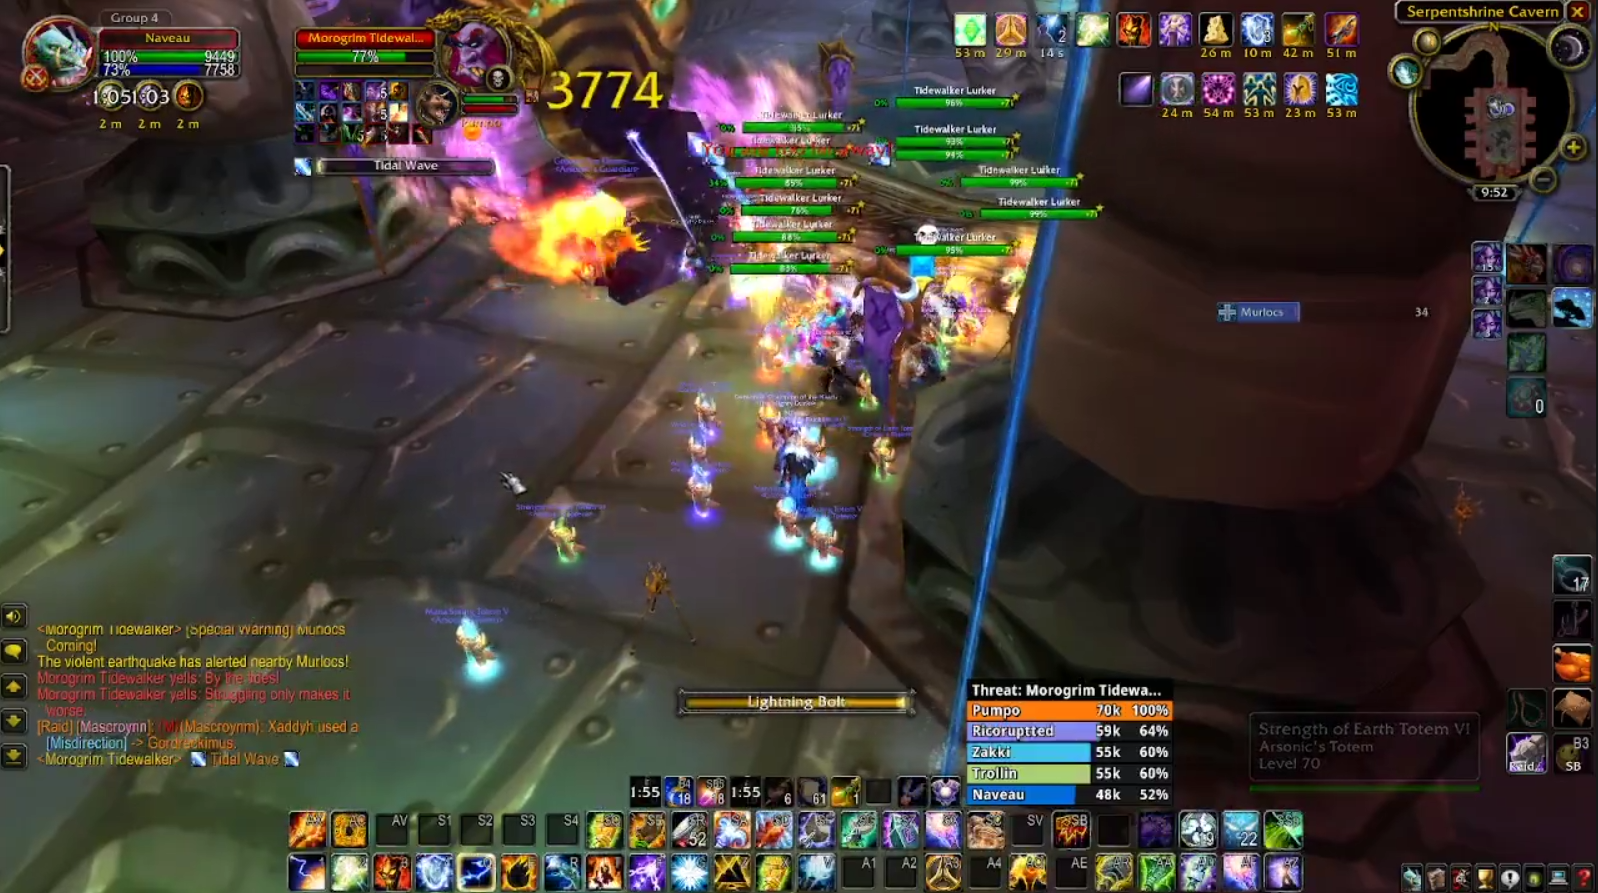
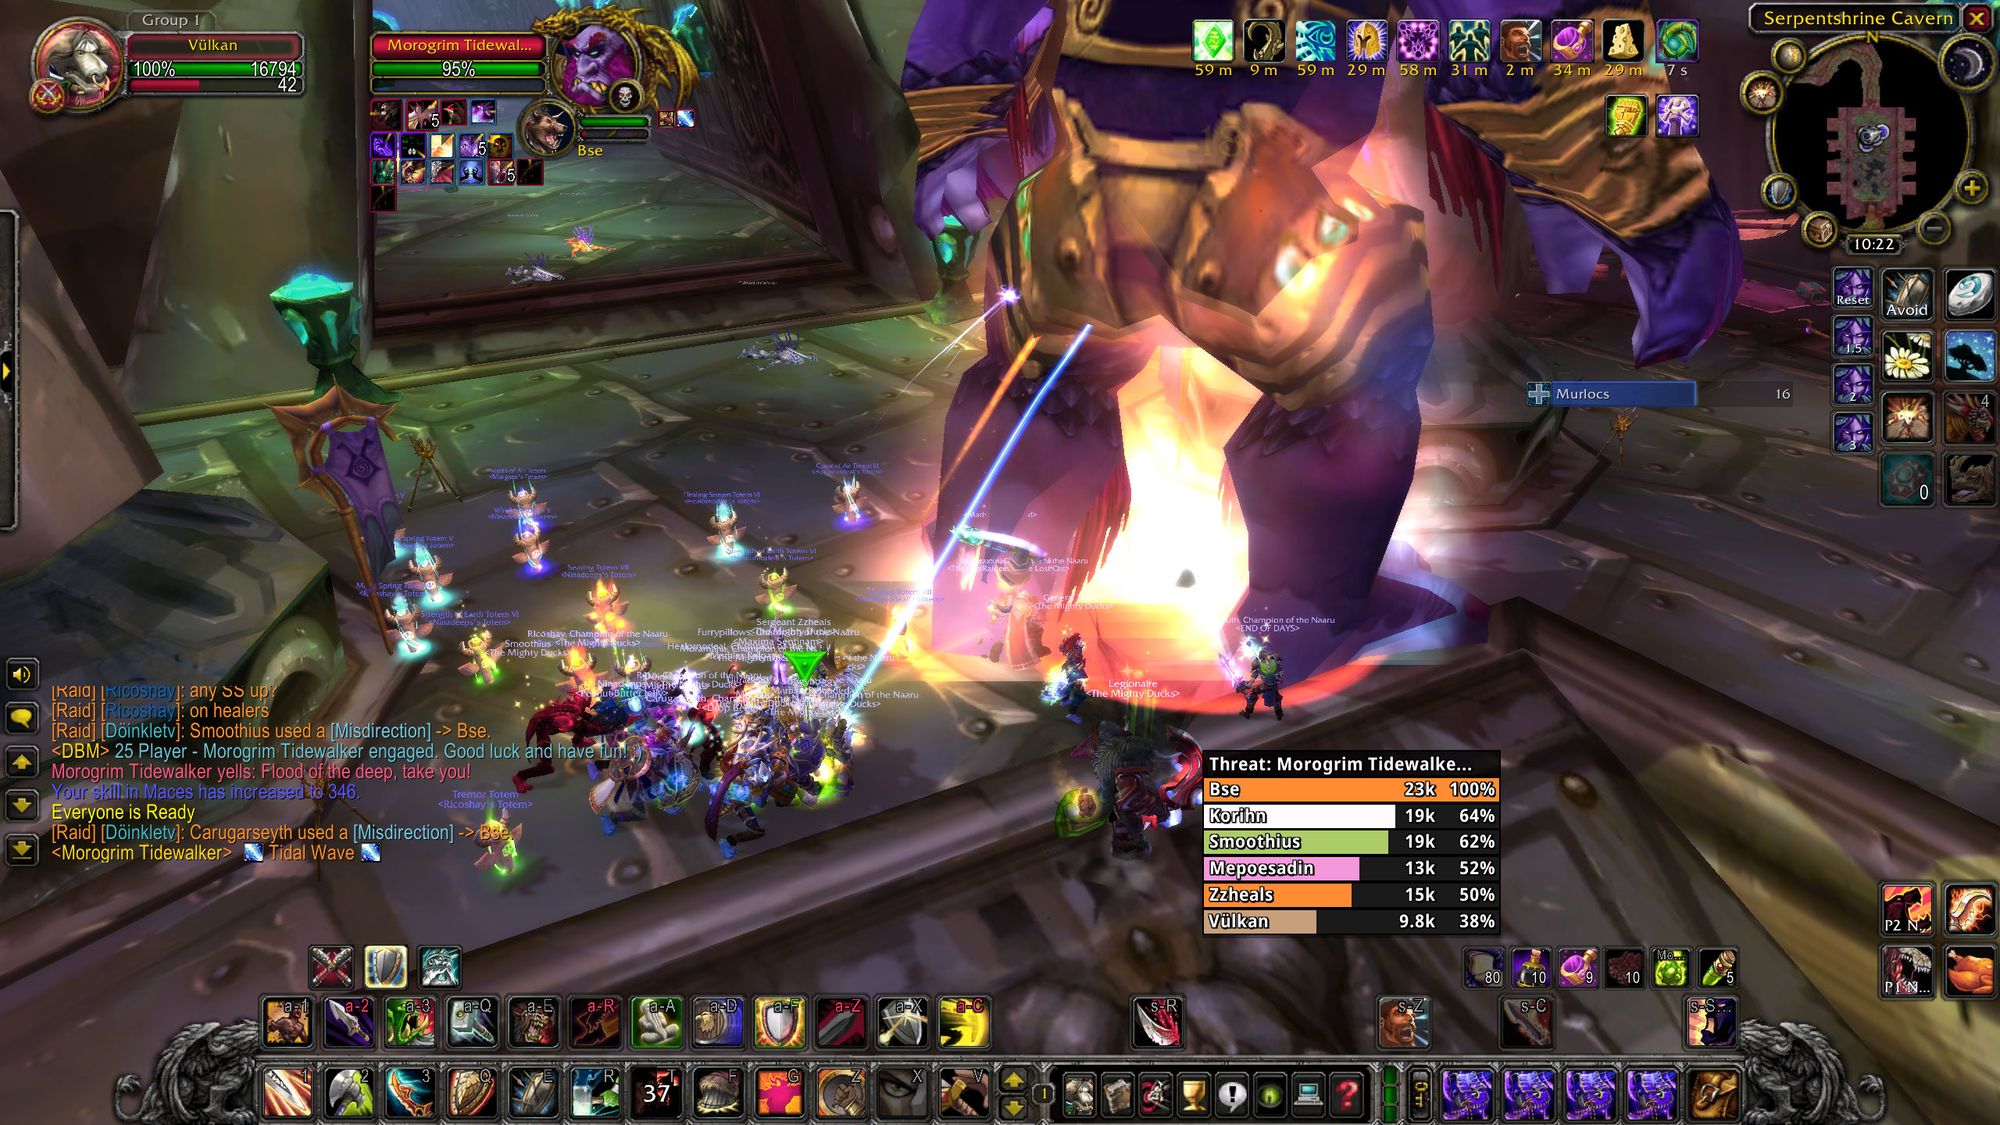
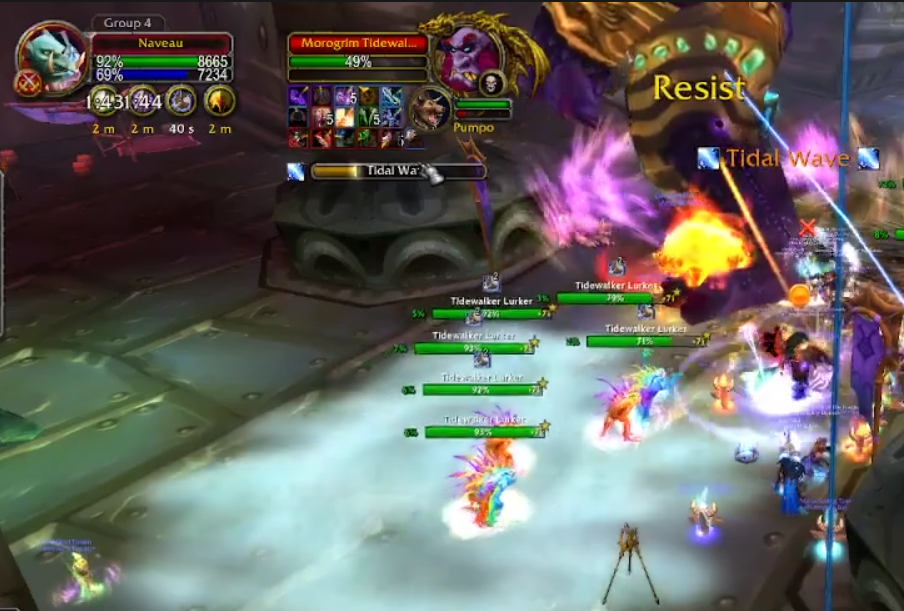
Boss Five - Morogrim Tidewalker
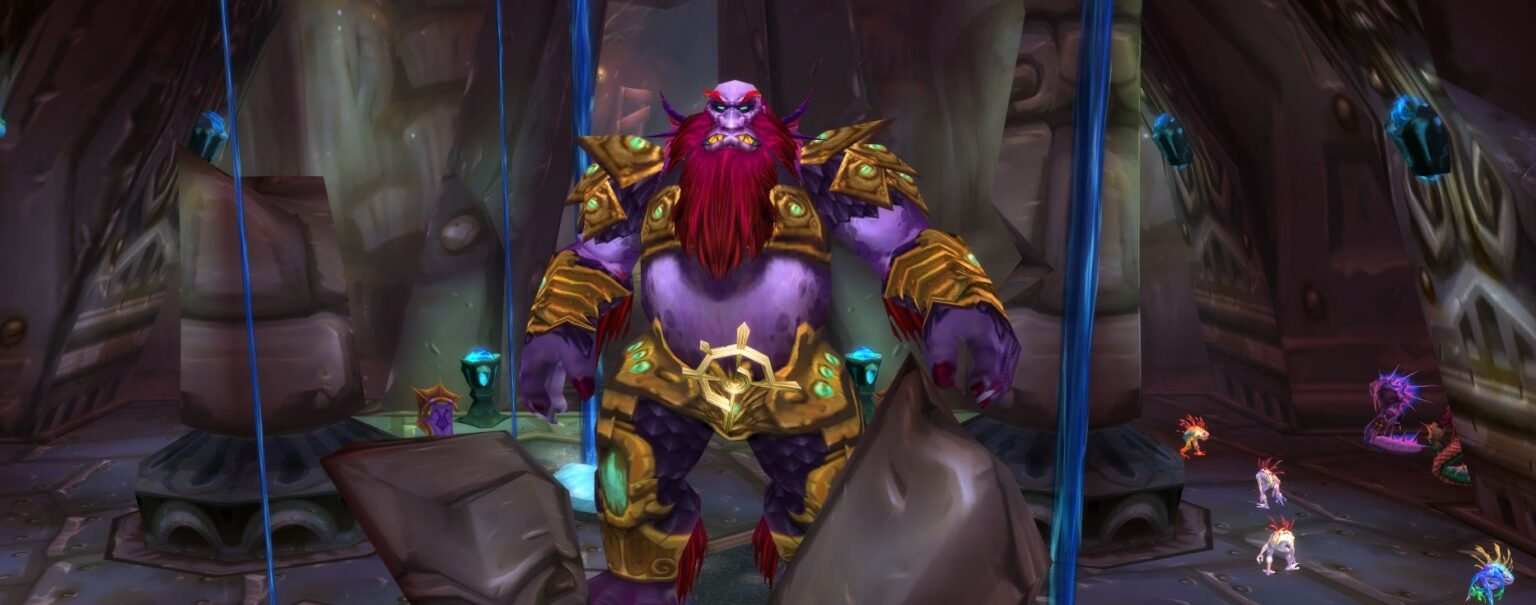
Morogrim Tidewalker is the gear check of Serpentshrine Cavern - and it's a brutal one at that. If your tanks are too thin, they'll get squished. If your healers aren't up to scratch, they'll run out of gas long before the boss does. And without enough damage, your tanks and healers are sitting ducks.
Morogrim himself is a genuine tank buster. He hits your tank for large amounts, in quick succession. Even a good tank will require multiple healers for the majority of the fight. Morogrim is capable of "flurrying", where he hits the tank multiple times in a short space of time. This is lethal for warriors and normally ends in a crushing blow. Your best hope is a druid, armed to the teeth with mitigation gear.
Morogrim doesn't just flog your tank, however. Periodically, he'll cast earthquake, which deals significant raid-wide damage. He'll also cast Watery Grave on four random players through the fight, which will stun them and deal them a significant amount of damage. Healers need to communicate effectively if they end up in a bubble, especially if someone assigned to the main tank gets water tombed. You'll also need a dedicated healer to top off players in bubbles.
Lastly, the boss will also summon waves of Murlocs to pressure the raid. Two packs will spawn, one on either side of the room. As to be expected, they'll make a beeline straight for healers, so your caster DPS will need to use countermeasures to slow them down, such as Blizzards, Freezing Traps and Earthbind Totems. Have your Paladin build threat with consecrate, but keep moving - if all of the Murlocs hit your Paladin at once, they're dead meat. Have your warrior keep an eye for loose adds and keep them away from healers and DPS.
Tactics
Positioning for Morogrim is simple. All the healers and range stack tightly together on one pillar at the entrance to the room, whilst the boss is tanked on the opposite pillar. Hunters should put Freezing Traps at both entrances periodically.
One trick to build threat prior to a wave of Murlocs hitting your ranged stack is to have a Warlock use Life Tap and then have your Paladin tank use the biggest healing spell they can. This generates enough initial threat to attract most of the Murlocs, who will then enter the consecrate and can be moved around whilst being hit with aoe spells to bring them down.
Warriors can also use super sapper charges if they're an engineer, or have hunters misdirect whilst using a super sapper charge. Whatever helps your warrior peel murlocs off healers. If your healers are good enough, they should look to taper off their healing until the murlocs are under control, but with all the raid and tank damage going off, your healers (and tanks) need to be pretty fat.
Once Morogrim hits 20%, the water bubbles in the middle of the room will start slowly moving toward the players. You'll want to tuck the entire raid into a corner and rush the boss down as quick as you can. You'll also get at least one, if not two waves of Murlocs, so all remaining abilities to manage them should be used to keep them suppressed, rather than to kill them. The aim of this last phase is to kill the boss before the water bubbles reach the raid and start entombing players.
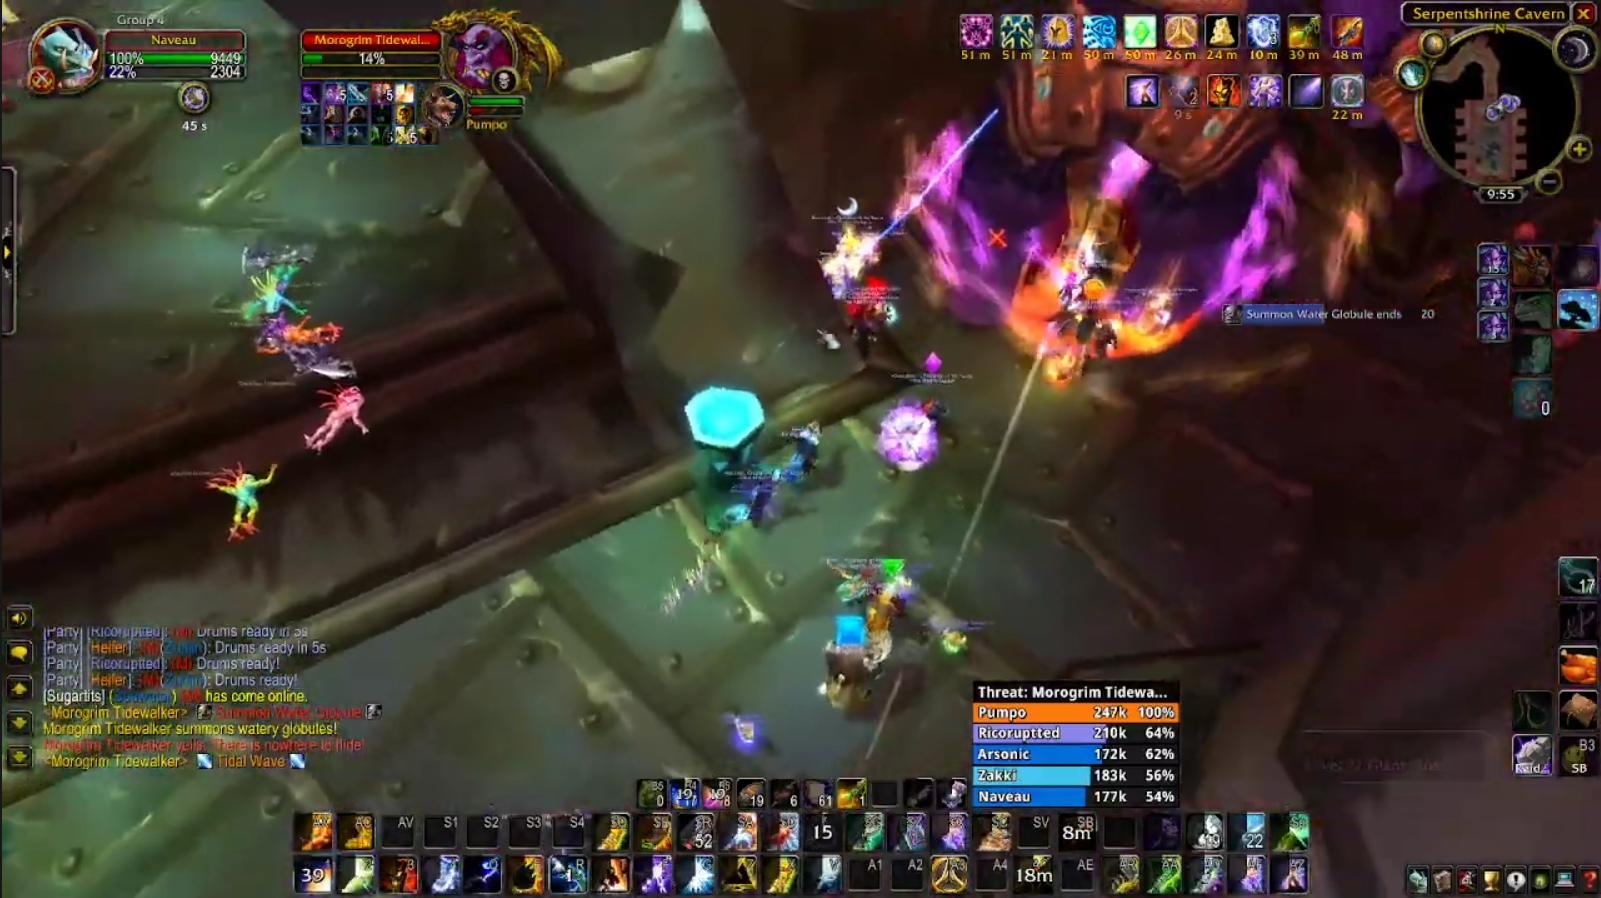
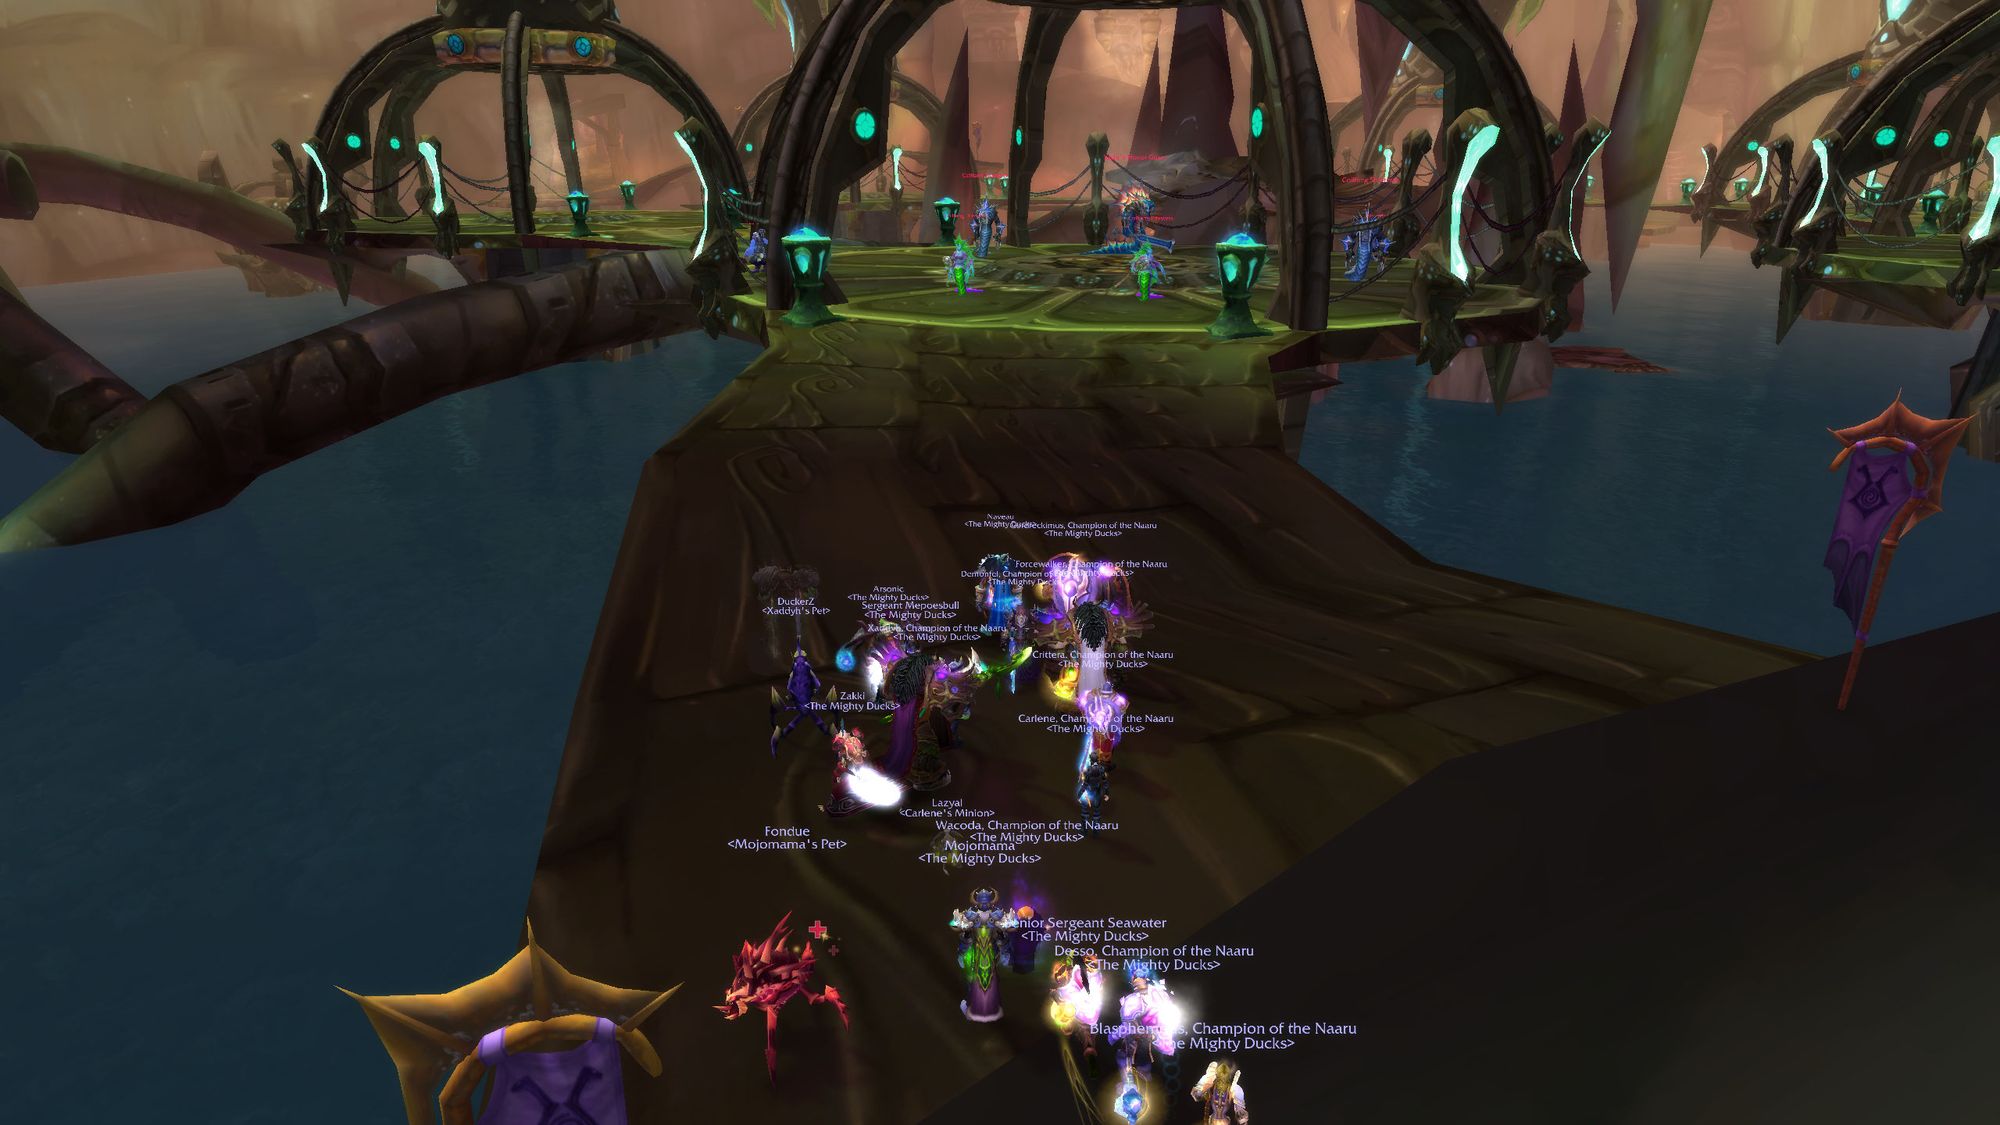
Once the boss falls, you can now divert your full attention to cleaning up the murlocs. Collect your phat lewt, hit the switch, and it's time to take on one of the genuine threats of the expansion.
But first, we have to get there.
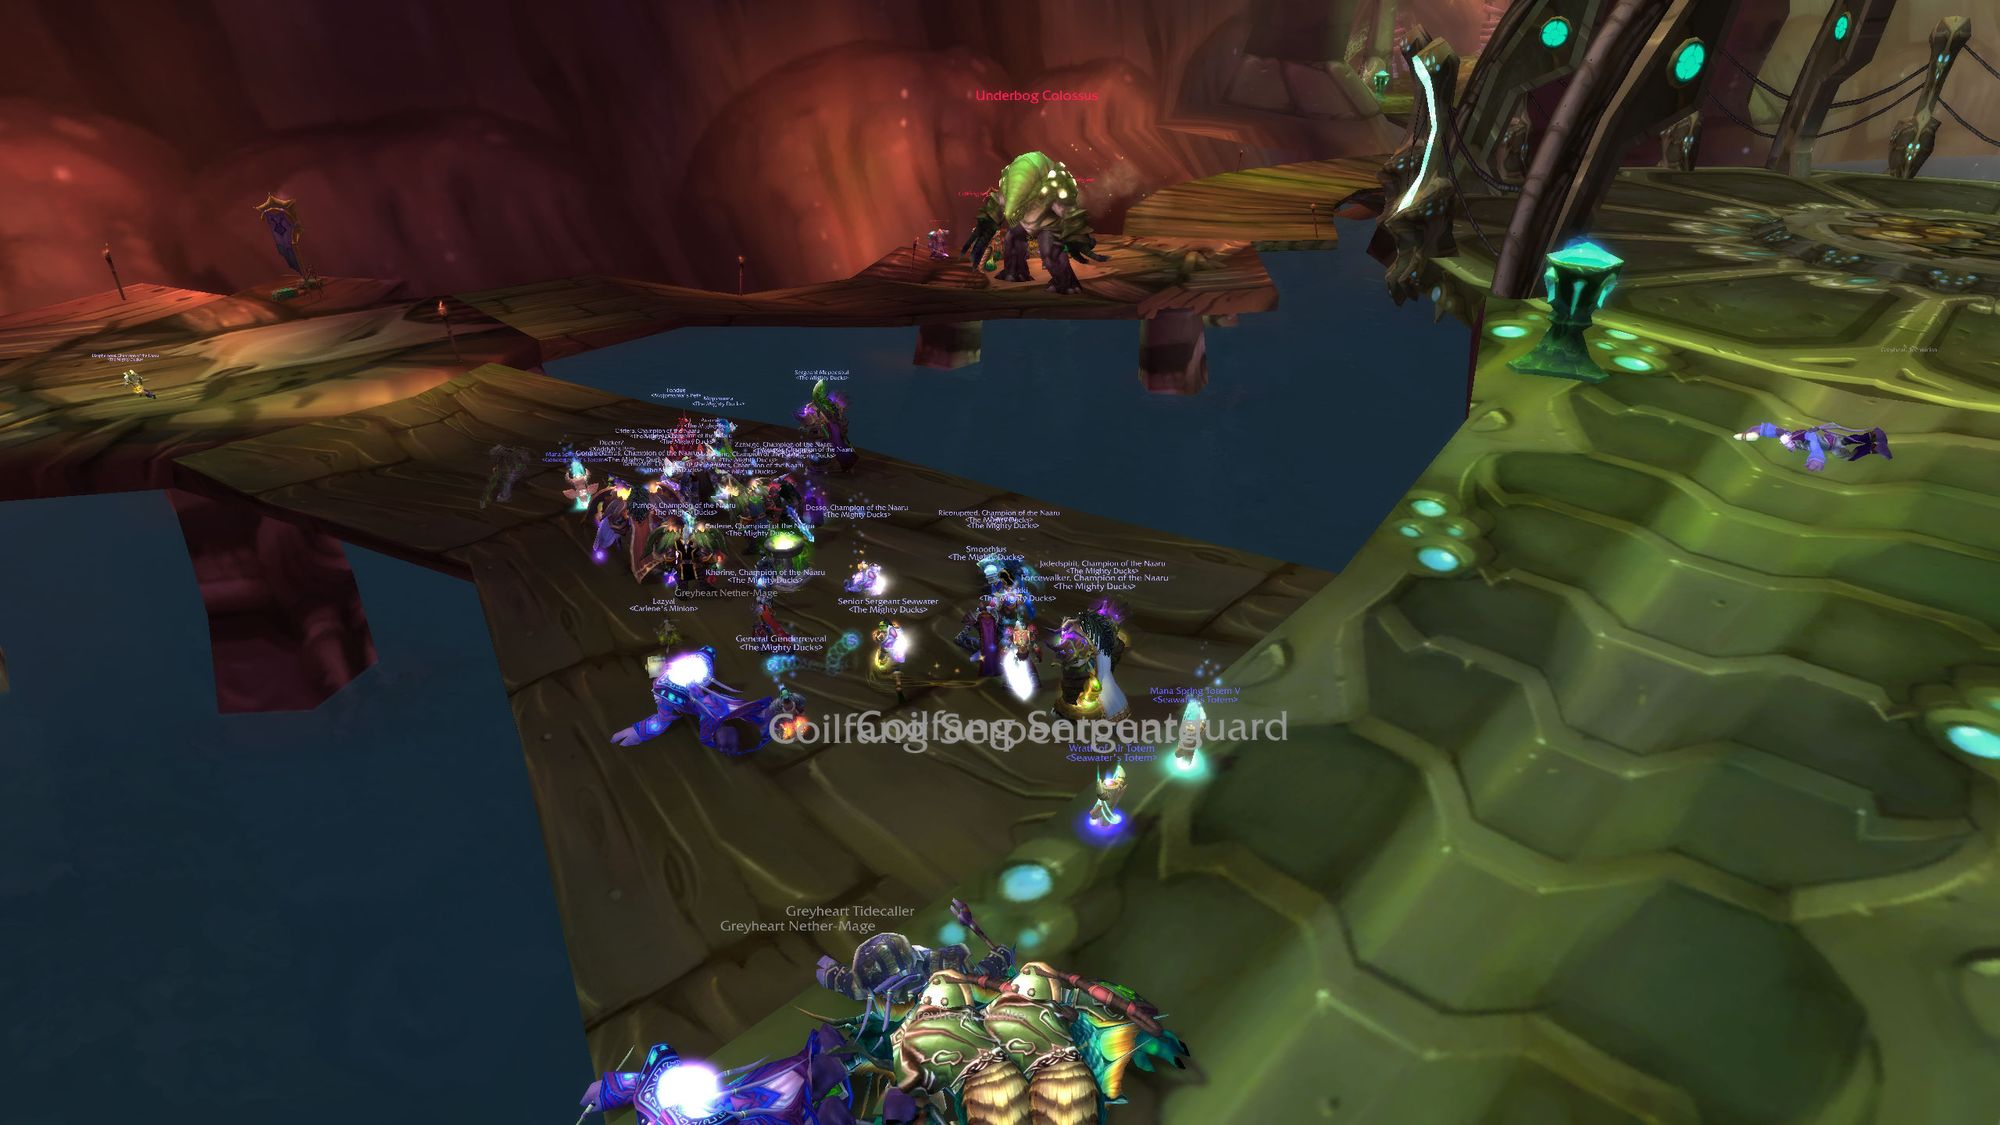
The aim is to reach the bridge console in the original cavern, which can now be activated. To get there, you can either walk all the way back through the previous boss rooms, which is longer, but means you don't have to clear any trash, or exit out of Morogrim's tunnel - seen here pictured at the platform three and four duckboard.
There are two packs and an underbog colossus between you and returning to the bridge console. The first is two Serpentguards and two Fathom-witches, which should be engaged in the same way - up against a wall, DPS positioned where they can't be ejected from the platform.
After dealing with the colossus, the last pack consists of Tidecallers, Skulkers, Nethermages and Serpentguards. As before, use crowd control effects on the Nethermages, kill the Tidecallers and Skulker, then focus down the Nethermages one at a time. Make sure if you're a class with a dispel, such as arcane shot, purge or shield slam, you're dispelling the Nethermage buff they apply. Hunters also need to make sure they're switching to totems again.
Having cleared the trash (or walked all the way back), make your way to the bridge console, and listen to Lady V threateningly tell you all about water. You're nearly at the end, but this last boss is no joke. Even post-nerf, this boss requires coordination and planning.
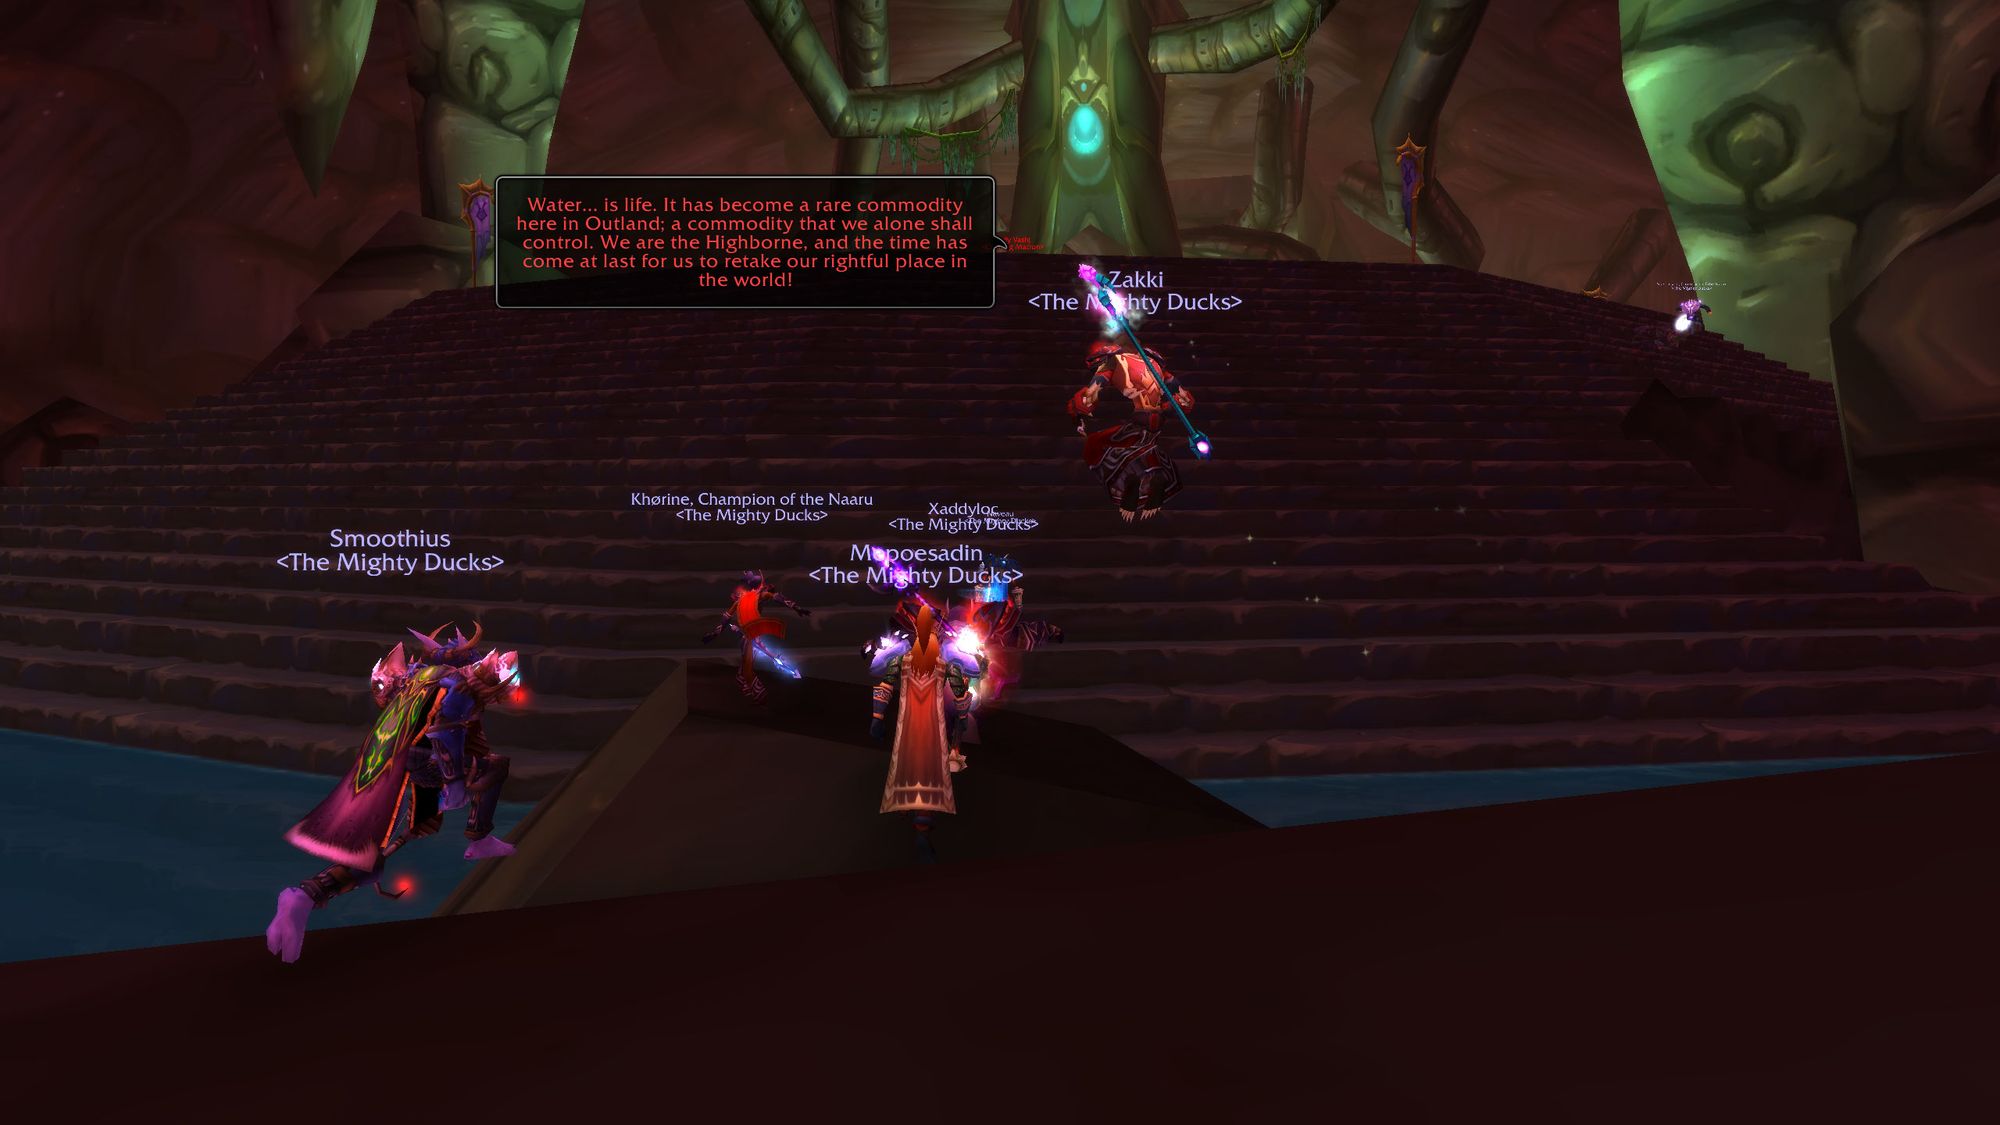
But we're not talking about post-nerf here, we're talking about the real deal, prenerf Lady V, as originally released by Blizzard. Buckle up, because you're in for a time and a half.
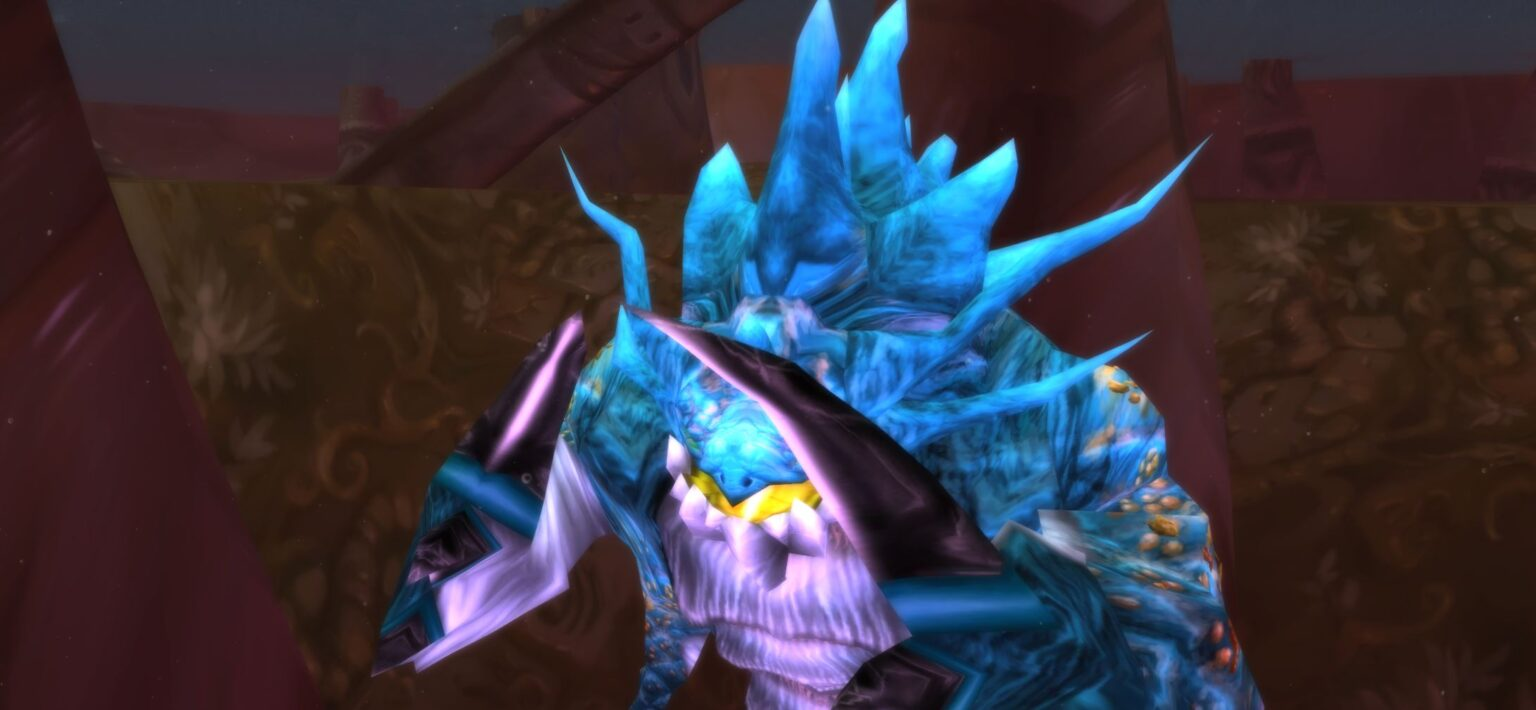
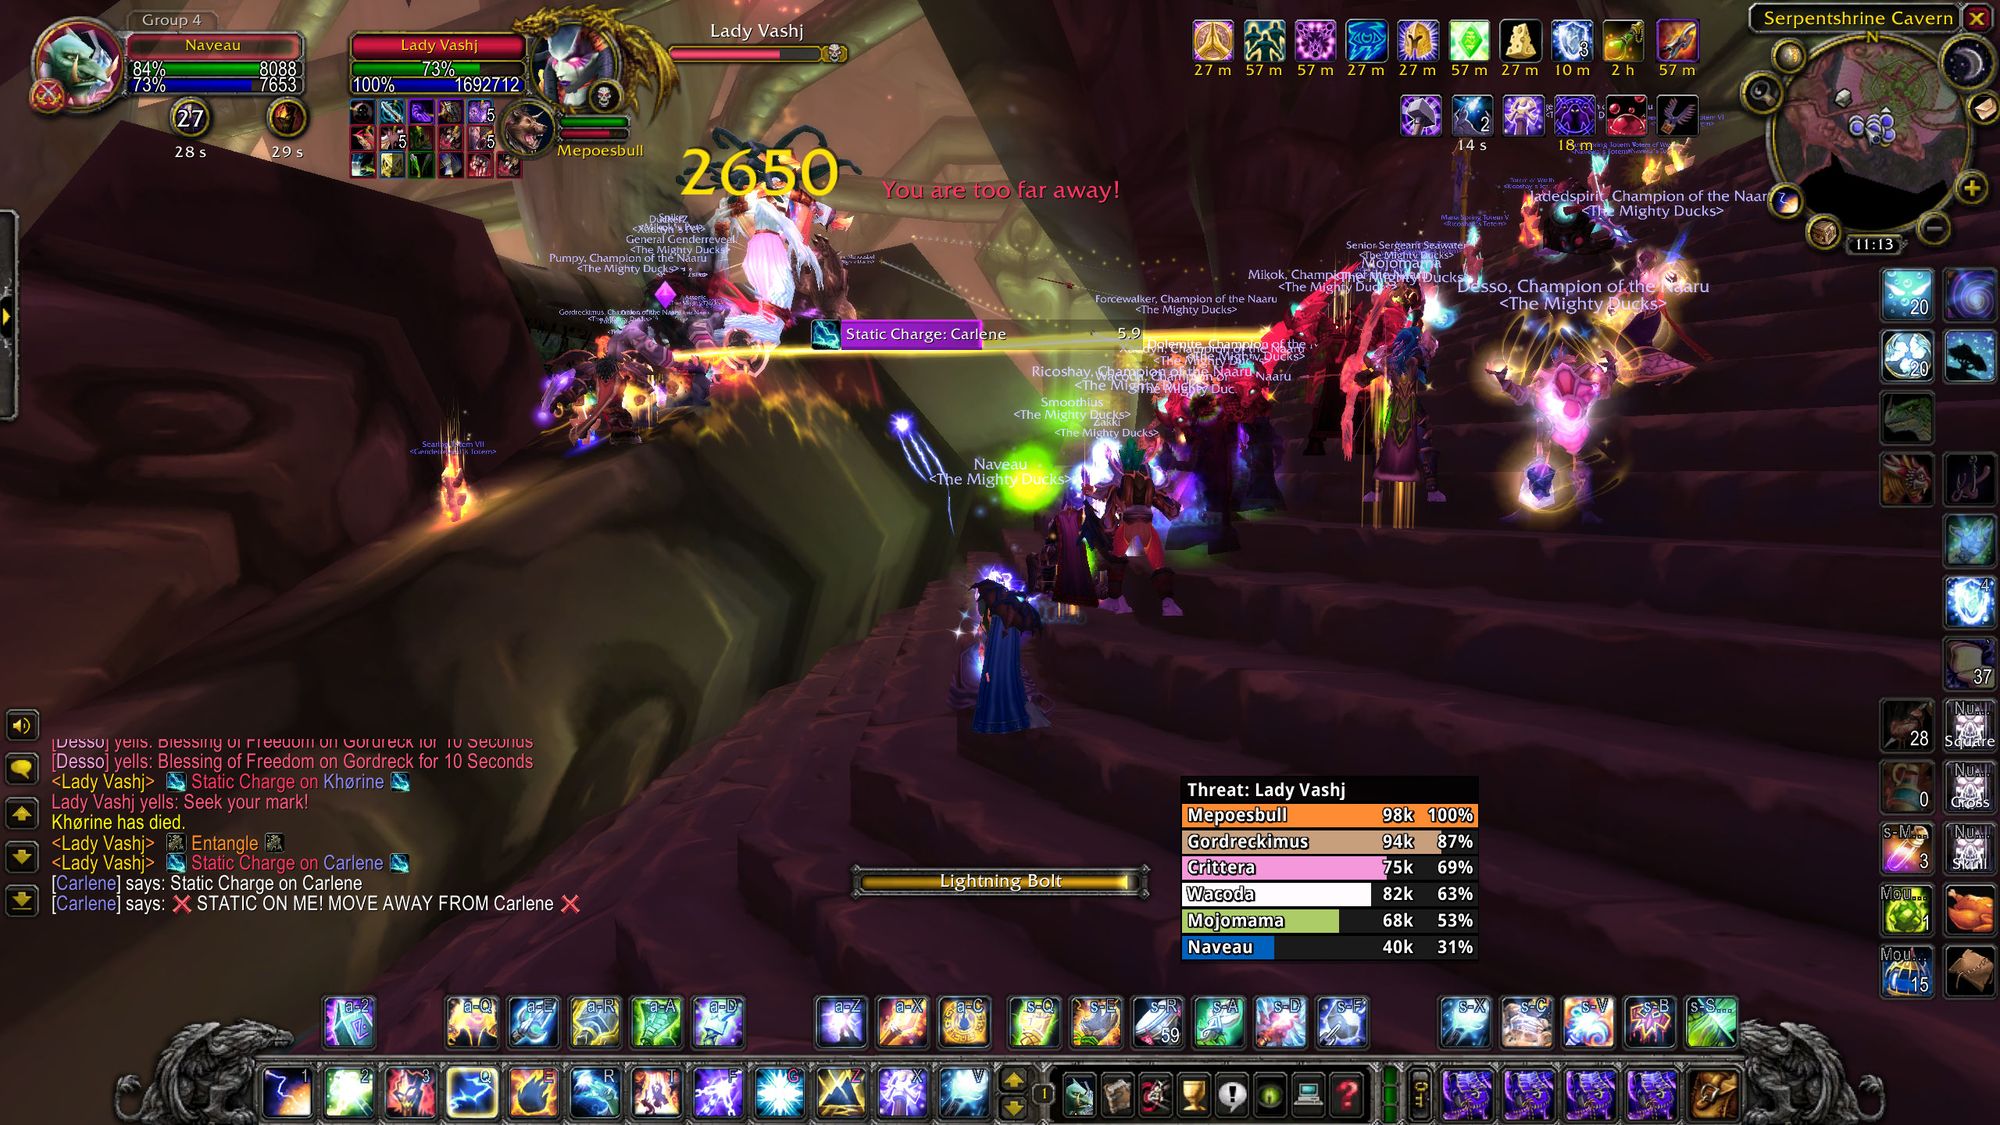
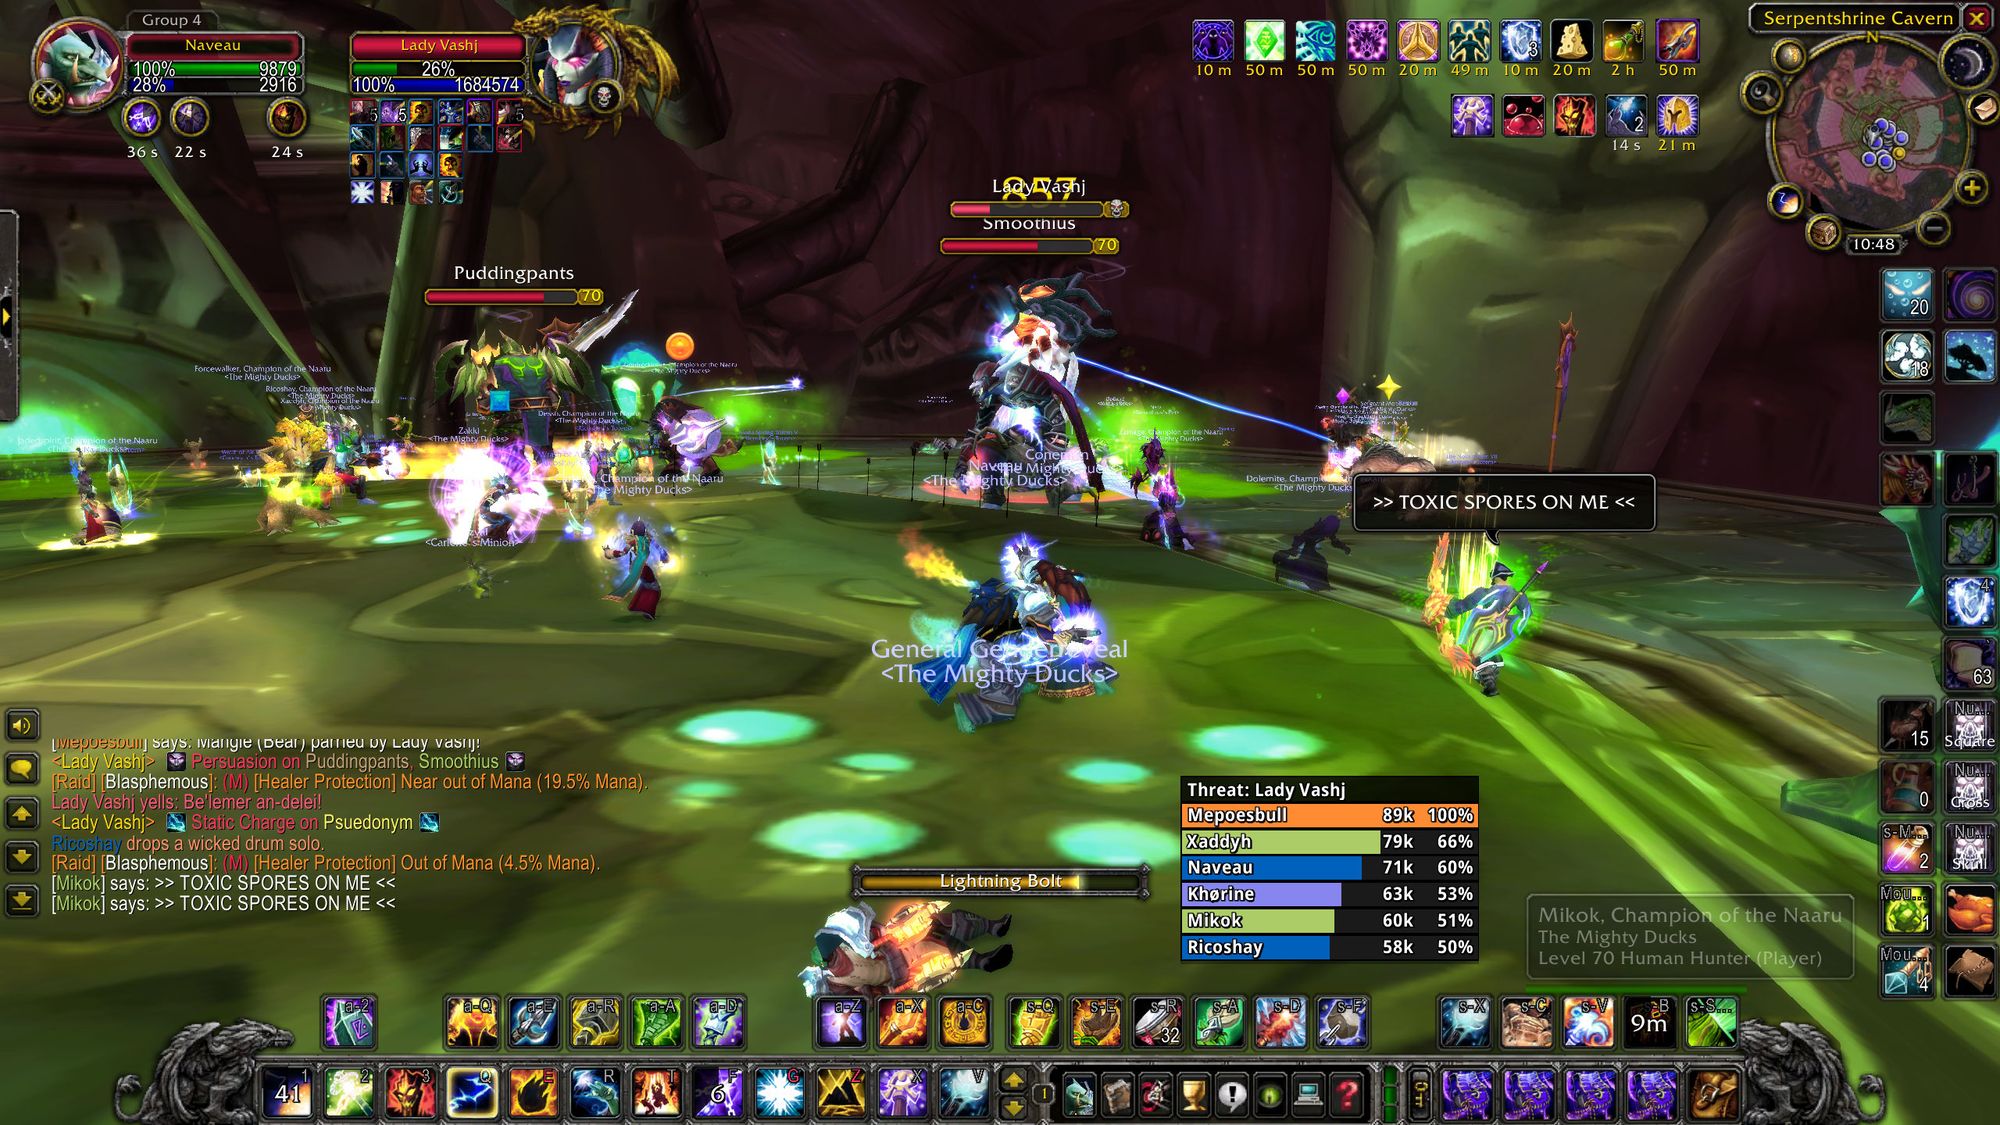
Boss Six - Lady Vashj
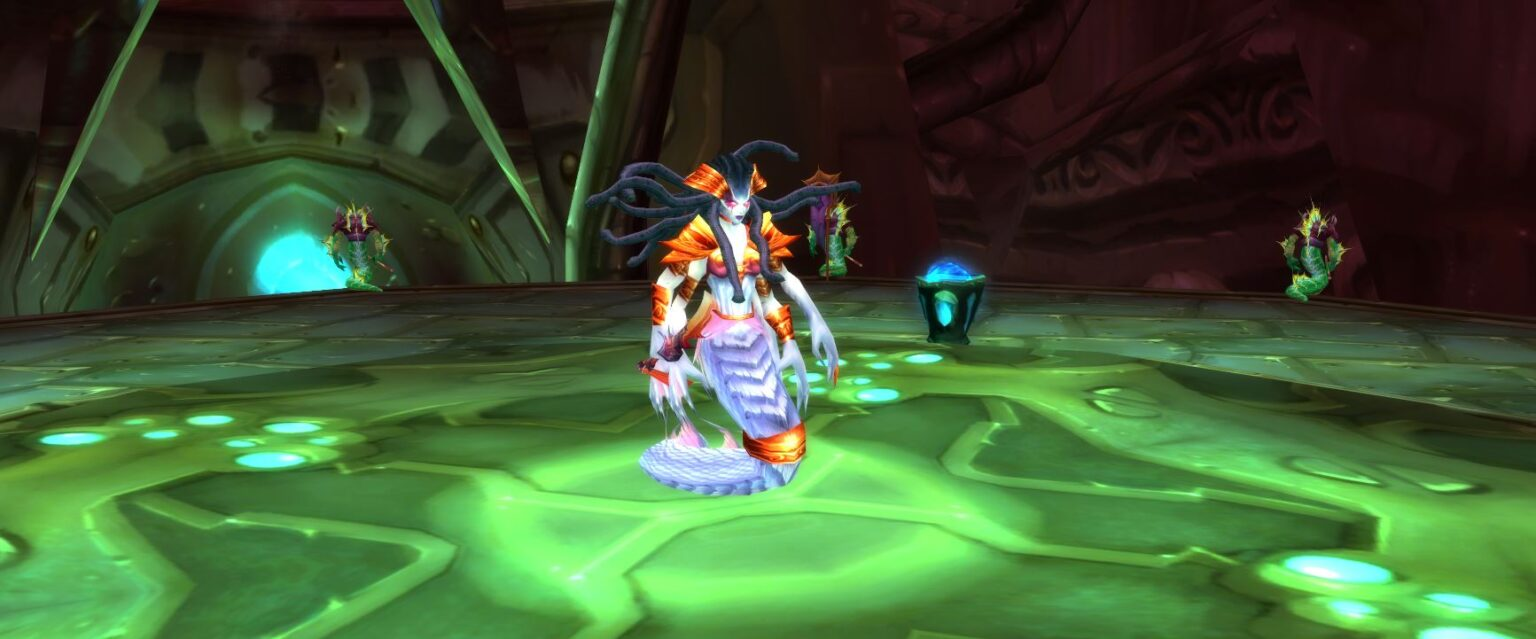
Lady V (or some other unsavory nicknames you can probably imagine) is an intimidating figure. Sitting alone atop her platform in the middle of her doom factory, you get a feeling this is not going to be easy.
And easy, it is not.
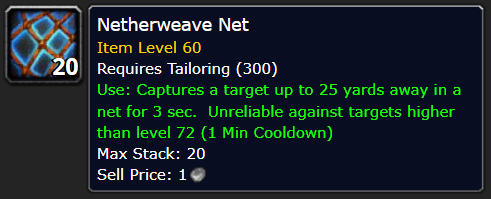
Lady V consists of three phases that I will go over individually. This boss requires no special resistance tanks, but it does require a specific two items. The first are netherweave nets, which are quick and cheap to make, but do require tailoring.
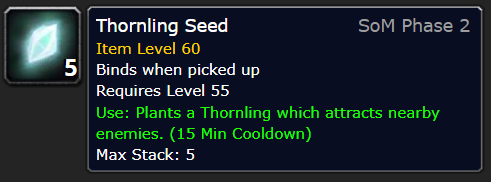
The second are Thornling Seeds, which can be farmed from Dire Maul, a classic level 60 dungeon. Some of the mobs in there are immune to nature damage, so bear that in mind - you can farm seeds passively without fighting enemies, but they're also a good source of demonic runes, so you can kill two birds with one stone.
That kind of encapsulates what I have loved about TBC that you don't see in later expansions. To have the best chance of doing well, sometimes you need to call back to an earlier period. There are also head and shoulder enchants from Zul'gurub and Naxxramas which are also quite good, but I digress.
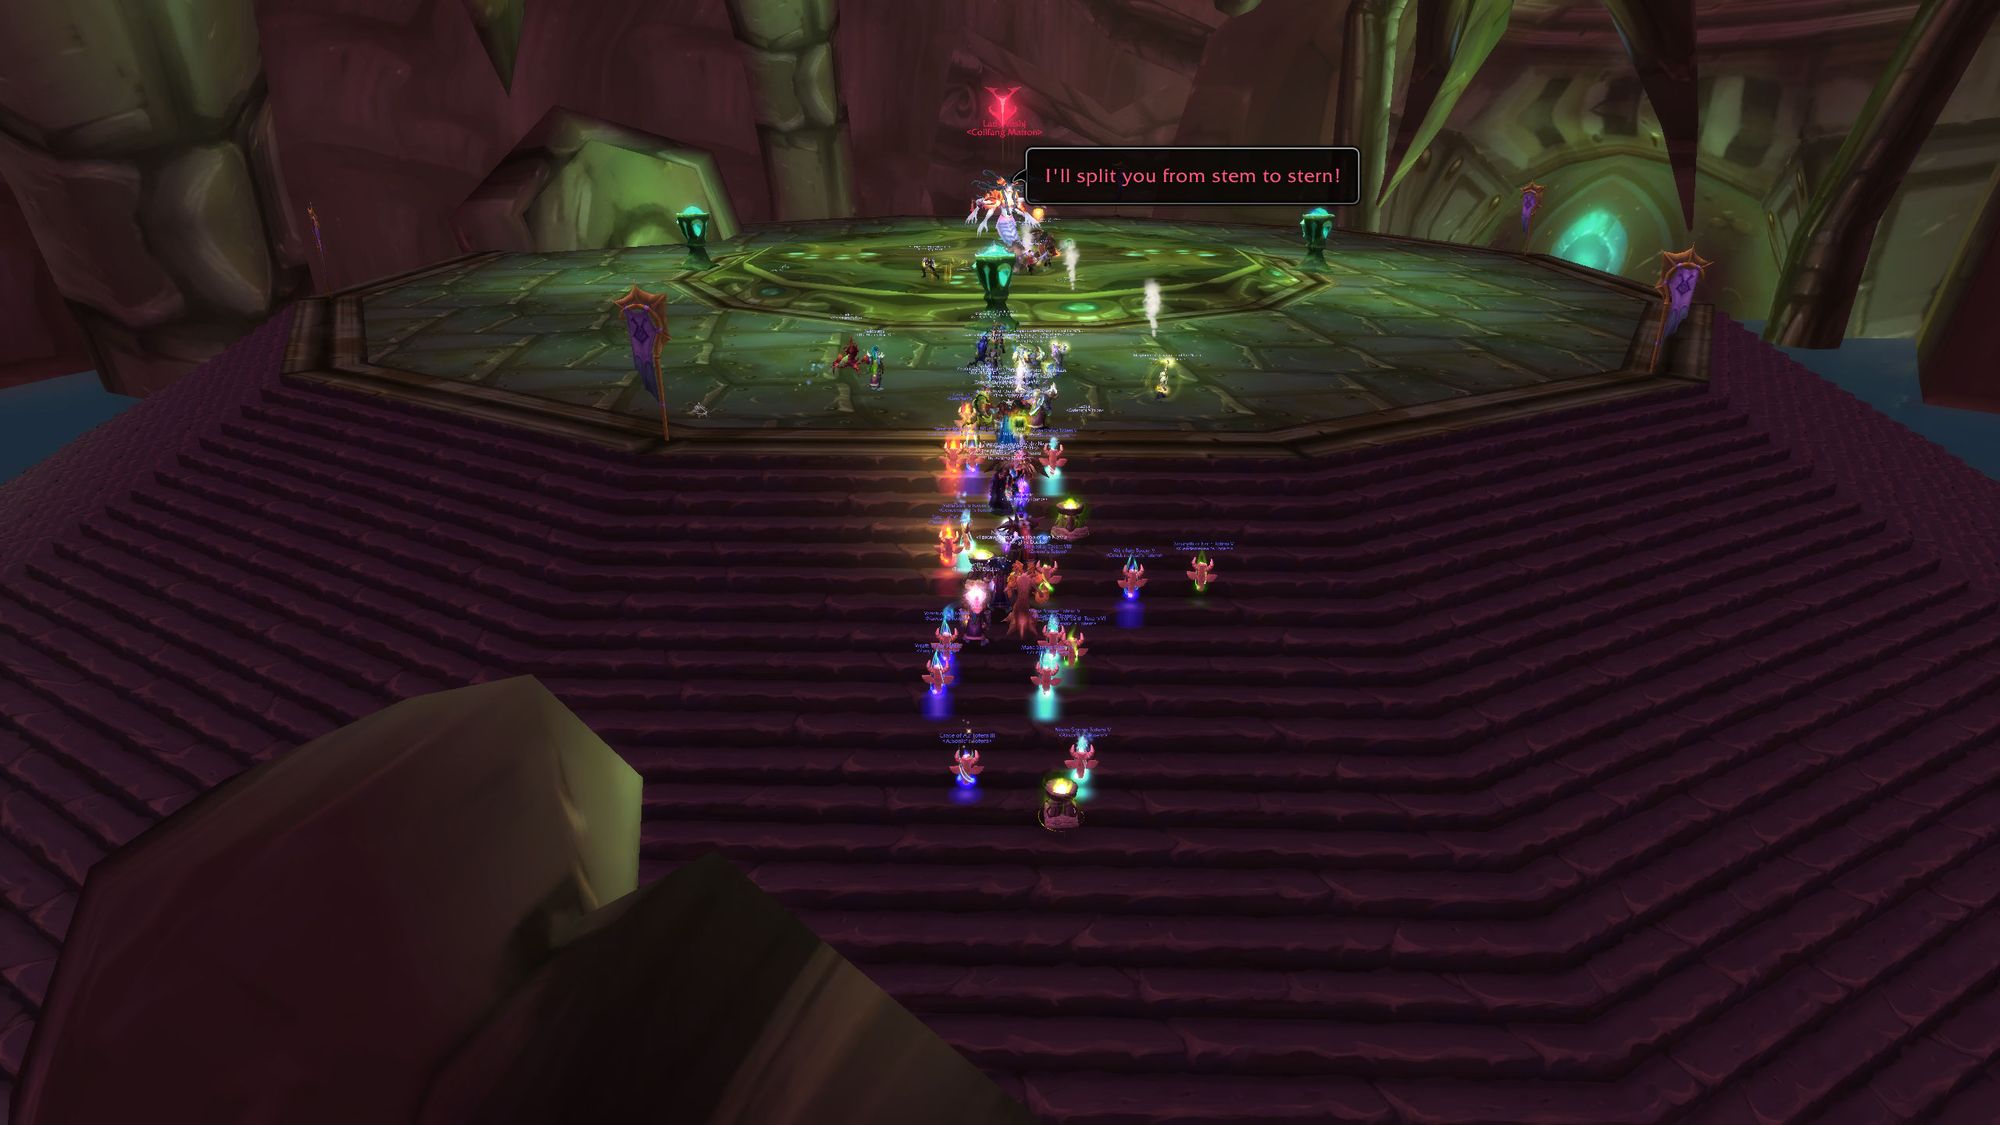
Before the fight, all players will need to be aware that Lady V has line of sight over the entire top of the platform. Prior to the pull, you'll be able to move around on the stairs, and use the shield generators, provided you're right behind them. This becomes important when recovering after a wipe - and you will wipe. A lot.
One last thing. At all times, players will need to have maximum hitpoints in excess of 8,500. Depending on the raid's gearing, that can be quite difficult, so some classes, particularly mages, warlocks and priests, may need to sacrifice healing or damage to pile on stamina gear in order to reach this.
To begin the encounter, have the ranged stack gather tightly on the stairs and have the melee form a line behind the shield generator. When everyone's ready to go, have your main tank step out from behind the shield generator, which will instantly aggro the boss.
From there, it's go time. Good luck - you'll need it.
Tactics - Phase One
Lady V in the first phase is a fairly straightforward tank and spank. The key here is that you'll want to position her so that when she transitions at 70%, you can squeak in some additional damage. Every little bit counts toward the DPS race in phase three at the end.
It is a bit arduous, but near the ranged stack is a pipe - you'll want to move the boss all the way across the platform, down the stairs, through the water and up the pipe. One complication is that she will periodically cast a stun and ensnare on the main tank. Your off-tank(s) should be ready to swap at a moment's notice, as when your main tank gets stunned, they'll start to take a belting, and can't move.
It can also help to have a Paladin dedicated to casting blessing of freedom to clear snares. Druid tanks can also shapeshift, but this can be rough if your off-tank hasn't taunted off you.
Both the ranged and melee need to be aware of shock blast, which does damage in an AoE around the target periodically. You'll normally get at least one tick of this off before moving to safety, but the key is to move as soon as you get it to minimise raid damage. If a tank gets it, the melee need to move, especially if they're ensnared. It can help to have a designated fallback point for the shock blast, so players don't scramble around in confusion.
In addition, Lady Vashj will also target three players with a multi-shot. It is possible to get unlucky and take a multi shot, plus a shock blast and take the magic number of 8500 damage, hence the warning above about making sure to have at least this amount of health, to remove that possibility.
Once Lady V hits 70%, she will immediately move back to the middle of her platform and begin phase two. There's a bit of time before it begins in earnest, so check your buffs, confirm your position and make sure you're topped off.
Tactics - Phase Two
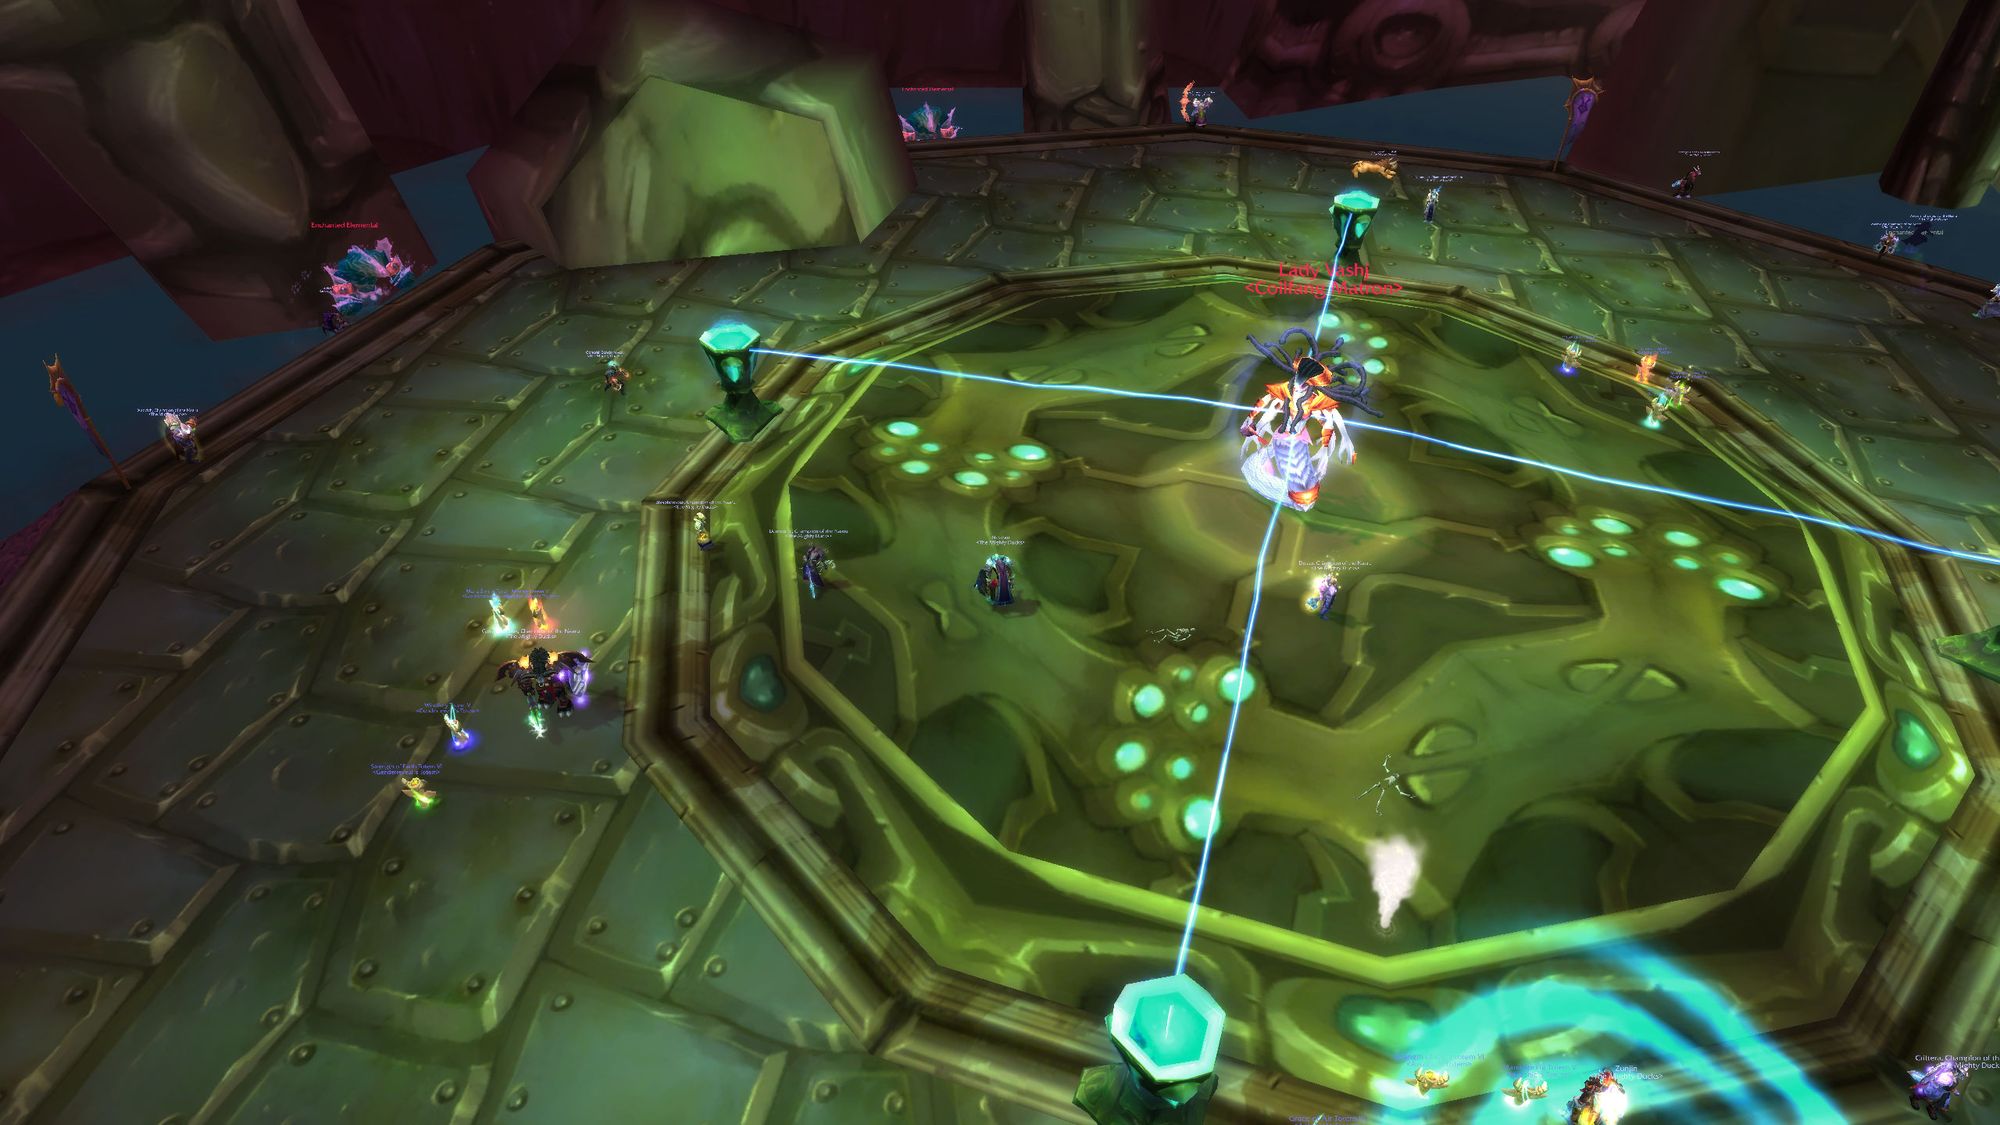
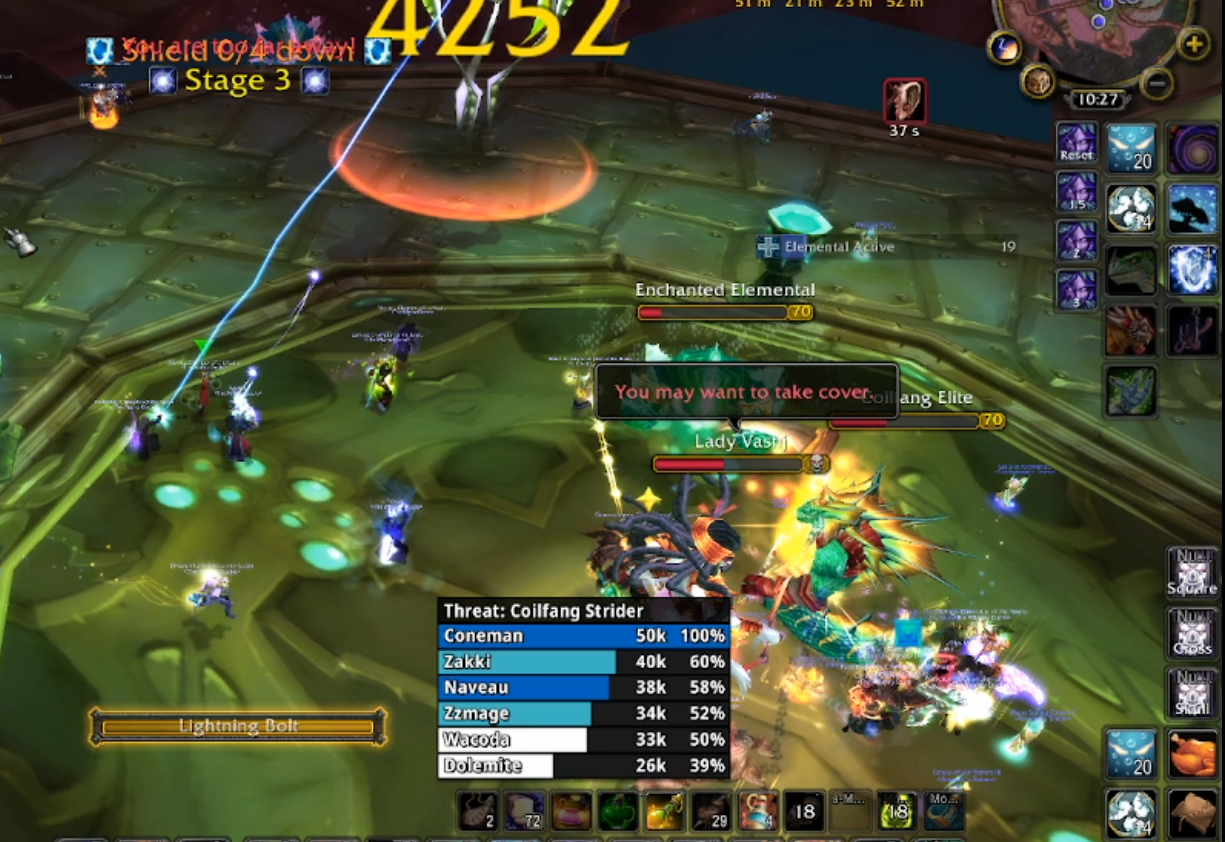
In phase two, Lady Vashj protects herself with an invulnerable shield that needs to be removed by putting four tainted cores into the four shield generators around the room. These tainted cores are recovered by killing tainted elementals that spawn on the stairs around the platform.
This phase is coordination heavy and dependent on clear and effective communications. Players must be aware of where they are, where their target is and if they need a heal, assistance from other raiders, or if they're about to use a netherweave net.
It stretches your raid right across the platform and places a high amount of individual responsibility on each player. Everyone must do their job perfectly, or a wipe will be swift.
To start with, the boss will pressure the raid by casting forked lightning in a cone in front of her. It is possible to avoid this, but the damage is minimal and provided she hasn't recieved a buff to her damage (more on that later) it's of minimal concern.
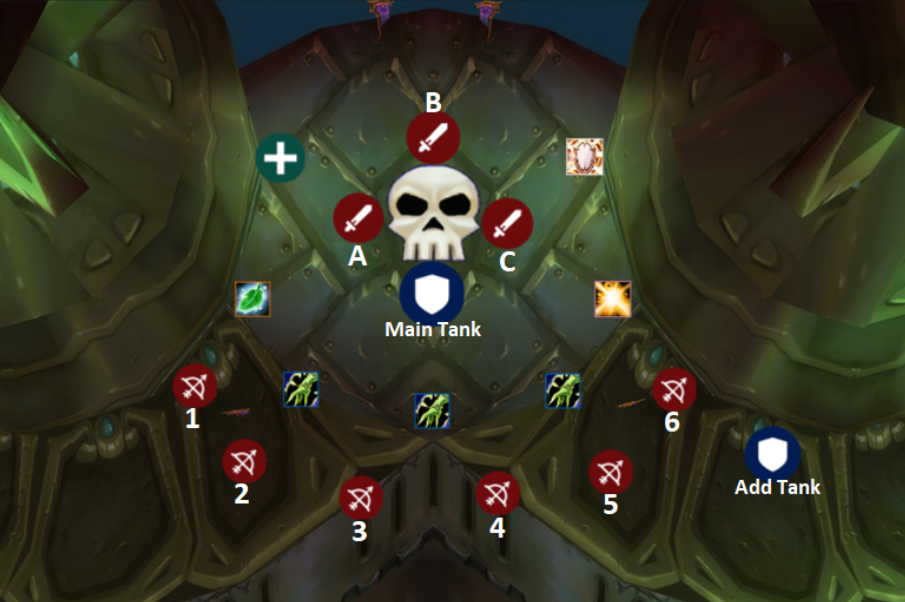
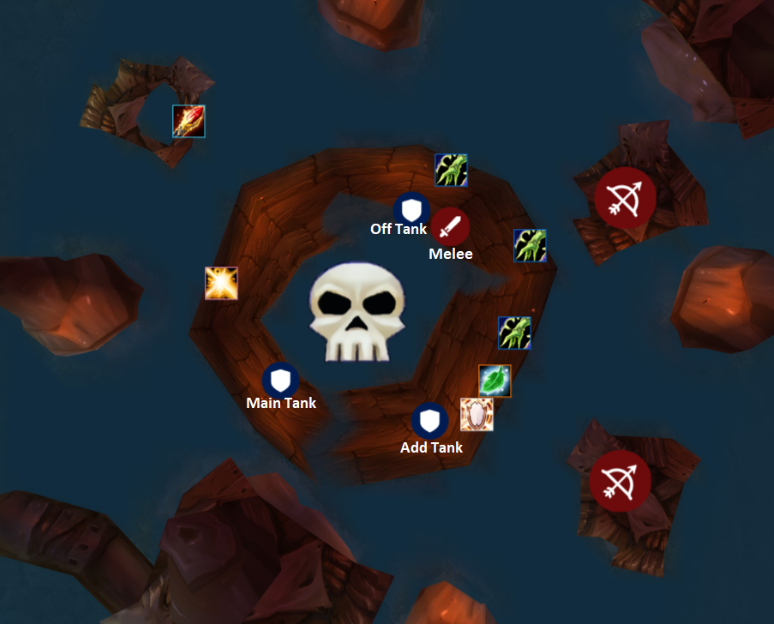
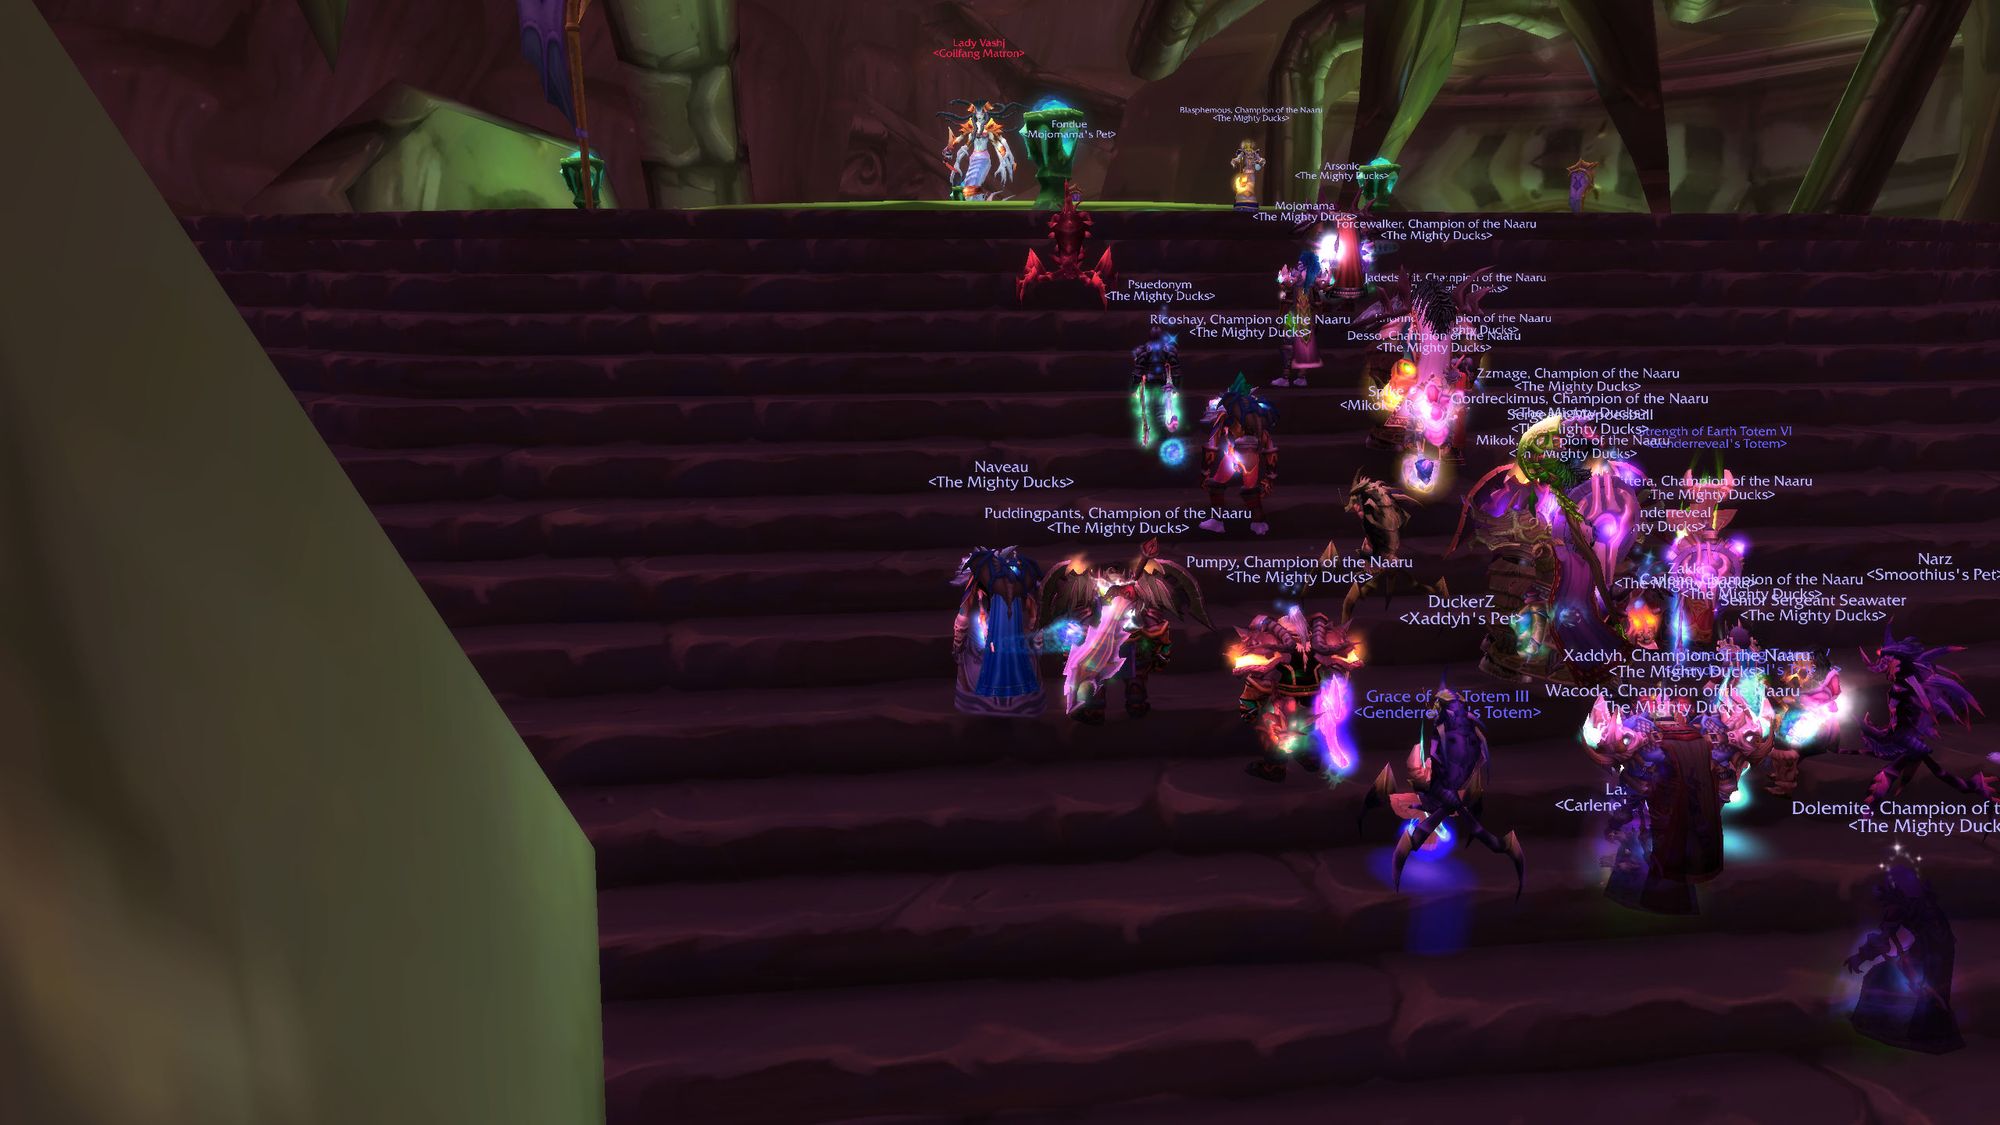
There are three main roles in this fight - the core team, the melee team and the ranged team. To make this simpler, you'll want to divide the platform into zones and use a raid map so you can assign teams to individual locations - here's the one used by the ducks:
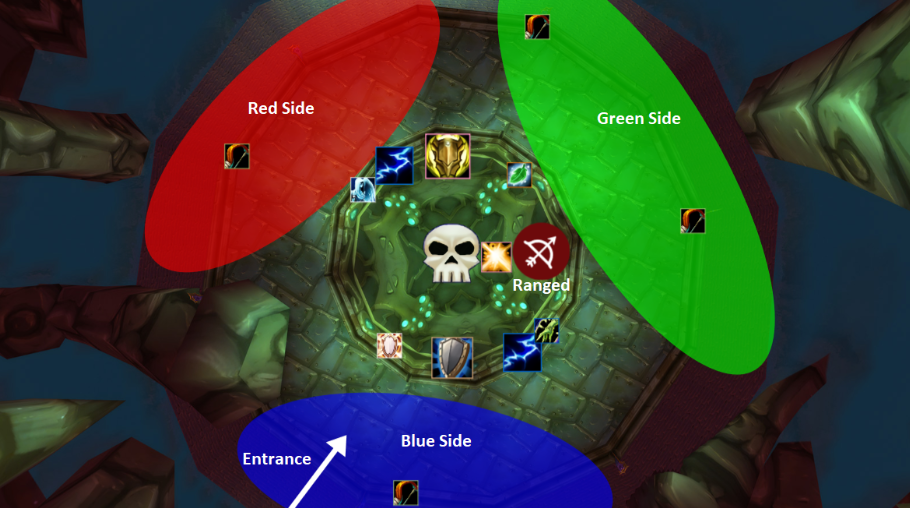
There are two jobs for the core team - to keep the elementals that buff the boss under control, and to kill and retrieve the tainted core from tainted elementals. Your core team should consist of four ranged DPS who are self-sufficient, such as hunters or warlocks, and four healers. You'll also want to have one or two loose ranged DPS, or an off-tank, who are reponsible for using the cores on the shield generators.
Every elemental that reaches Lady Vashj at the center of the platform permanently increases her damage by 5%. So eventually if enough elementals reach her, that forked lightning will start chunking people and make phase three impossible. You can make it to the end of the phase without the boss getting buffed at all, so this should be the goal.
The catch with a tainted core is that when you have it, you can't move. So you need to daisy chain it to the next player. So, under ideal circumstances, the ranged DPS kills the tainted elemental, passes it to the healer, who passes it to the off-tank under the shield generator. There's a very old, venerable macro used from original TBC that still works today, which helps make this simpler.
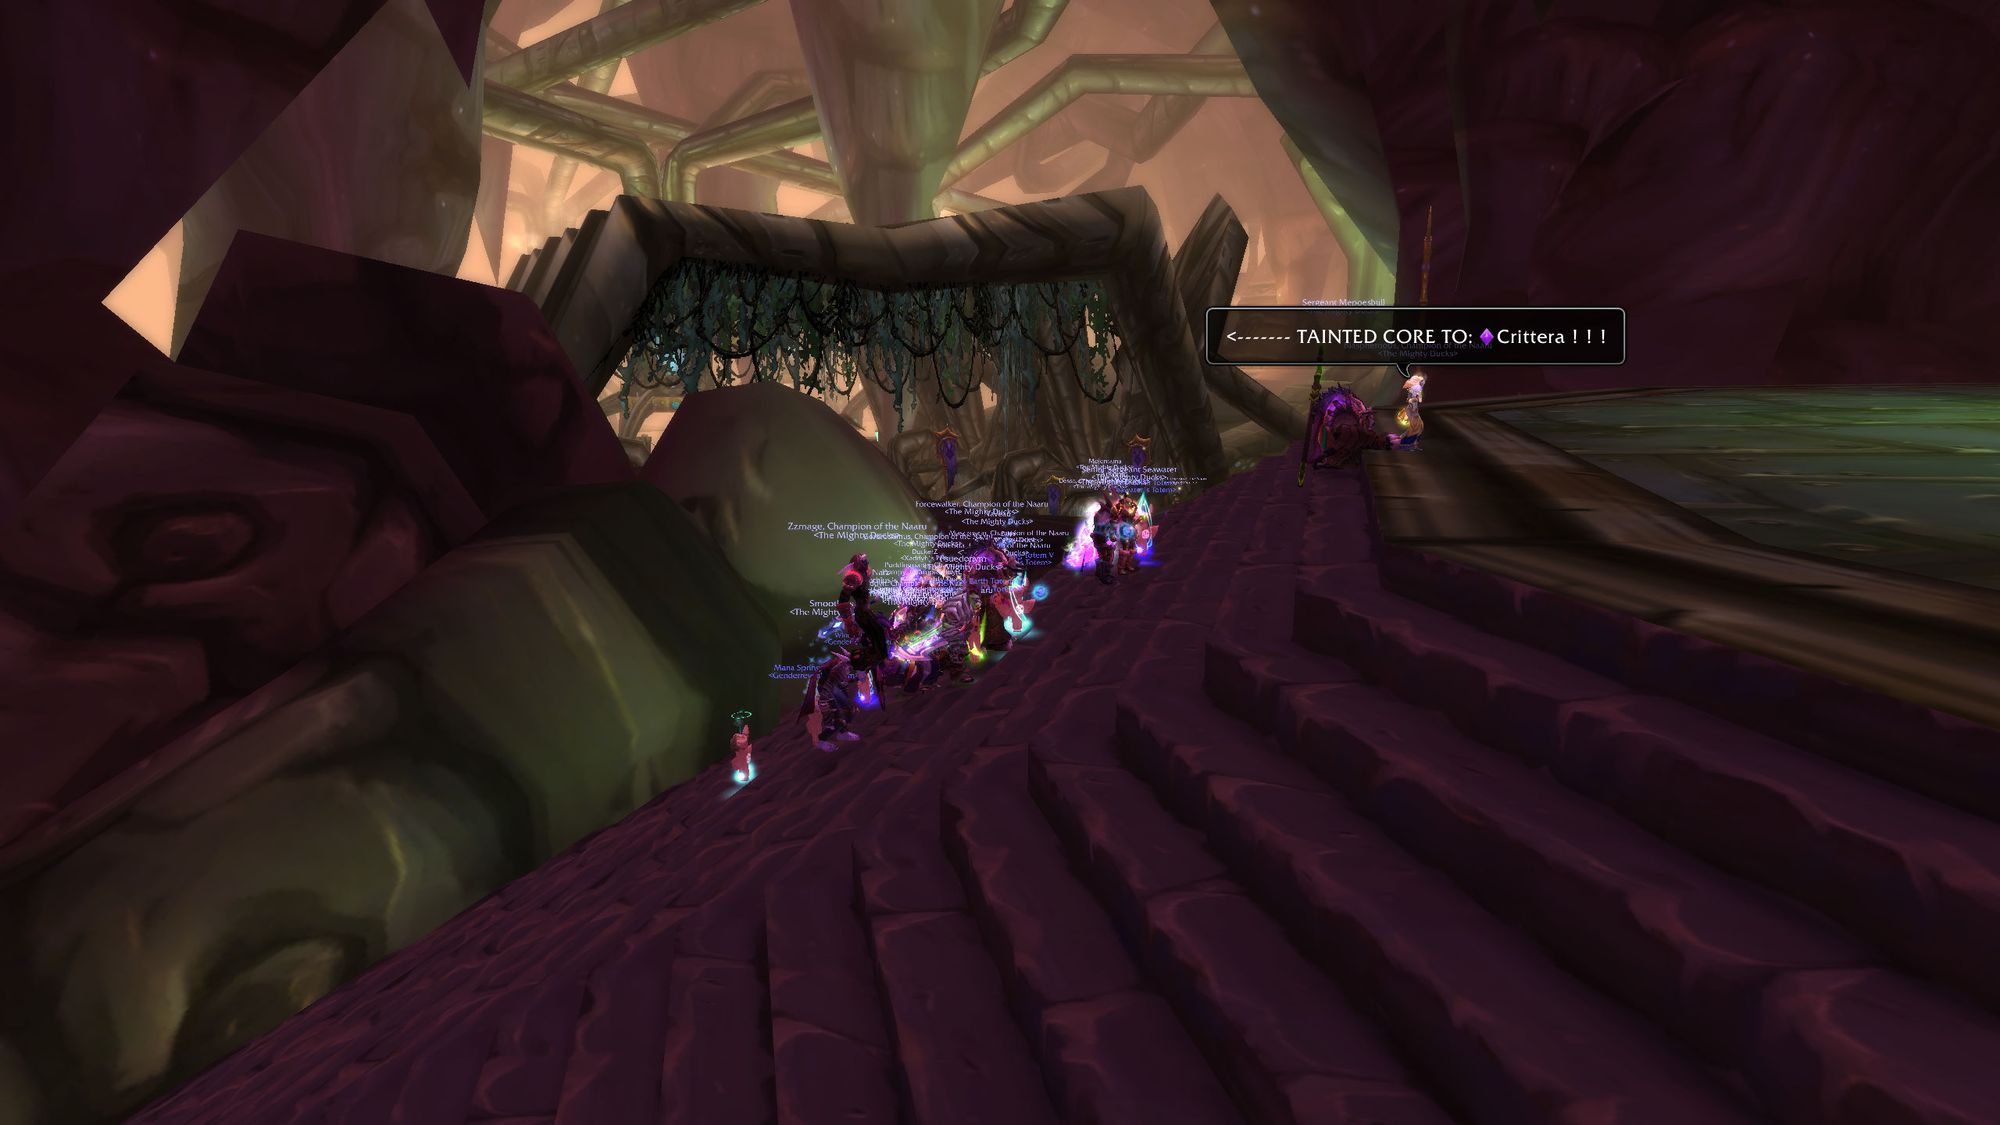
Tainted elementals only spawn periodically and only one for the entire platform - so the core team needs to be observant for when it appears on their side and be ready to prioritise it as a target. If you miss too many, you will fall behind, which will kill the attempt.
Both the healer and the DPS need to be aware of line of sight issues, and also be careful that they don't get attacked by spawning Coilfang Elites and Striders, particularly whilst they can't move. It's best practice to stand at the top of the stairs in line of sight, and only go down between spawns to retrieve the core.
Many an attempt has been torpedoed by an unlucky hunter or warlock who got bonked on the head going down to get a core, so pay attention.
The second group of players is the melee team. It's their responsibility to deal with the Coilfang Elites (or 'Nagas', for short). When they spawn, a tank should call their location, pick them up, and drag them to the center of the room. This needs to be done quickly before the Naga peels off and kills a healer. To complicate matters, they do cleave, so all players need to make sure they're not in the frontal cone of a naga, or risk getting carved up.
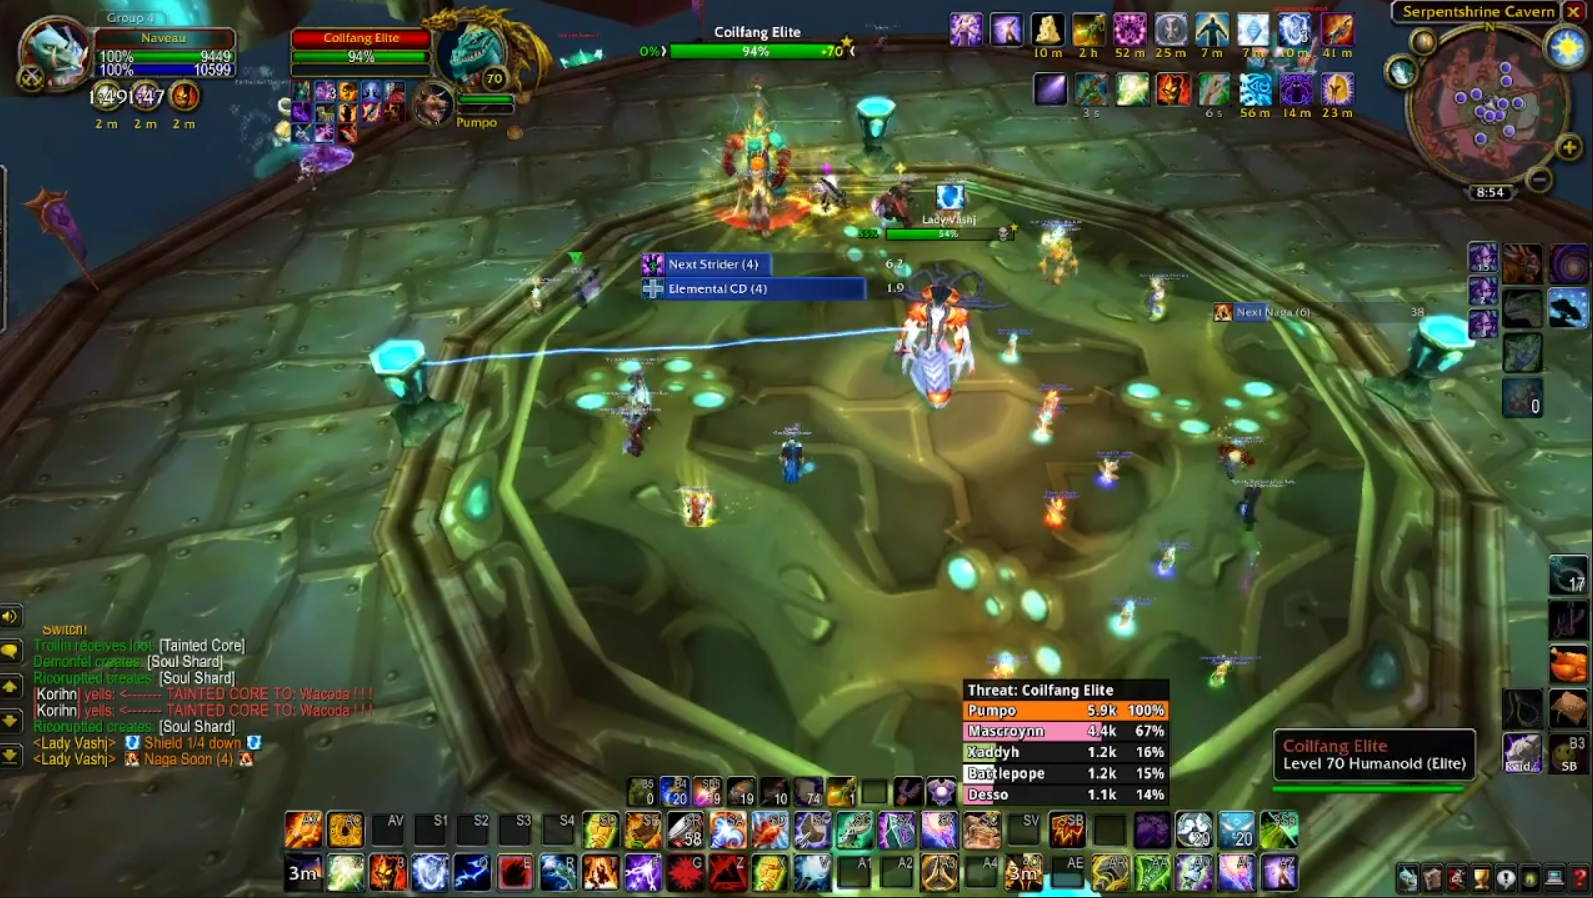
Nagas have a high health pool, so losing even a single melee dps can put you too far behind and dealing with multiple adds, which is usually a wipe. Melee need to mind their positioning and minimise the load they put on the healers, as it can sometimes be difficult to get line of sight. Wherever possible, they should stay on the inner platform to help with loose elementals and so they don't get feared by striders.
If melee players do venture out, they must also take care with their threat, as the Naga are very prone to turning around and smacking an overeager DPS before the tank arrives.
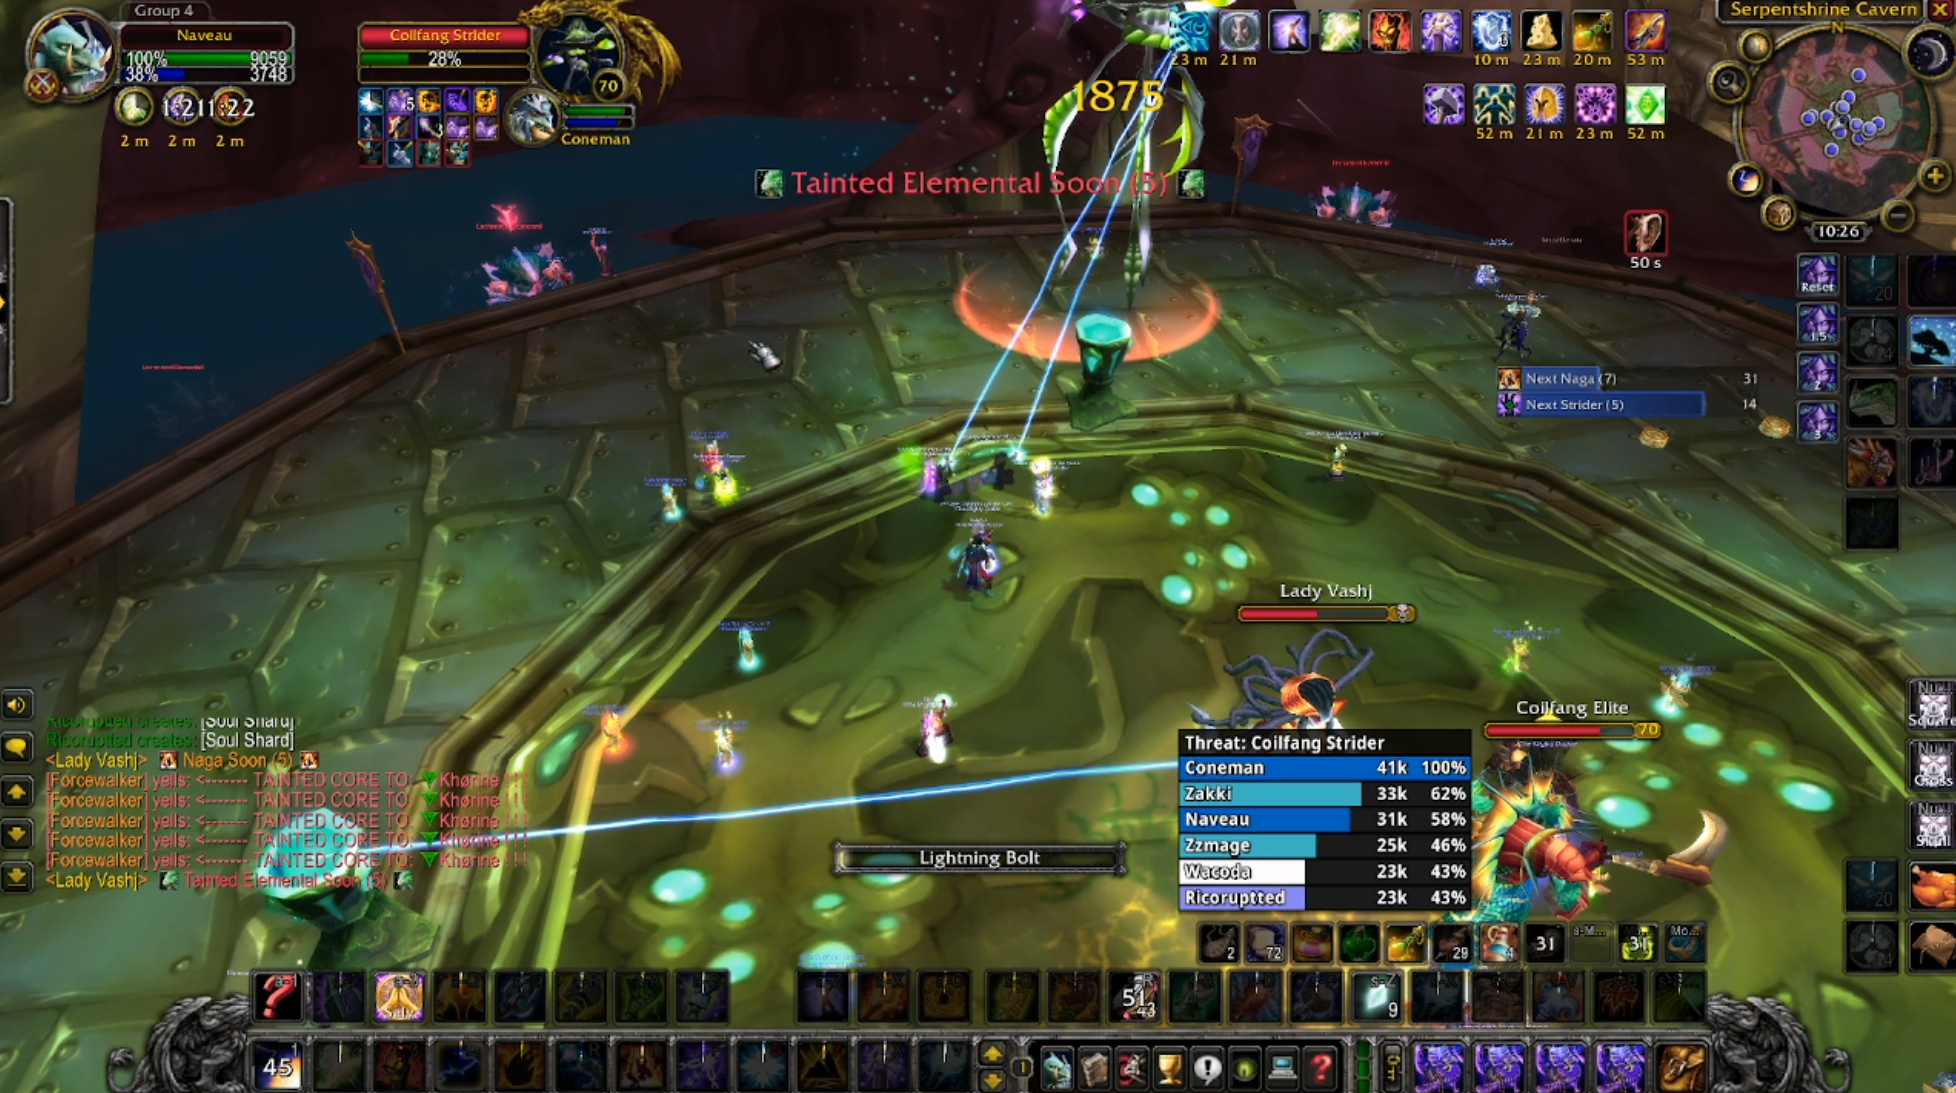
Finally there's the ranged team. Every sixty seconds or so, a coilfang strider will spawn. These mobs fear in an AoE around them, cast a mind blast and are untankable. They need to be kited whilst the rest of the caster DPS sit in the center and hose them down with damage.
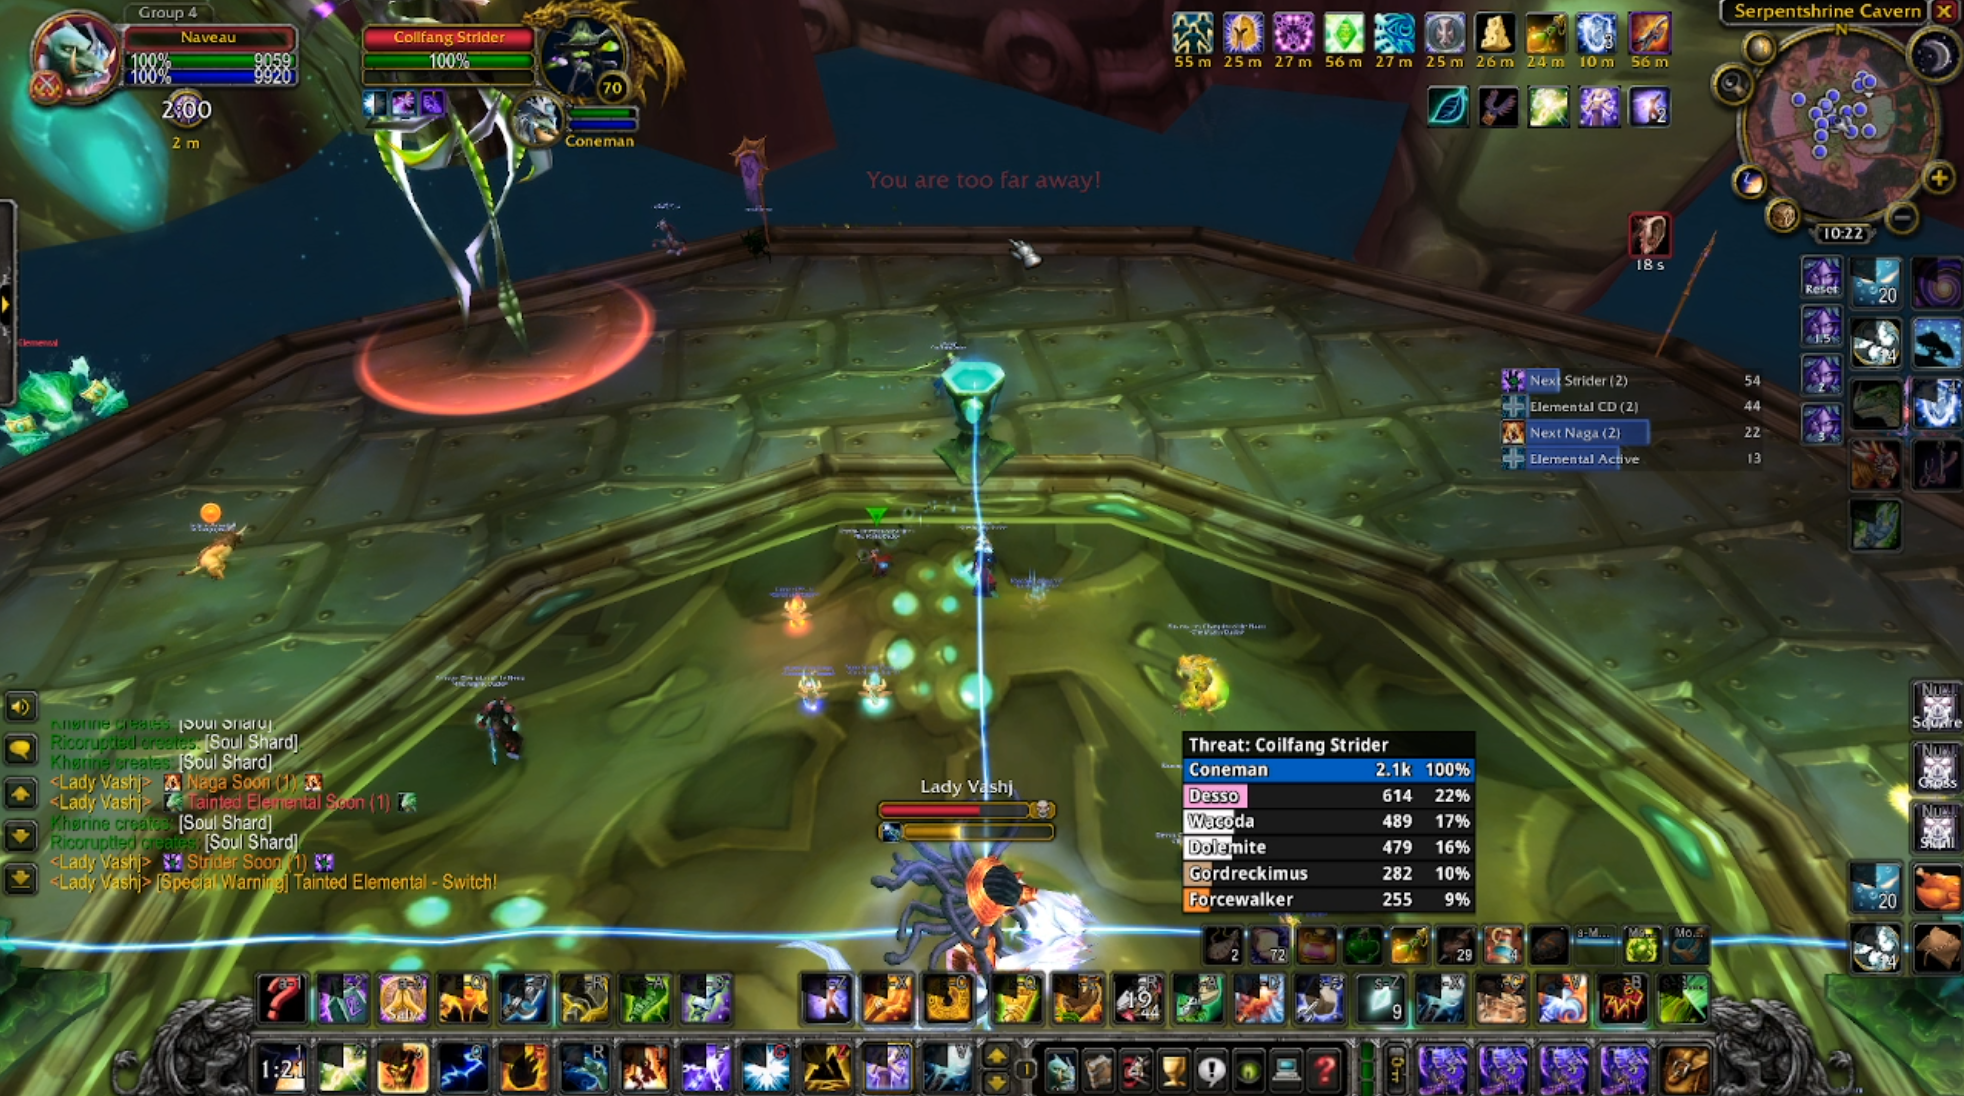
Normally, you could ask a hunter to do this. But all the hunters are otherwise engaged, aren't they? So the only class left that can really do it, is an Elemental Shaman. The combination of an instant cast slow, low cast time spells and earthbind totem makes them perfect for this job. It also separates the proper Eles from those who are just pretending.
It's very important that whoever you get (Elemental Shaman only) to kite the strider, that they take off any threat reducing abilities they may have. Normally that will just be blessing of salvation. Elemental damage is very low compared to a Warlock or Arcane Mage, so you'll be depending on casting often and taking advantage of the high threat modifier of Frost Shock.
I would recommend using a camera distance macro to override the original view distance, as the Strider model is quite big and it can be quite difficult to judge the distance. If the Strider touches you, its noodly appendage will kill you, so there's no room for error here.
It's also recommended you have folks with netherweave nets. Coordinate so that your nets don't overlap and when a Strider gets immobilized, use that opportunity to pump threat into it to keep aggro. Remember, the casters in the middle aren't moving anywhere near as much as you, so you have to really work for that threat.
If you're a caster in the middle, your job is the same as the melee - maximise uptime on your target, to make sure you clear it before the next spawns.
As you can imagine, this phase is terribly chaotic - there will be groups of people communicating to each other at once, so the key is to make sure you're effective and concise. And spare a thought for the raid leader who needs to keep an eye out for all these different interlocking components.
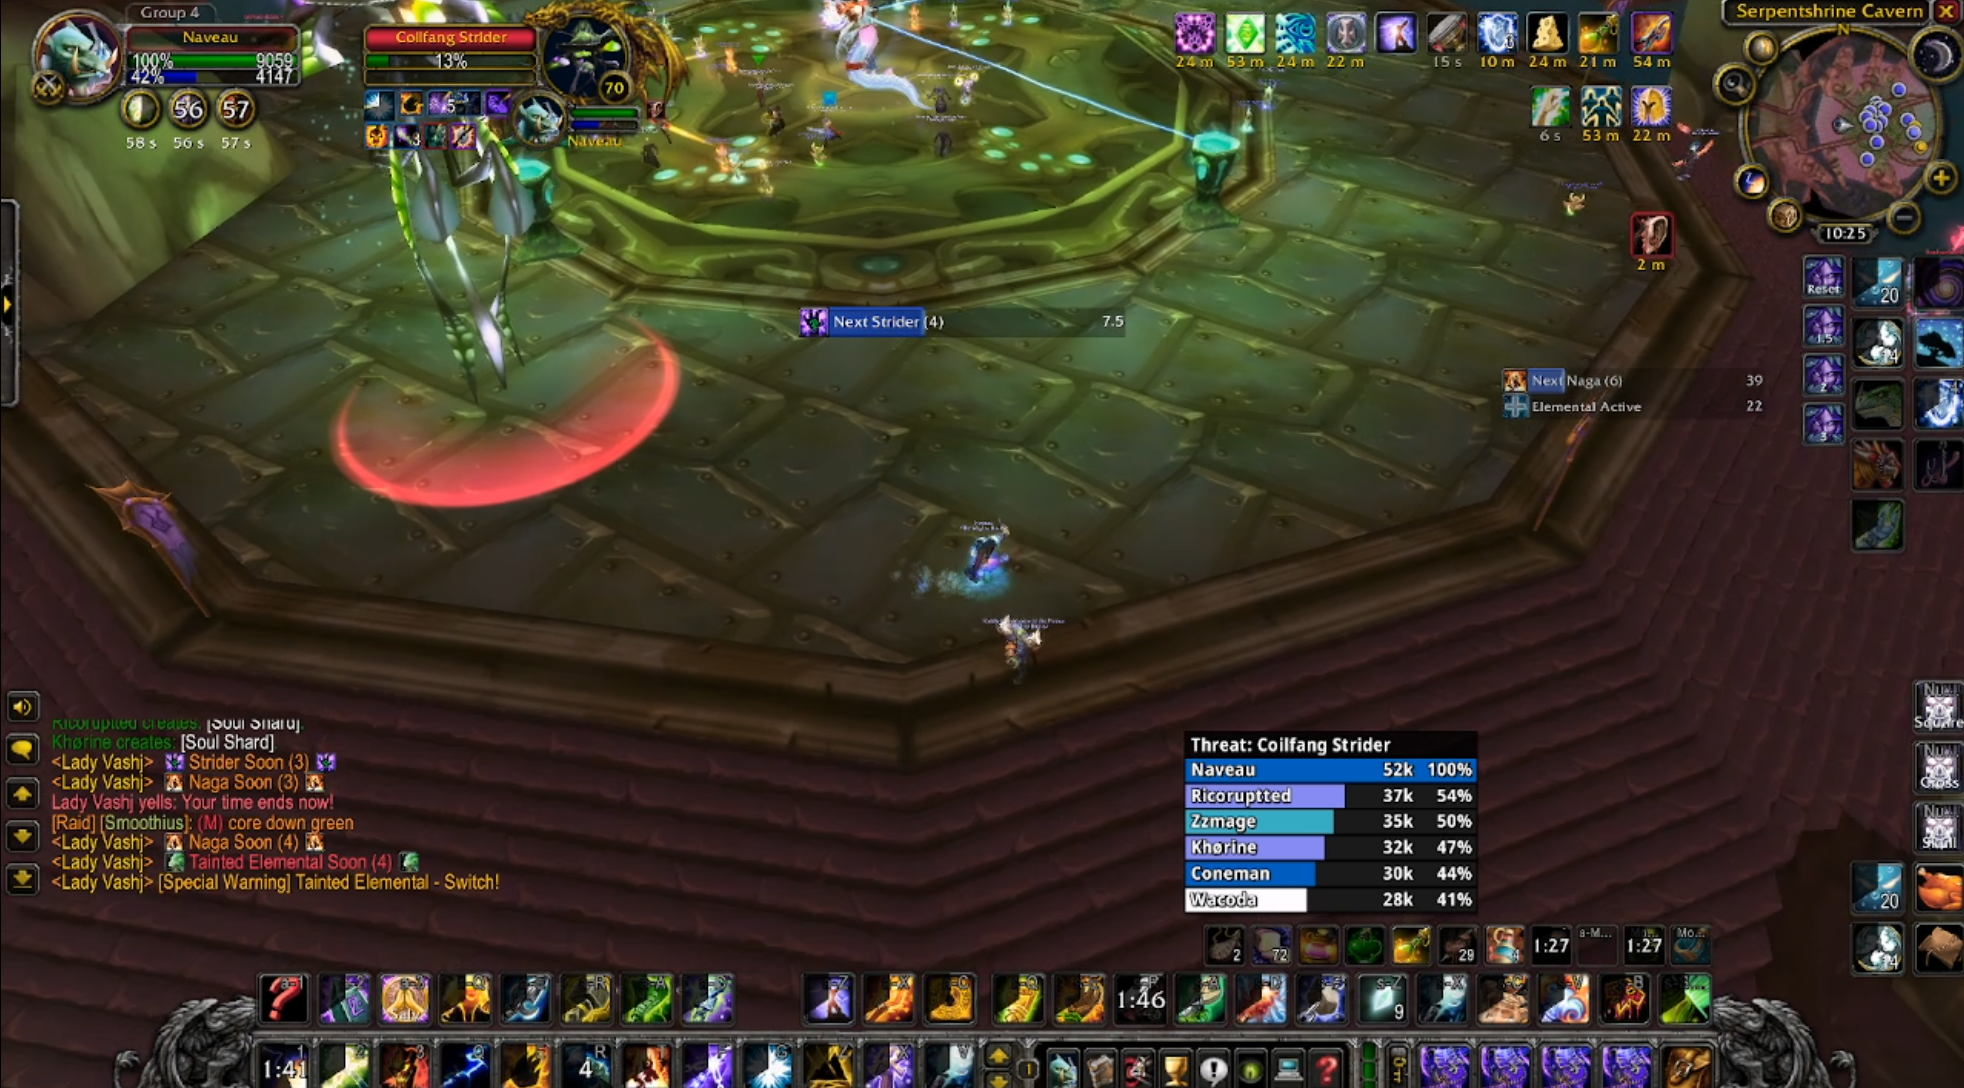
The aim is to put in the last core as you clear the Strider and Elite. Once you put the core in, these adds stop spawning. A clean transition with no adds and 25/25 alive gives you the best chance of a kill and each add that needs to be cleaned up before starting work on the boss reduces your chances.
If everything is working as it should, then you should be able to transition the boss after the fourth strider has been killed. This leaves a ten second window before the sixth Naga spawns - yes, it's that tight. It can sometimes help to hold the core up rather than putting it in straight away to clear up adds.
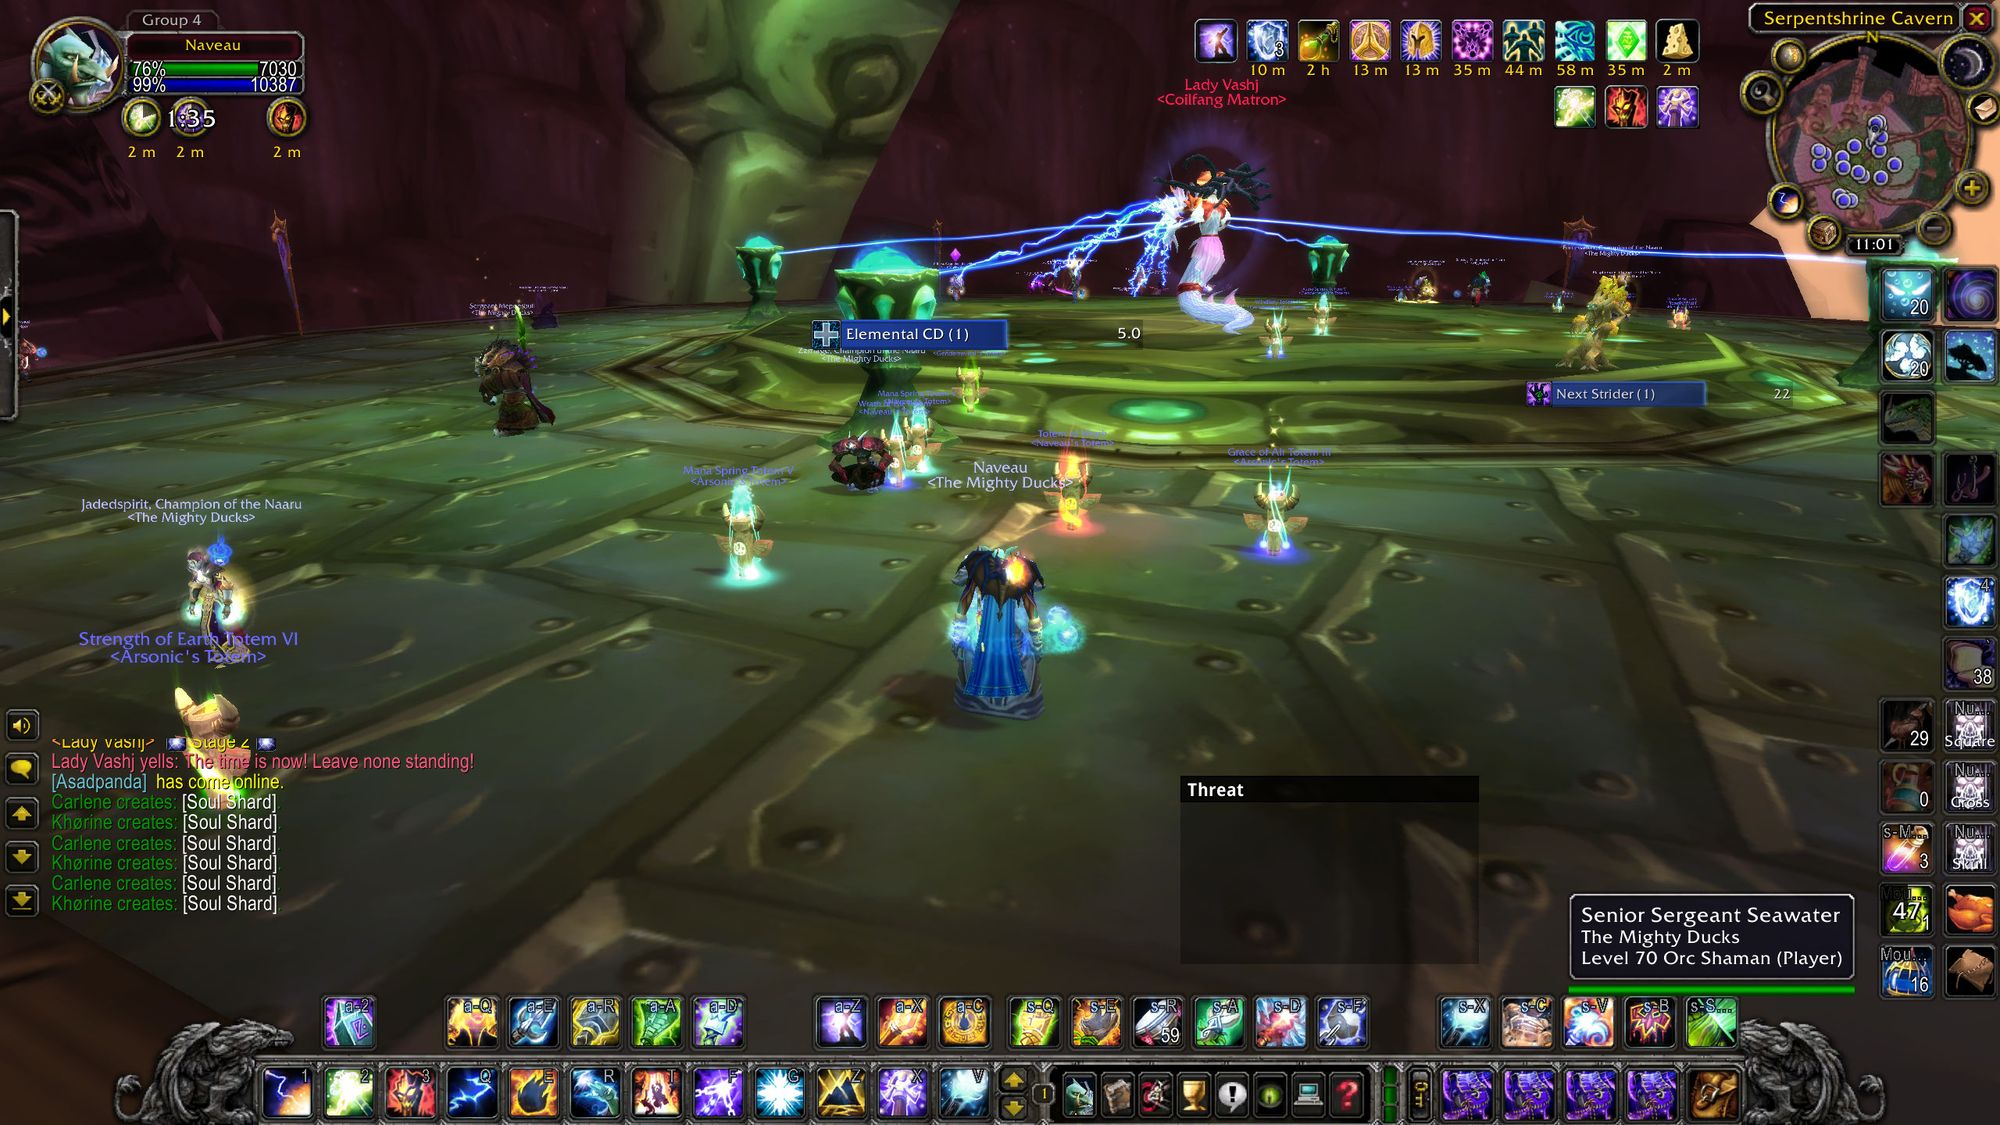
The next phase starts as soon as you put the last core in, so you'll want to communicate to your raid to get into position for phase 3. That is, a loose spread around the boss.
Tactics - Phase Three
The last phase is a DPS race. The boss will resume stunning the tank, shock blasting and multi-shotting players and ensnaring melee range players. There are two new mechanics, however.
The first is Sporebats will appear overhead and start shooting poison goo (called "toxic spores" in game) at players. This will create a lingering particle effect around the target, which will kill a player in three hits. Deadly boss mods will tell you when you're about to be hit, which will allow you to move. It does tick on contact, though, so you have to move early.

Where this can really get you into trouble is when a player is ensnared in toxic spores. This is normally a death sentence, but if your paladin is alert to this outcome, they can sometimes save you with a timely blessing of freedom. Druids can also shapeshift out as well, though this is only likely to be relevant for a bear tank, as feral cat DPS is largely unrepresented in TBC's rigid meta.
Encourage your players to make liberal use of healthstones to minimise healing load. You should be doing that anyway, but it's doubly important here.
The second mechanic (Editor's Note: Which was removed postnerf...) is persuasion - a target mind control which jacks up a player's health, damage, healing and run speed. If a healer gets this, the volume of healing they can pump into Lady Vashj will push the DPS race out far enough that it will be impossible, so you may need to kill and interrupt healers that get mind controlled close to the end of the fight.
Players that get mind controlled can be taunted, but not stunned or crowd controlled. You must manage them, which can be tricky. However, you can reduce the number of players that get mind controlled using the thornling seeds farmed from Dire Maul.
The boss counts a thornling seed as a valid target for persuasion - if enough players drop a thornling seed at the start of the fight, you can significantly reduce or eliminate entirely, the chance that players get mind controlled. This is dependent on luck, and you won't have enough thornlings for the whole fight, but it can put you in a good position with everyone alive to kill Lady Vashj.
You will want healers and tanks to drop their seeds first on the outer ring of the platform, then after they expire, have DPS drop their seeds in the same place.
As for the race itself, you want to have everyone loosely spread and start the fight on the inner platform. You'll want maximum attack - bloodlust, DPS cooldowns, potions, etc. When the middle starts to fill up with toxic spores, you'll want to move the boss to the outer ring and start moving slowly around the outside. Don't clump, or you'll lose multiple people to toxic spores.
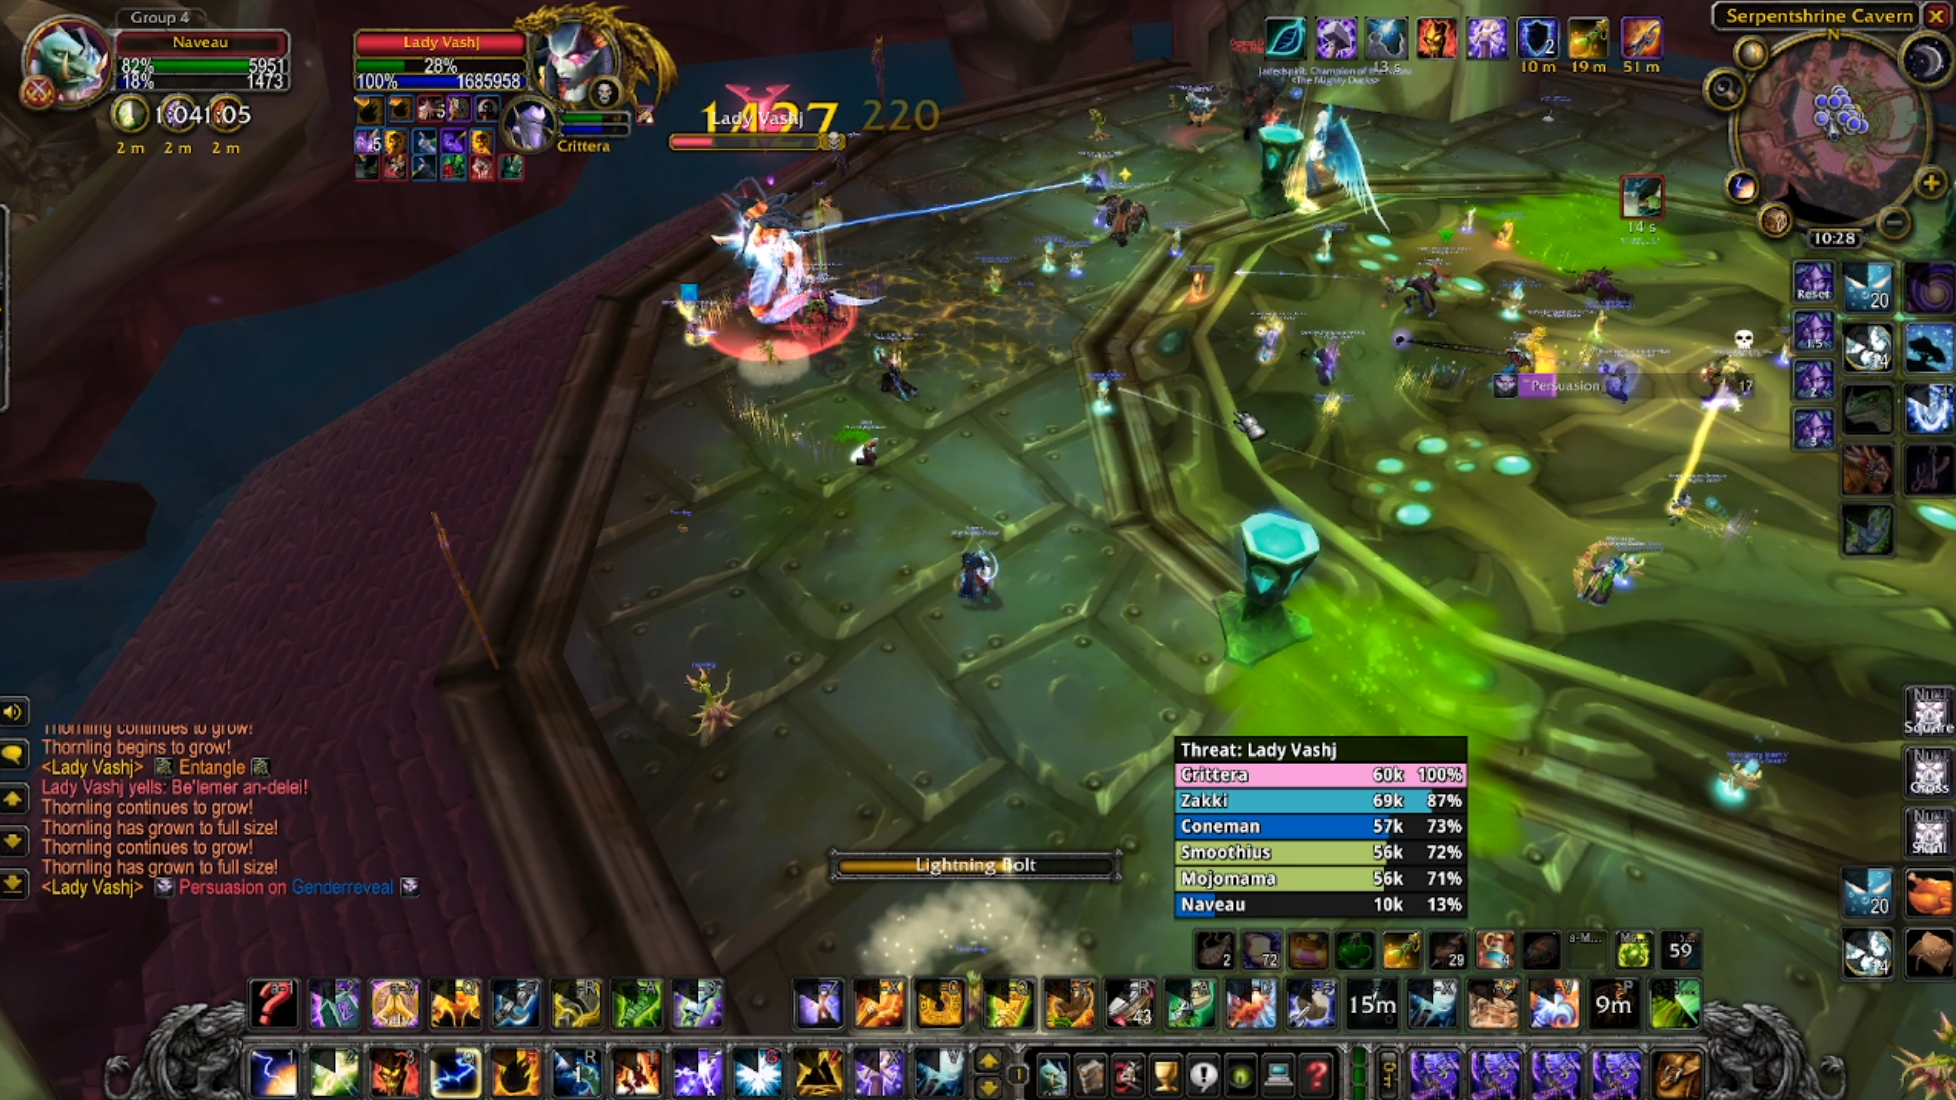
The outgoing damage is crazy high, so expect to lose people to multi shots, shock blasts, picked off by persuaded players and toxic spores. But, if RNG is on your side and you put up the biggest numbers you can, you can kill this boss.
Don't be shocked if this takes you many wipes to get right. But it's the challenge of cracking the shell that makes the meat so sweet. Enjoy your victory when it comes, and give yourself a pat on the back for beating one of the hardest bosses in TBC in one of the hardest raid tiers.

Conclusion
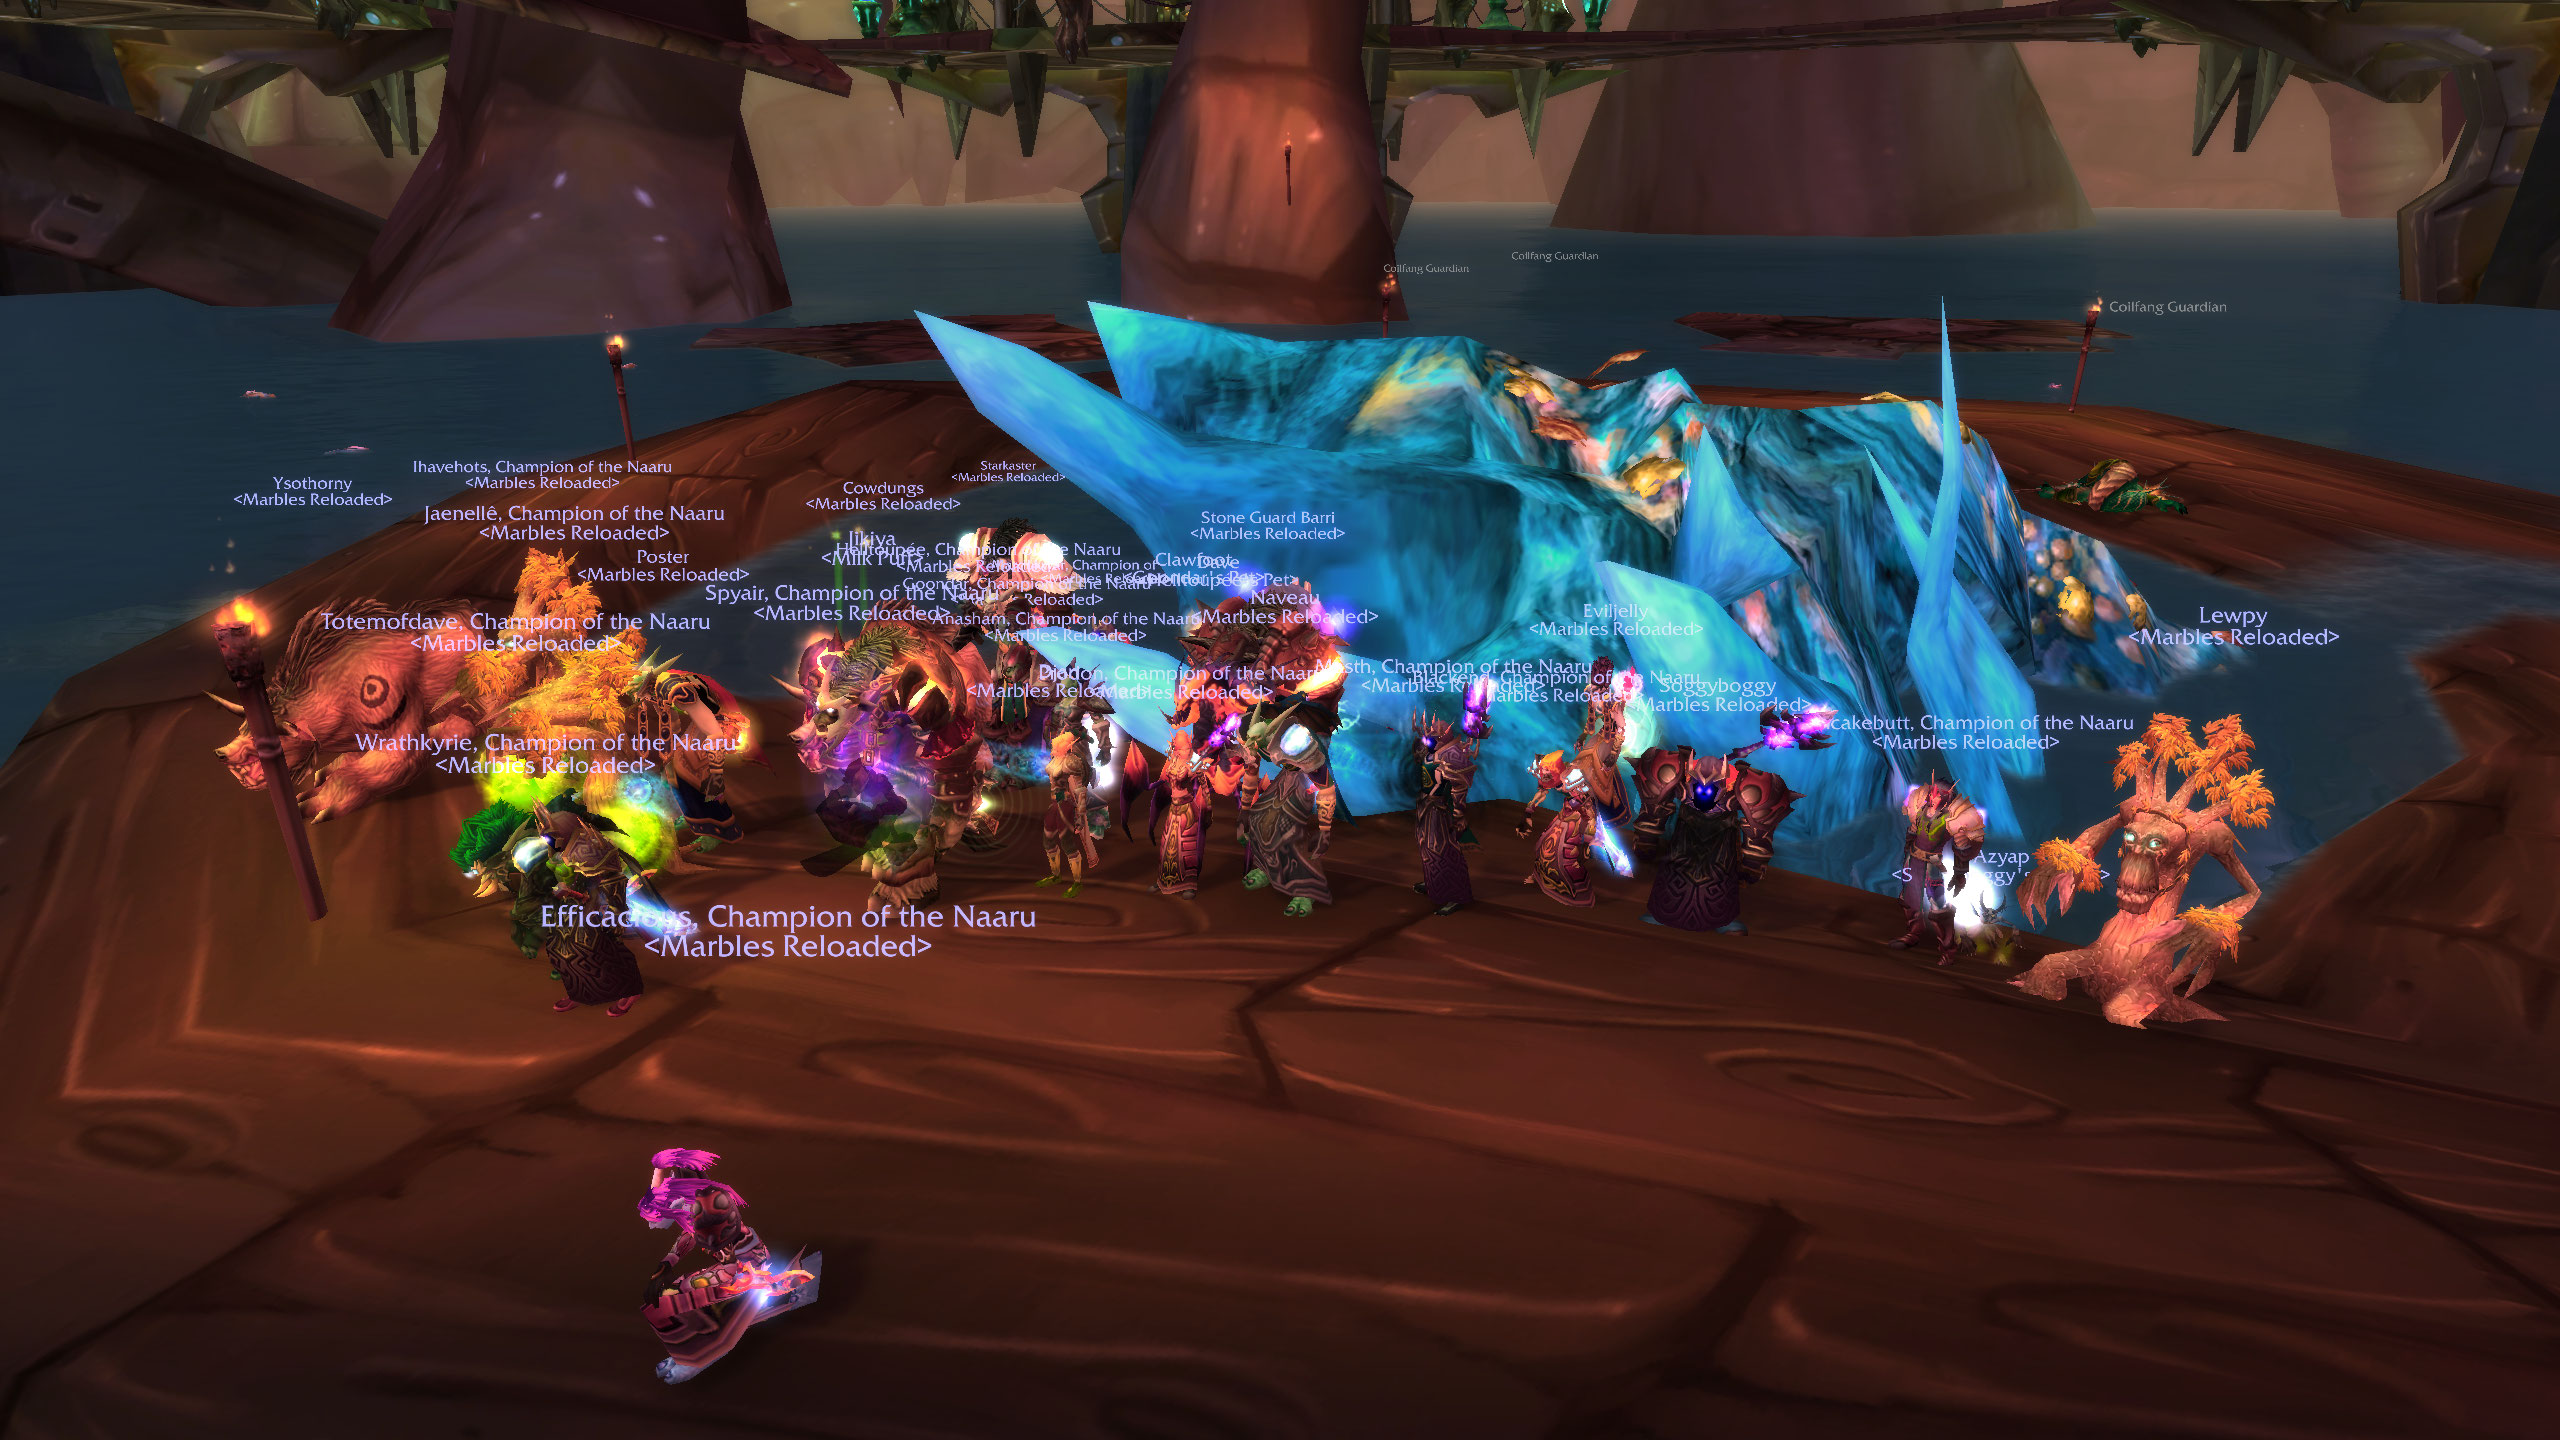
Serpentshrine Cavern (and Tempest Keep, but more on that later) was, up until Phase 5, the hardest content prenerf I had ever done. It was made all the tougher by having a limited amount of gear, delivered in small quantities, by the time phase two dropped. Players will long forget that Gruul and Mag dropped a single token each. Gearing up 25 players was done at glacial pace and most raid teams, with the exception of those who had momentum out of classic, were behind the eight ball.
Serpentshrine Cavern marked a hurdle most guilds just could not cross. They were too thin, too small and the playerbase saw a mass exodus as guilds and players came up against this incredible wall they'd not seen in a long time. With the exception of Sunwell Plateau, pre-nerf SSC and TK are the hardest content chunks I have ever experienced. But I'm glad I got to tackle them when they were at their most oppressive.
Even now, you cannot find mention of the infamous mind control mechanic Lady Vashj had. It's just a memory now. But that's why this blog exists. To remind you that at some point, the Coilfang Matron was a beast that stopped guilds cold.
At the tail end of phase two, Serpentshrine Cavern was nerfed and the health pools shrunk and the difficulty went with it. But it was still a marvellously atmospheric and aesthetic raid. Just without the undercurrent of danger that added a pinch of nutmeg to the otherwise bland rice pudding.
And, dear sister, if you ever read this, just know. I did it.
Additional Resources
First is a post-nerf run of SSC and TK as an Elemental Shaman. It doesn't really reflect the true nature of the instance, but gives a general idea.
The second is a prenerf kill of KT and LV. Note the high time to kill, mind controls and coordination requirements.
Catch you next time,
Vulkan
Did you like this article? Did you hate it? Go over and keep the discussion going on the official Vulkan's Corner facebook page! - whilst you're at it, leave a like!
