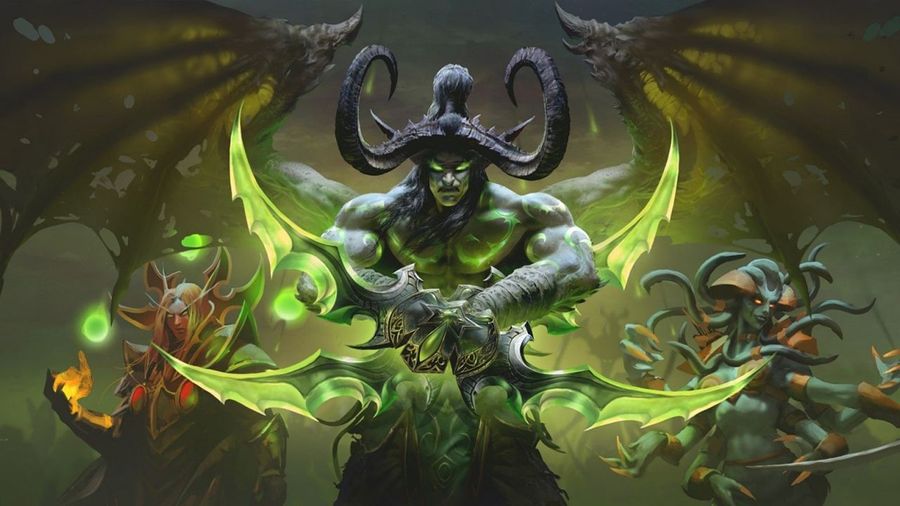
So here we are, at last.
For me, Sunwell Plateau felt like the end of a journey that started eighteen months ago. As a baby shaman in the valley of trials.
Little by little, I crawled to 70. Burned the midnight oil. Battled it out in Serpentshrine Cavern, Tempest Keep, Mount Hyjal and Black Temple. I survived a guild disintegration, mismanaged the rebuild, and worked my way through benchings, and sackings, to have my time in the sun with the Ducks.
And my reward was to be given the biggest mountain to climb of them all.
Sunwell Plateau, pre-nerf, is the hardest content I have ever done. It truly is off the scale. The outgoing damage is titanic, the gear checks are nutty, and all the while, attrition was the highest it had been across the entire expansion. Players were quitting the game left right and center.
Part of what makes Sunwell so difficult, is the boss design. Frequent readers of this blog and my raid reports, will note that often a boss will be a DPS race, or a battle for survival. Archimonde, for example, is a battle for survival, but not a DPS race.
At least four of Sunwell's six bosses - Brutallus, Eredar Twins, M'uru, Kil'jaden - are both a DPS race and a battle for survival. And they are all positively nightmarish in their own way.
Beyond just being difficult, SWP also represents the culmination of a guild's ability through the entire expansion to consistetnly farm and gear up their raid. For guilds that ran splits and had lots of looks at the loot table of Black Temple and Mount Hyjal, their reward was nightmarish difficulty.
For those that didn't, climbing the wall was simply impossible. You might have the gear to get Kalecgos - but past that point? Forget it.
And whilst all of this sounds very scary, the harder the shell, the sweeter the meat. When we got in the grind, chaining wipes together, it was a total slog. But the reward of clearing the harder bosses in Sunwell have been some of the most euphoric moments in my recent memory.
The good news, is that there's no attunement process for Sunwell. In addition, unlike the original TBC, which required a certain number of dailies on the Isle of Quel'Danas to be completed in order to unlock later parts of the raid, it's completely accessible from day dot. Provided you can clear those bosses.
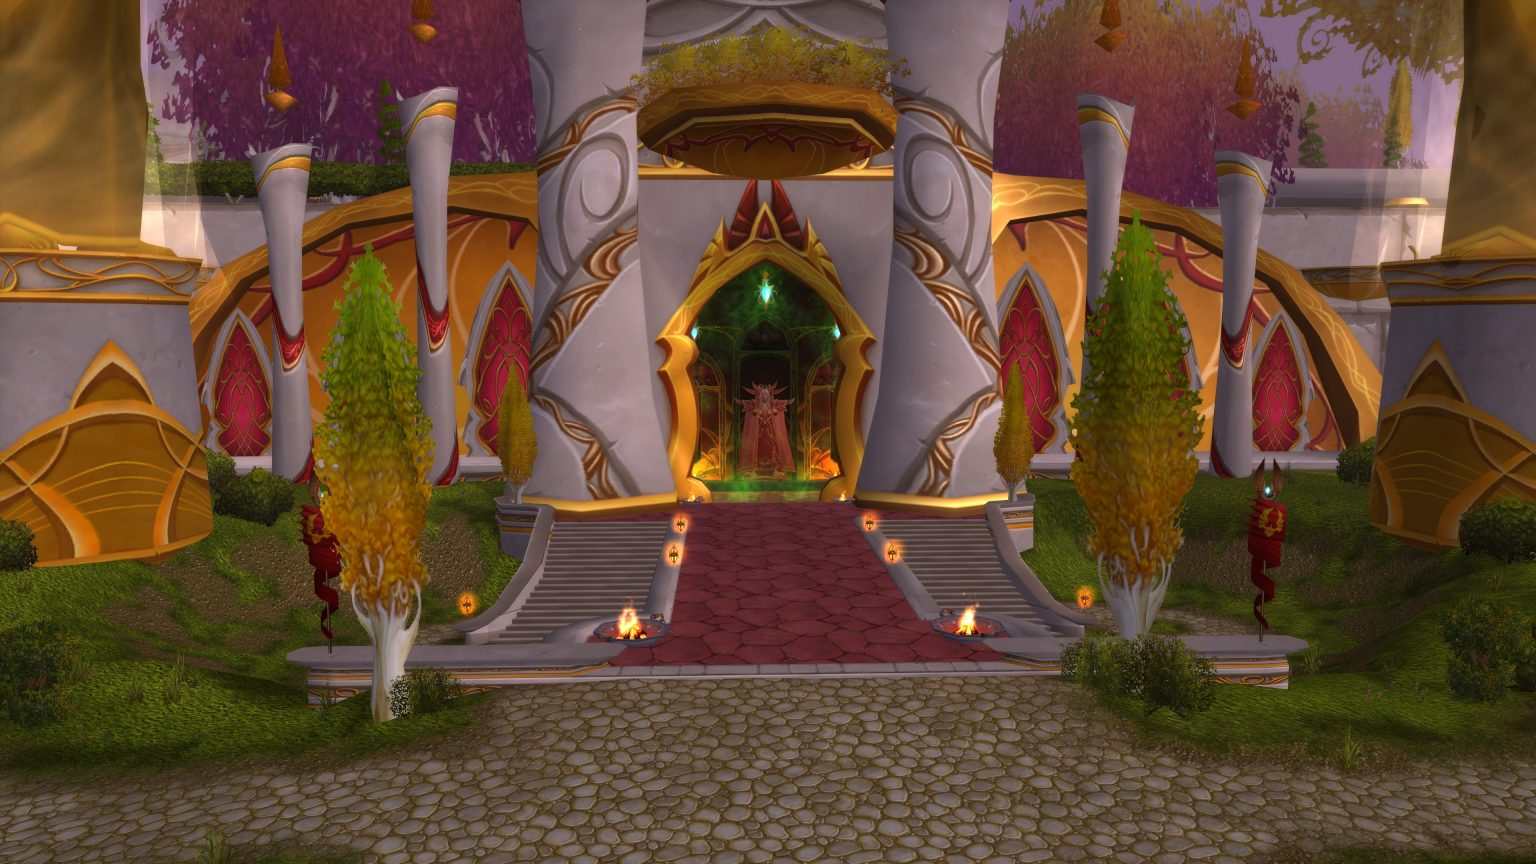
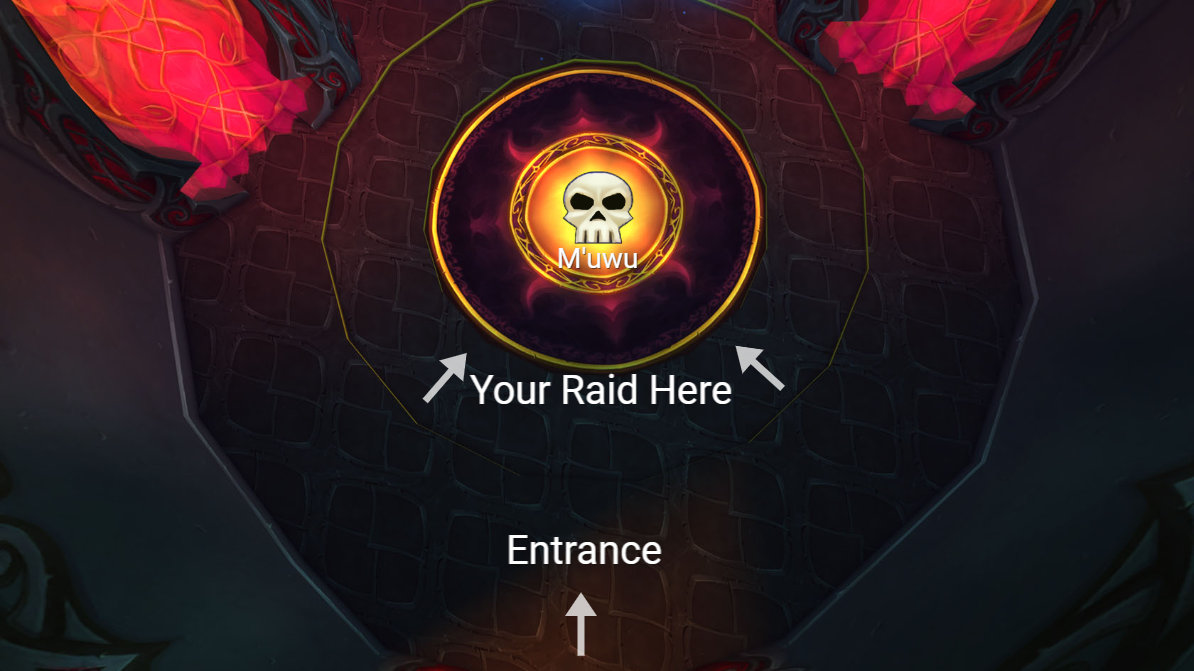
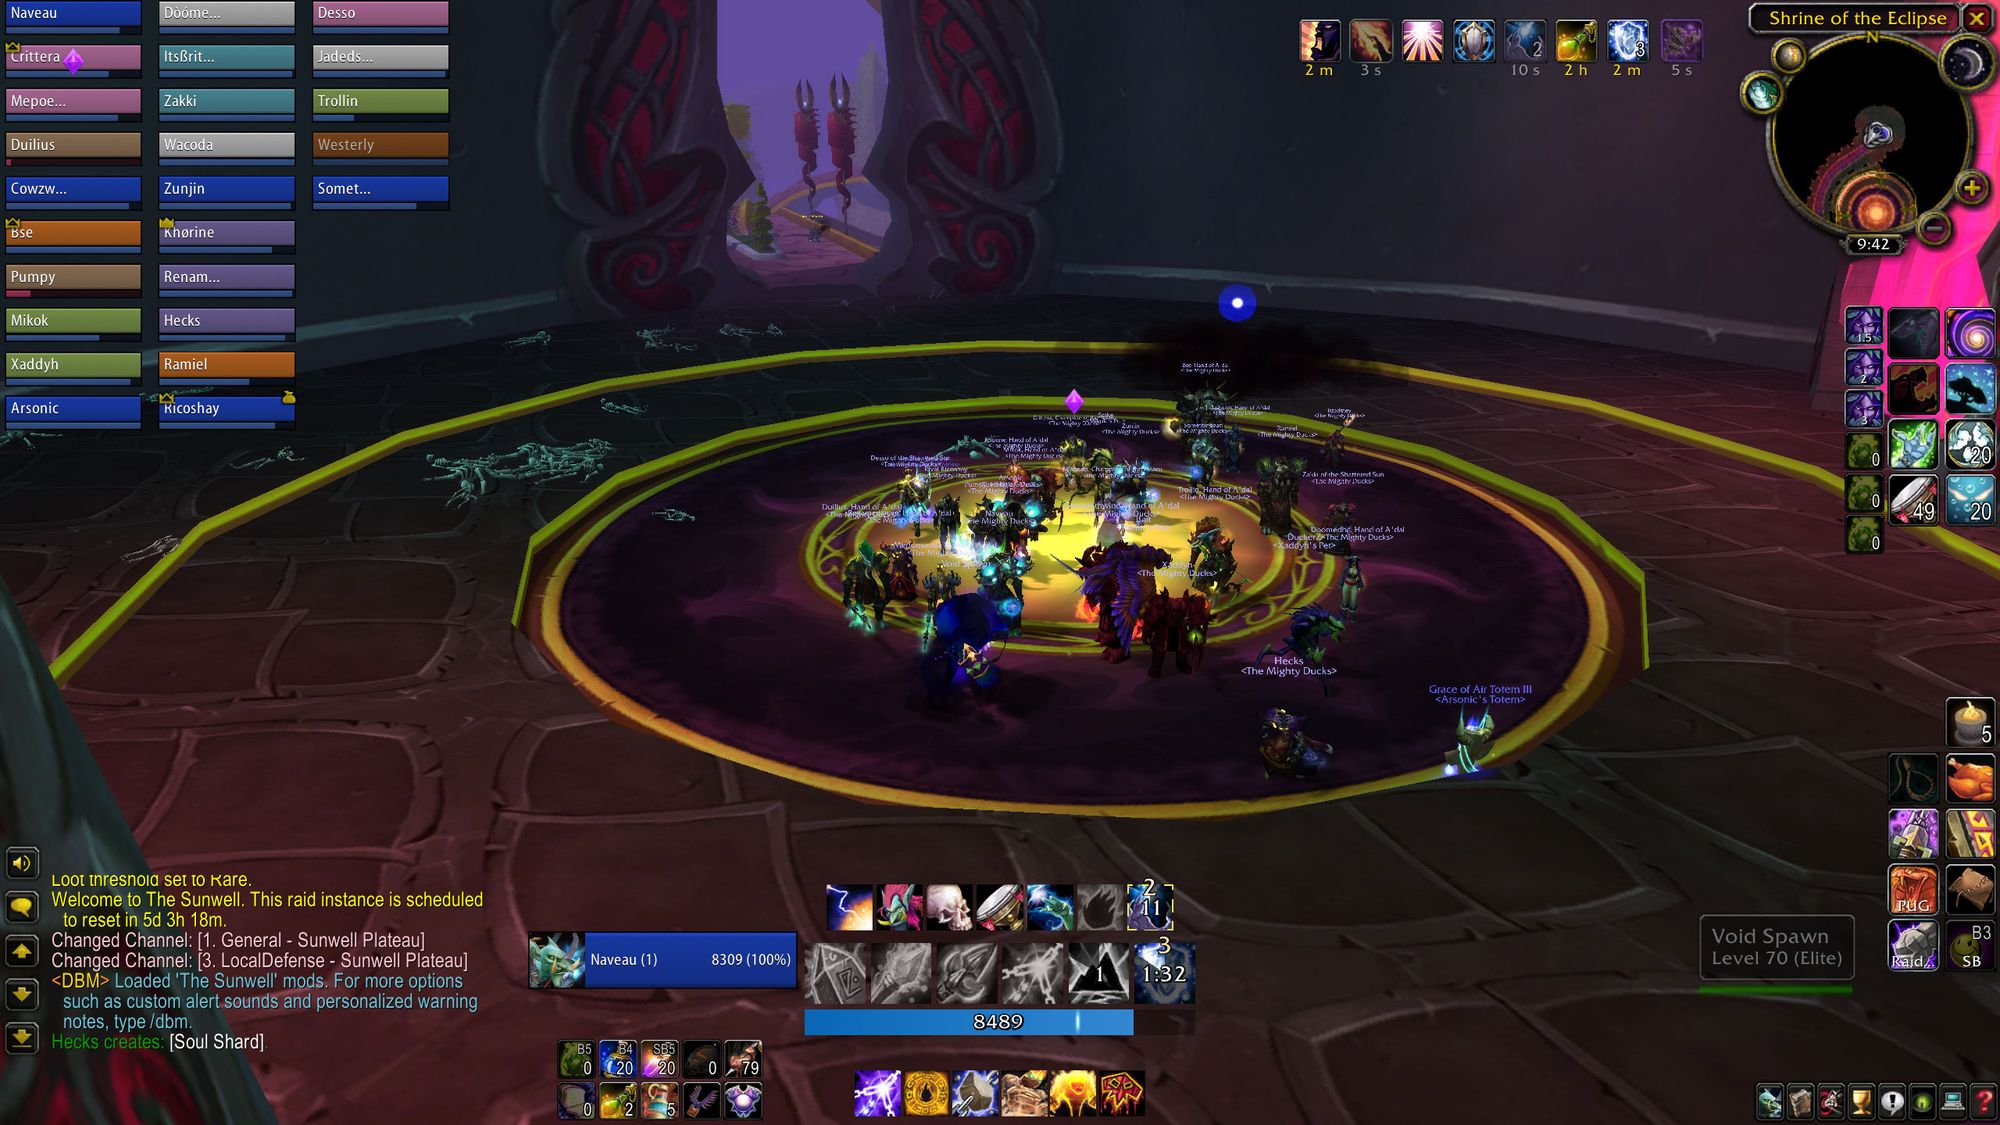
The raid entrance is smack bang in the middle of the isle. When you first enter the raid instance, you're greeted with a cute courtyard with benches - and lots of wounded Shattered Sun Offensive soldiers. A warning of sorts, for things to come.
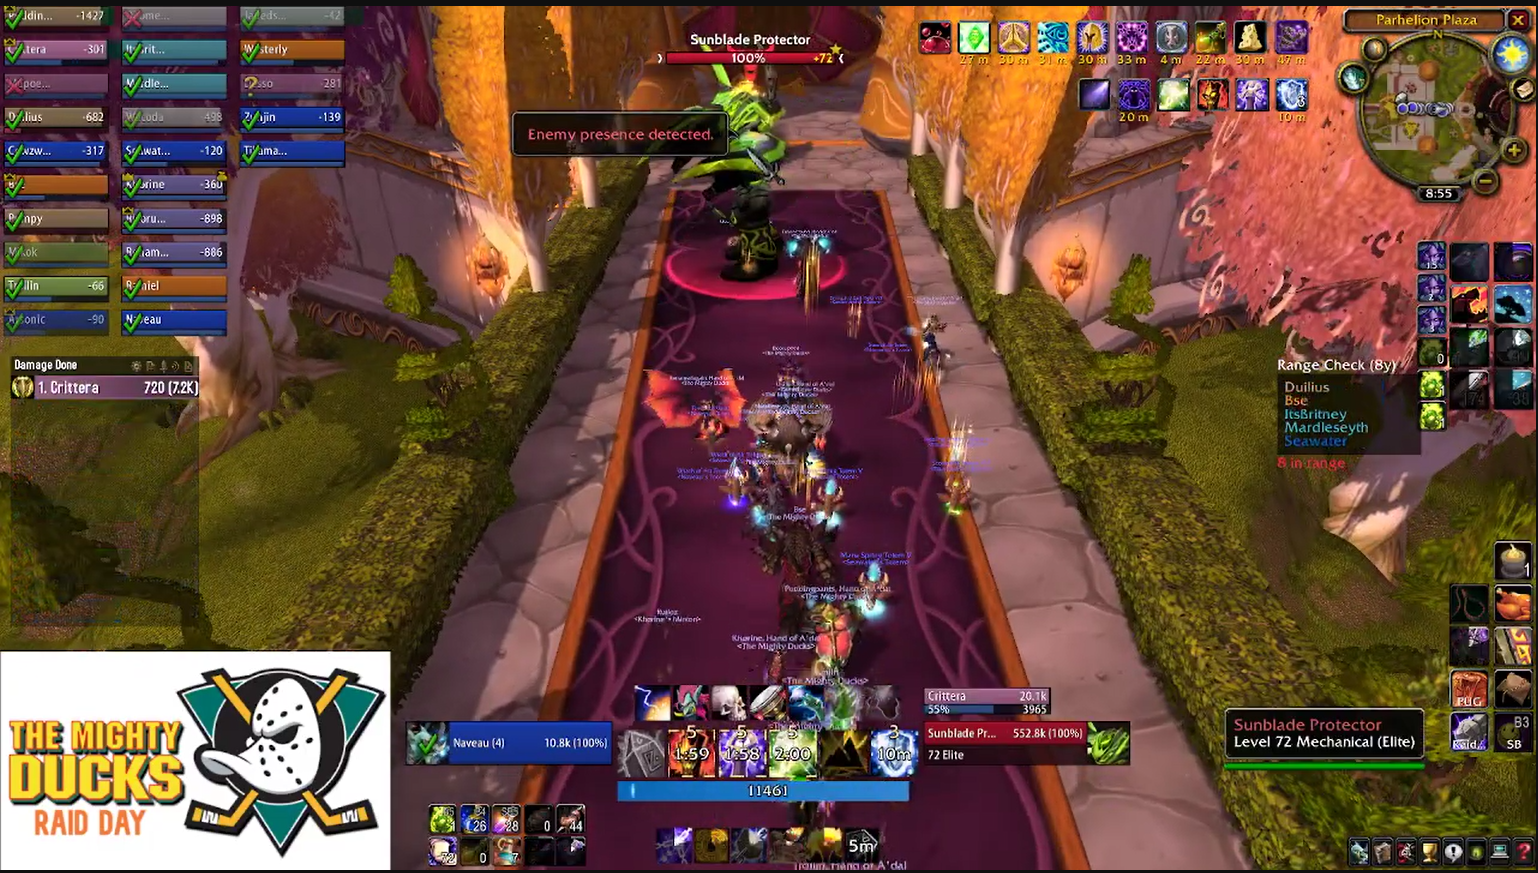
Beyond the first archway is where the violence starts. Much like SSC and TK, this trash is dangerous and requires your full attention. Starting with the Sunblade Protector, an arcane sentinel looking dude who smacks your tank and pressures the raid with Fel Lightning, a supercharged chain lightning (colour me jealous) which chunks eight members of the raid.
You then face two identical packs of trash. There are eight mobs in total, so your paladin is going to get a real workout here.
There's a cabalist, a generic caster mob who summons an elite imp friend, who should be crowd controlled at the earliest opportunity. There's a dawn priest, who casts an interruptible holy nova, a dusk priest, who fears, and two vindicators, who have a frontal cleave and belt your tank. Lastly, there's a sunblade slayer, which will target a player with Slaying Shot, which chunks a random player for huge damage, but not enough to kill them.
You deal with this pack twice, which then leads you into another courtyard - this time, it's full of baddies.
Later packs in this courtyard also introduce an archmage (or sometimes two) that teleport around the place, threat dropping and casting big aoe spells. In tight confines the damage can be absurd, so you'll want to either crowd control them or blast them down.
Additionally, these next two courtyards are patrolled by Sunblade Scouts. Much like the scouts from Zul'aman, these mobs will run to nearby deactivated Sunblade Protectors and wake them up. Dealing with a pack of Sunblade mobs and a Protector is a guaranteed wipe, so you will want your ranged players to coordinate, usually with a pull timer, to kill the scout instantly.
Unlike Zul'aman, though, pulling the scout also pulls the pack of Sunblade Elves, so the rest of the raid will need to be prepared to jump straight into action with crowd controls, interrupts and mob pickups.
The key here is coordination - your raid will need to practice working as a team, or spend a long time looking at the sky. Listen to your raid leader, pay attention, and you'll be fine.
To lower the risk of a Sunblade Protector ruining your day, you can also engage some that are in particularly precarious positions. In the first courtyard, the Sunblade Protector to your immediate left as you enter the room is a likely target, along with the two Protectors on the right wall after you clear the first pack.
You'll deal with two big packs of elves, as well as a smaller roaming pack with a dusk priest, dawn priest, and a vindicator. The room will then reach a hairpin, and you'll go back down the other side of the courtyard.
You'll deal with two more packs - the first is the most difficult, because line of sight is limited. If you want to play it extra safe, you can mind soothe the scout and then have a hunter ranged pull the protector on the right wall back into the first part of the courtyard - this increases the distance the scout has to run, which should be directly towards you, making it "easy" to clean up the pack.
Once that's done, you'll reach the last pack of elves in the courtyard. This is by far the easiest pull, as, again, the closest protector is toward you, meaning the scout turns into a lemming that can be chewed up by your ranged DPS. Crowd controls, interrupts, and practice, and you'll cruise through these two areas.
Head up the stairs and admire the view. You'll also question why the Sunblade Elves inside the Sunwell didn't do anything whilst their comrades (and demon allies) were slaughtered by player characters on the isle.
The trash here follows a pattern as it winds around the building. Every time you reach a covered gazebo-type platform, you'll deal with a bigger pack consisting of a dawn priest, dusk priest, vindicators and archmages. They can take some time to pop in, so be careful rocketing forward on your mount.
After each gazebo, there will be a smaller pack of four elves - nominally another dusk and dawn priest, a vindicator, and either a slayer or an archmage. If you can deal with eight mob packs in the courtyard below, you can chew through these relatively quickly.
You'll eventually make your way to a ramp leading upward, which leads into a small room with three entrances. Either side of the room is a pack of elves, and the exit heading toward the boss has a sunblade protector. If you're clever, you can deal with just the pack leading up and the protector, but if you're predicting a wipe (or several wipes) you'll want to clean up the elves on the other side.
You've now reached the first boss and dealt with the lion's share of the trash. Good job.
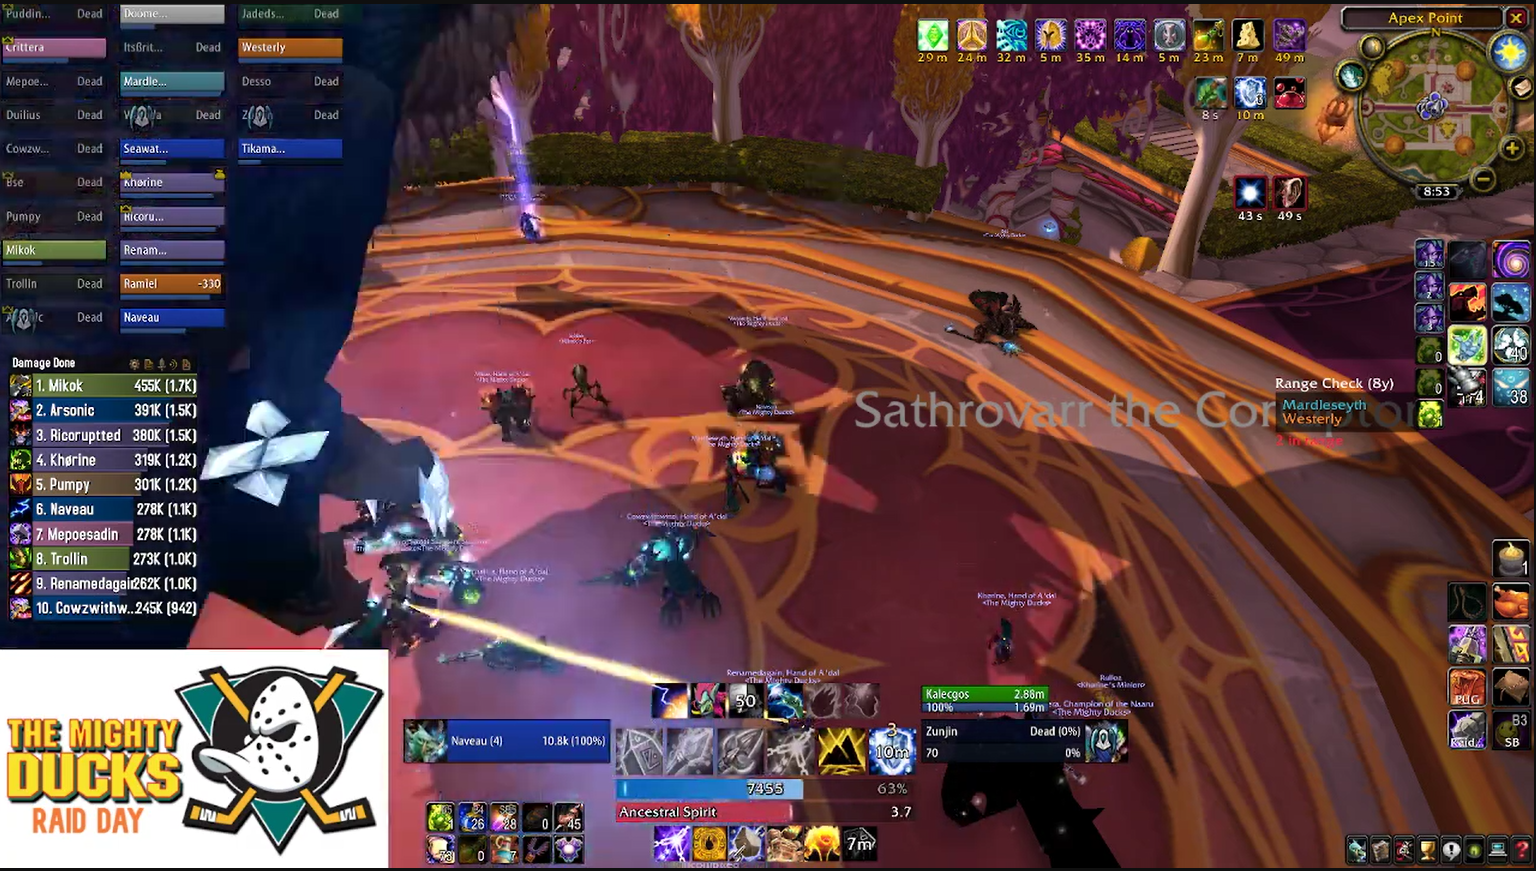
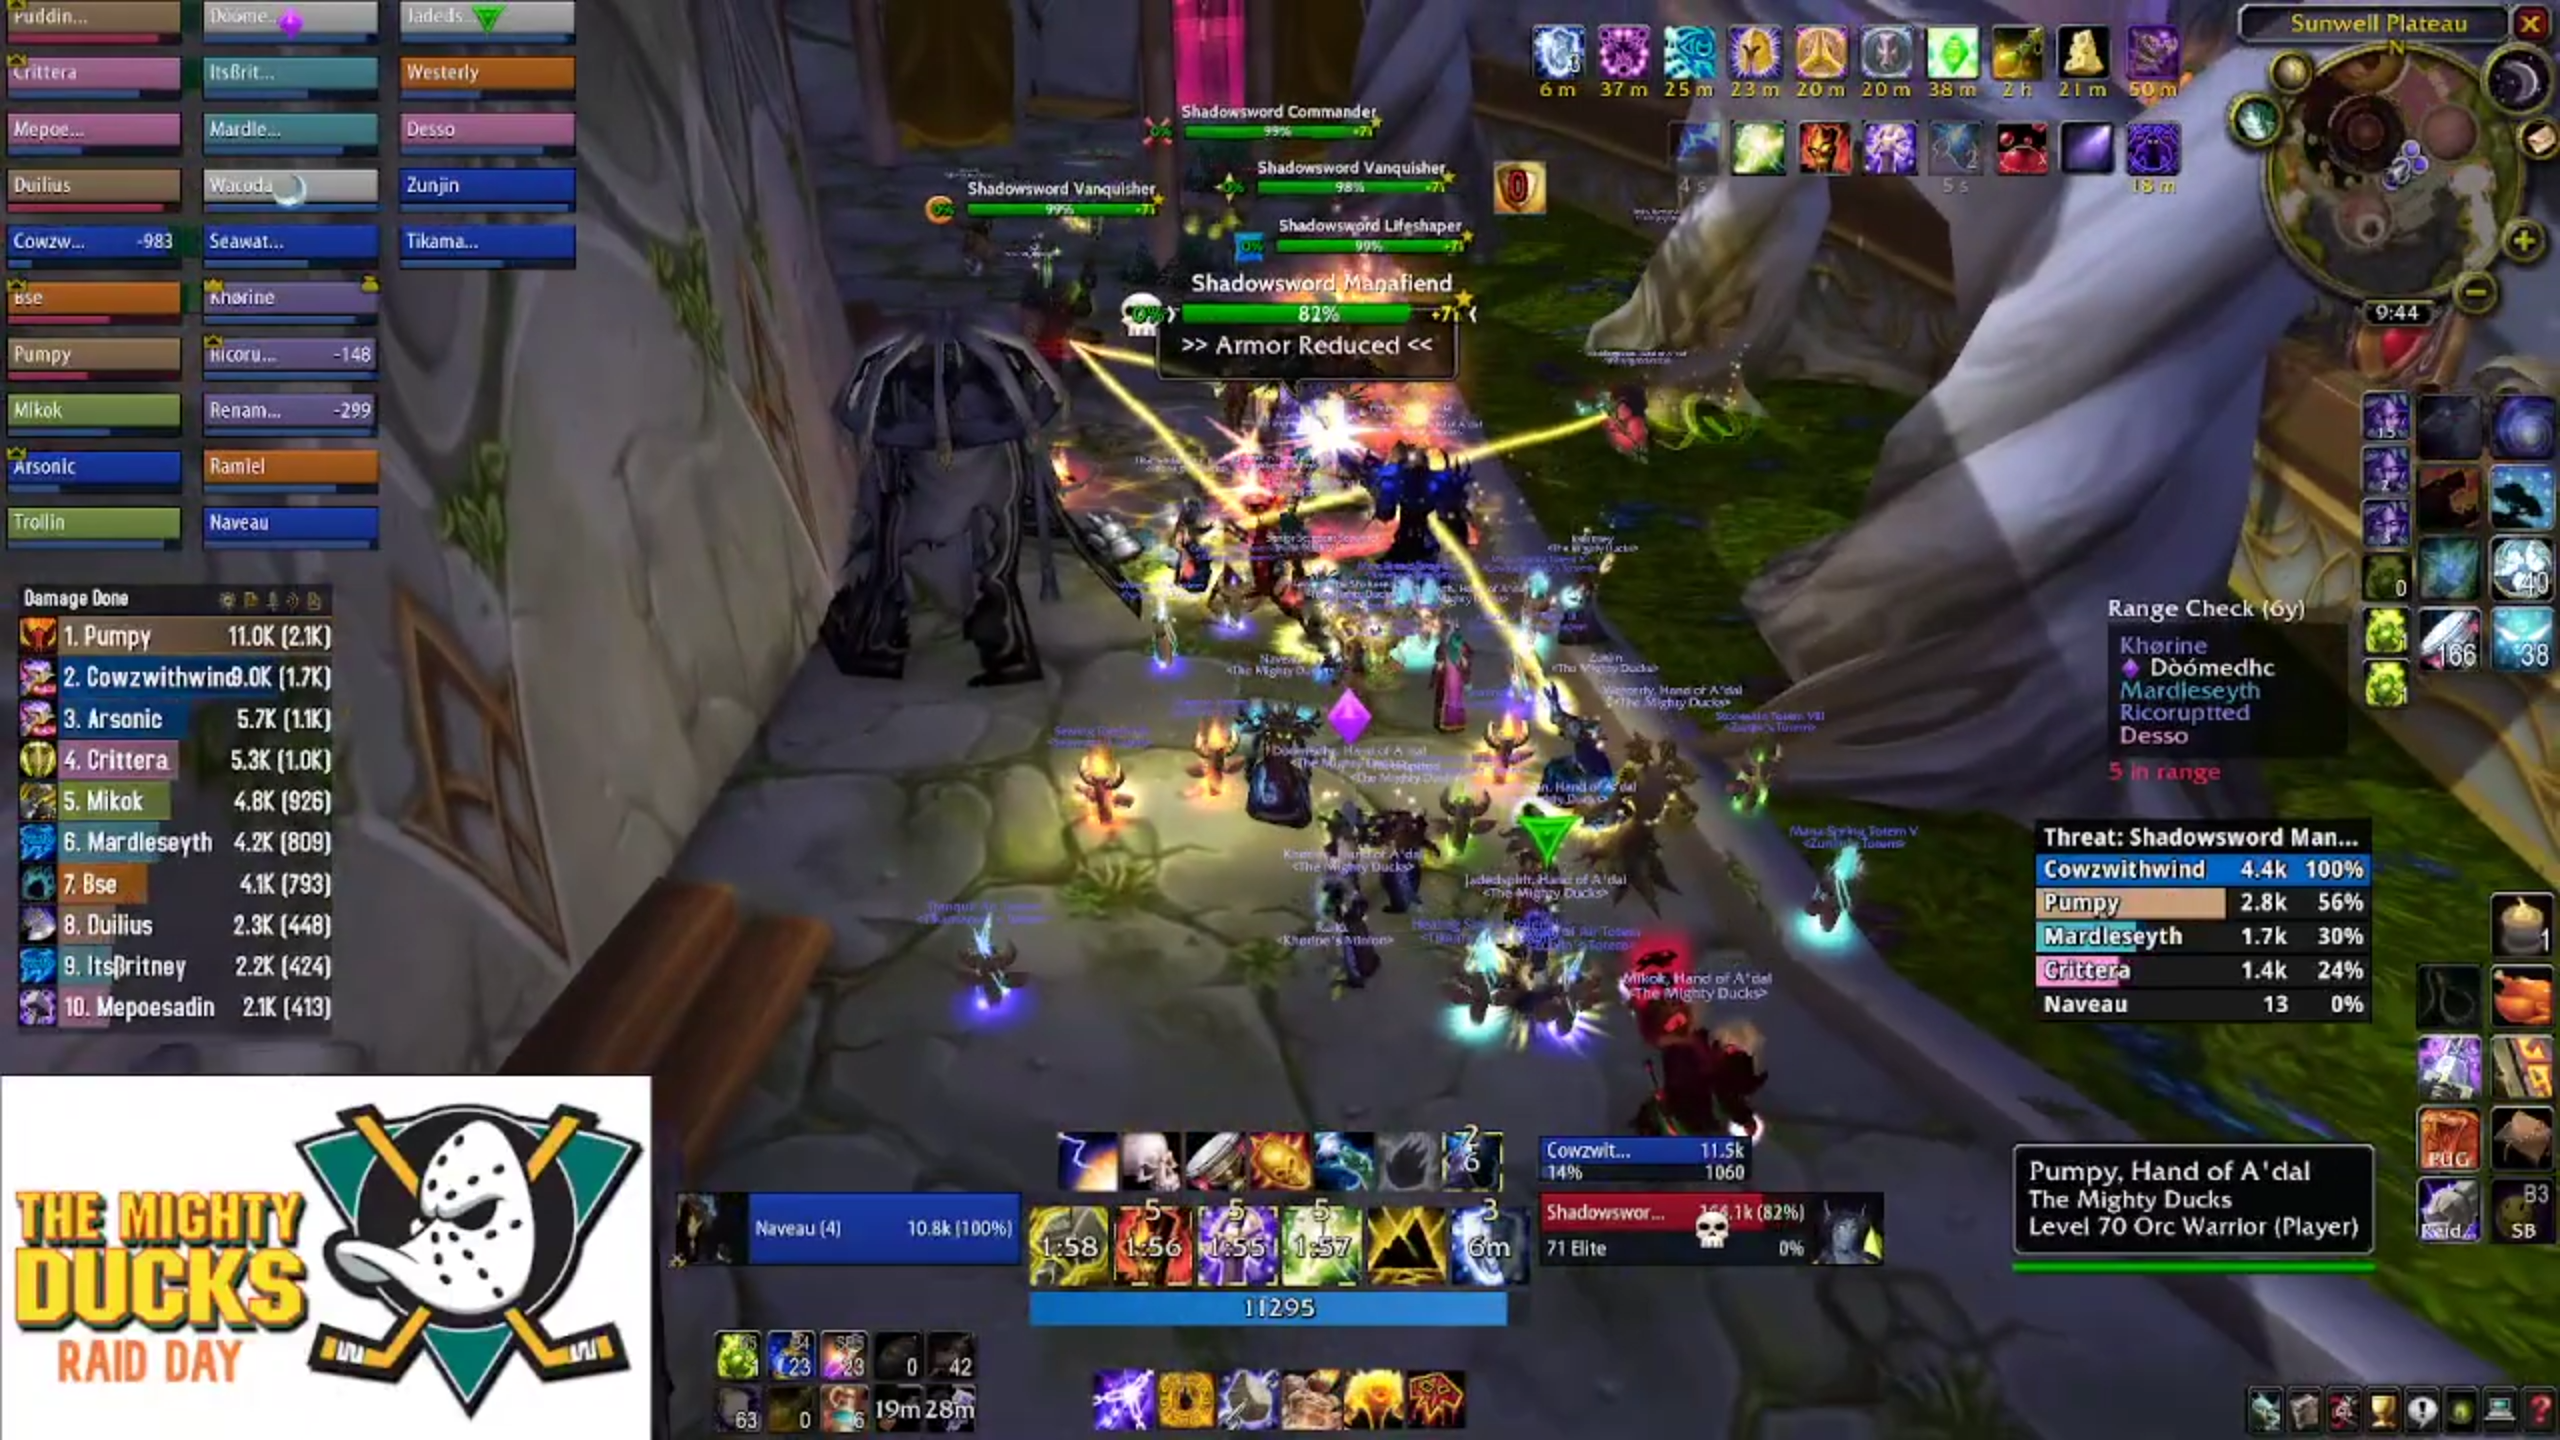
Boss One - Kalecgos
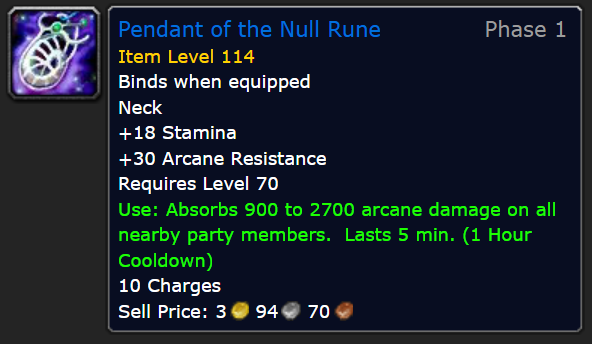
Before you start thinking about fighting Kalec, simp of the Blue Dragonflight, you will need to have Arcane Resistance gear. Once you have enough gear this becomes optional, but initially the amount of arcane damage this boss pumps out is oppressive.
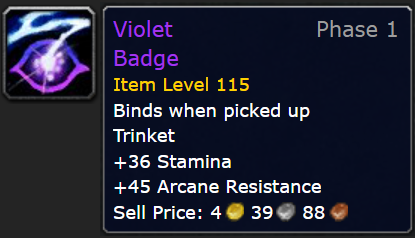
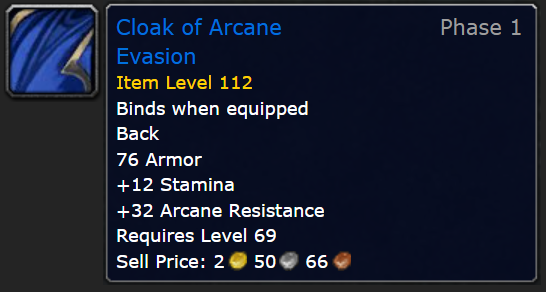
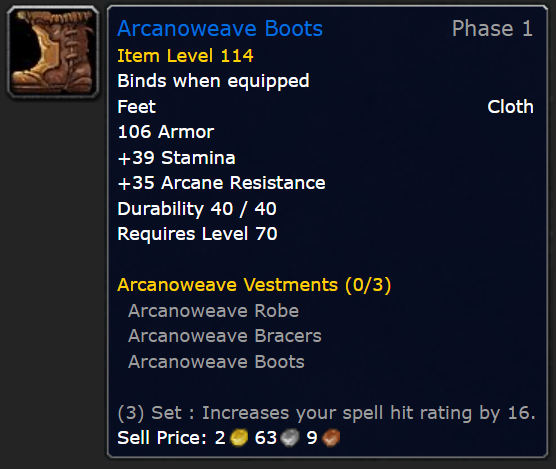
You have a couple of different ways to get there, but you want to aim for around 100 - 150 arcane resistance before buffs (which is just mark of the wild). Options include the Violet Badge, a quest trinket from Karazhan, the Arcanoweave crafted cloth set (particularly the boots), the Cloak of Arcane Evasion, and a crafted ring and neck piece.
You'll also want to have your DPS, tanks and healers split into four groups. You can number or letter these groups how you want, what you need to be clear on is who is in what group, and also have a contingency plan for your healers and tanks when things go wrong - and they will go wrong.
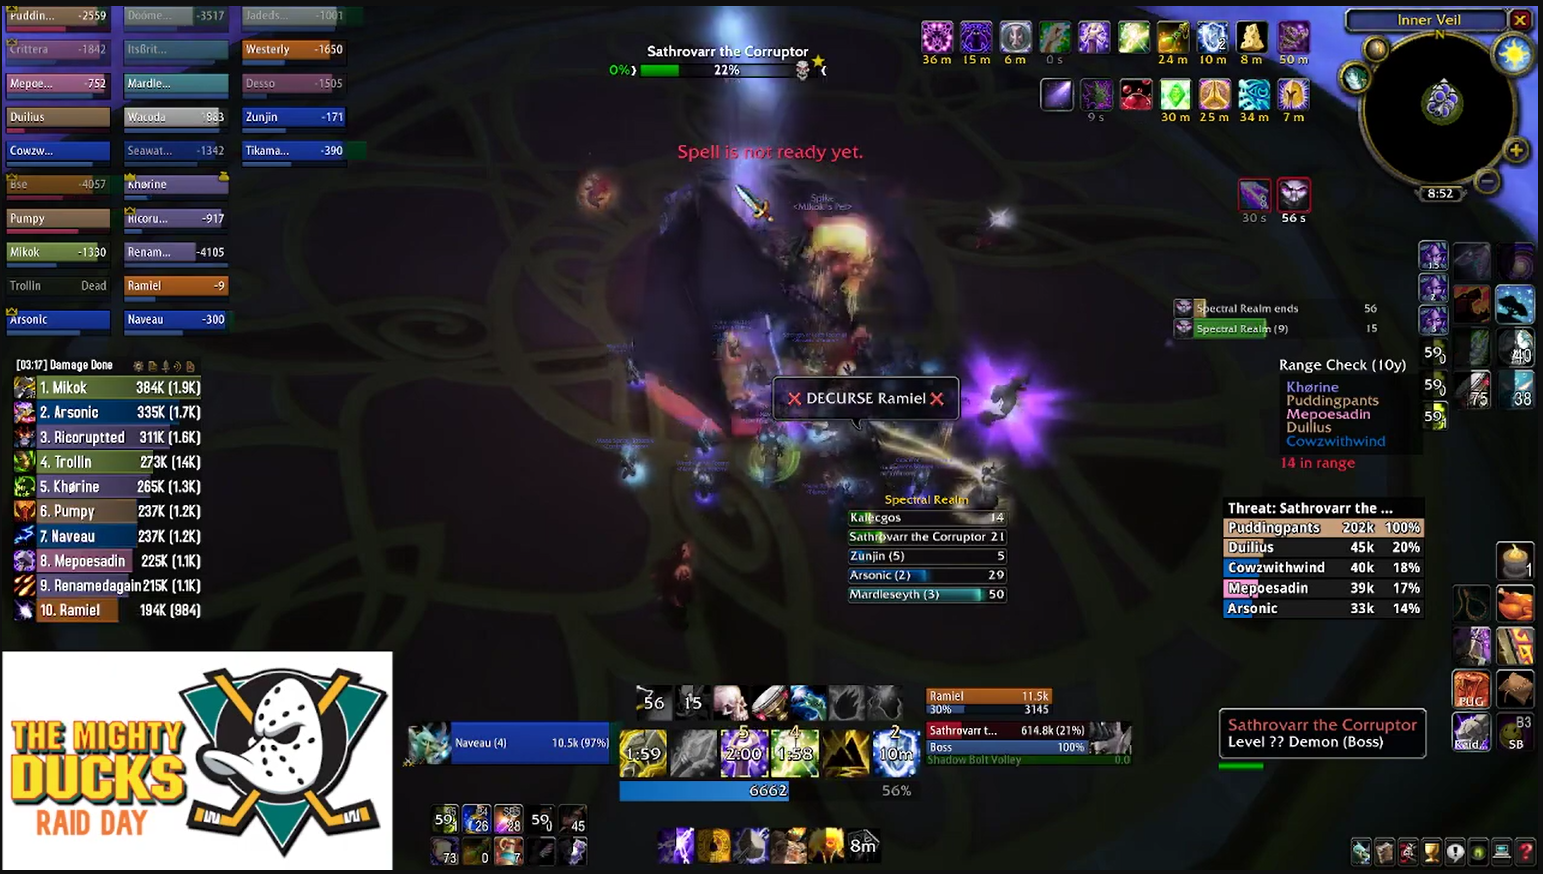
The encounter takes place in two identical, but separate, phases. There's the encounter with Kalecgos (which will be referred to as "upstairs", or "up top") and the encounter with Sathrovarr ("downstairs"). The objective is to kill Sathrovarr, then Kalecgos.

Kalecgos also has a physical representation of himself downstairs, who is battling Sathrovarr - if good Kalecgos is killed by Sathrovarr, the encounter ends. If you kill Kalecgos before you kill Sathrovarr, the encounter also ends.
Don't confuse "ends" with "you win and get loot" either. If the encounter ends, you have to do it again until you get it right.
Up top, everyone will need to spread out, at least eight yards apart. Kalec is also a traditional dragon, so don't stand behind, and don't stand in front.
Once everyone's briefed, has their arcane resistance gear equipped and is ready to party, you can pull the boss in one of two ways. A traditional body pull, and a hunter feign death pull to reset the boss, so everyone can spread out without also trying to DPS the boss.
Either way, it's fight time.
Tactics
Kalecgos should be positioned side-on, at the extreme far end of the arena. This will allow the most room for your DPS and healers to spread out. DPS should give priority to healers, to keep the raid and themselves topped off as much as possible.
Kalecgos will pump arcane damage into the raid via Arcane Buffet. This does low damage initially, but every time the spell is cast, it increases Arcane Damage taken. Once you reach approximately seven or eight stacks, the next hit you take will either chunk you, or kill you, so you need to get downstairs as quickly as possible at that point. This is why your healers need to be flexible when dealing with this next ability.
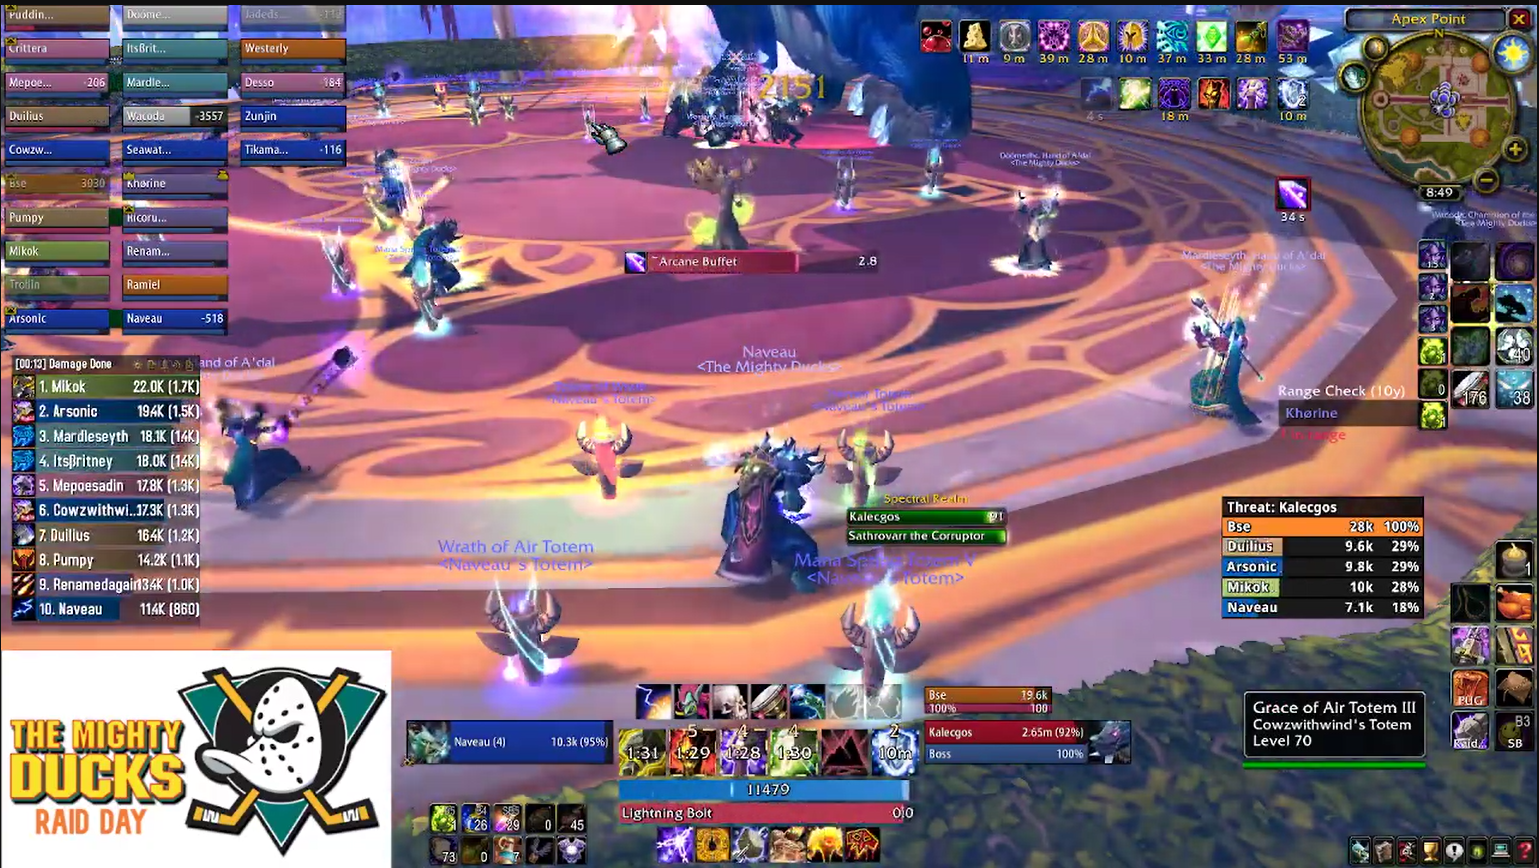
Every 10 to 50 seconds, Kalec will cast Spectral Blast, which teleports a random player to the shadow realm dragon realm ("downstairs") where Kalec is battling Sathrovarr. The target also takes a chunk of arcane damage. When this portal appears you'll want everyone in group one (or A, or whatever) to enter the portal. Only one person can use the portal at a time, so make sure to keep trying to use it until you get in. When the next portal appears, you'll want your next group to enter and so on, and so forth.

Your tank needs to be very careful and only taunt Sathrovarr off of Kalecgos' manifestation when he has healing support, as Sathrovarr hits like a freight train. Your DPS need to be in maximum attack mode when they enter the portal, as Sathrovarr needs to die first, but has a higher health pool than Kalecgos. Shamans should hold their lust until all of their party members are downstairs, to maximise output.
Sathrovarr also has two other abilities - a Shadow Bolt Volley, and Curse of Boundless Agony, a dot that does ramping damage. It moves to a new target when you remove it, so your decursers (mages, druids, etc.) need to wait until it starts to flog your DPS before removing it, or they're just wasting mana. DPS need to help with personal cooldowns and healthstones to reduce pressure on the downstairs healers.
Regardless of how a player got downstairs to begin with, they are given 60 seconds to do their thing before they go upstairs again.
Through the whole fight, and across both upstairs and downstairs, Kalecgos will target a random player every 5-6 seconds and either buff or debuff them with wild magic. This can be a list of six effects. White, blue and green are all beneficial in different ways, either increasing critical strike chance, reducing resource costs or pumping up healing. Red, Purple and Black are negative effects, reducing hit chance, doubling spell cast time, and increasing threat by 100%.
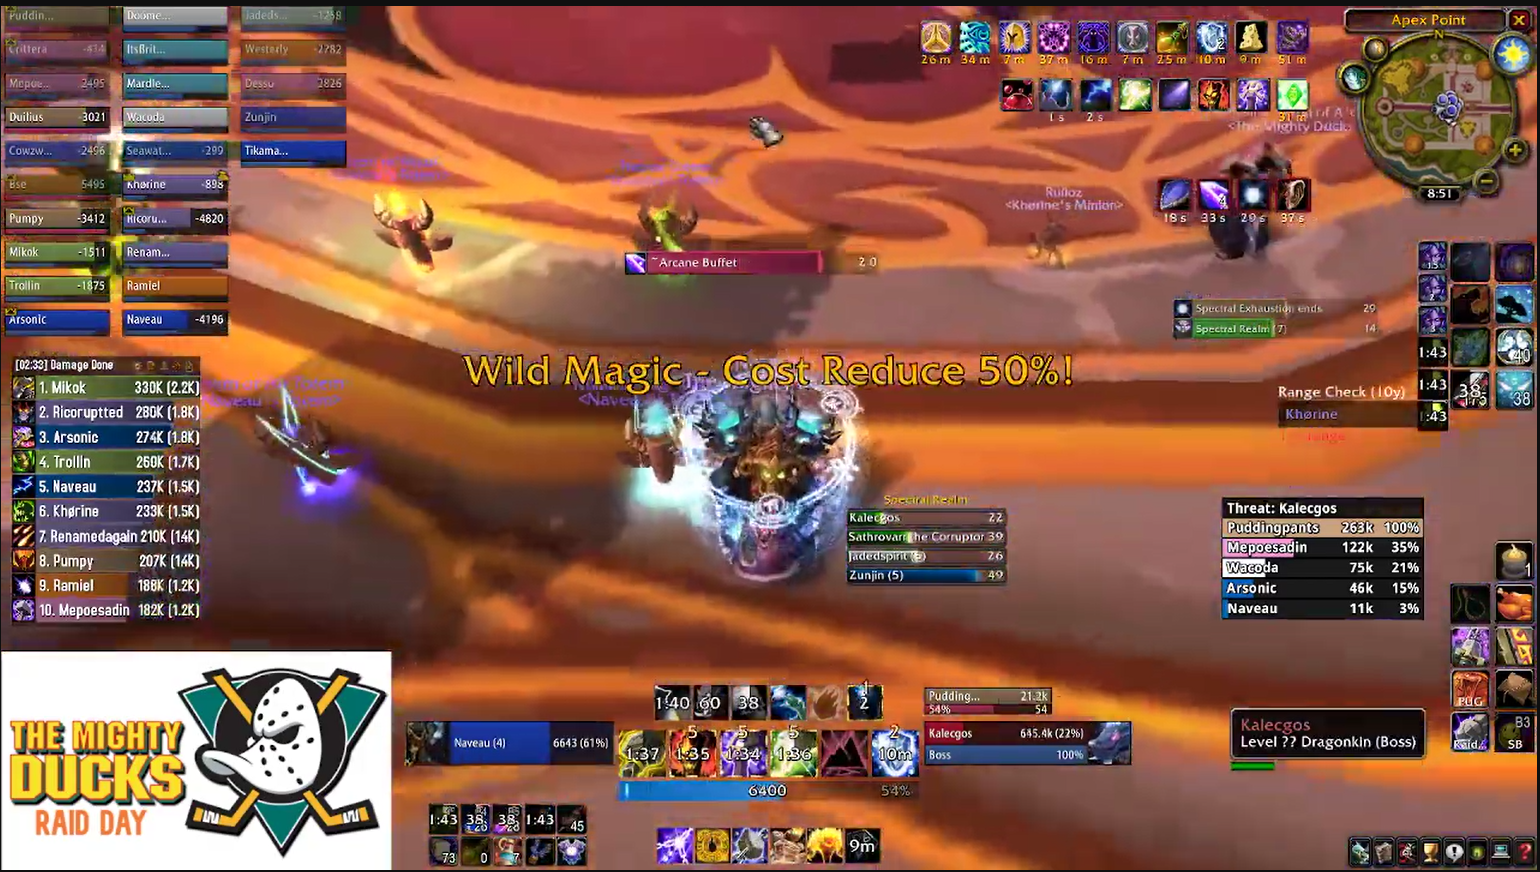
There's nothing you can do about these, just have to say a little prayer to RNGesus that the right buffs reach the right people and the debuffs stay away.
The real test here is coordination and situational awareness. Because Spectral Blast targets a random player, it's important that the raid be aware of which portal they need to enter at any given time. Because Kalec will quickly eat a tank without support, the heal team in particular needs to communicate with each other about who is going down and who's staying up to control Arcane Buffet stacks.
When either of the two bosses hits sub 10%, it's go for broke time. Both Sathrovarr and Kalecgos will soft enrage. The increased damage output will overload your healers, so whatever your DPS have in the tank is what they'll need to finish the fight. Just be careful that you leave enough players up top to clean up Kalecgos, as everyone who goes down, particularly late in the encounter, will be stuck downstairs for 60 seconds, even after Sathrovarr dies.
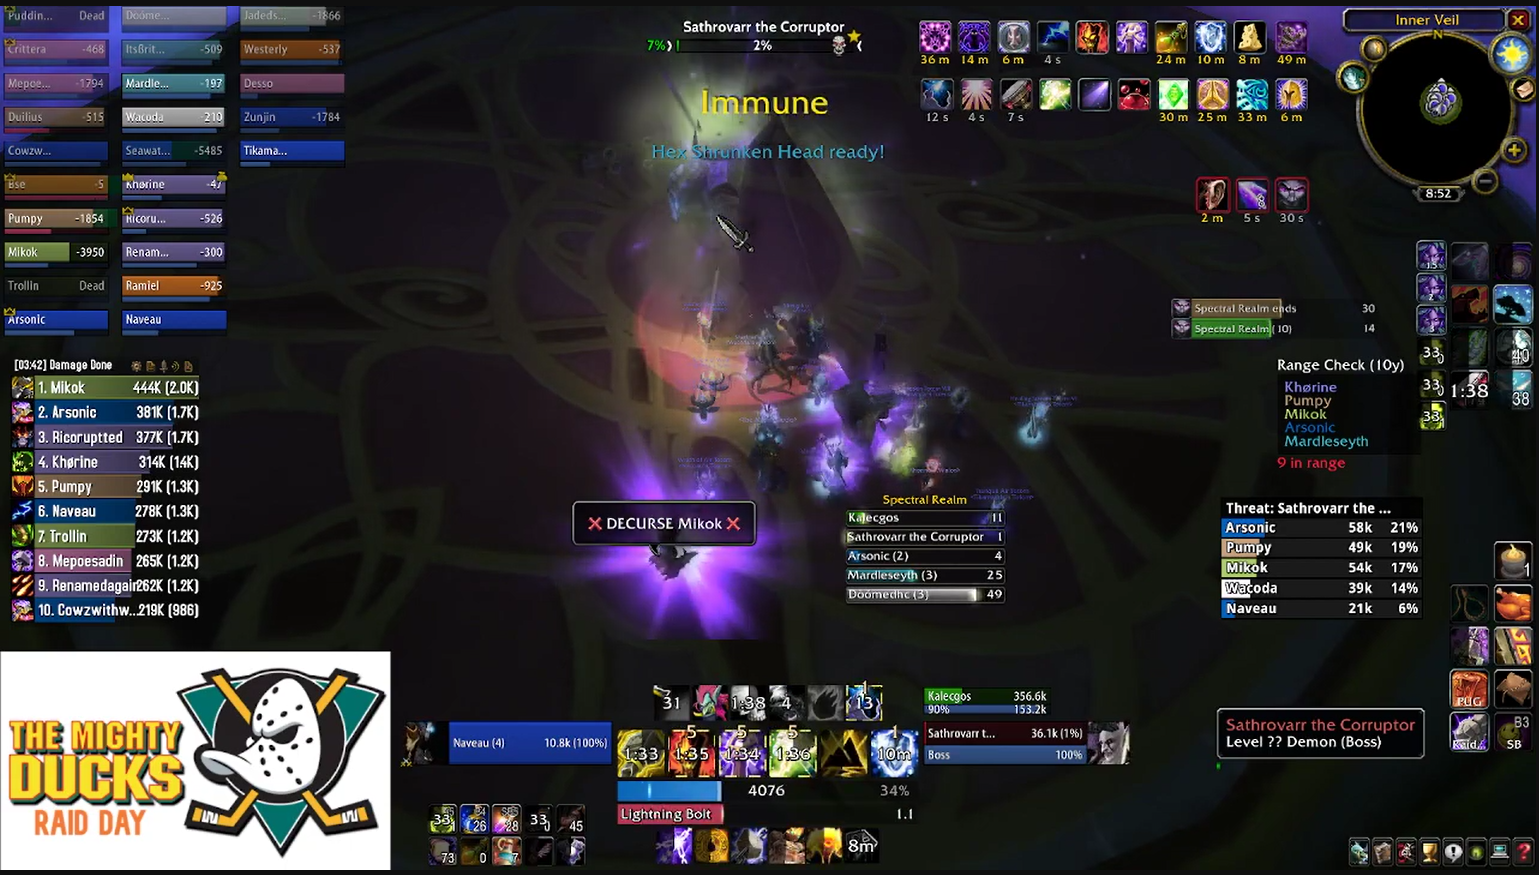
Many an encounter has ended with too many members downstairs, resulting in Kalec smashing the under-resourced top platform and then picking off players as they teleport up top, one by one. The good news is that if enough people are downstairs, he'll get bored and reset, meaning some players will escape with their lives and the recovery can be quicker.
Once you get your coordination right, Kalec is not particularly difficult and the DPS check is not severe. You should be able to notch your first kill.
One down, five to go.
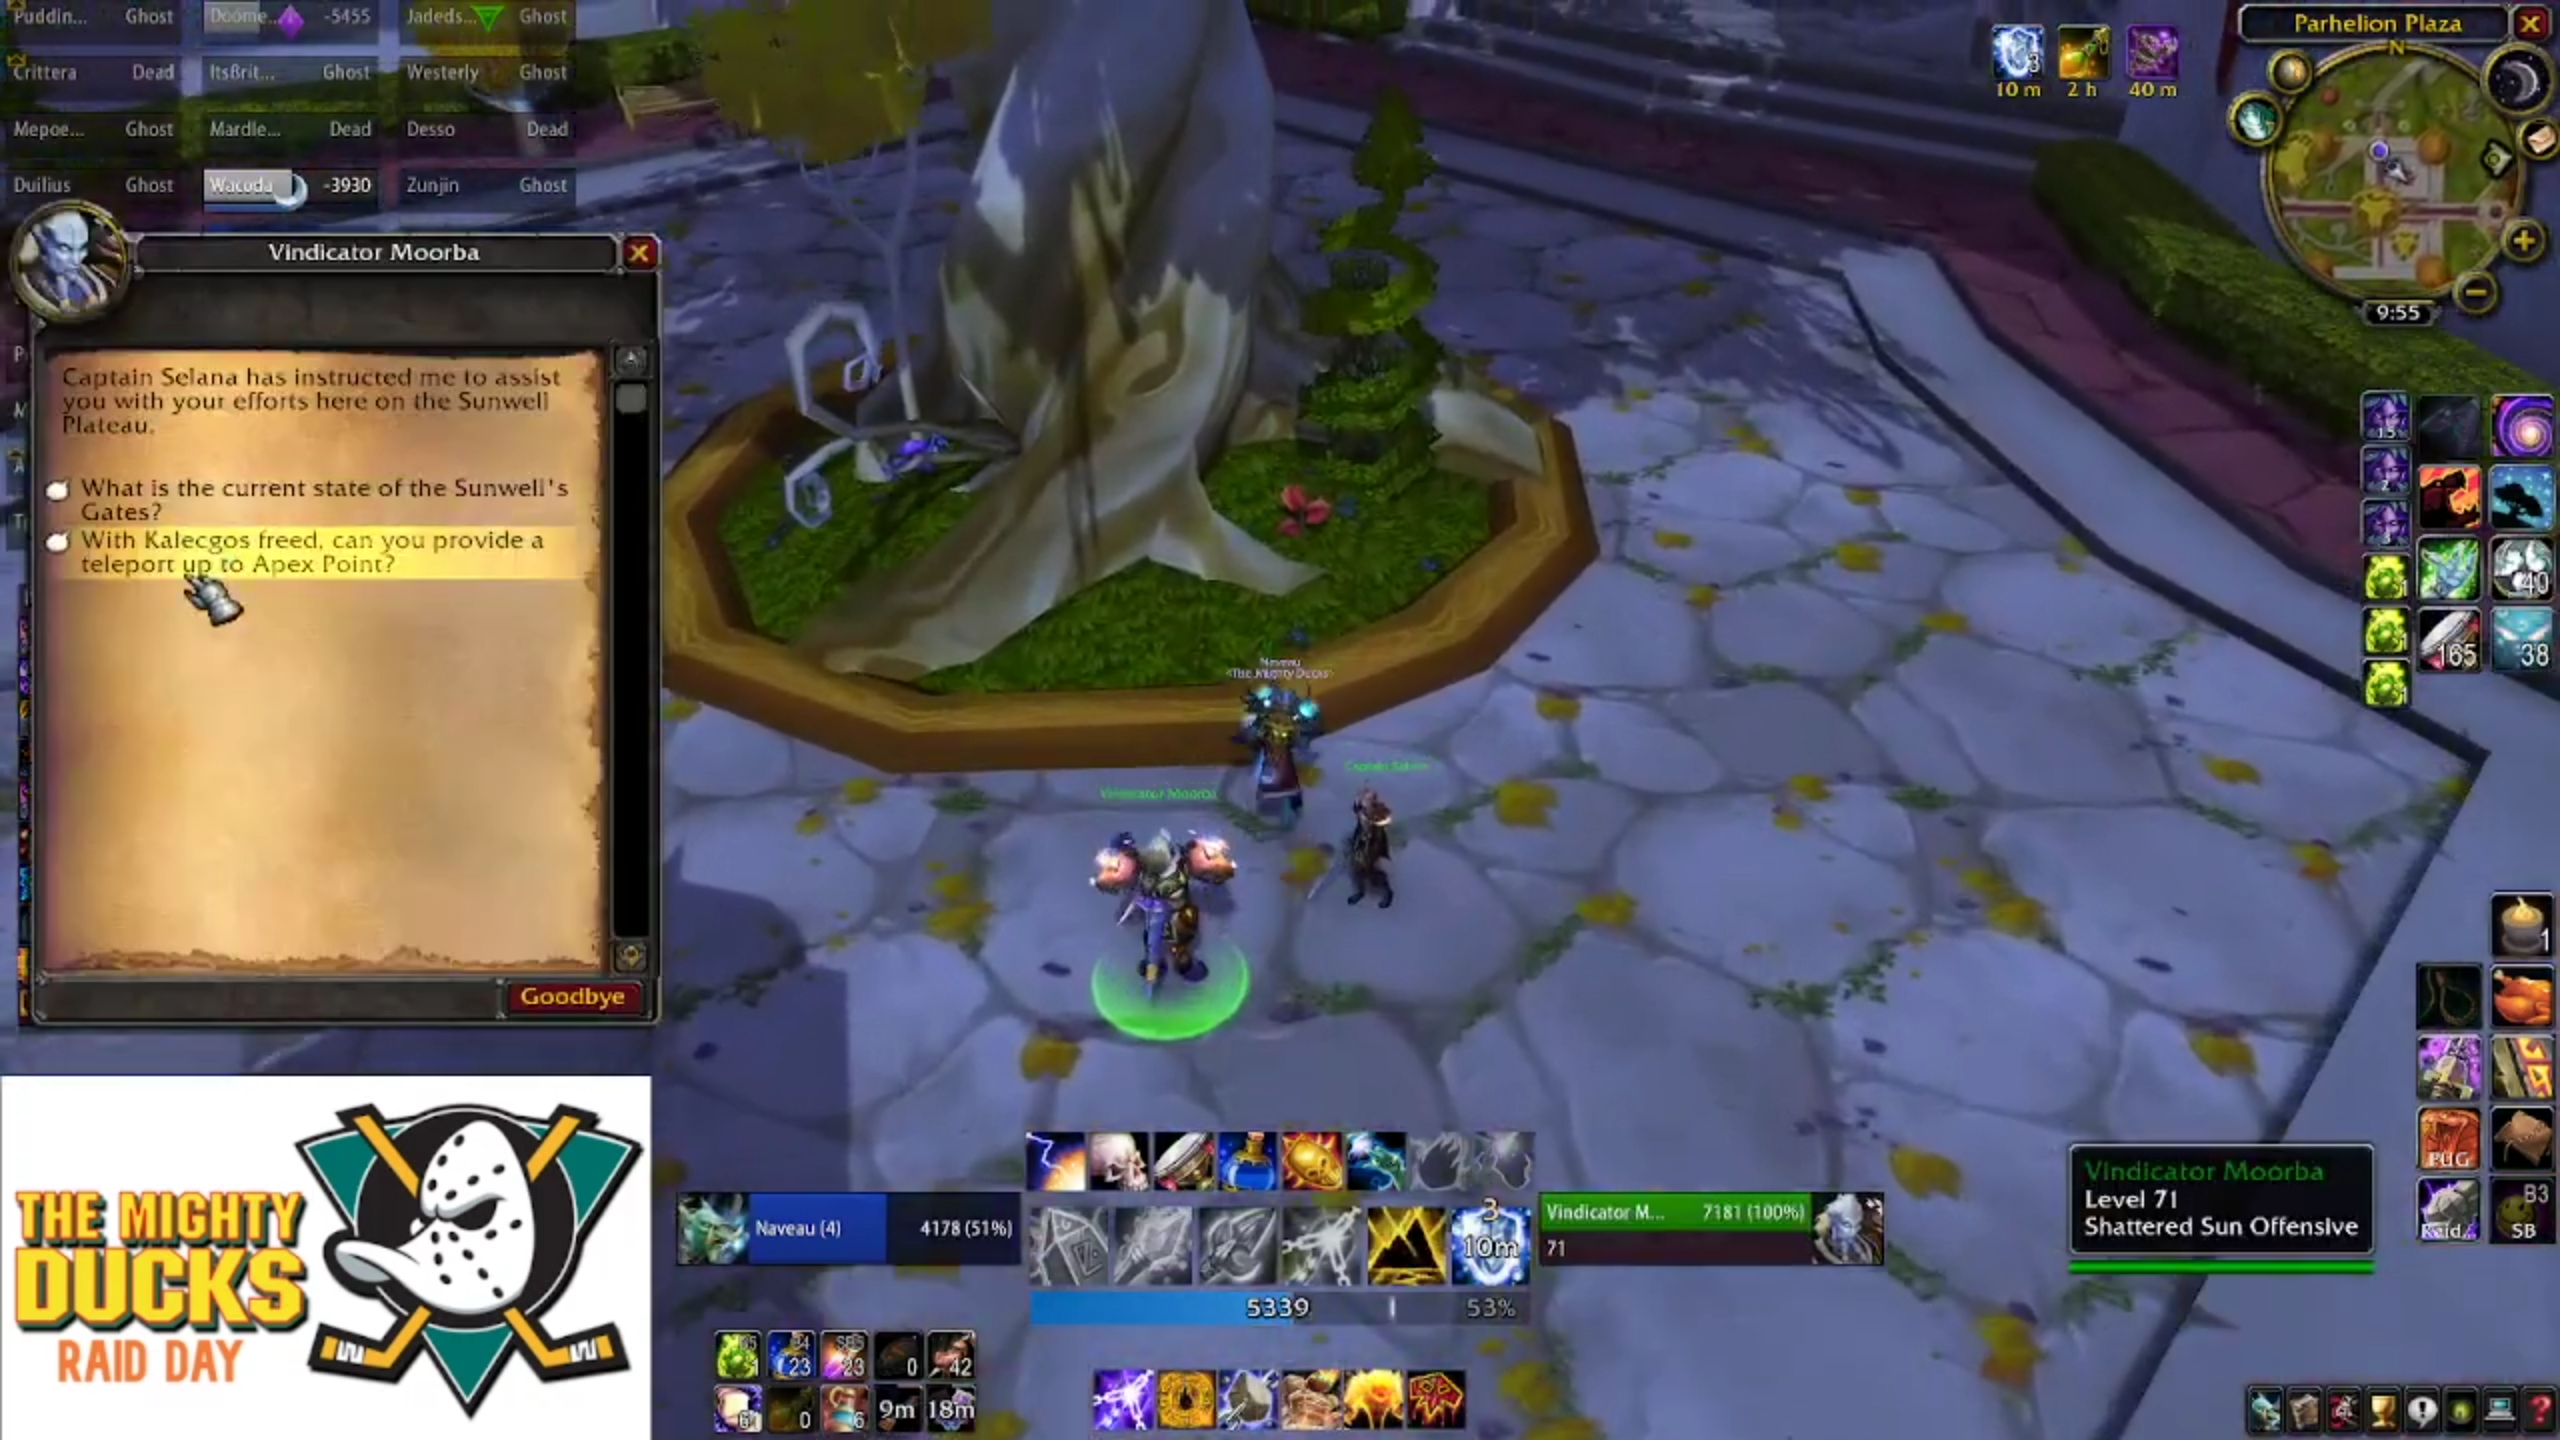
Should you wipe, you will be able to teleport directly to Kalec's platform by speaking to the NPCs in the courtyard.
Either way, you'll be able to proceed to the other side now that the big blue dragon is gone. There's a Sunblade protector you'll need to run over, followed-up by another pack of elves identical to a big pack in the courtyard.
Now, whilst you're clearing the trash, there's a barrier between you and the next boss, whilst a pseudo-cutscene plays. Madrigosa, a dragon of the blue dragonflight, tries to fight Brutallus, trapping you in the room before the boss. She gets killed after a short skirmish, then he breaks the ice barrier with a roar, telling you to come get some, if you think you're hard enough.
The first time you watch it, it's interesting, but it takes about a minute and a half to resolve. If you have a rogue or mage stealth past, you'll be able to initiate the cutscene whilst you're clearing the trash, and save yourself the time.
After the cutscene has ended, jump down and take your places.
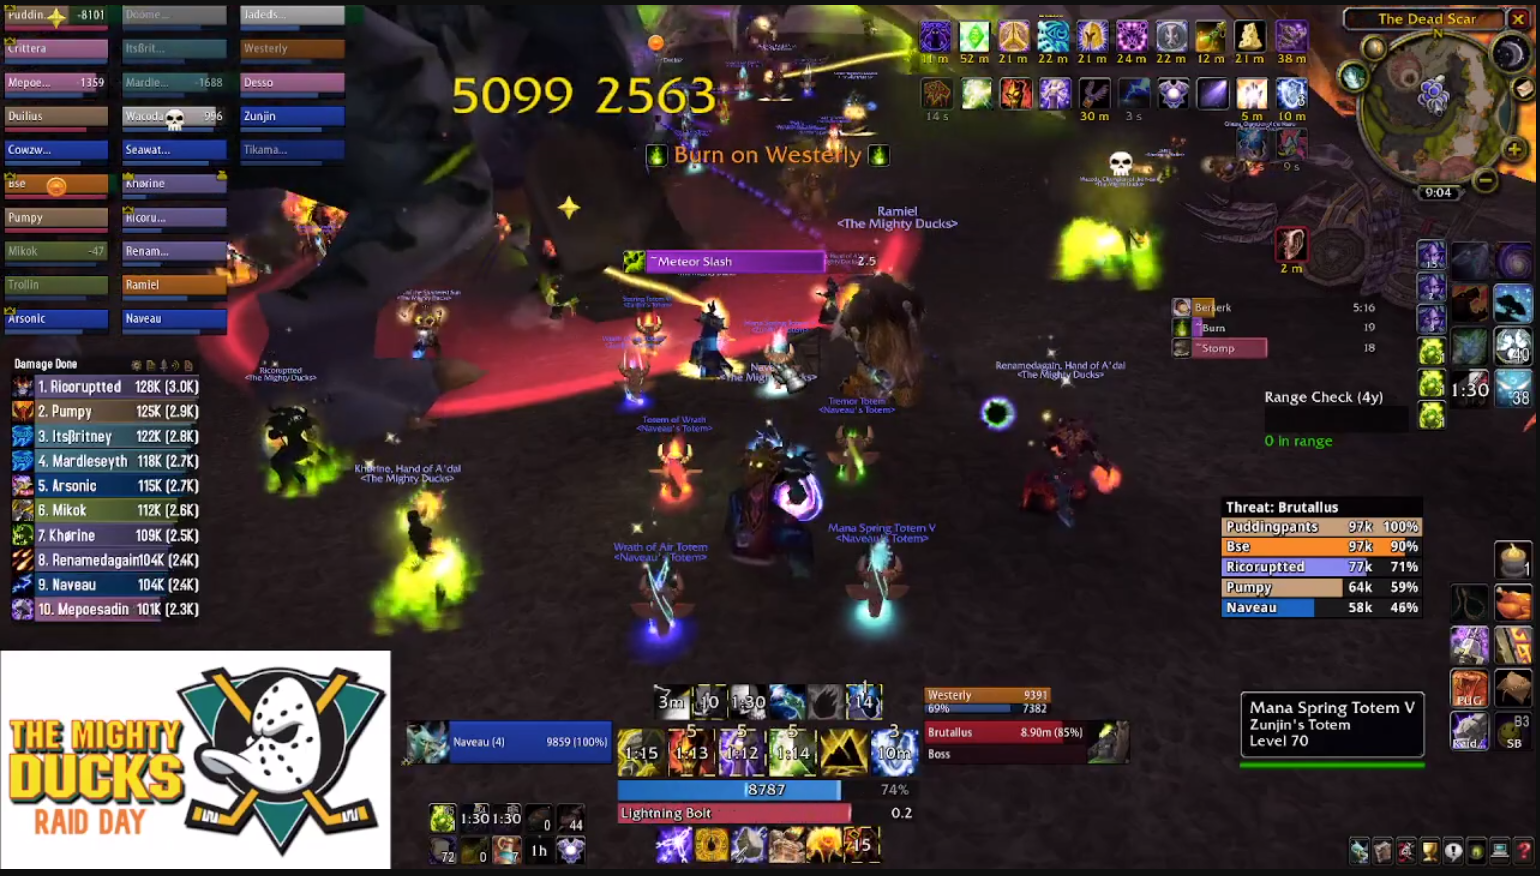
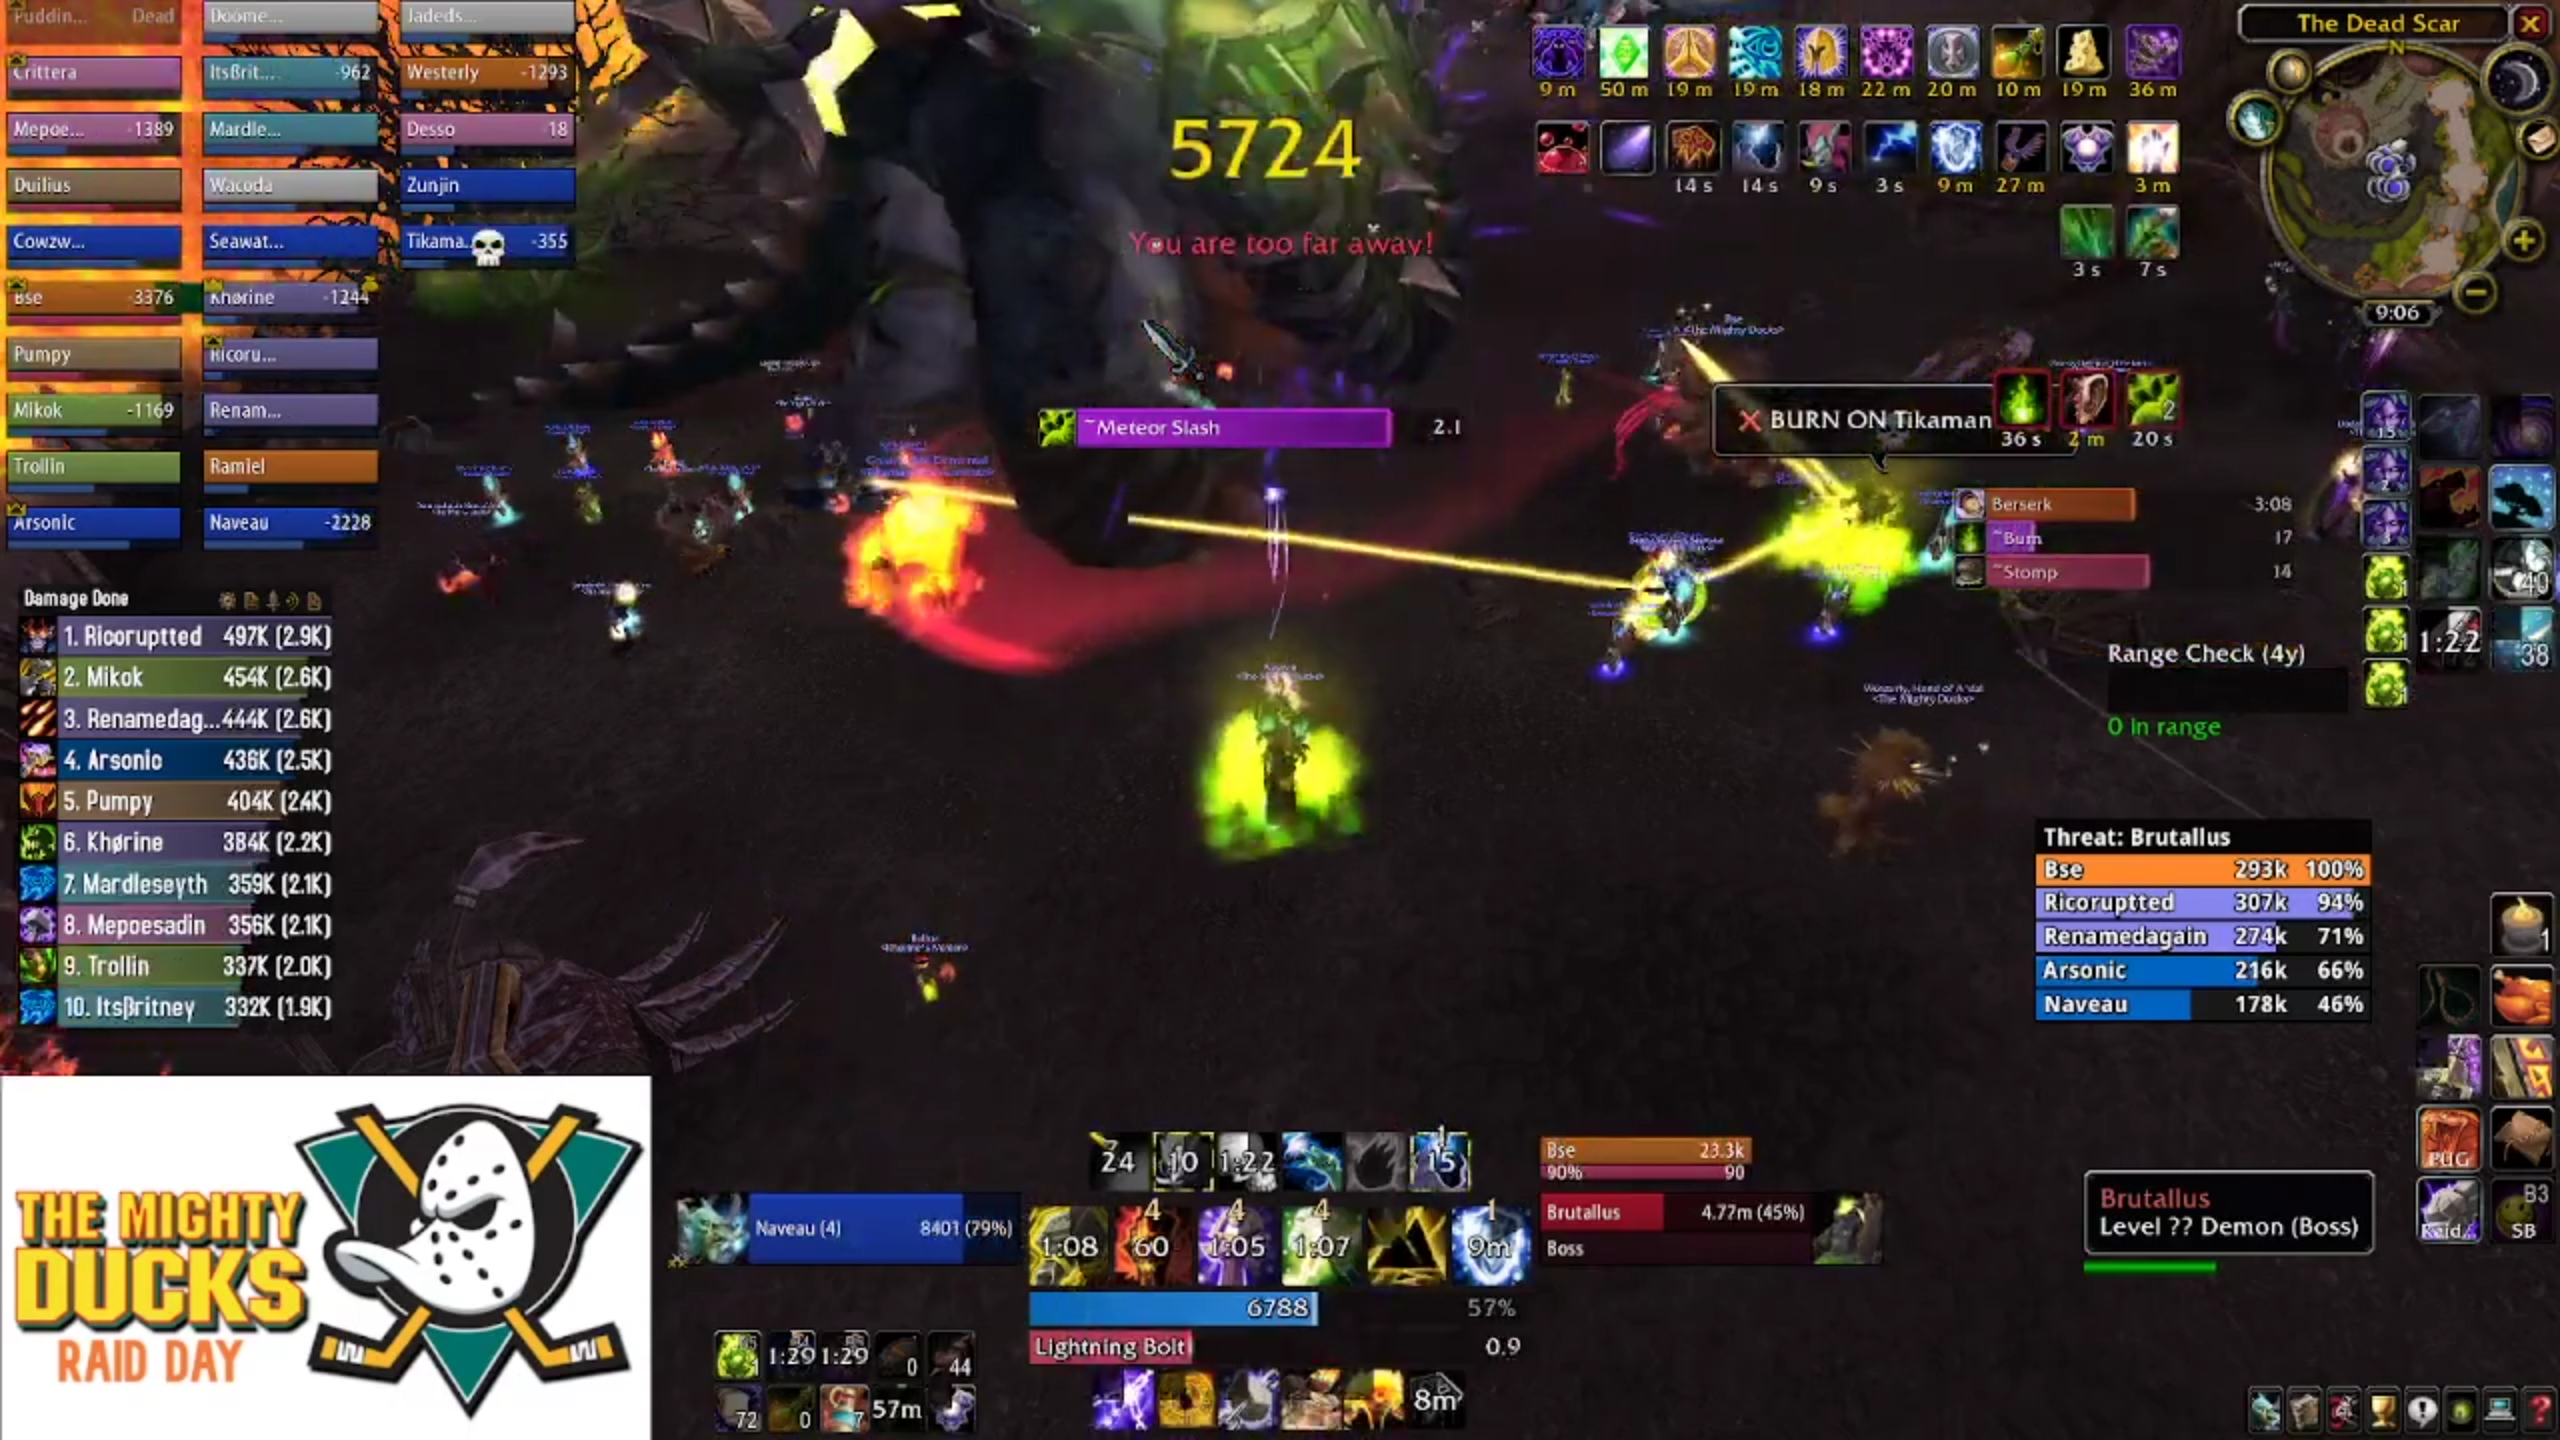
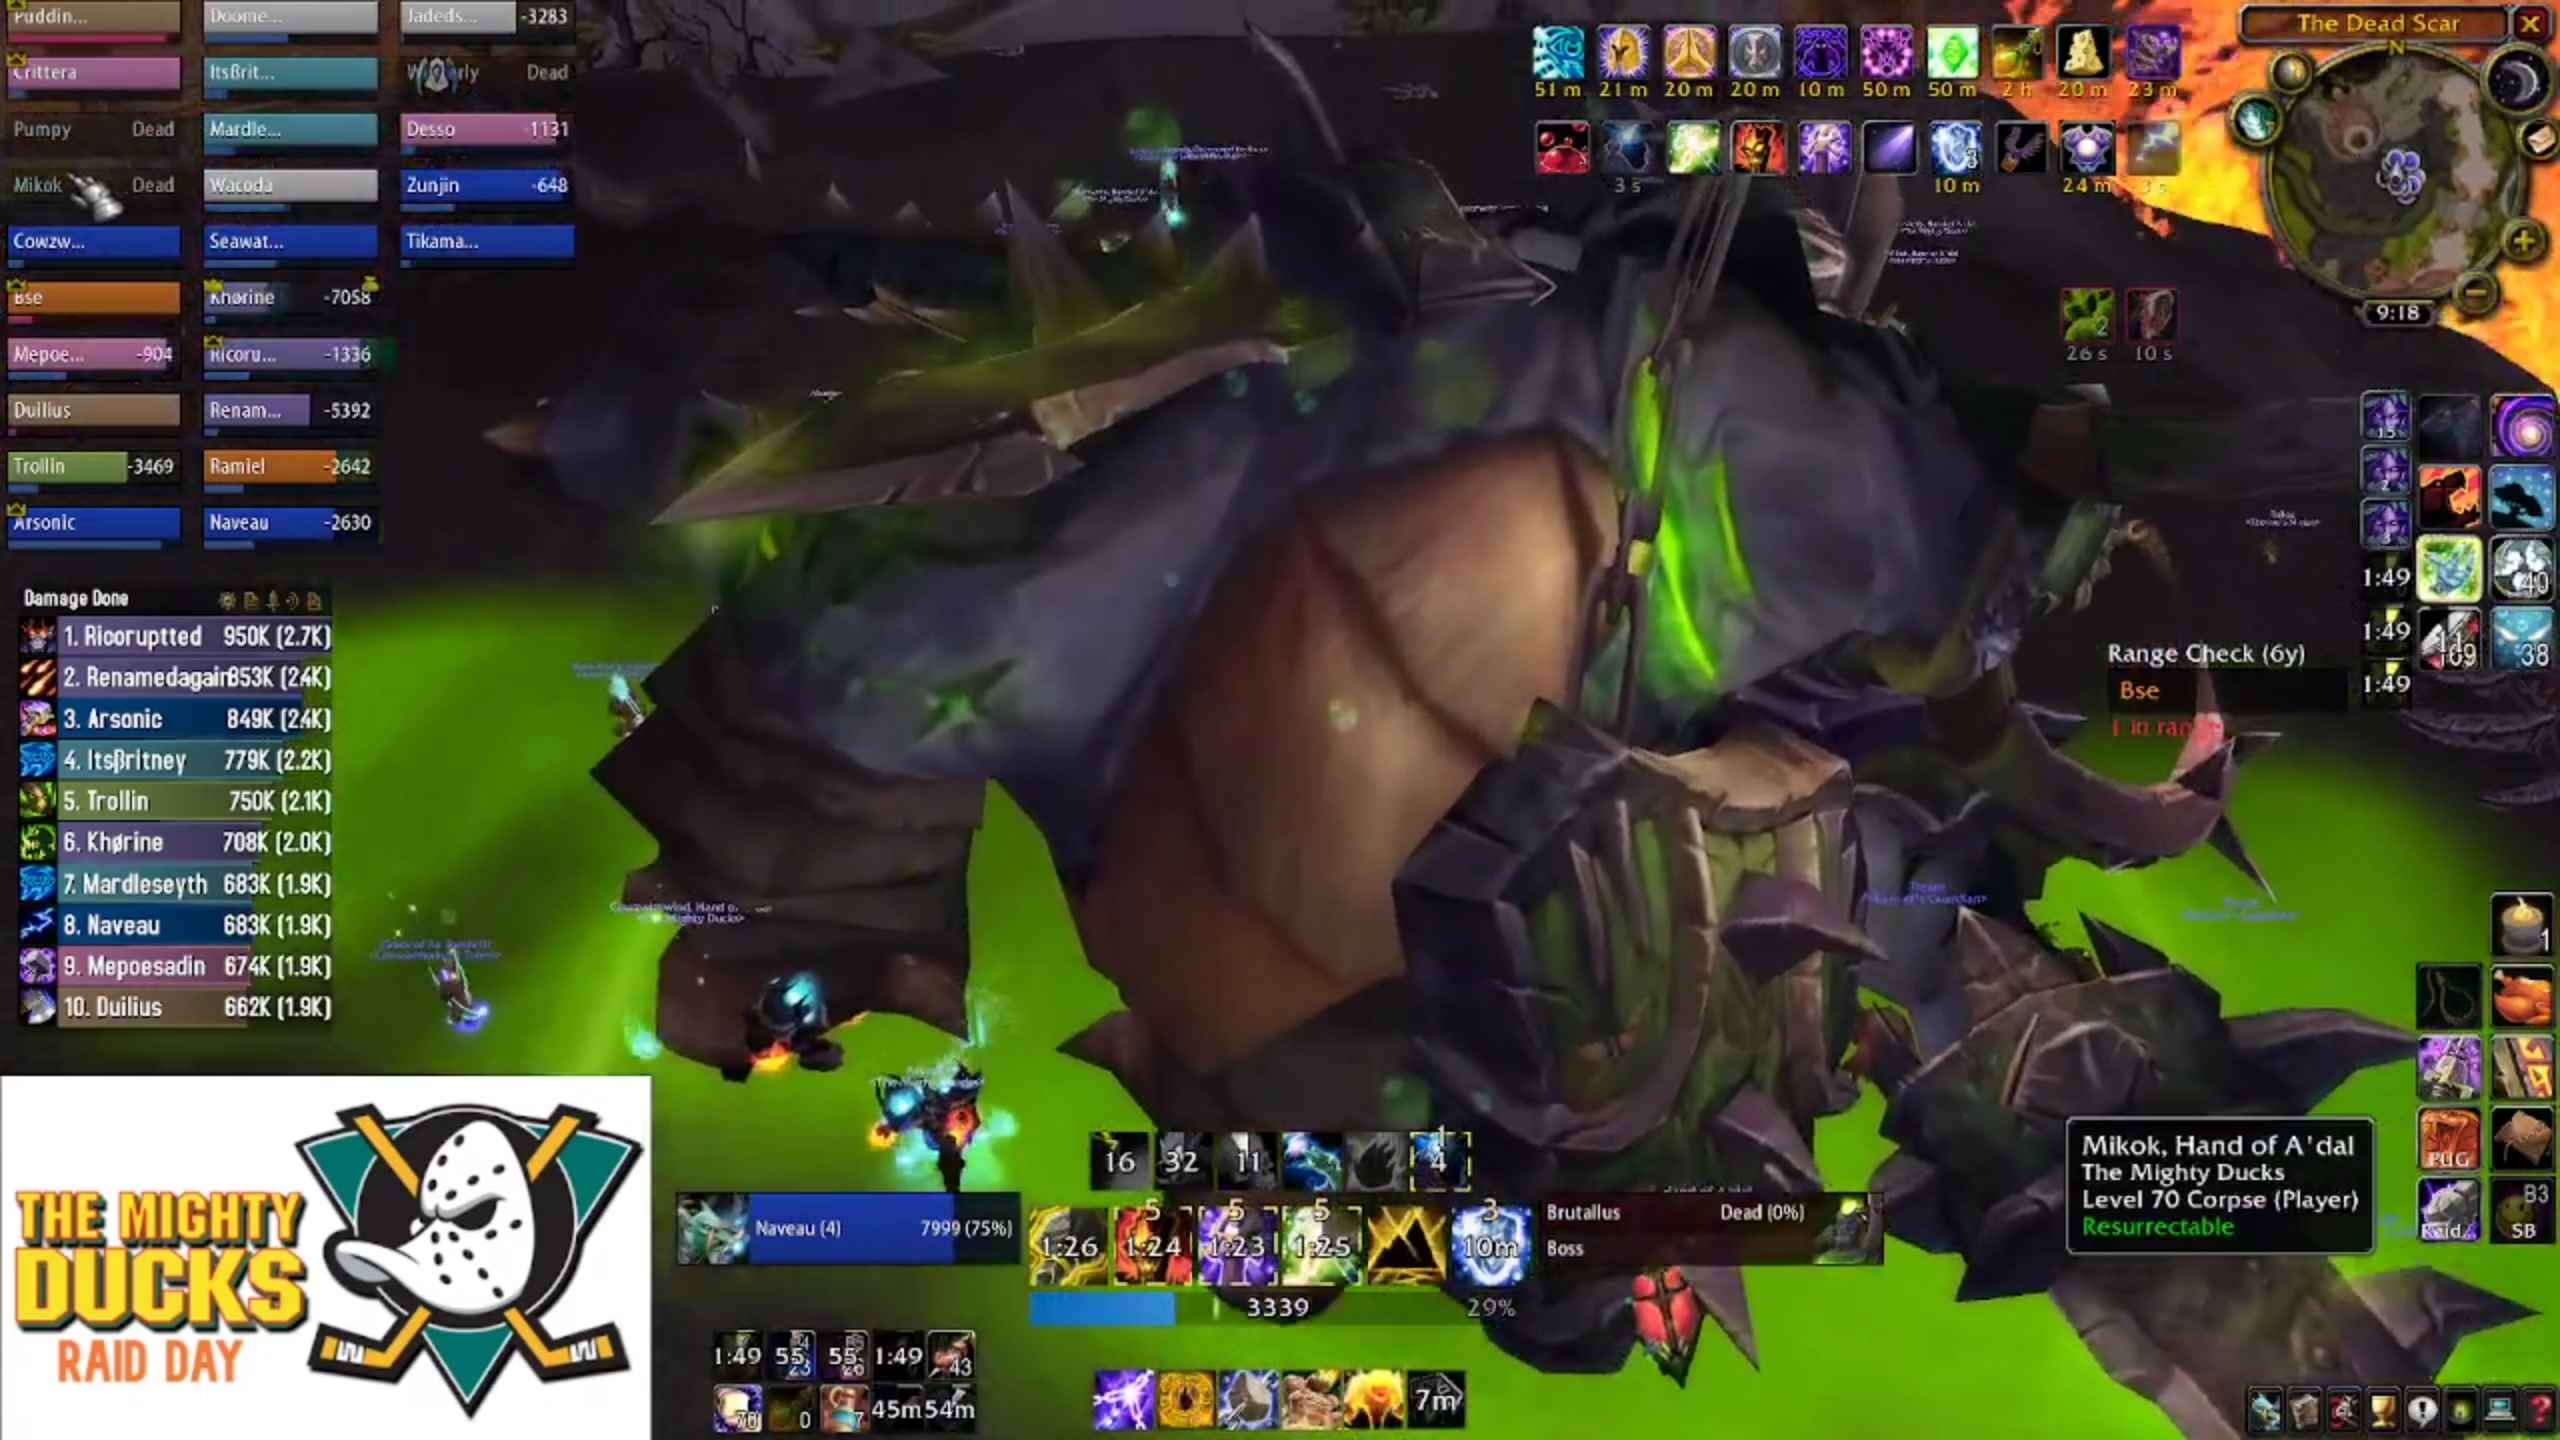
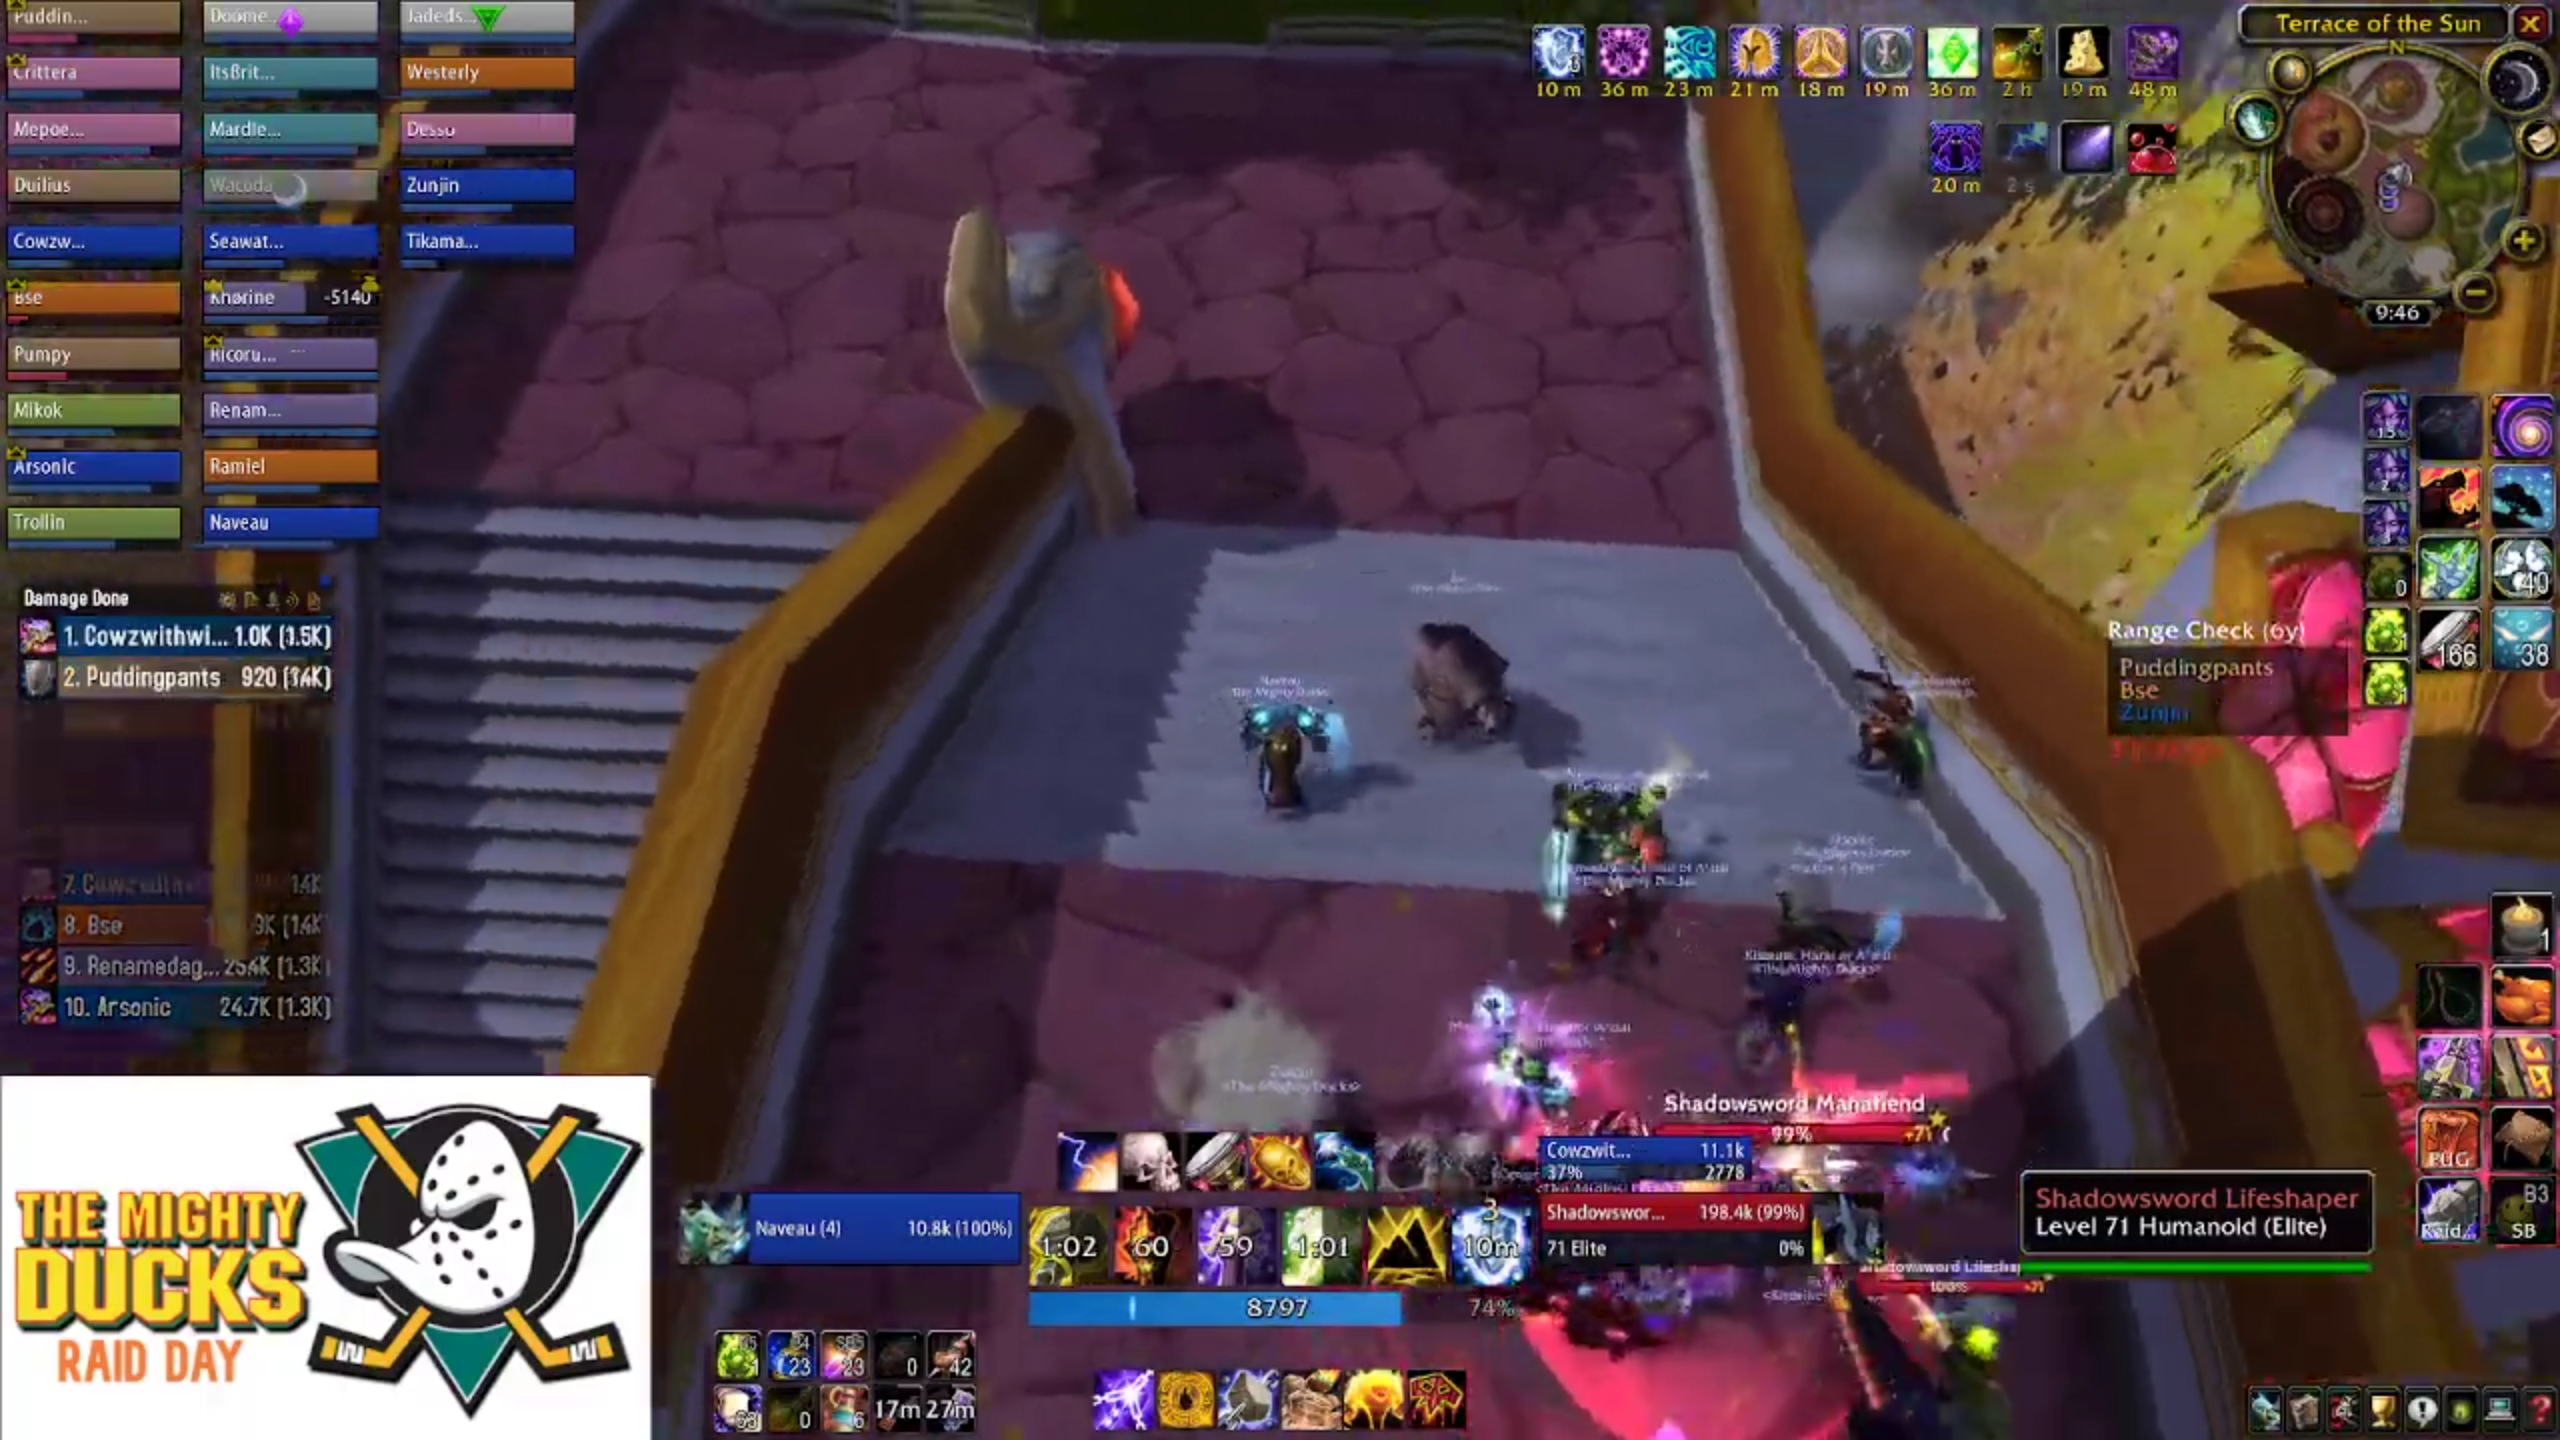
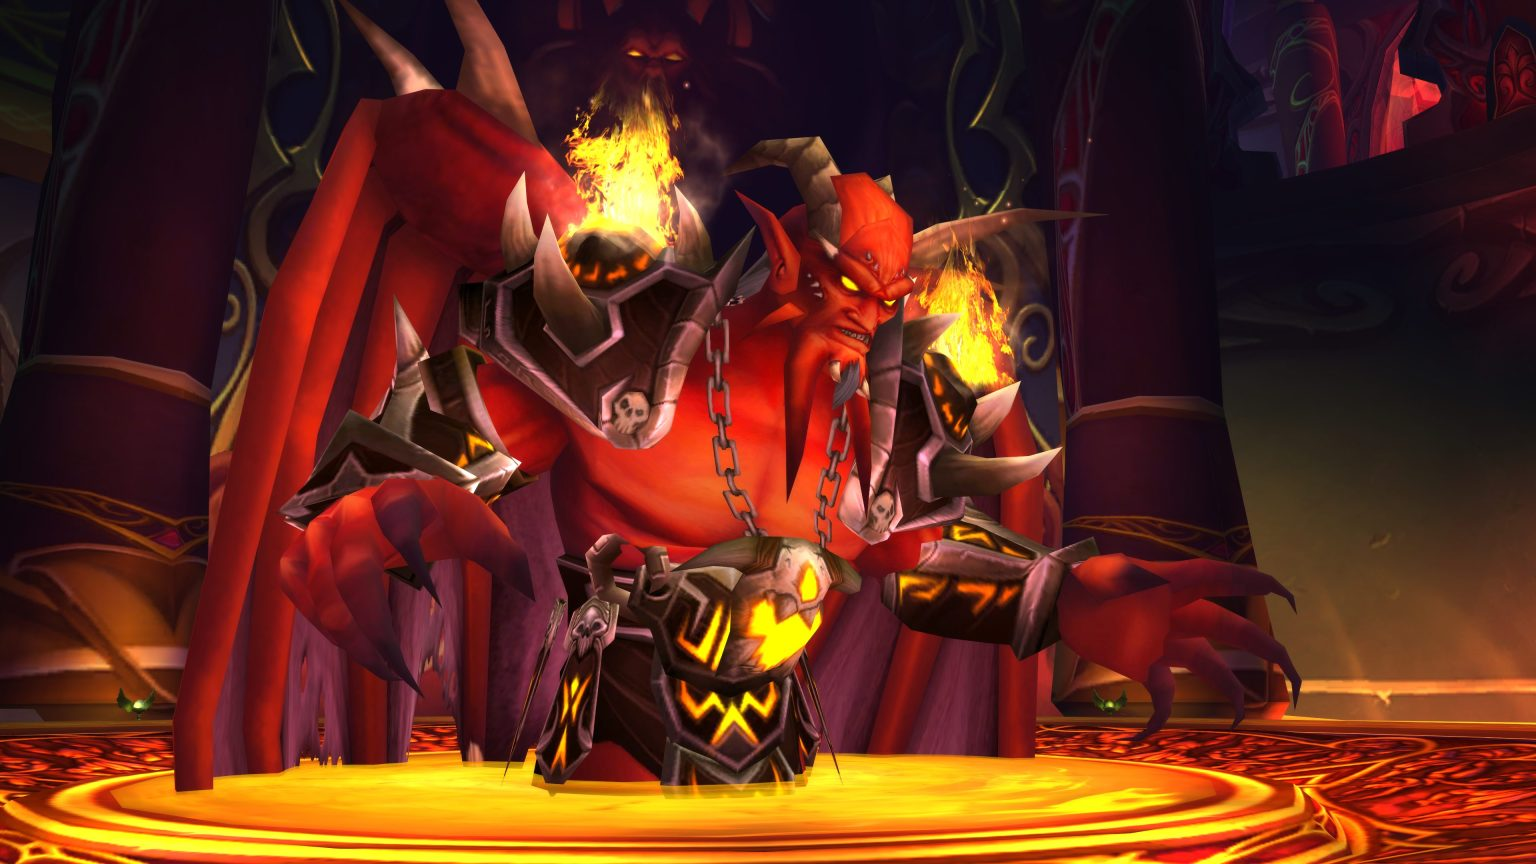
Boss Two - Brutallus
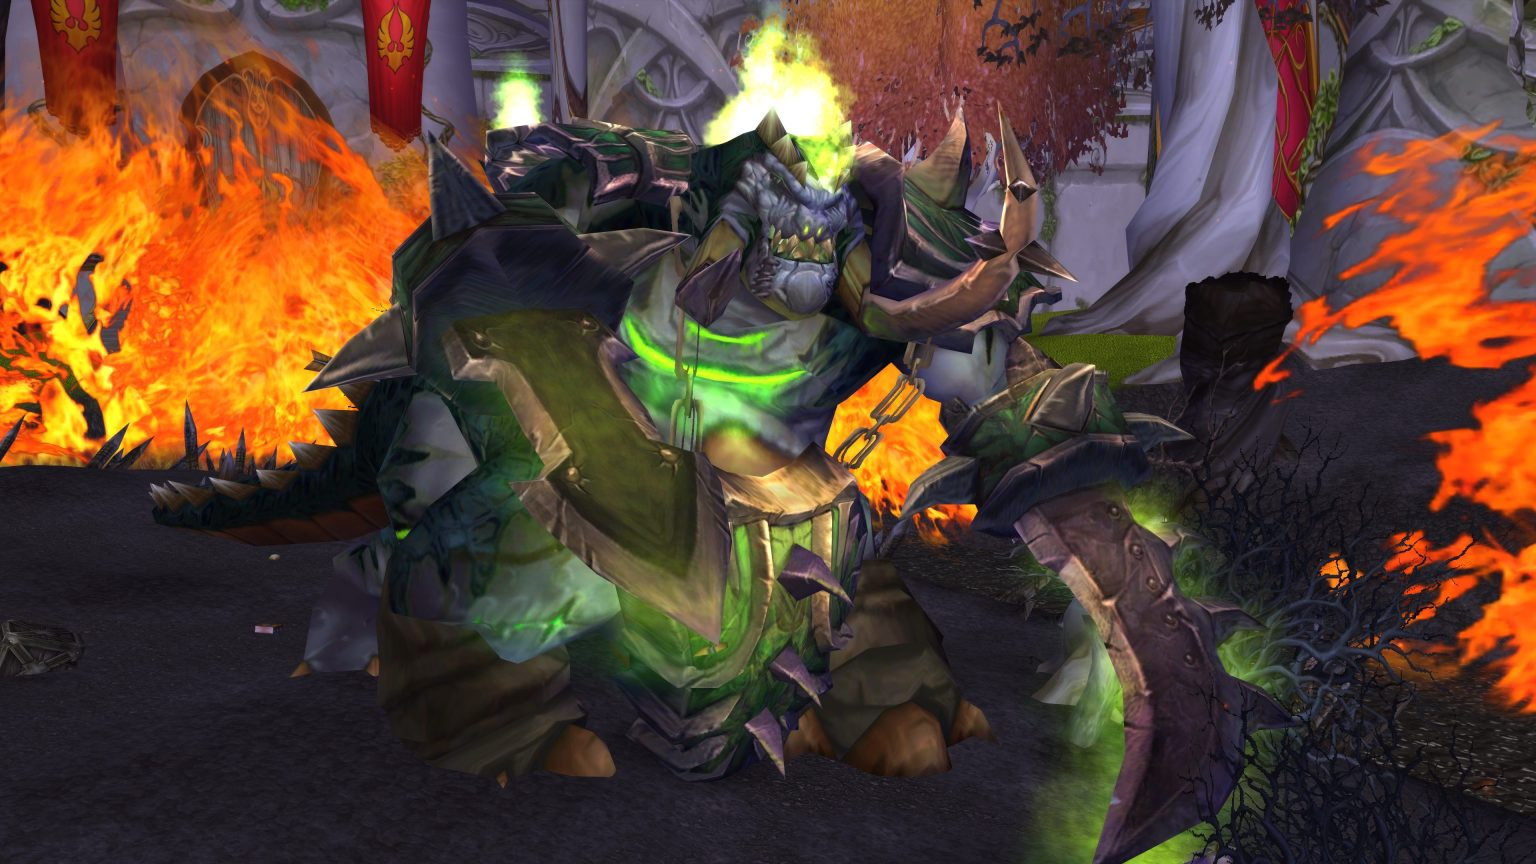
Brutallus is... brutal. As mentioned before, he is a gear check, damage race and battle for survival, all rolled into one. He has ten million hit points, second only to Kil'jaden, and a hard enrage timer of six minutes.
To start with, you will want your ranged, healers, and tanks divided into two equal groups (or as equal as possible). You only need two tanks for this fight, so depending on who you gave the job to, either they can offheal (Paladin) or do a bit of damage (Warrior).
In those two groups, you want to precisely allocate positions, as everyone needs to be six yards from each other. Space is at a premium, so it can feel very claustrophobic at times. Everyone in the raid needs to understand where they are positioned during the fight - losing even a single person can mean a wipe, the timing is that tight.
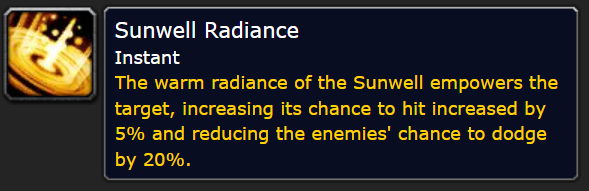
Your tanks will want to wear full mitigation gear. The aim of the game is survival. Your quest to not get smeared all over the walls is not helped by Sunwell Radiance, a buff given to every boss which cuts down a big chunk of avoidance for any tank that steps up to the plate.
You'll also want to have a designated spot to the side of the boss where players can go when they are afflicted with the "Burn" debuff, to enable focus healing. This should be equidistant between the two groups.
Again, be kind to each other - especially the tanks. Brutallus will do plenty of physical damage to them, they don't need mental damage piled on top of that.
When you're ready, you'll want the hunter to misdirect the boss to your first tank.
Tactics
Brutallus flogs your tank. Your tanks need to be kept at 100% for pretty much the entire fight. It's entirely possible for Brutallus to kill your tank with melee swings alone, so your healers will be stressed for the entire fight.
Furthermore, every so often, Brutallus will cast Stomp on his main target, chunking them for huge damage and cutting their armour in half. When this happens to your tank, they'll need to use a cooldown if available. This can be more than enough to mow down a feral druid, who famously don't have cooldowns, so it can help to have a discipline priest with access to pain suppression.
Whilst that's going on, Brutallus has two more major mechanics to worry about.
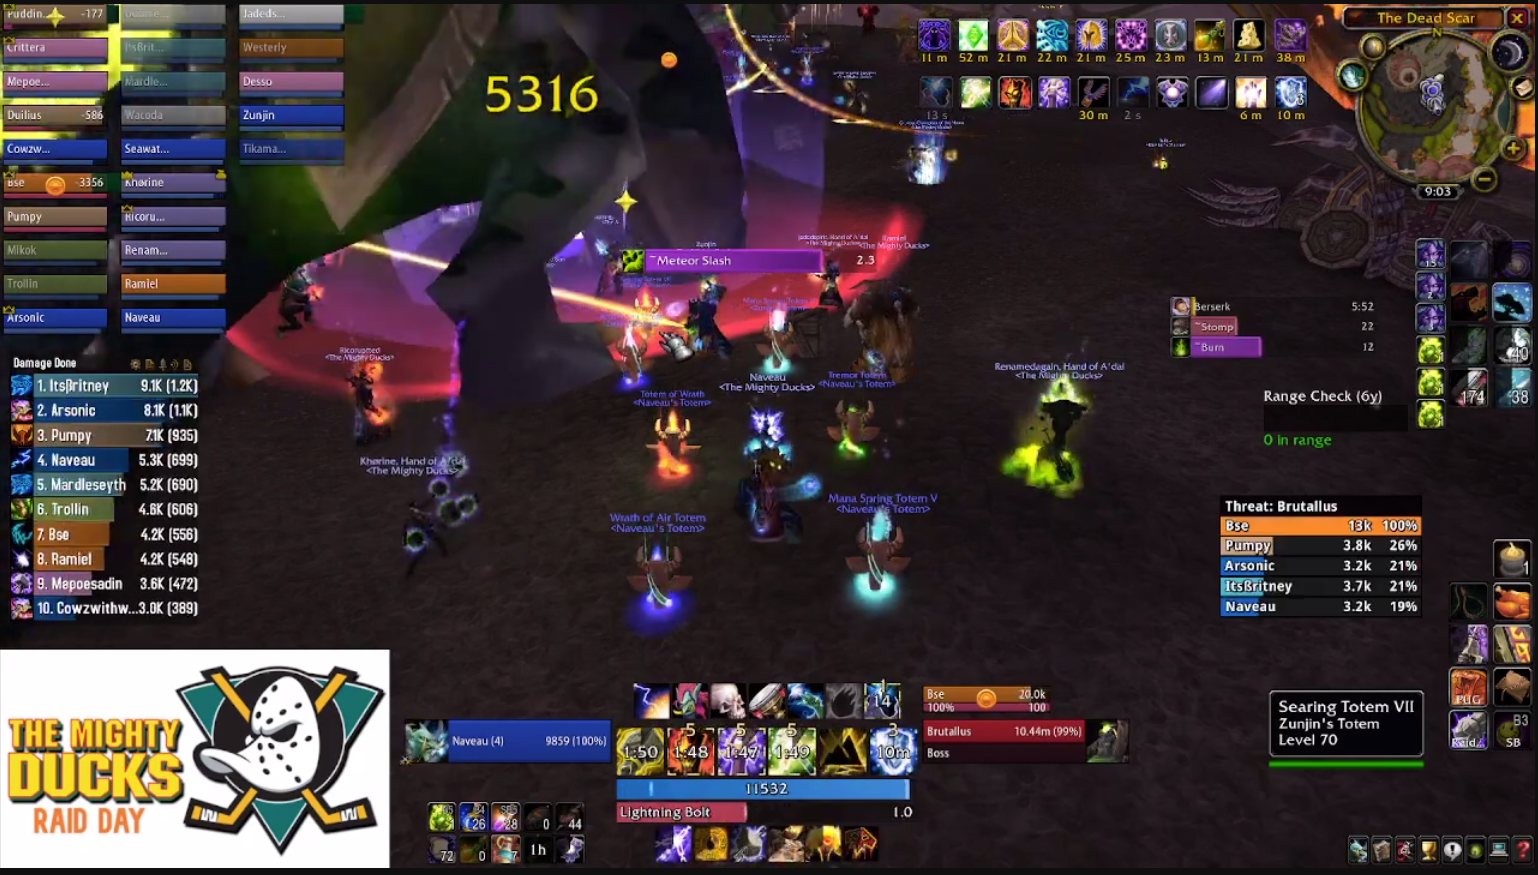
The first mechanic is Meteor Slash. This is a melee ability which inflicts fire damage in a frontal cone in front of the boss. The damage is split between all targets that get hit, and then increases their fire damage taken with a stacking debuff. The first two slashes do relatively little damage, the third one hurts, four one will kill squishy cloth-wearing classes like priests, and five will instantly kill everyone in the group.
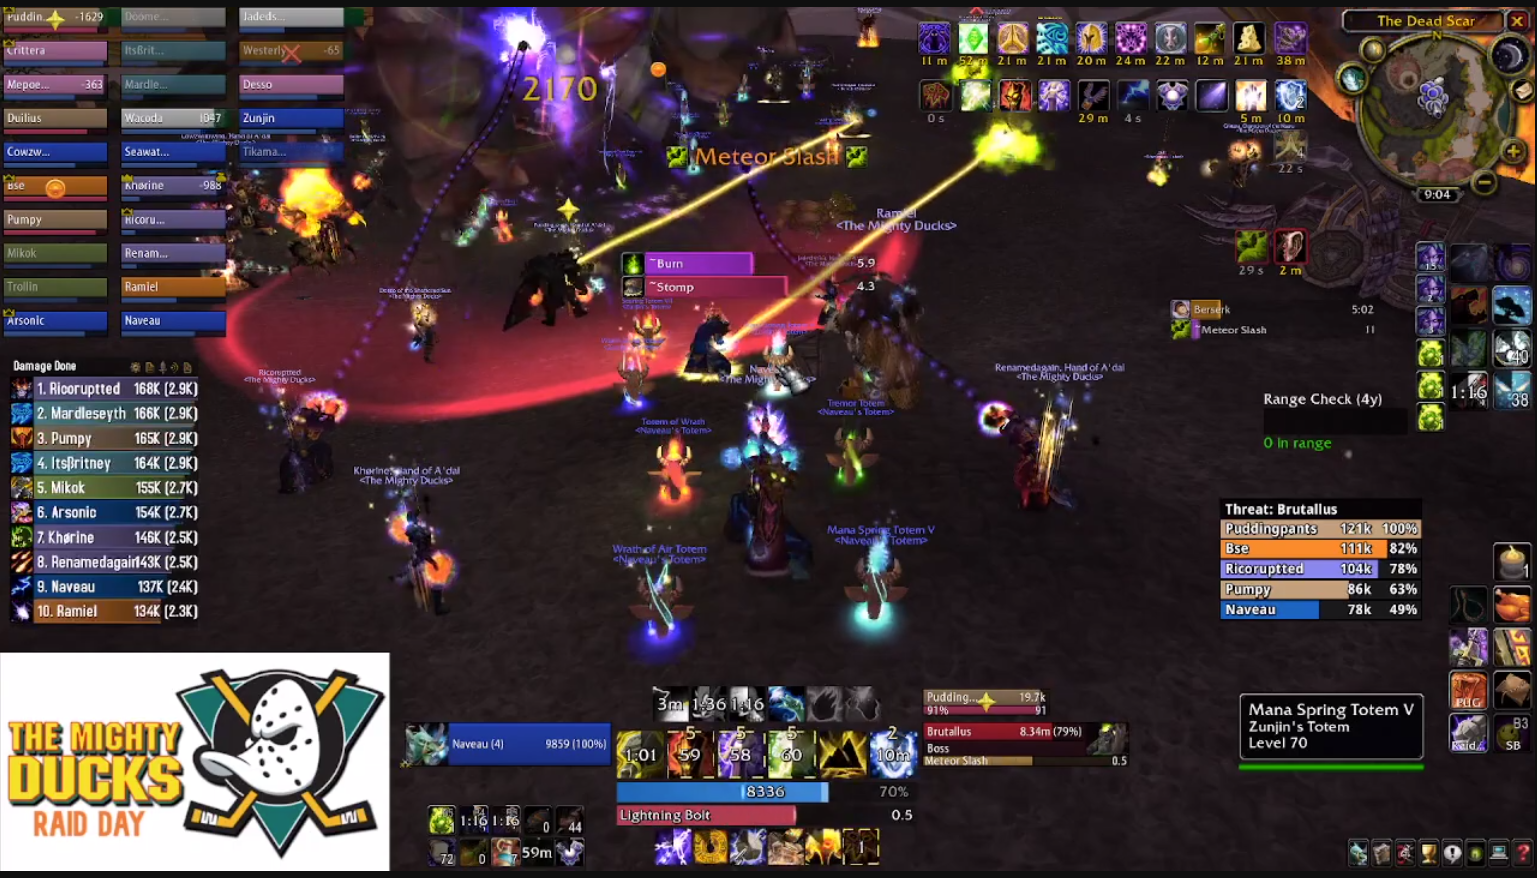
This is why the raid's ranged and healers are split into two groups - you'll want each side to soak three meteor slashes, then have the tank on the opposite side taunt the boss, so the opposite group can start soaking slashes.
Your tanks need to communicate regularly and make sure they don't taunt too early, or too late. Because the cooldowns are on variable timing, it is possible to have a tank on one side take a stomp, then the tank on the other side taunts it before the meteor slashes start, to reduce the tank damage significantly. However, if you get too greedy with the timing, there's a good chance your group will take a fourth meteor slash, which can be a wipe on the spot.
Brutallus' second major mechanic is burn. A quite simple name for a quite brutal (geddit) mechanic. Through the fight, the boss will target a random player (including the tank, however stomp will dispel burn, so don't panic) with burn, a damage over time effect which deals increasing damage. It also spreads to players in four yards, and having more than one or two players with this debuff will usually be a wipe.
The last ten seconds of the debuff deal so much damage that a player needs to be topped off between ticks, often requiring the attention of two or more healers. Whilst I mentioned above that you could have your warrior put on DPS gear, it's far better to have your boomkin and protection paladin put on healing gear to help out instead.
Burn's damage will instantly kill you if you get hit with a meteor slash, due to the increased fire damage taken. However, burn is applied to players who do not presently have stacks of meteor slash, meaning it will end up on the other group (or the melee) by default. It's imperative that if you get burned and the boss is about to be taunted, that you move out to the designated bone burn zone so you can start being focus healed, and also so you don't get meteor slashed and insta-gibbed.
Because positioning for this fight is so cramped, players will need to have a third eye on raiders in their group who have burn, and be prepared to move in order to open up corridors for players to move out to the bone burn zone. Players with burn that need to move out need to be vocal about which players they need to move - so hope that your shy intorverted pumper warlock doesn't get hit, or they're probably screwed.
Brutallus represents the first big hurdle for your raid. He will smear your tanks, burn and meteor slash will kill people learning how to move when they're boxed in. You'll miss the DPS check window a lot, and don't be surprised if you don't make the timer when you're missing even a single damage-dealer. Ten million health in six minutes is absurd, but it what's you've got to do.
He is proper hard, even with an optimised raid composition and best-in-slot gear from the previous two phases. Be patient with each other and hold yourself to the highest standards, and you'll get past him.
There's no trash between this boss and the next - the corpse of Brutallus bleeds all over Madrigosa, who was killed in the cutscene you definitely watched, and turns into Felmyst, a big bone dragon lady.
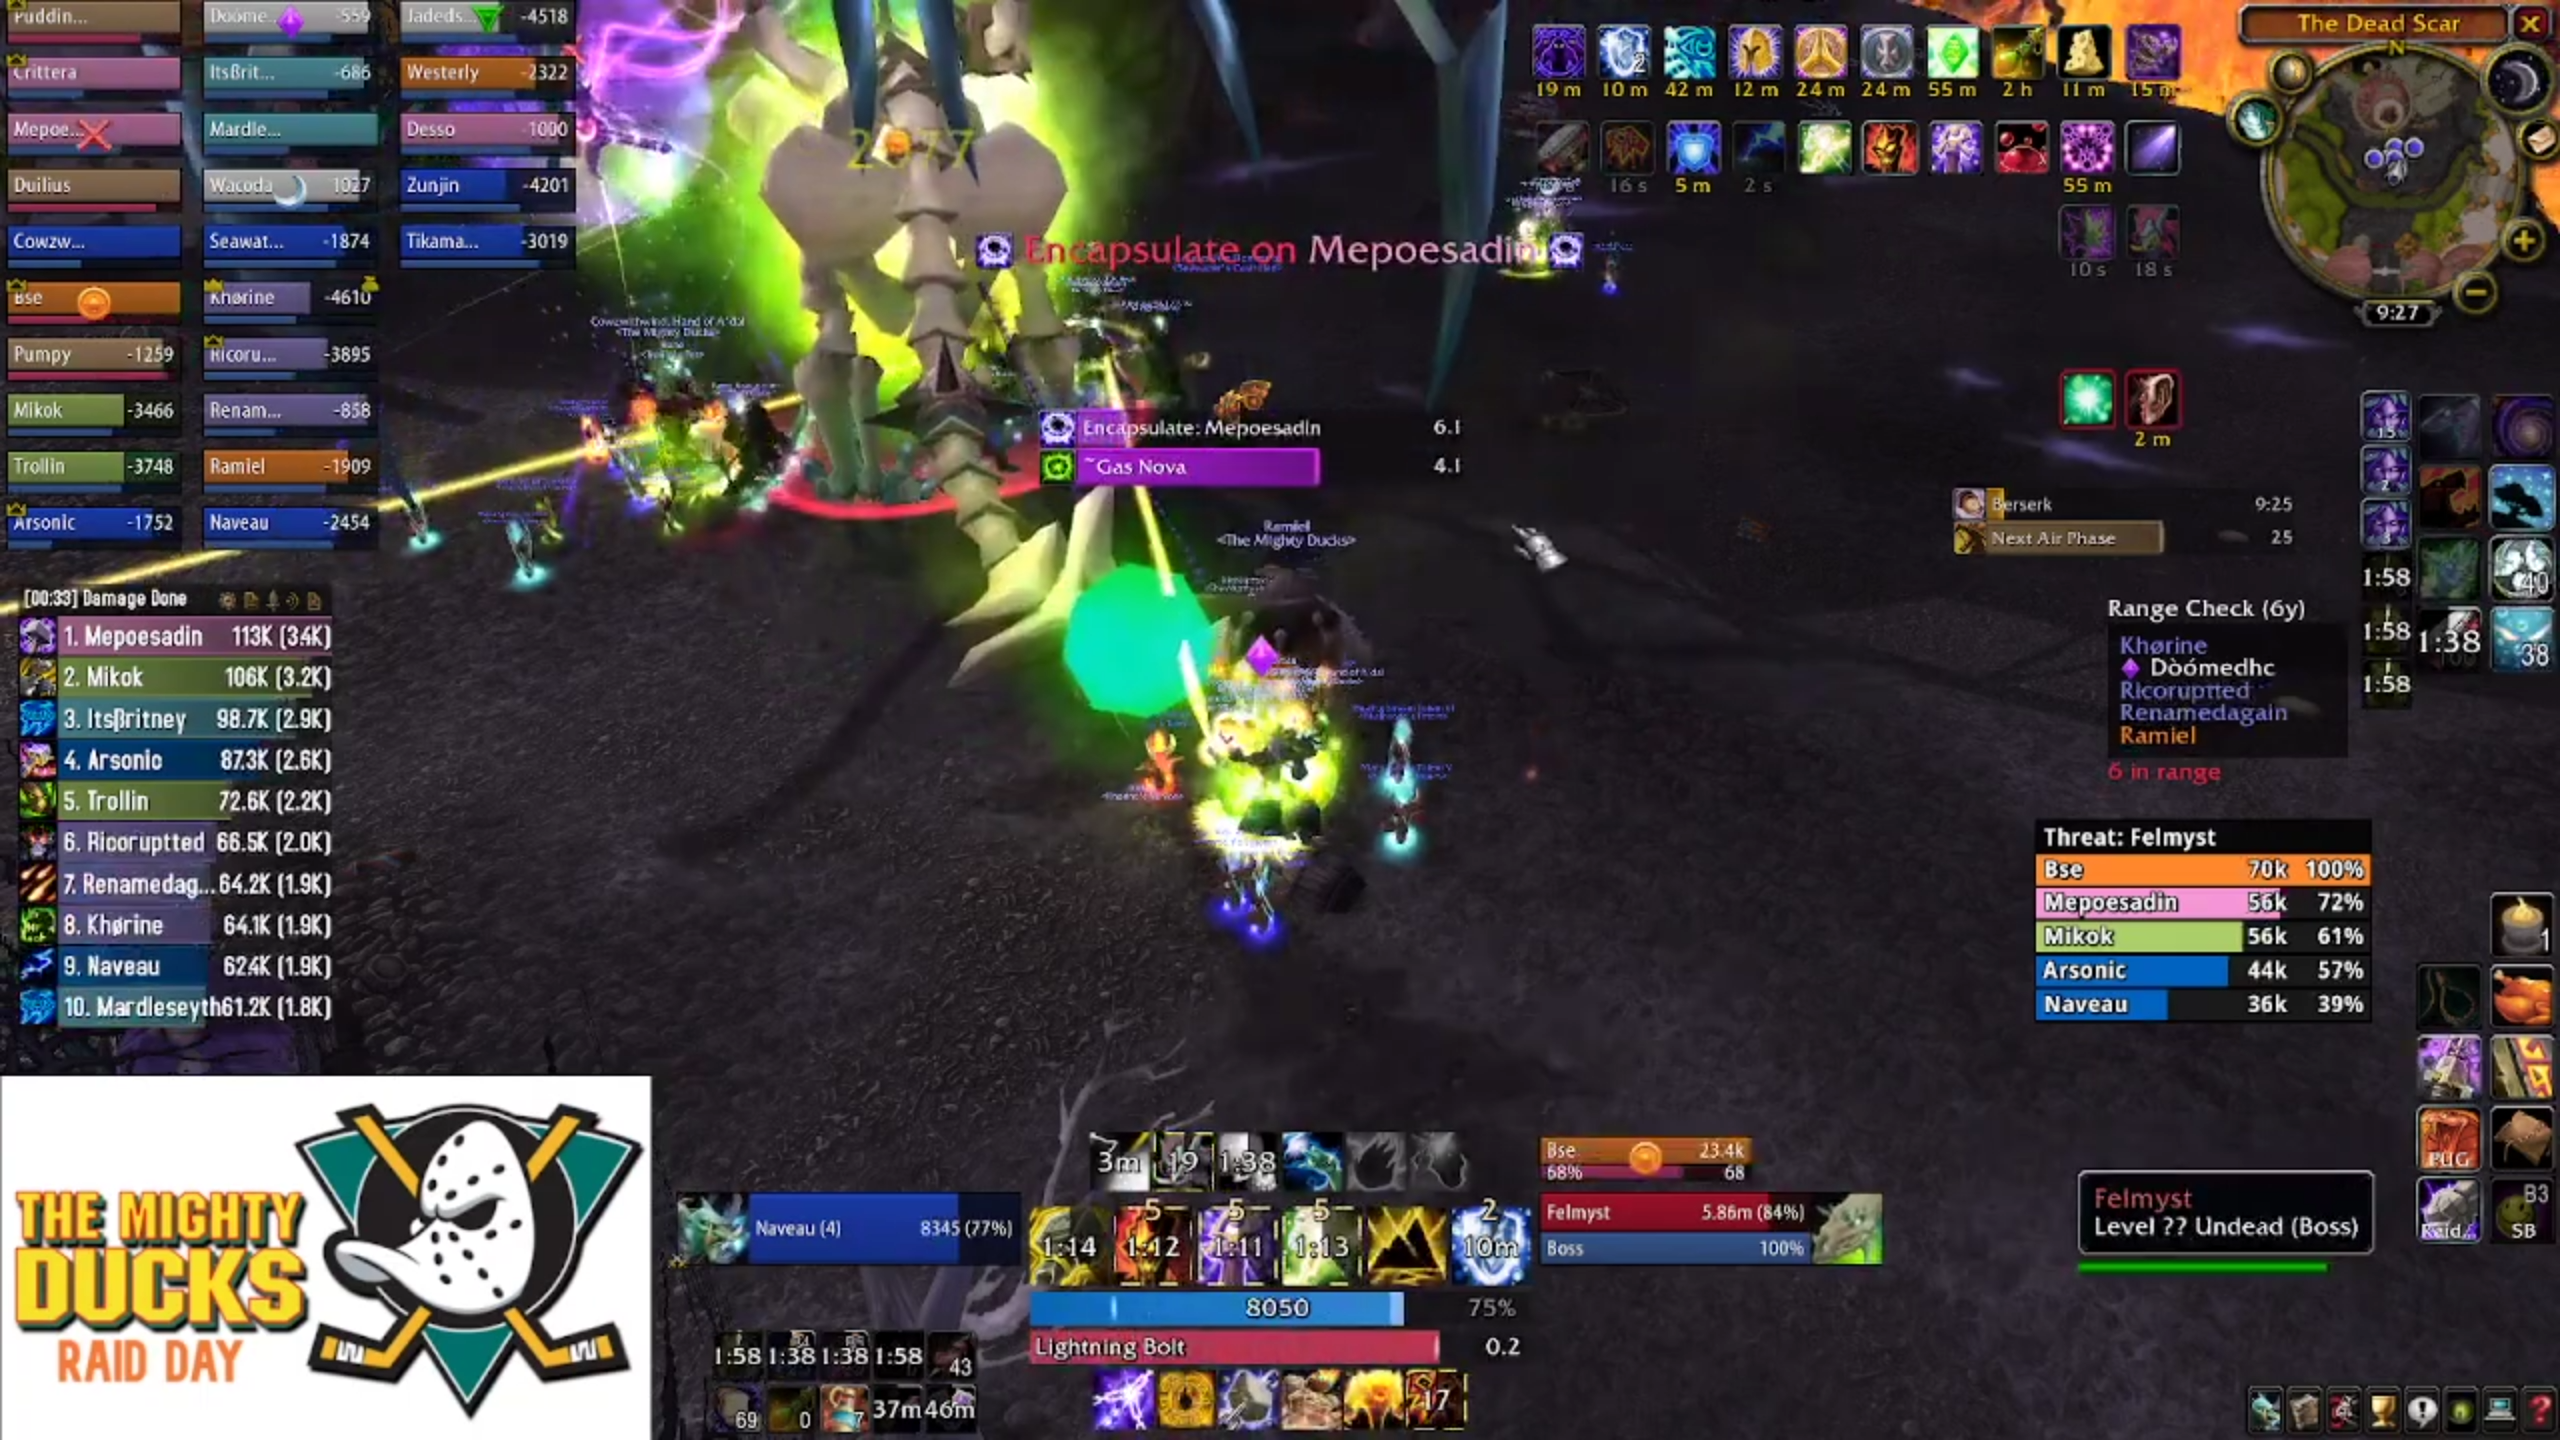
Boss Three - Felmyst
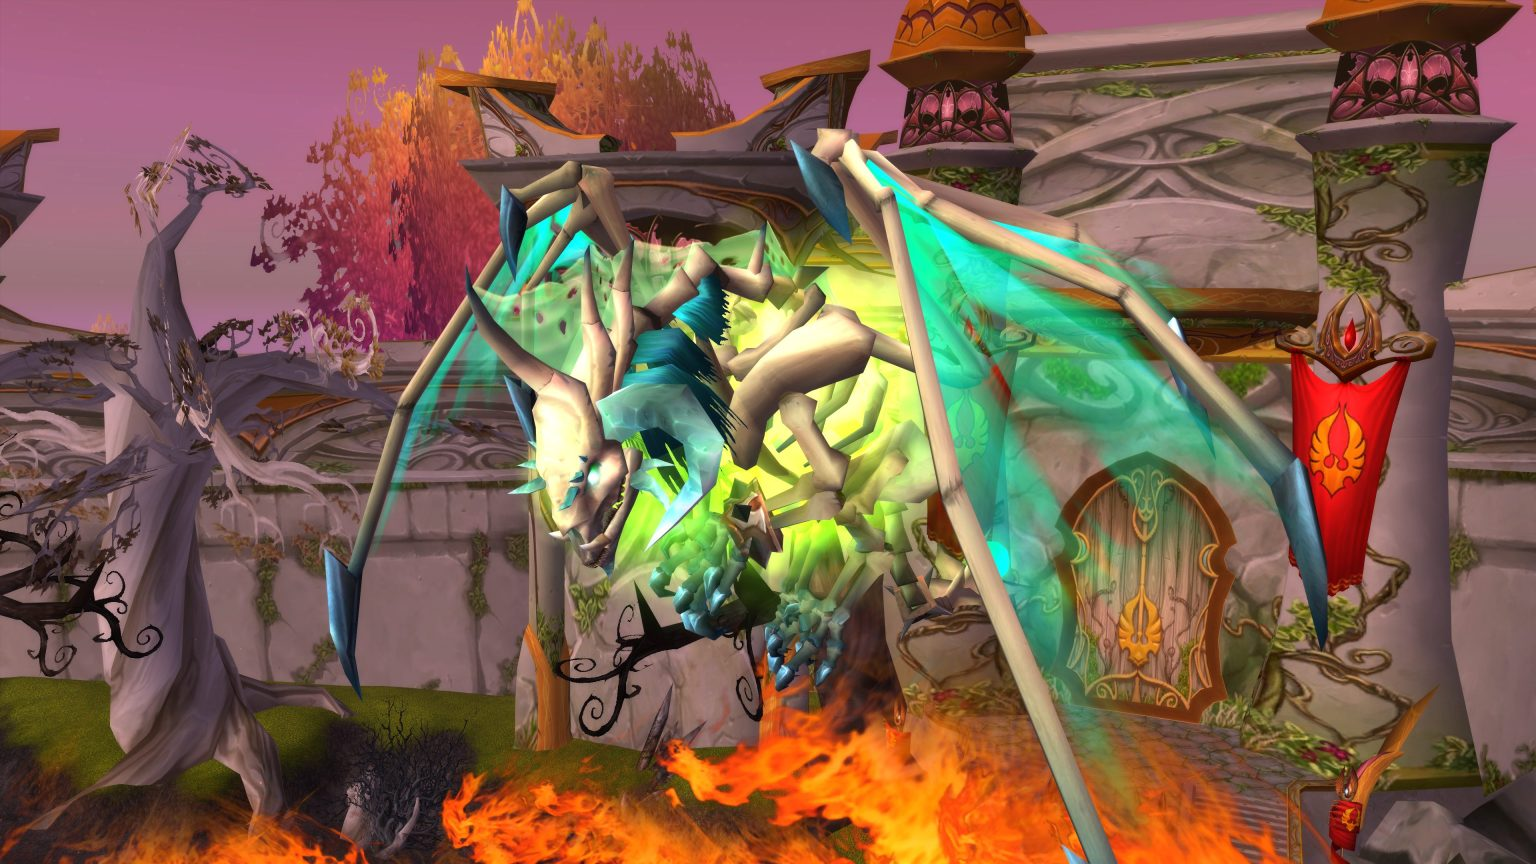
Brutallus was a test of endurance - force on force. Felmyst is about awareness and the ability to read the boss' movements. With the right composition, this boss is easier than Brutallus, but still far from a walk in the park.
First things first - you will need arcane resistance gear again for this fight. It can be particularly helpful if players have access to the arcane resistance neck, because the arcane damage is dealt in one big fistful and being able to mitigate even a small amount of it can save players' lives.
This fight and its positioning depends on the number of priests you have in your group - if you have two it's pretty sweaty, if you have three, it's a lot easier. Ducks always had three, so I'm going to give you the three-priest strategy.
You'll want your ranged DPS in three groups - you'll need to pull the boss with a misdirect and wait for her to come and get you, as this encounter requires your raid team to be in specific areas around the boss. There's small landmarks in the arena - barrels, crates and other deritus - which I recommend you use to remember where you are, and where you need to be.
You'll want your healers and ranged DPS to be in groups no more than 10 big, because Mass Dispel caps out at ten possible targets, including pets. Players and classes who can dispel need to be on high alert as well, particularly for handling individual dispels on key targets - such as the tank - and players that didn't get hit by the mass dispel.
It's also worth having a preset "fall back" area for each group for the boss' second ability, encapsulate. For this reason, each ranged stack also needs to be grouped tightly. Players should know where they're going when their group gets targeted, and be prepared to move (and use healthstones) early and often. Time to put your reaction times to the test.
When everyone's equipped and ready to go, you'll want to direct your hunter to step out and drag Felmyst down onto your tank.
Tactics
Felmyst is a battle of two phases - the ground phase and the air phase. It should be mentioned that as a superior ranged DPS, when the boss is taking off, there's a window where you can continue to attack the boss before the air phase really kicks off.
In the ground phase, Felmyst will deal low, ticking damage to your entire raid. This is more a mechanic intended to keep the pressure on than actually kill anyone, you'll just need to heal through it. It's distance-based, so it's not applicable during the air phase, either.
The boss will debuff your main tank with corrosion, chunking them for a reasonable amount of damage and increasing their damage taken by 100% for 10 seconds. Assuming you've assigned the job of tanking the boss to your bear (like you should), you should be fine to truck along and just health through this, though the damage can get a little bit spiky, so your tank healers will need to be on high alert.
The first of the two chunky abilities you need to be prepared for is Gas Nova, which is why you're divided up in the first place. This puts a hefty damage over time effect on everyone in the raid, which needs to be dispelled. Having someone handle the tank (ideally like a paladin) is ideal. Raiders should be prepared to use healthstones and offheal until they can get the debuff removed.
The key here is that it doesn't take more than one mass dispel cast to sort out the entire raid. Where this can get tricky is trying to handle the melee and a ranged stack - the easiest way to handle this is to have two larger ranged and healer groups, then have a smaller third group positioned close to the melee.
Felmyst's second ability is Encapsulate. This will be your leading cause of wipes on the ground. Felmyst will target a random player, launch them into the air and trigger pulsing arcane damage originating from that player. This can affect everyone except the tank. If you didn't use your healthstones for Gas Nova, this is where you'll want to use them.
Mages can cheat this ability with Ice Block, as well as paladins with Divine Protection. Otherwise, everyone else needs to book it toward their designated fall-back position. Players in other groups need to be prepared to heal fleeing members. Tricks like an Arcane Protection potion can also help here if you know you're going to be slow on the draw getting away from a potential Encapsulate.
After about 60 seconds, Felmyst will take off and the air phase begins.
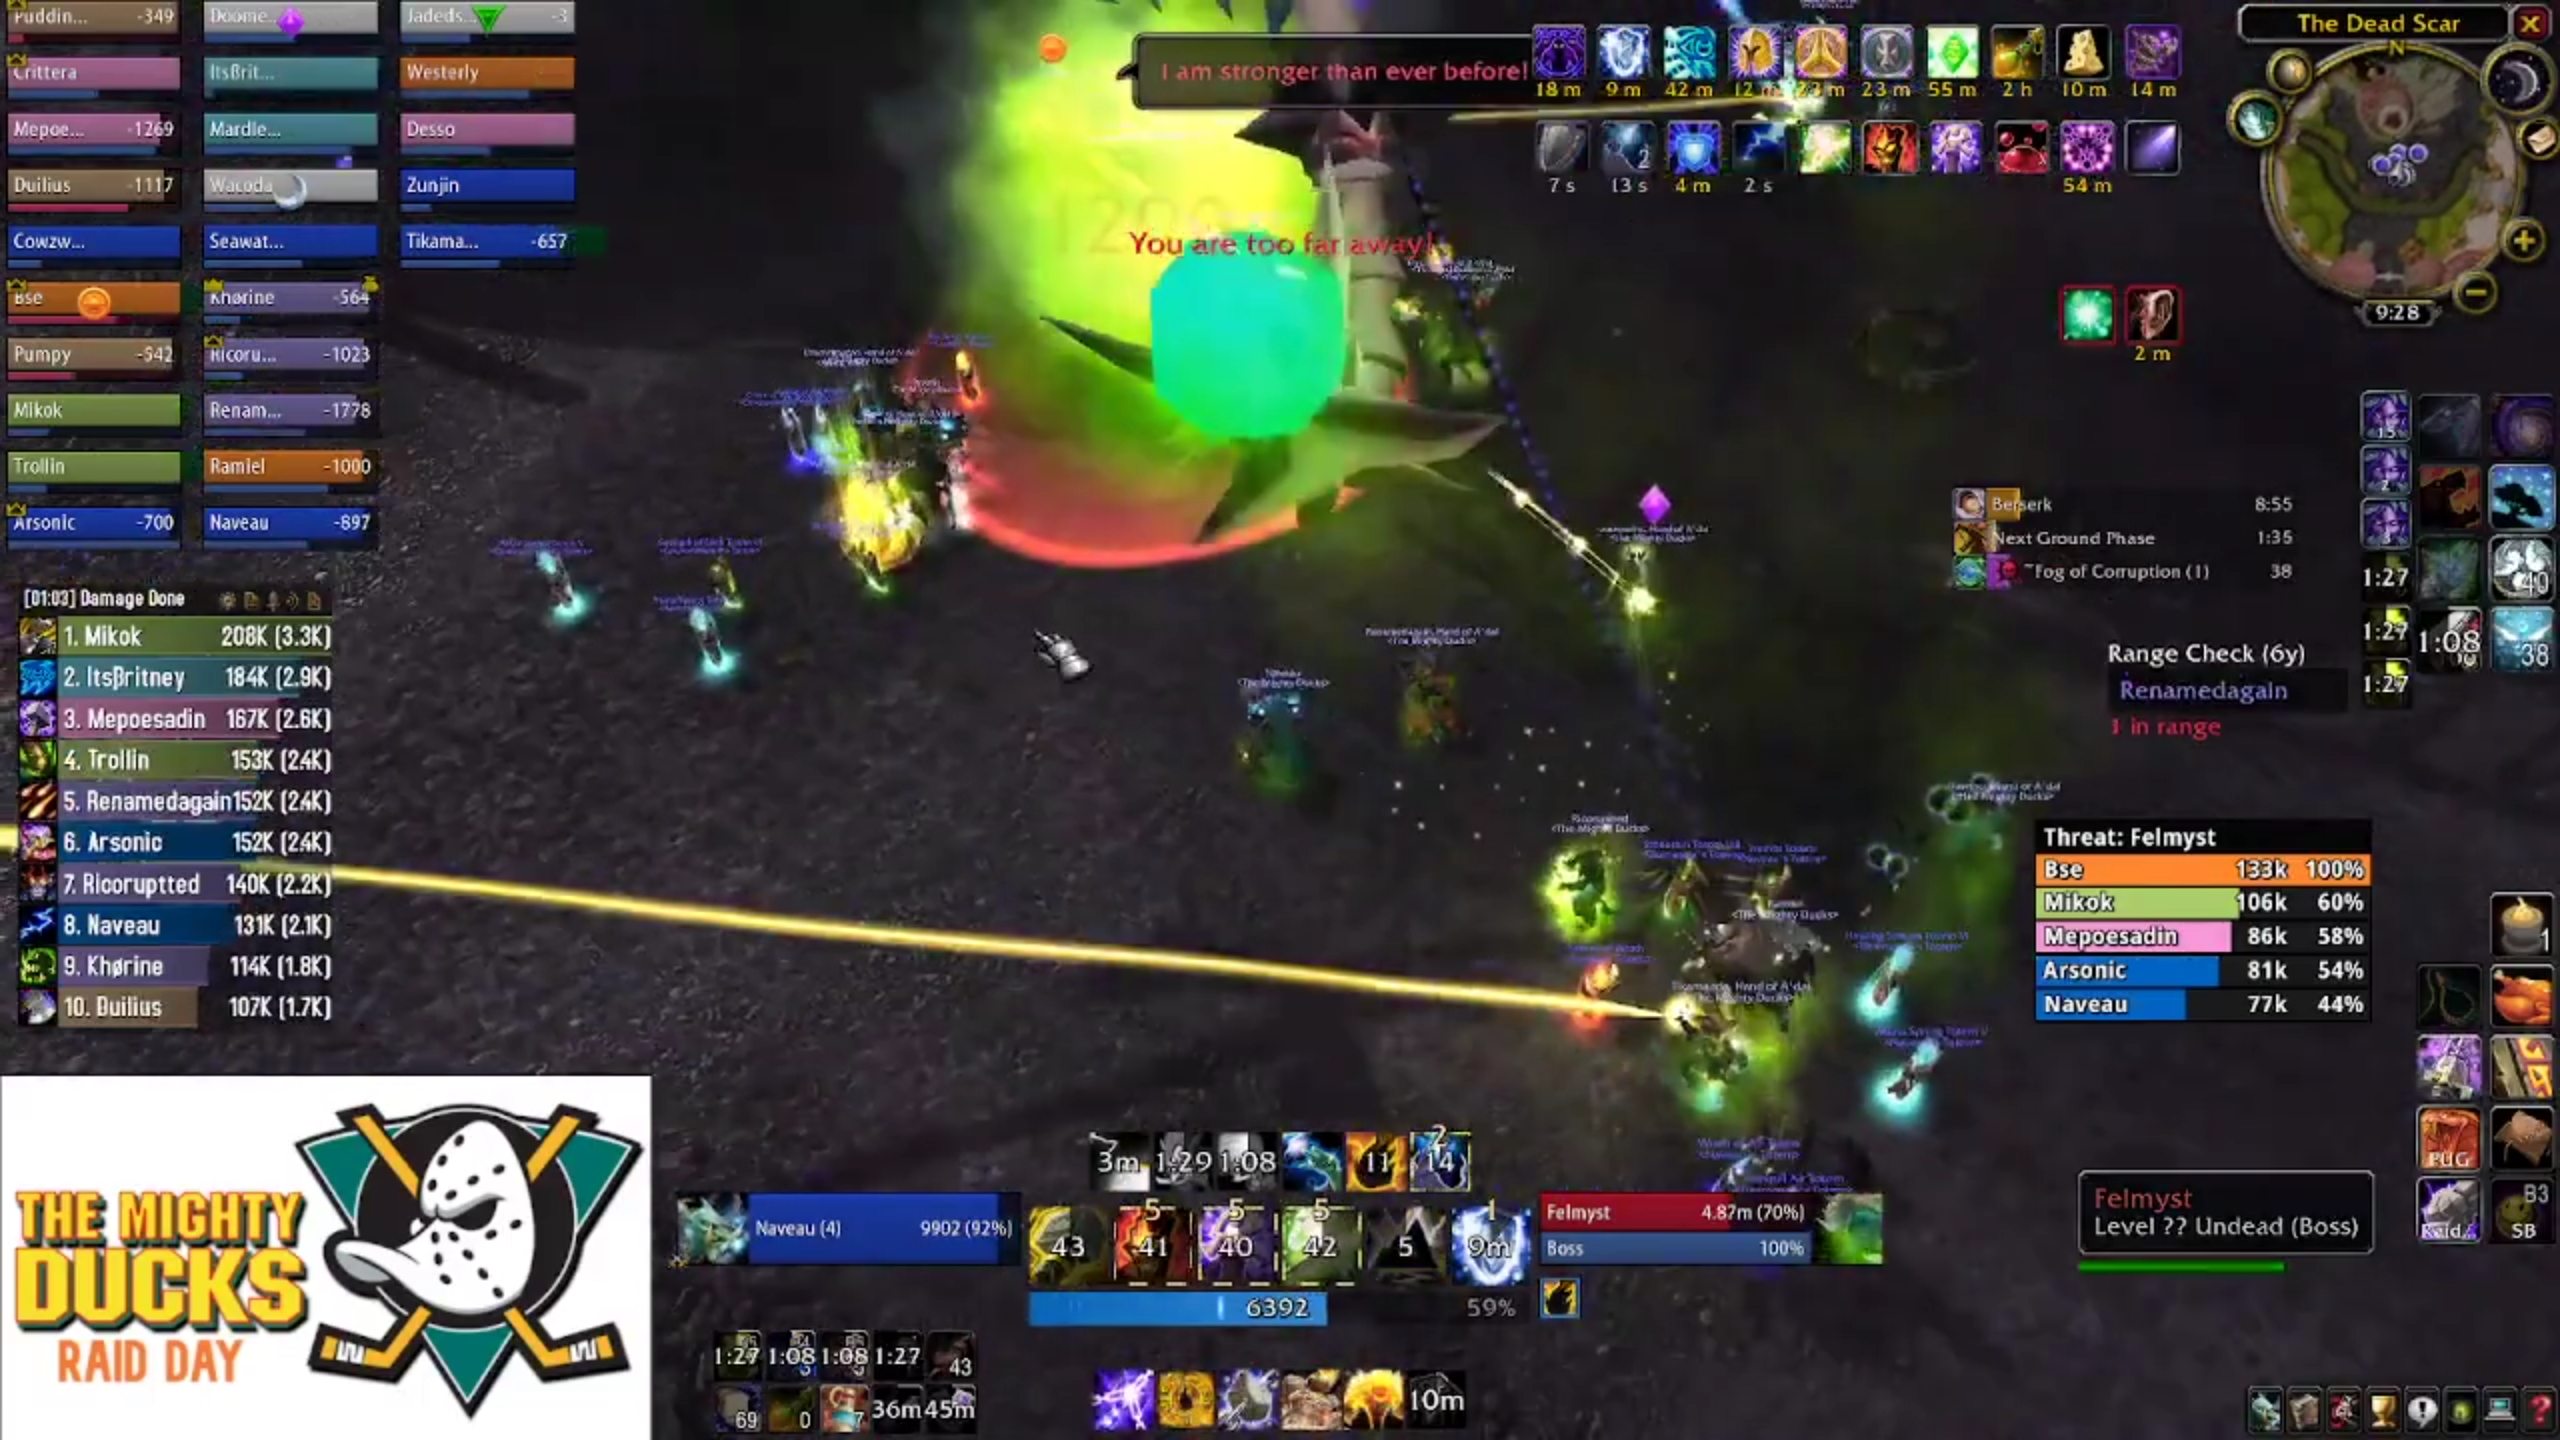
During the air phase, the boss will target two random players with a laser beam. Players targeted by this ability will want to run out (but not too far) and away from the rest of the raid. This ability will leave behind a trail of goo that spawns skeletons - everyone not affected by the laser beam needs to stack close to your protection paladin to pick them all up with consecrate, then your raid should blast them down.
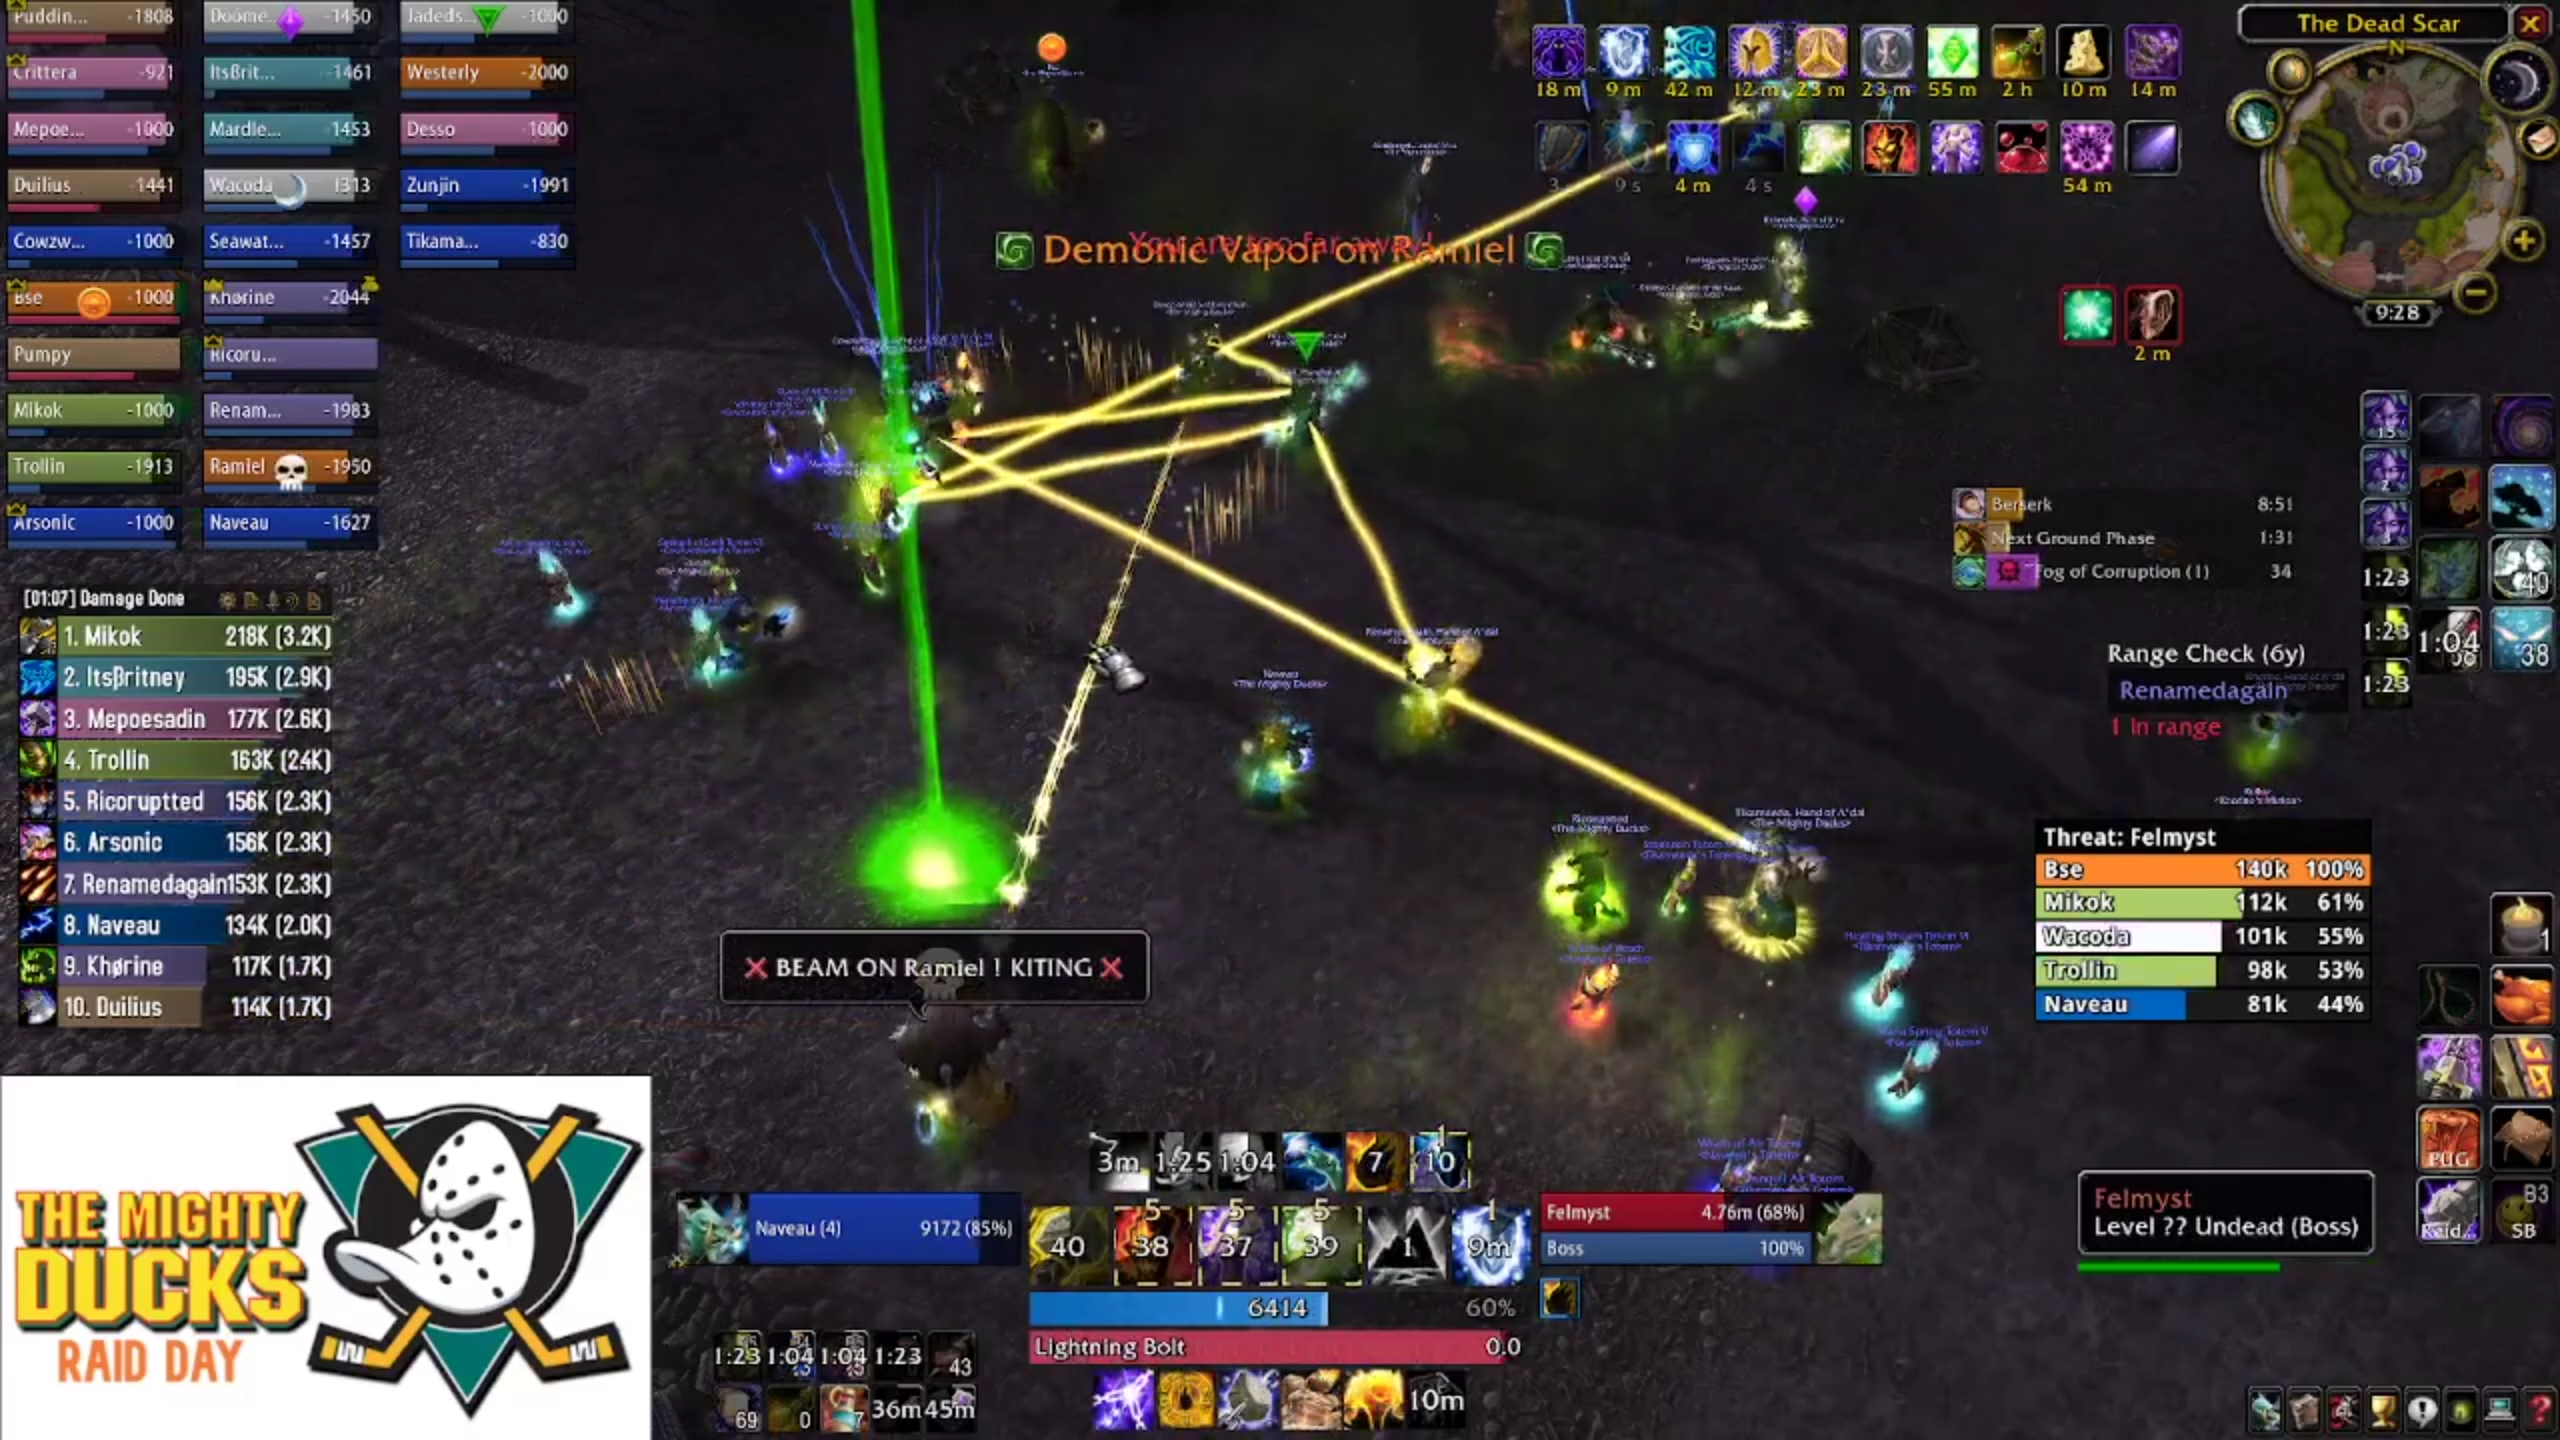
It's worth mentioning that ranged DPS characters can continue to attack Felmyst whilst she's hovering just above the ground. With enough additional damage during this transition phase, you can normally cut the fight time by a third, as you will skip one air phase.
Now comes the fun part.
Felmyst will make three passes across the arena, breathing a noxious gas which mind controls players caught in it. The area of effect for this ability is large, covering approximately 1/3rd of the arena. Your raid group will need to move in accordance with the boss' movements, which will tell you where the gas is going. It's recommended you have a spotter (just one) who observes the movements of the boss and directs the raid to the top or bottom of the arena. It's very easy to mess up - so expect this to kill at least one attempt, if not more.
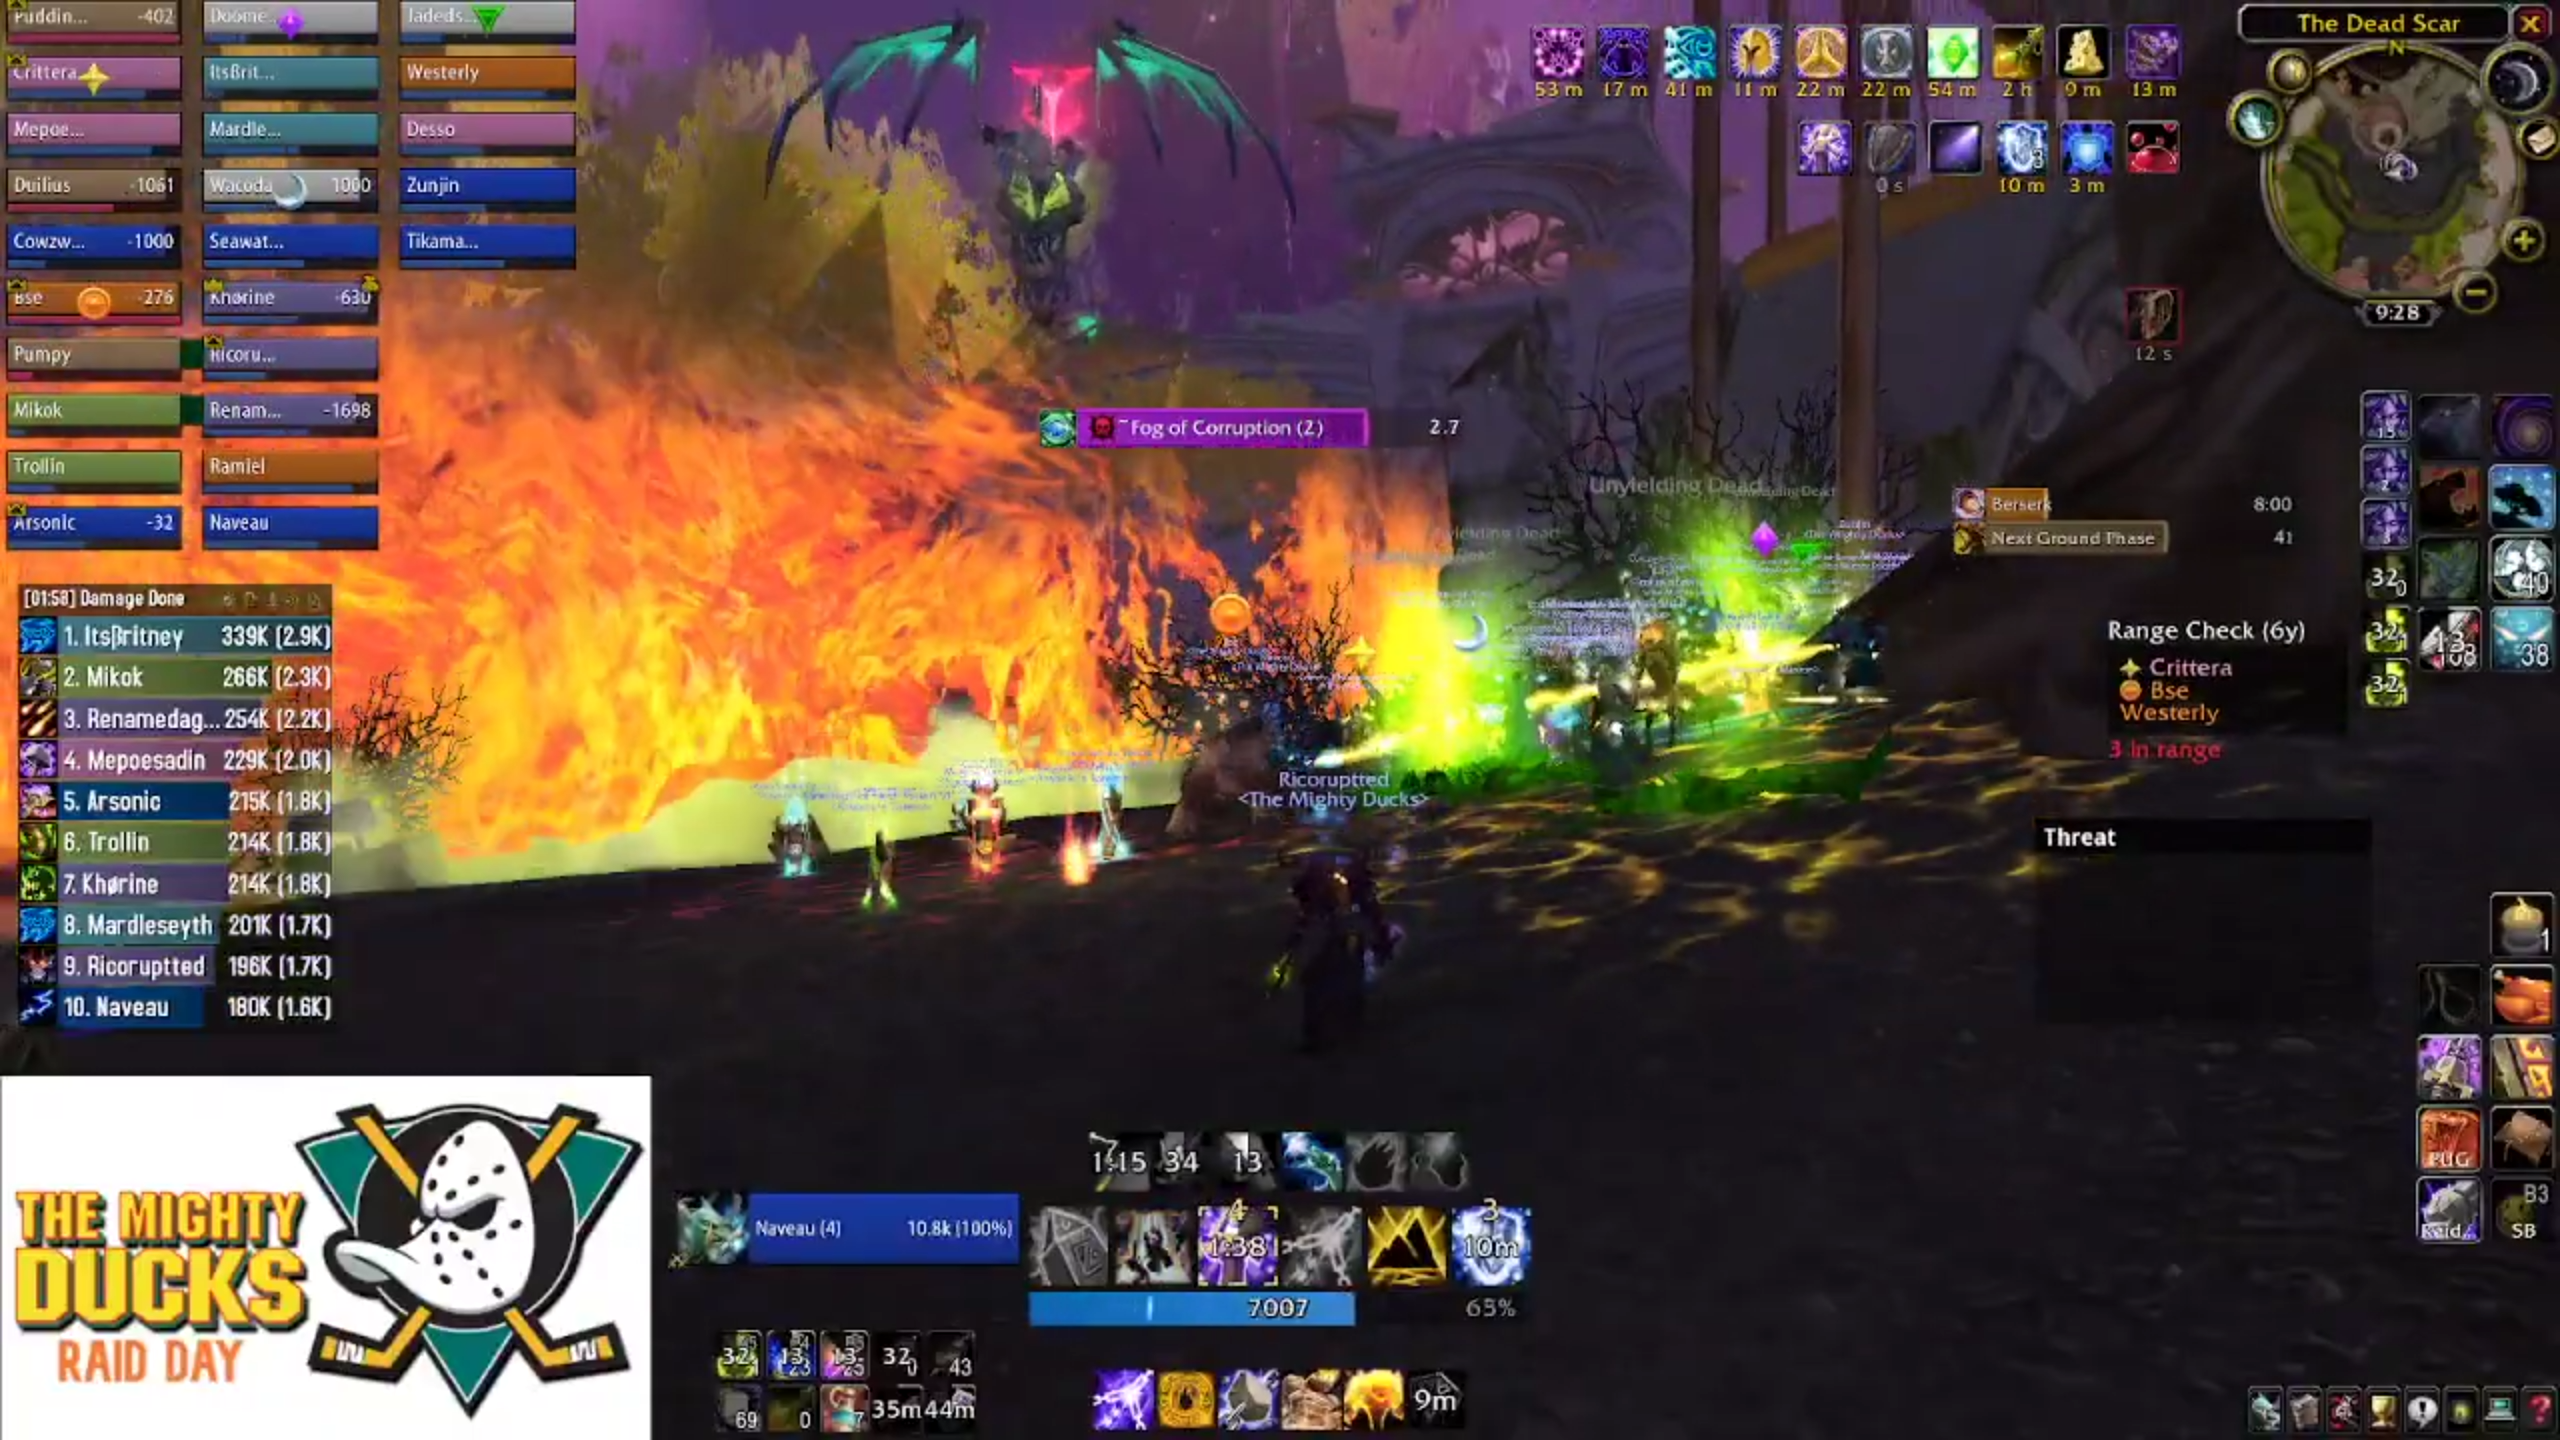
The key is confidence - if your spotter knows they're not going to get blasted by the raid for messing up a call, they'll perform better and make fewer mistakes. So, again, be kind.
There's plenty of downtime whilst all this is going on to regenerate mana, top off the raid, and if you're particularly cheeky, you can summon additional soulwells to provide fresh healthstones. This is an eight minute encounter, so there's plenty of room to use potions and cooldowns to help during the ground phase.
After three passes, Felmyst will land and the ground phase begins again. This is where your groups should use their landmarks to quickly get back into the same positions. The boss will sometimes get to her first gas nova very quickly, so getting back into place without delay is critical.
Once you've got the hang of encapsulates, dispelling gas novas, and calling air phase positions, Felmyst should fall - no bones about it.
After you clean up Felmyst, Kalecgos has recovered from having the snot beaten out of him by your raid team and in a short cutscene, has a sook about Madrigosa being turned into an evil bone dragon, then dispels the flames keeping the raid from progressing further into Sunwell Plateau.

This next part is the most difficult non-boss encounter, it's the gauntlet. Until you reach the top and kill the Shadowsword Commander, you will be bombarded with a non-stop stream of suicide bomber imps and deranged, drug magic-addicted elves.
There are four packs of Elves you deal with on your way to the top - anywhere from four to six mobs. Normally two vanquishers, who hit hard and have a frontal cleave, a manafiend, who smashes the raid with arcane explosions, a life-shaper, who drains life and heals the other mobs, and a soulbinder, who casts an uninterruptible mind control that needs to be dispelled instantly.
At the corners, you'll also have to deal with stealthed assassins, who will pop out and pick off squishy players and raiders who run in front of the tanks (don't do that.)
When going up the gauntlet, you'll want a hunter or boomkin (or both) to snare the imps with frost traps and roots, as they explode after a certain period of time. You'll want to make steady progress and let players stop to recover mana of their own accord - this isn't a DPS check (for once) and so you can handle trash with a quarter or more of your raid fuelling up - provided it's not all of your healers, of course.
Once you get to the top and kill the commander, the imps and elves stop spawning.
When you head through to the next area, there'll another pack of six elves - you can safely skirt this, but if you're looking for BoPs, Sunmotes, or your raid has clumsy raiders with big butts, you'll probably end up pulling this anyway - handle it in the same way as the others.
Take a right and head down the stairs. You can take a break on the nicely curated grassed area and benches if you want, then kill the two patrolling elves. No-one should touch the next flight of stairs, as that will trigger an event which spawns another pack of four elves. It's not likely to cause a wipe, but you'll definitely lose people in the confusion which will slow you down.
With that, you can head through the silken curtains to the next boss.
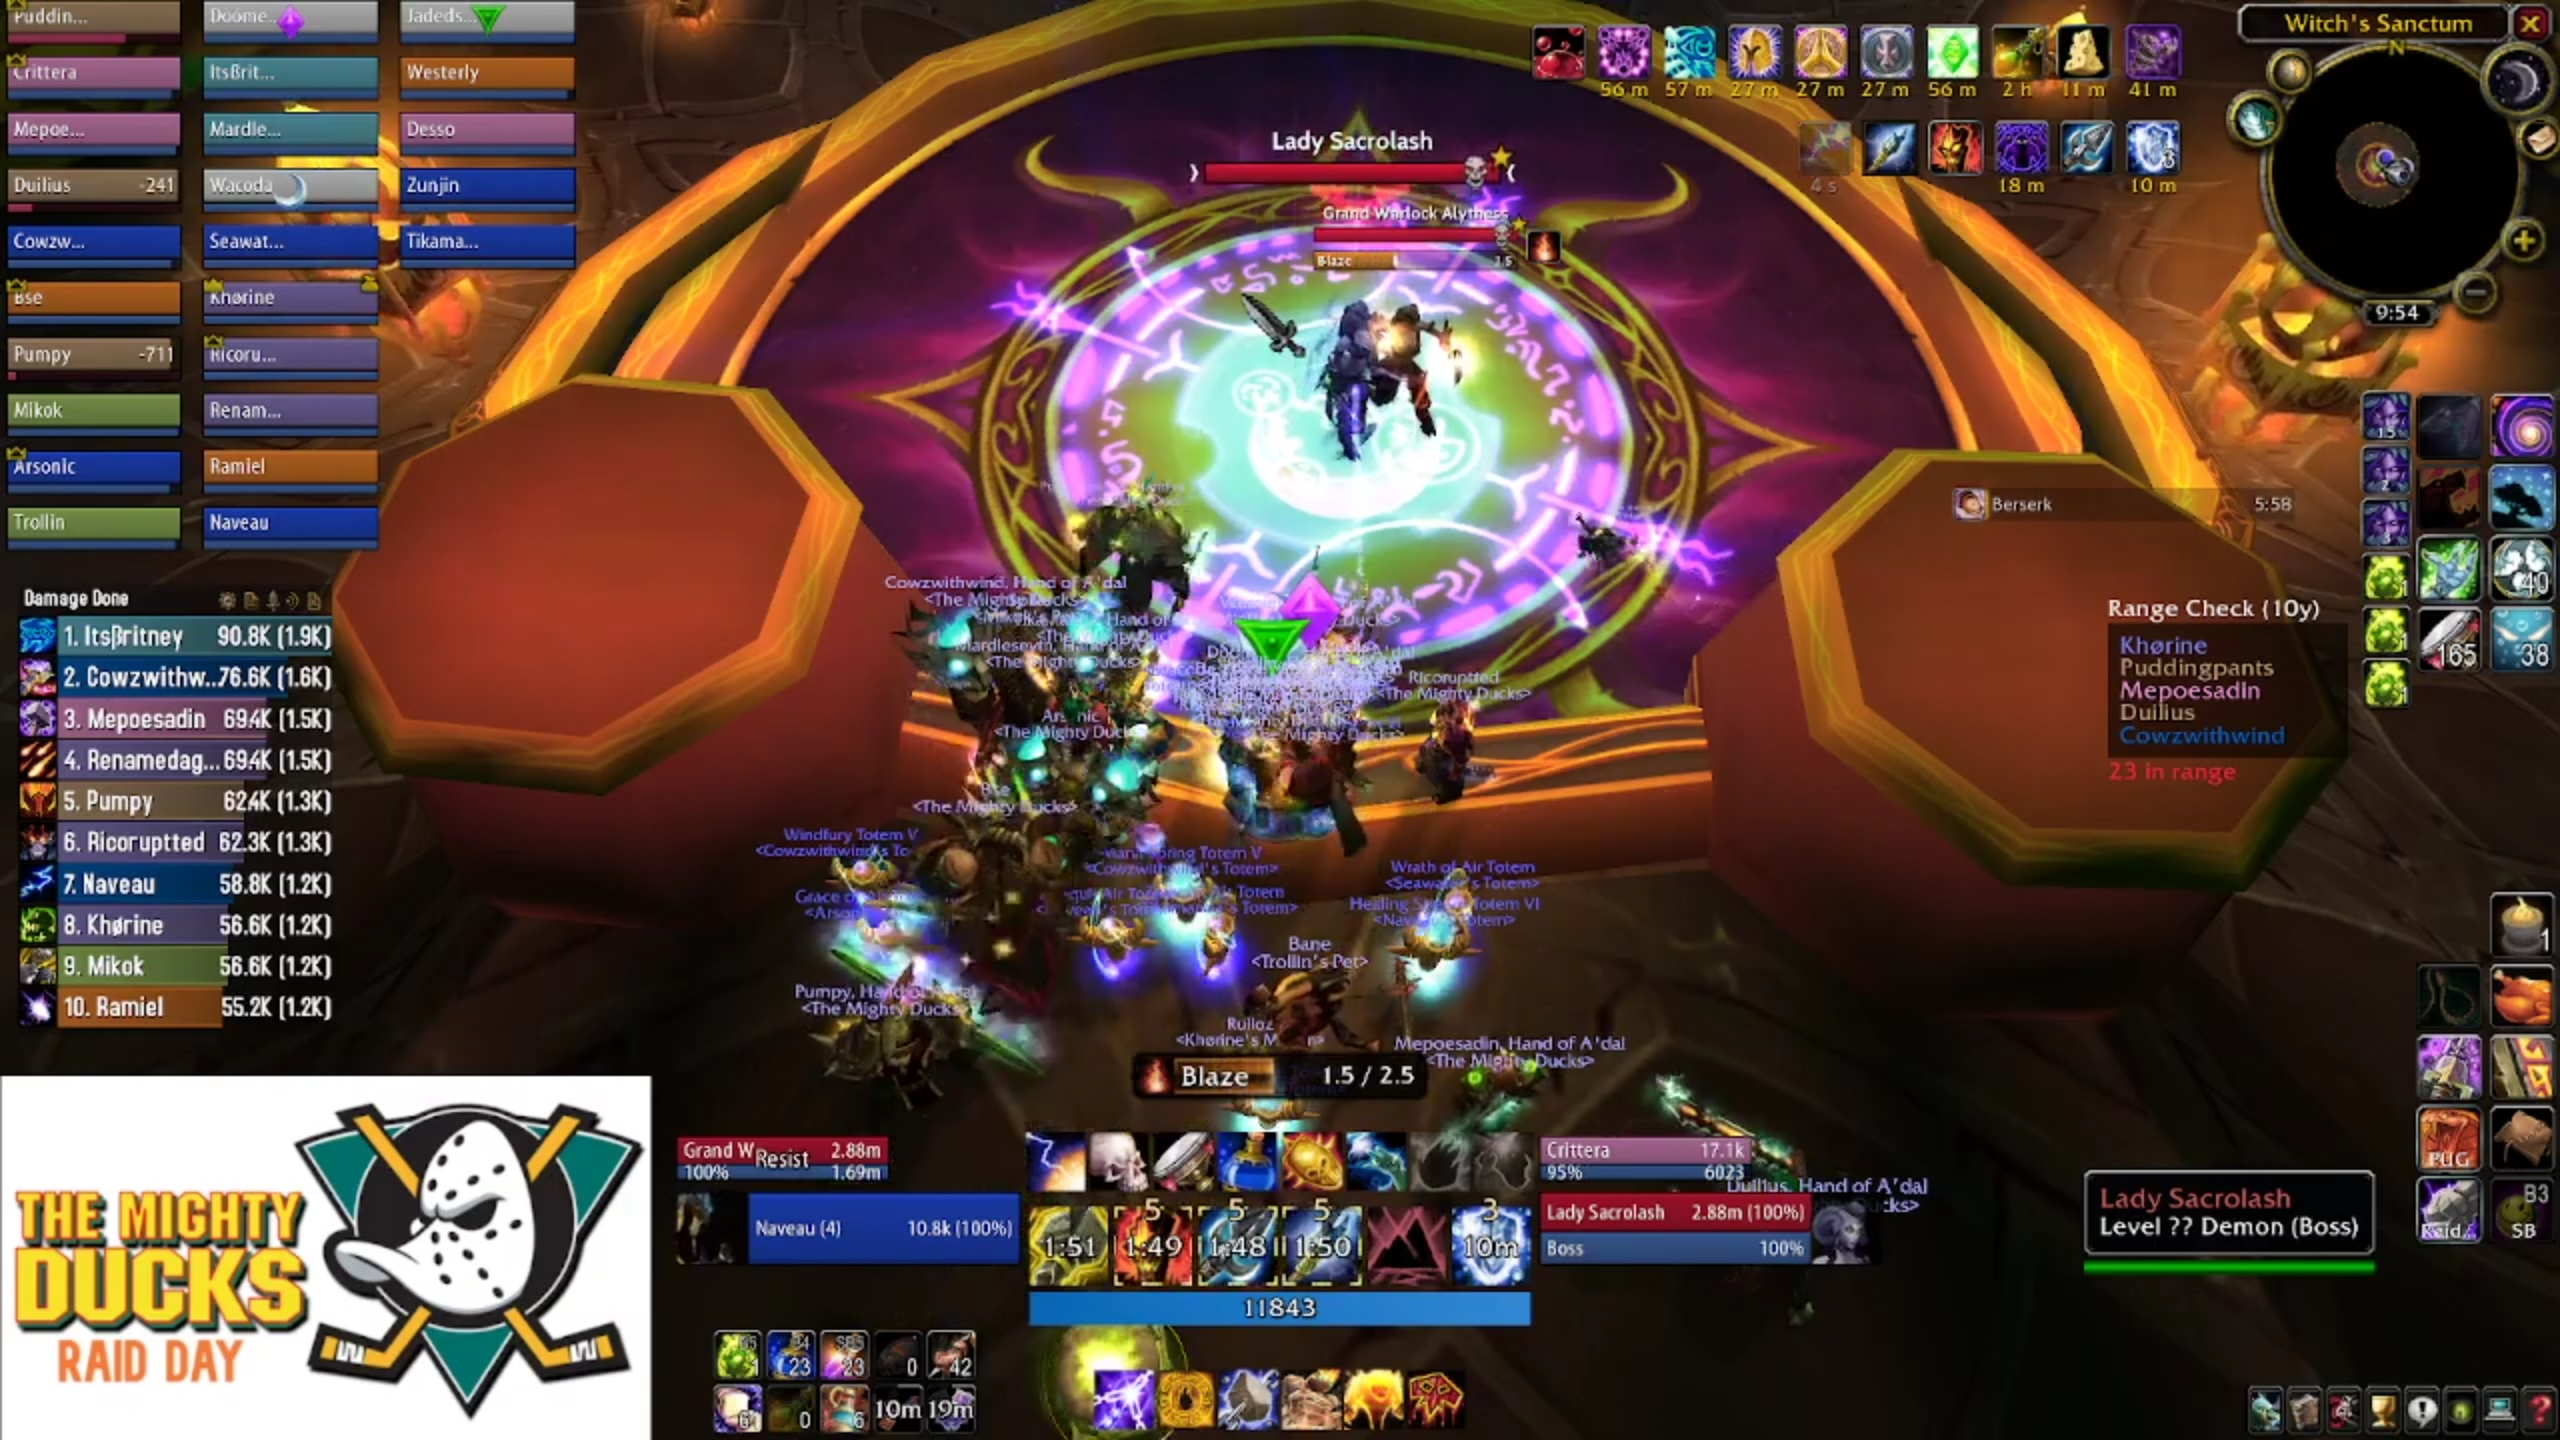
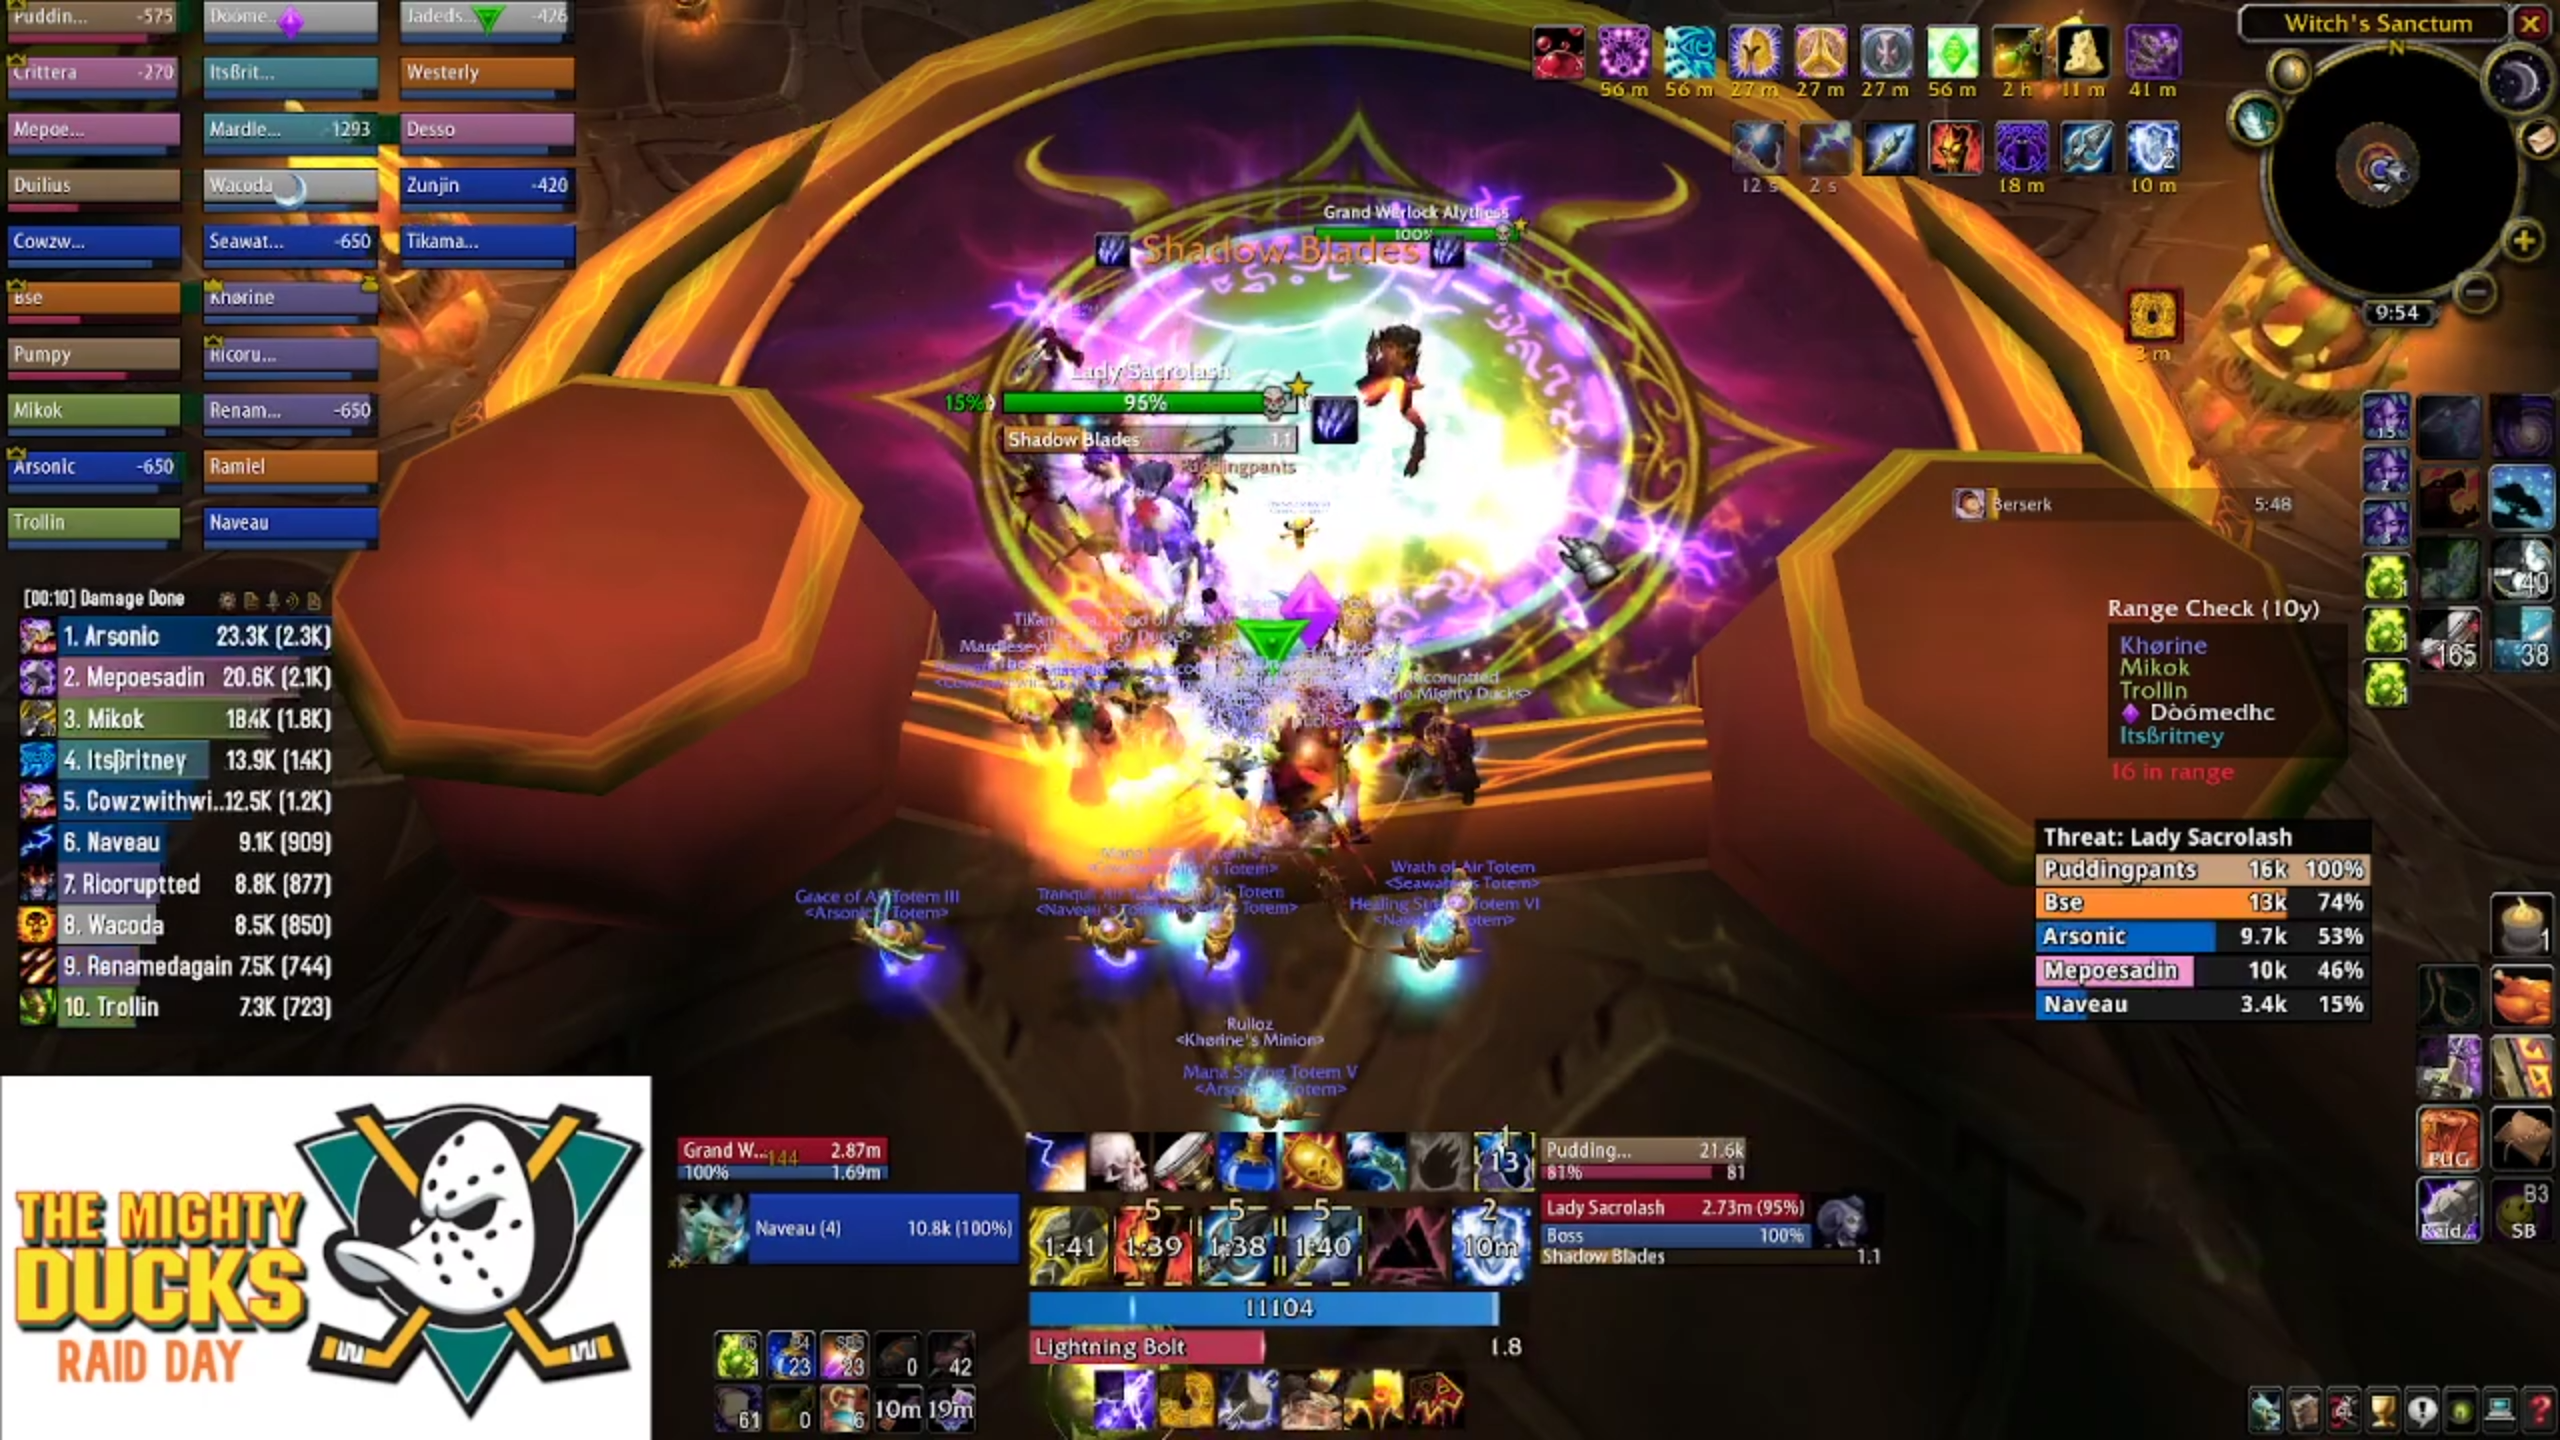
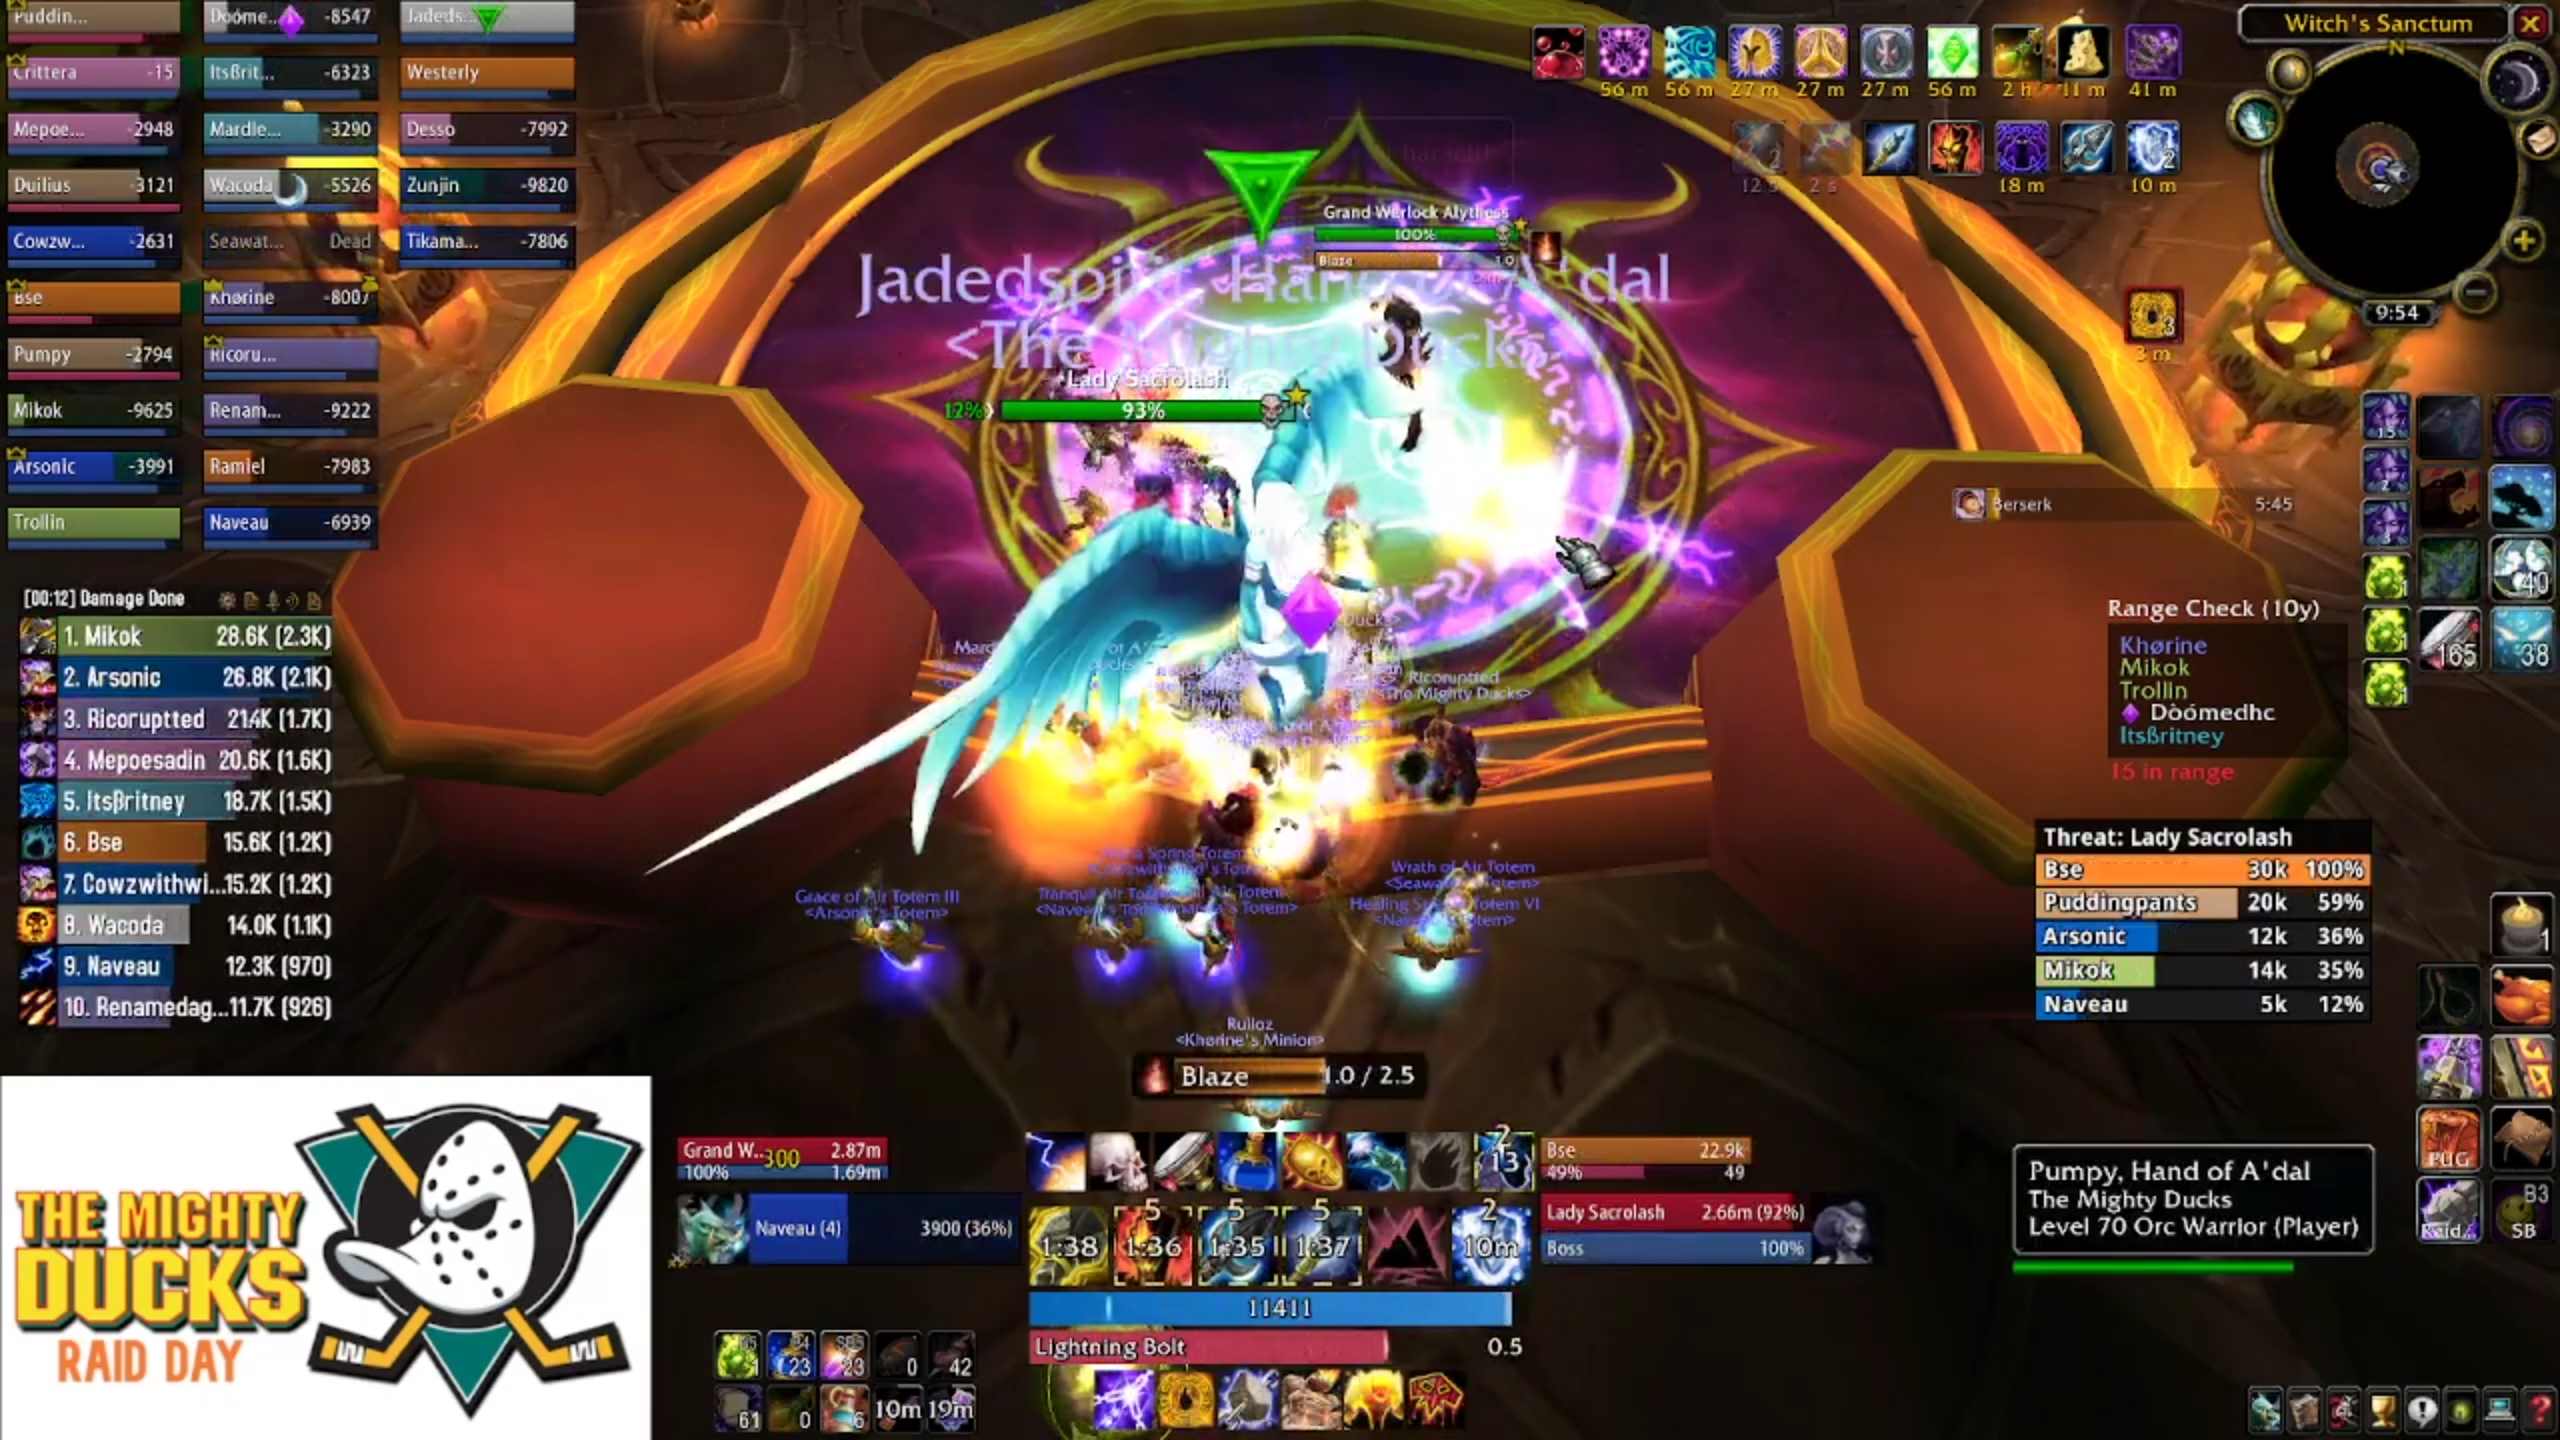
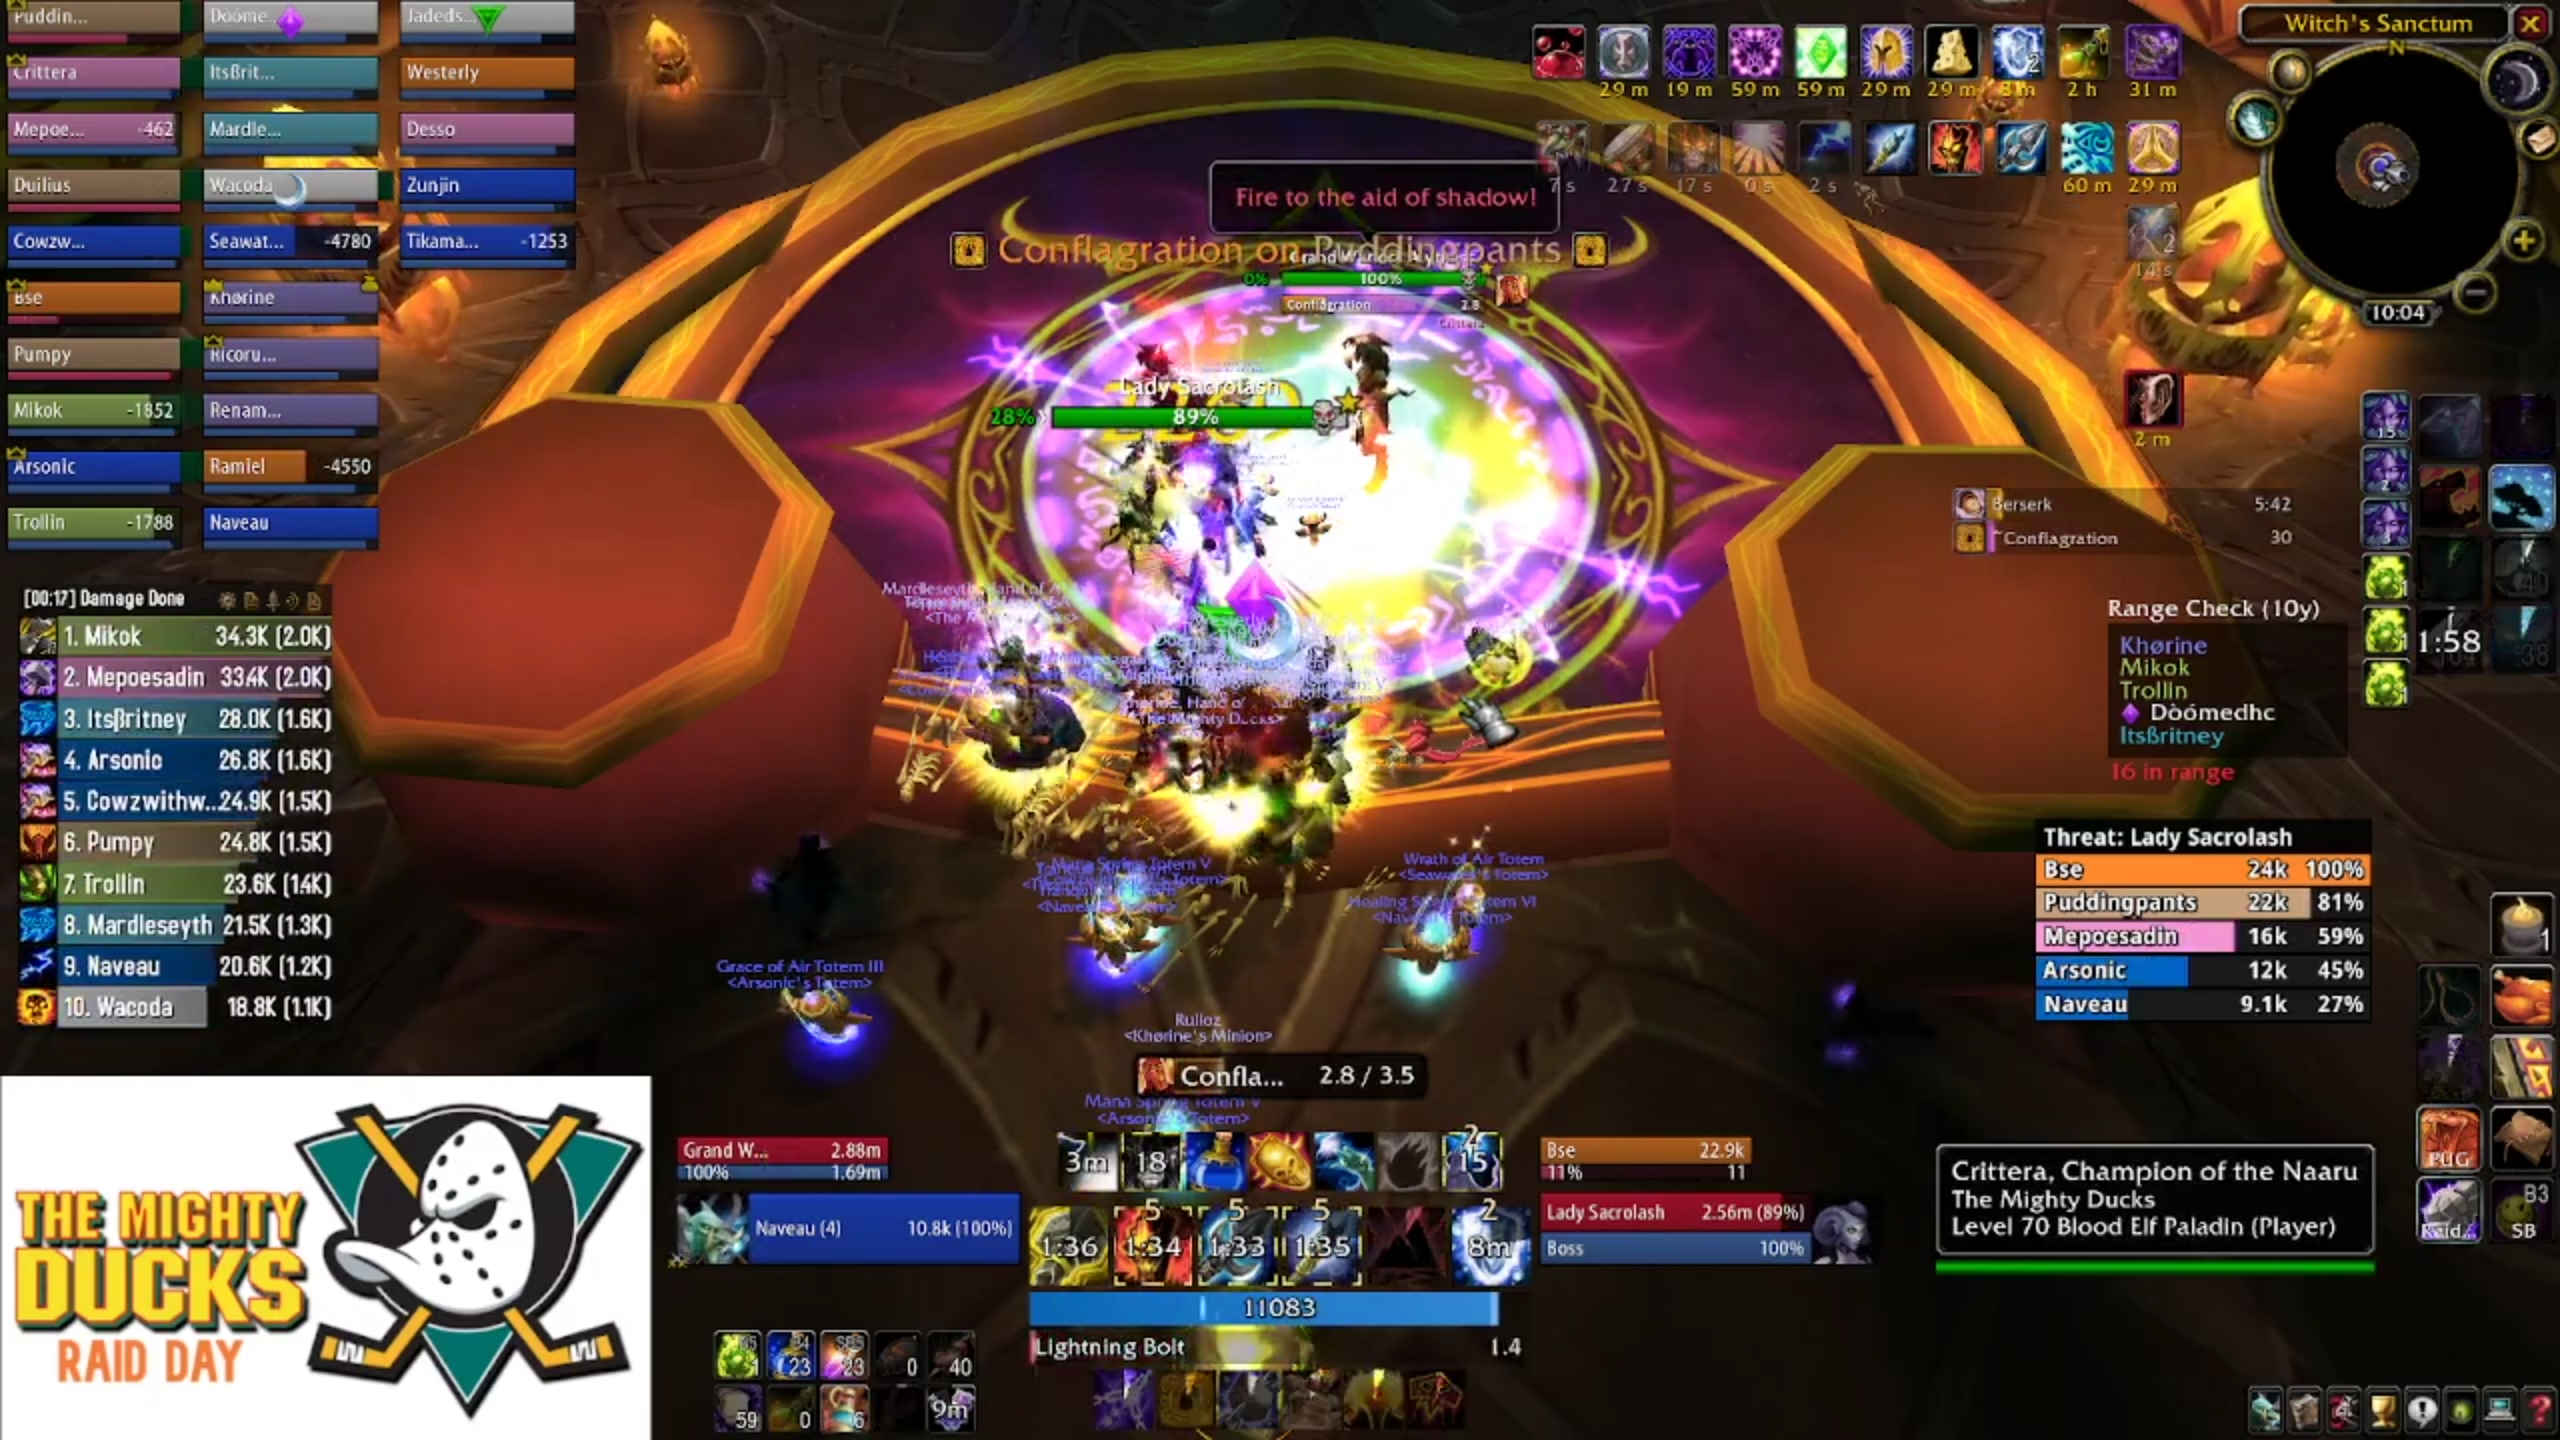
Boss Four - Eredar Twins
The Eredar twins, Alythess and Sacrolash, are a dynamic duo of fire and shadow damage that will flog your raid. It's a massive healing check, whilst also being a battle for survival and a DPS race. It's also a fun adventure in threat management.
One tank, probably your Paladin, needs to be fully decked in fire resistance gear to handle Alythess. They'll also need to be uncrushable, as this is one of the few bosses in the tail end of TBC that can crush. Fun times.
Everyone else needs to be wearing their PvP trinket - it's going to be one of those fights. The ability you need to use it on - conflagration - has a four second reaction window, and missing it, even if you break out of it with your trinket, is a guaranteed raid wipe.

The ranged and healers should also practice getting up and down from the ledge. There's a little lip on the platform above the boss that everyone who isn't melee or a tank needs to stand on. It's fiddly, but you'll get the hang of it. You should expect accidental pulls from people overestimating the distance they need to cover and landing in front of the twins.
It's called the ledge boss for a reason.
For this fight it can help to have a few additional healers - your boomkin (and loser elemental shaman that never bothered to upkeep his healing gear) are prime candidates. The raid damage output is bananas, and you can lose half your raid or more in the blink of an eye.
When everyone's got their pvp trinkets on, you'll want to kick things off with a misdirect as your tank(s) walk off the platform and drop onto the bosses.
Tactics
Twins is a two phase fight - of sorts. When you kill one, the other heals to full and you have to try and kill the other with whatever you have left in the tank. It's traditional to kill Sacrolash first, then trying to kill Alythess, so that's what I'm going with for this article. You can do it another way if you want, I guess, but considering the way this encounter works, I wouldn't try it.
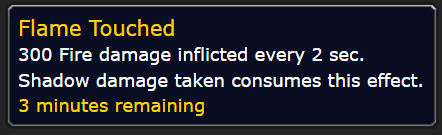
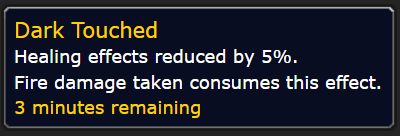
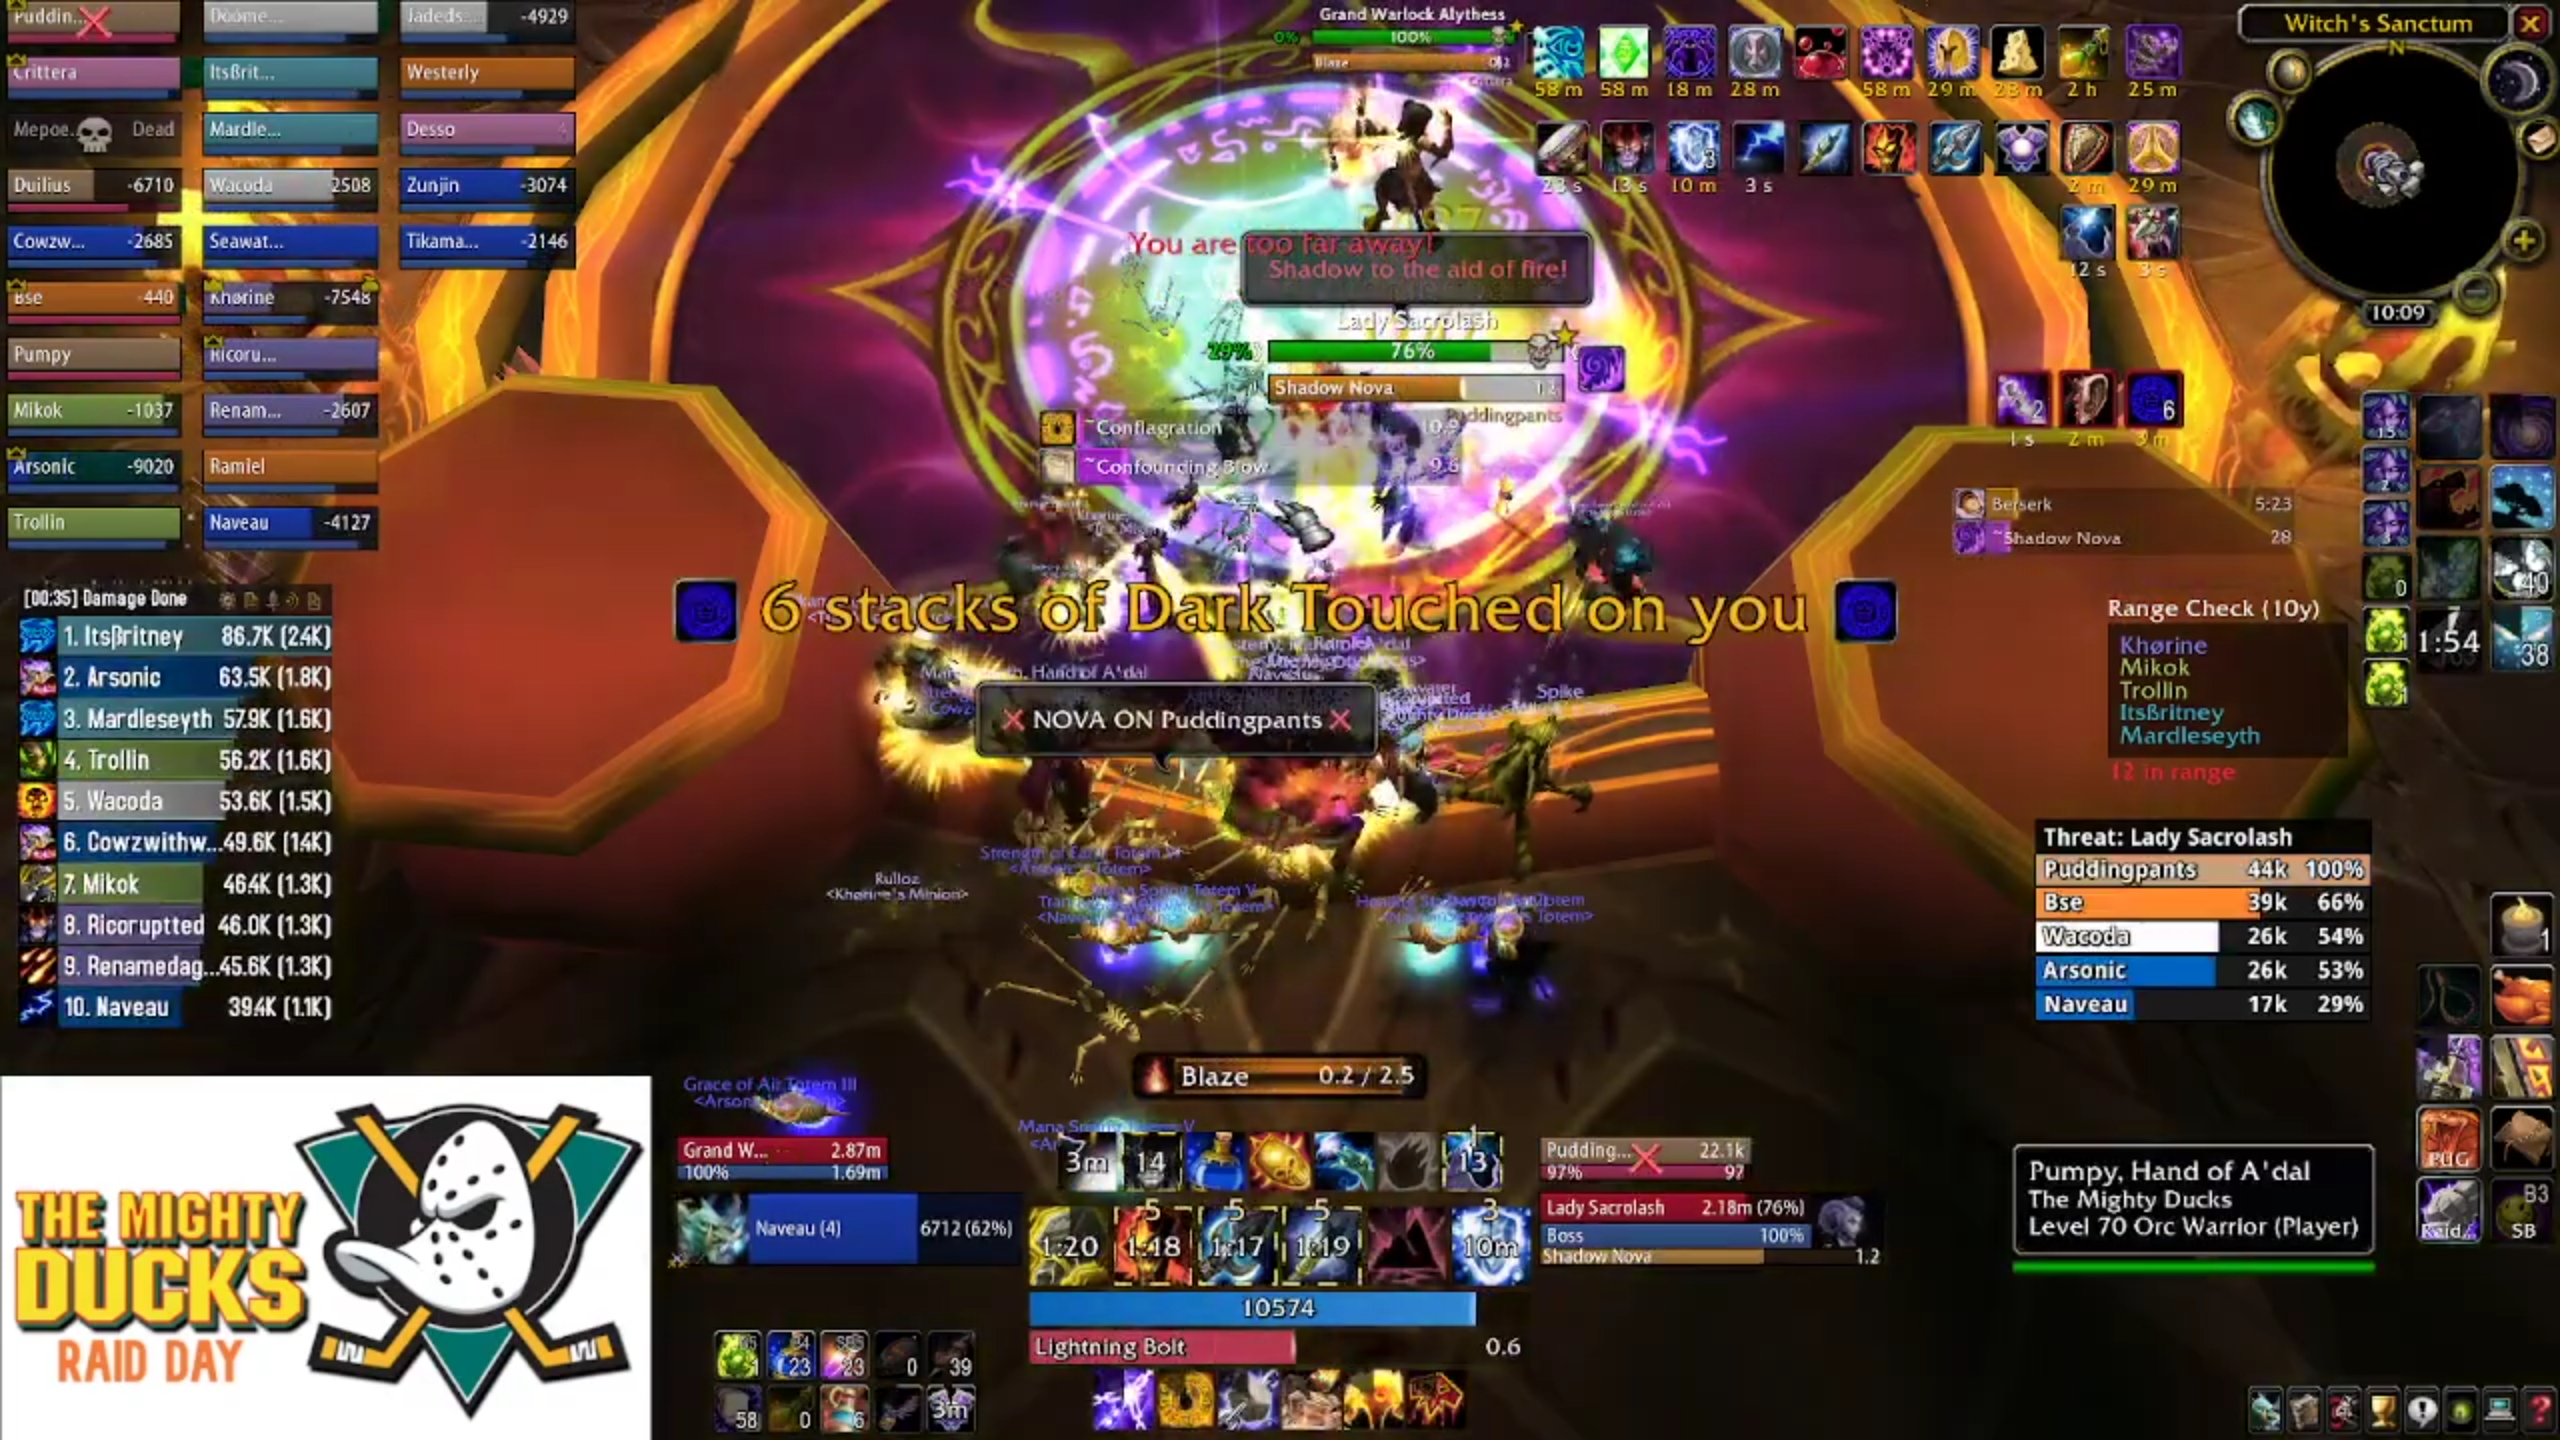
The first thing to understand about this encounter is that each boss applies a debuff when they hit a player with an ability, or the player steps in a boss' lingering ability. Sacrolash hands out Dark Touched, which reduces healing received by 5% and stacks - where Alythess hands out flame touched, which applies a dot.
As mentioned above, taking a hit from the other's effect clears your stacks. Every player needs to be aware of their stacks and how to clear them. As a rule, tanks and melee will need to clear dark touched with flame touched and ranged DPS and healers will need to do the opposite.
As the primary target, we'll talk about Sacrolash's abilities first.
Through the fight, Sacrolash will hit her primary target with confounding blow. Much like Void Reaver and Gruul before, this drops the target's threat and stuns them. This means you'll always want the second tank to be chasing threat, or having the two tanks fighting for threat. Your tanks can clear this with their pvp trinket, but it leaves them vulnerable to being smoked by a conflagration later in the piece.
Shadow Blades, Sacrolash's second ability, is the reason your raid can't stack together. It deals a chunk of Shadow Damage to everyone within 20 yards. This is what you'll need to use as a ranged DPS or healer to clear your flame touched stacks, by dropping down and running back up the ramp again.
Sacrolash's third ability, Shadow Nova, is another chunk of AoE damage targeted on a player and everyone within 10 yards. If the boss decides to be helpful, it'll get dropped on your ranged stack as multiple members have high flame touched stacks, but otherwise it's just more raid pressure and more damage. It also can target the melee, too, so don't get too invested in having everything magically work out for you.
Finally, Sacrolash summons copies of herself to run around and attack players. These are untargetable and mostly harmless, however sometimes they'll cast shadowfury which will stun players. If you get ultra unlucky you can be conflagrated as this happens, which will wipe your raid. Thanks RNGesus!
On paper it doesn't sound too dangerous, but the key to remember here is that there are two twins. All the damage being pumped out by Sacrolash is complimented by Alythess - and that's when it stops being "fun" and moves into "nightmarish" territory.
First, let's talk about the big one - conflagration.
Alythess will target a single player with this ability - after three and a half seconds, it'll apply a dot that scales multiplicatively with the number of players hit. So if three players get hit, each player will take the base damage, multiplied by three. You don't need to do the math to know if you dump that in the middle of your raid, it'll instantly wipe you.
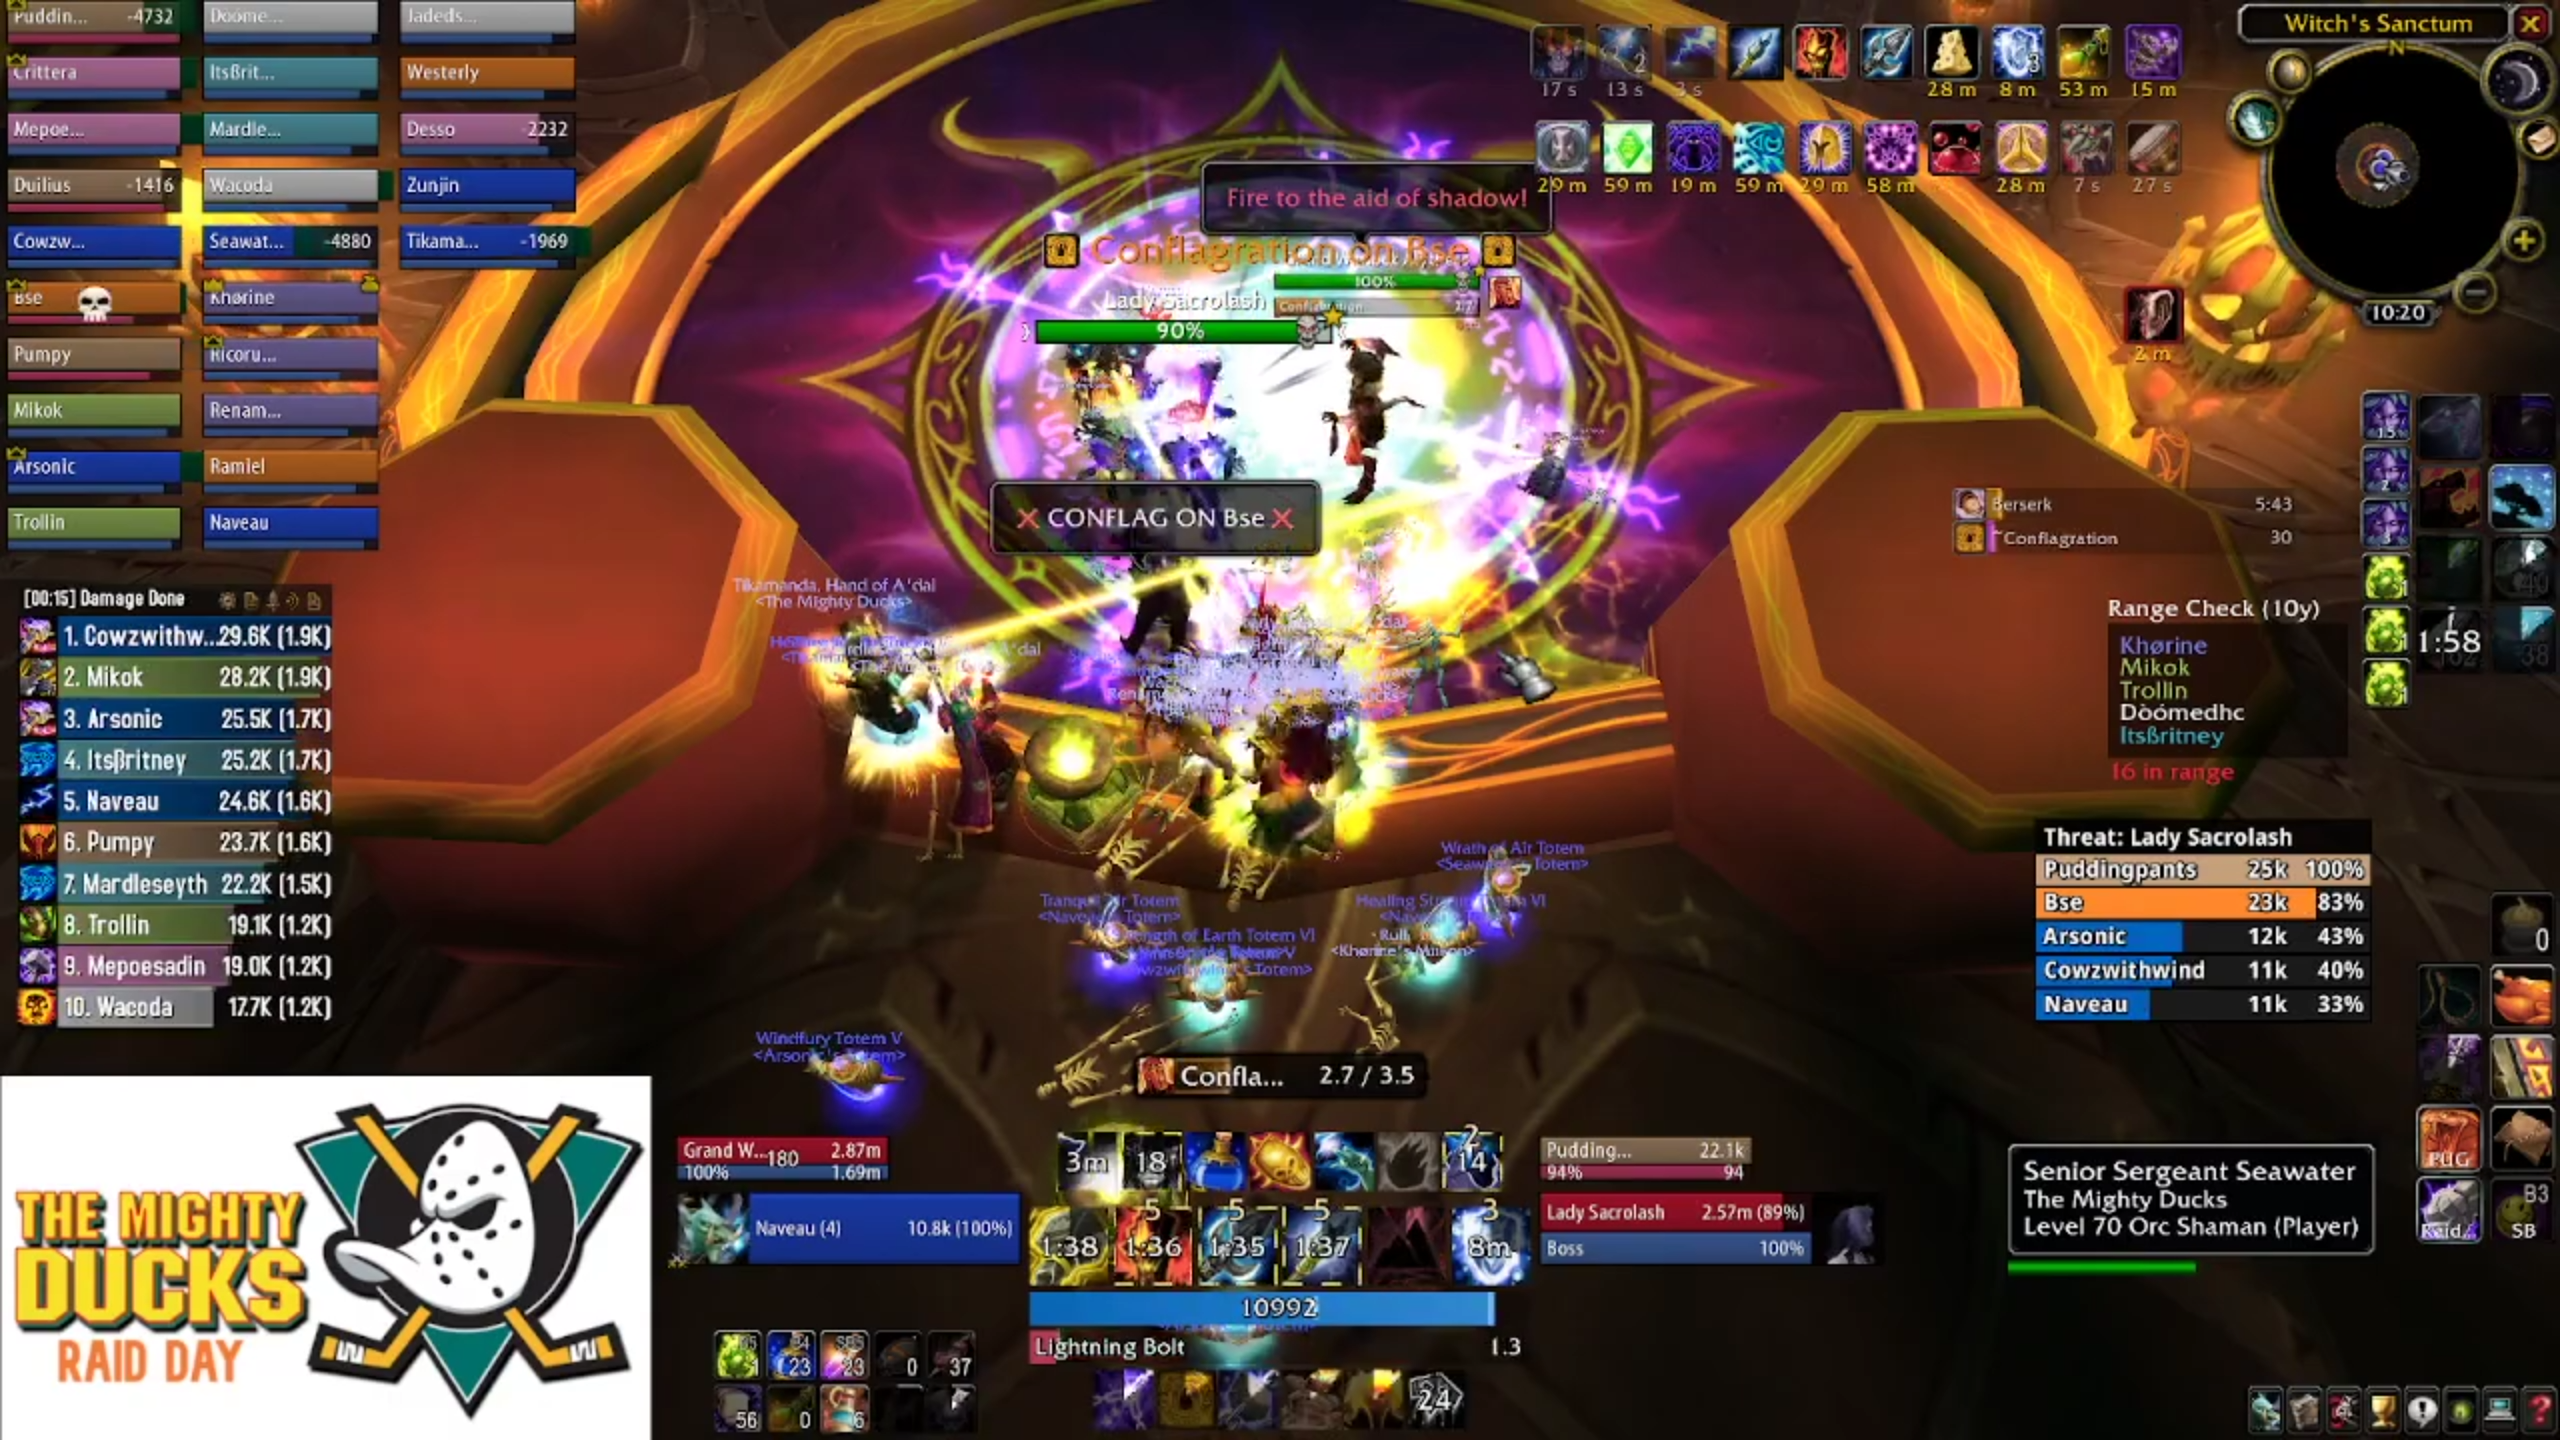
Tanks and melee DPS are at risk of being stunned from Sacrolash's clones and tanks in particular can be hit with confounding blow, then conflagged. Players need to exercise judgement about if they need to use their trinket to either break the conflag, or break an ability stopping them from moving out of their respective stack.
Using Ice Block, Cloak of Shadows and Divine Shield are all excellent ways to mitigate the damage - but just remember that it spreads - so you'll need to move out, then use your mitigating ability.
For the melee, it gets a bit harder - if your tank gets hit with confounding blow and doesn't have their trinket available, it is the melee stack that all needs to move out of range of the affected tank until it's cleared - which takes ten seconds.
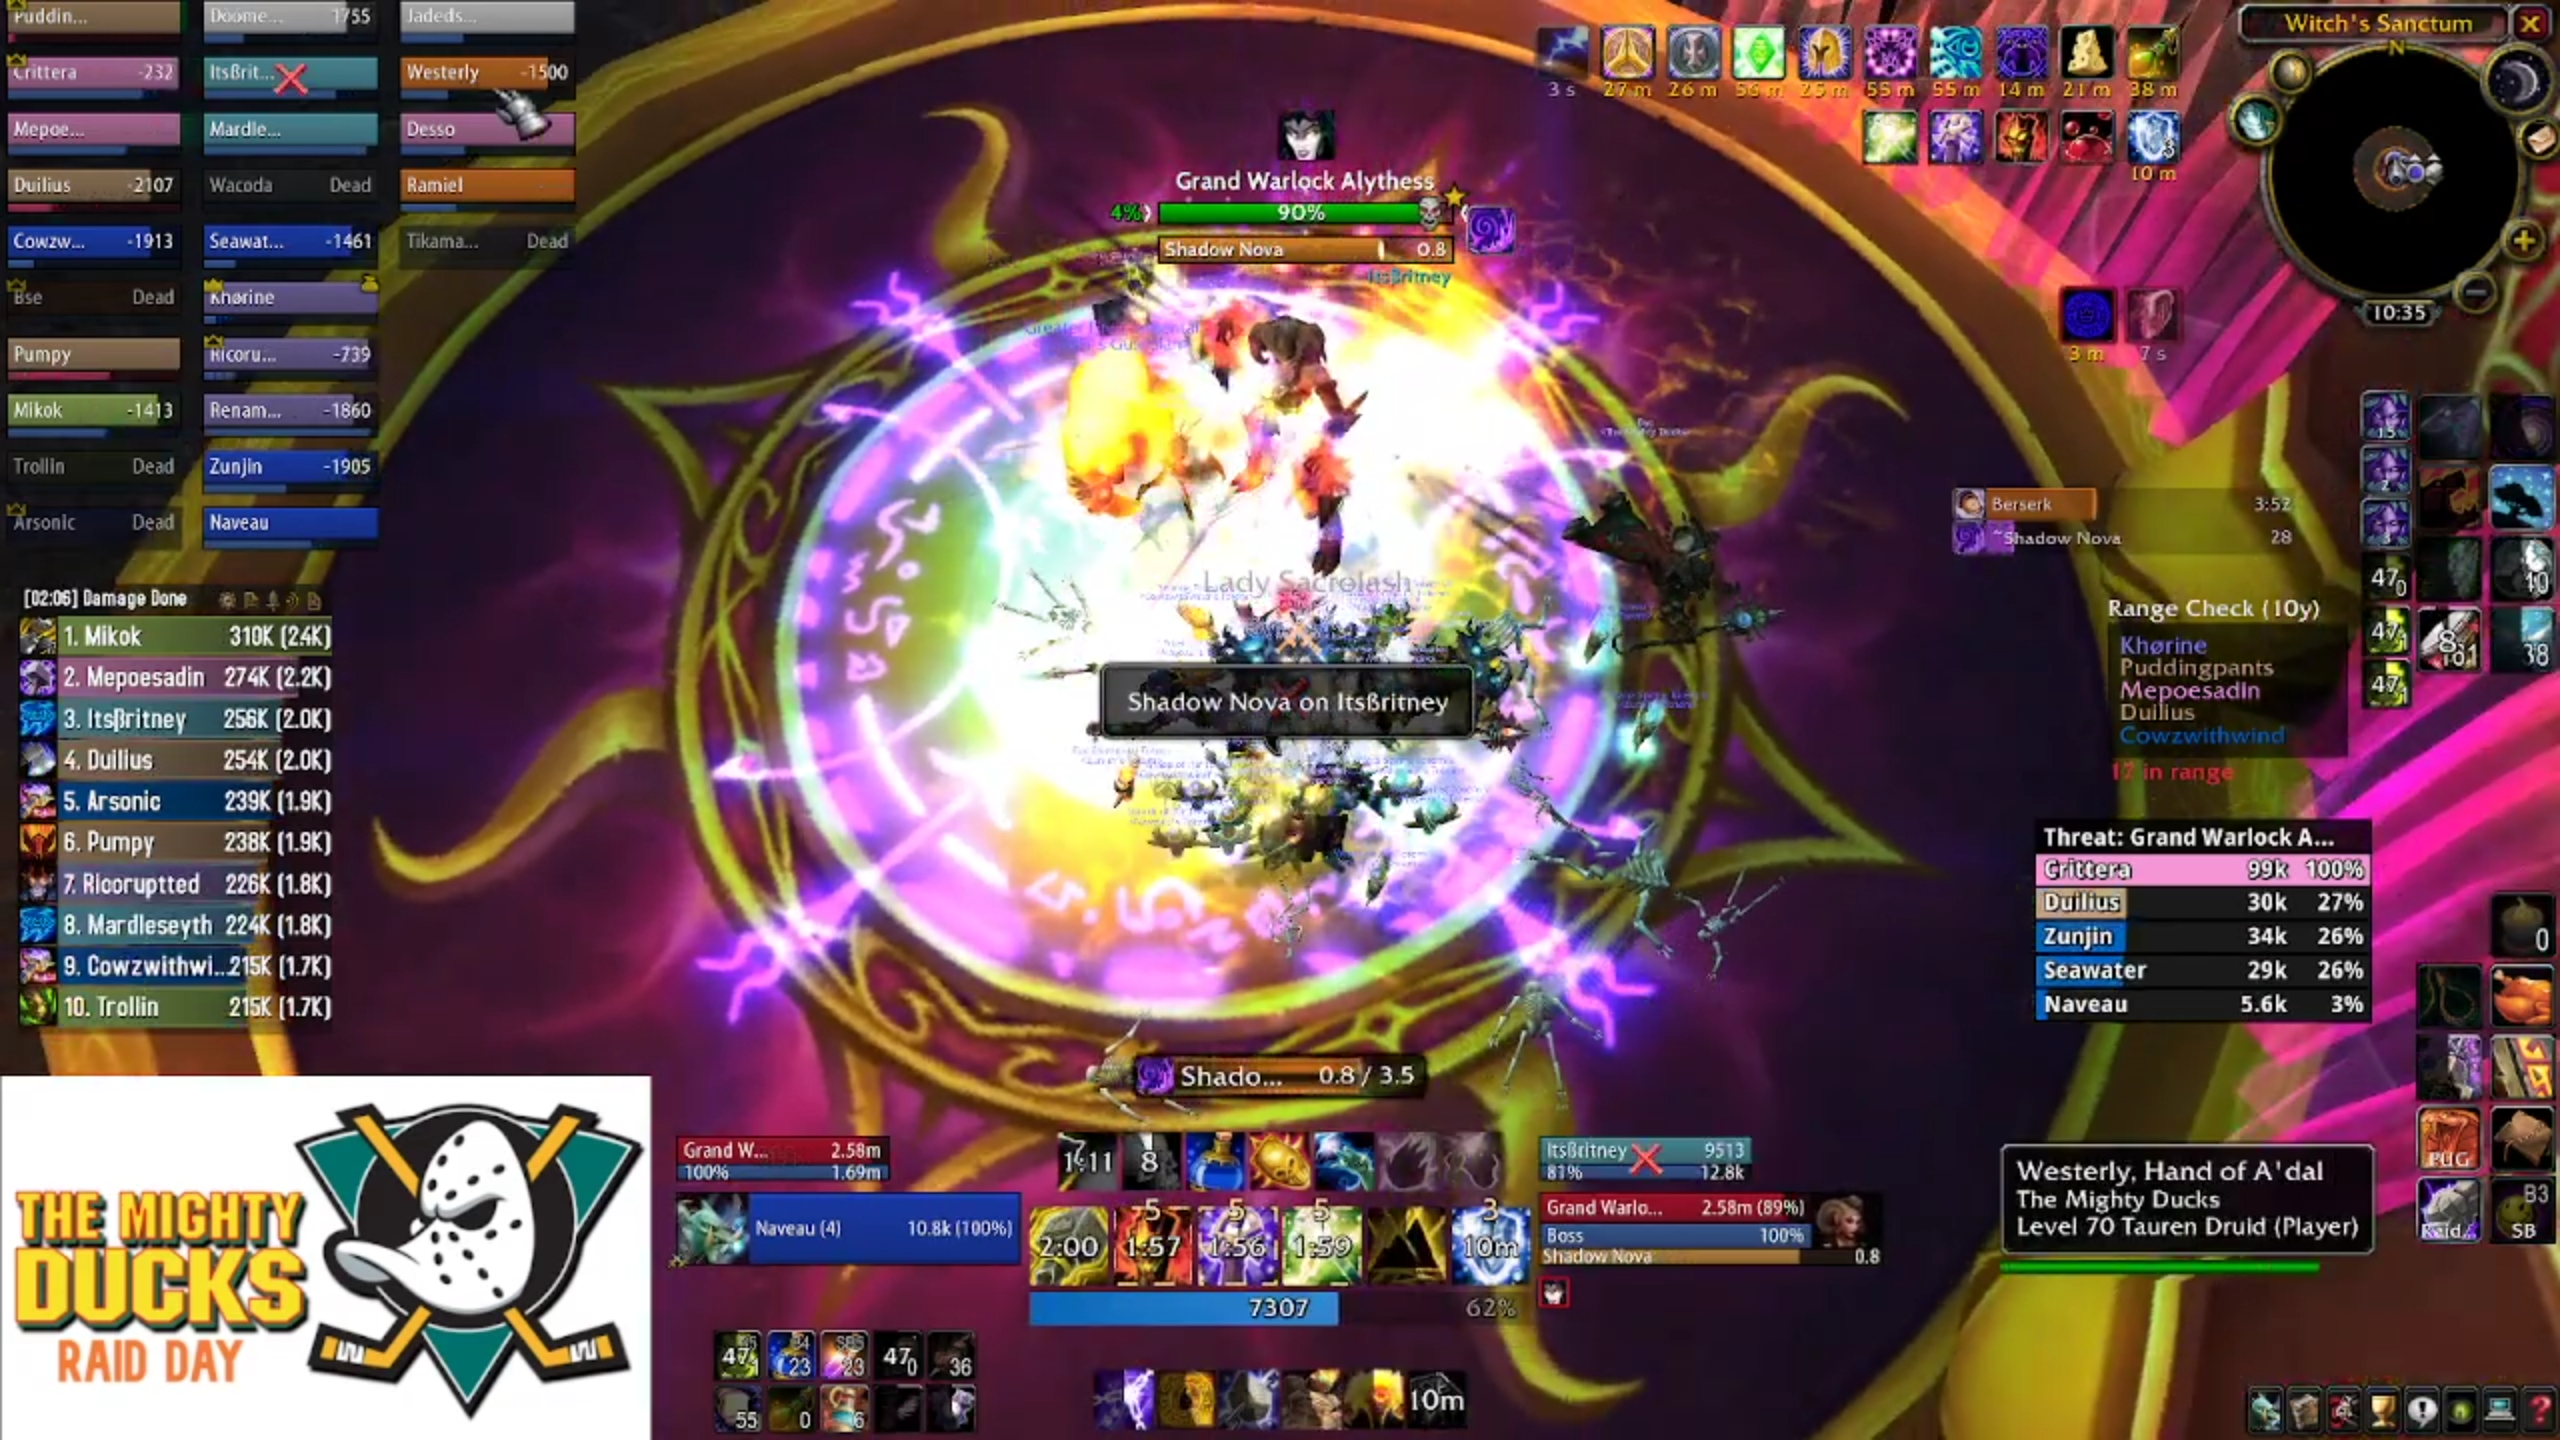
Relevant for the tank handling Alythess, she will cast blaze, which targets the player with the highest threat. As everyone will be pummelling Sacrolash, this should (in 99% of cases) be your third tank. This ability deals damage and puts a patch of fire at the feet of the player, which is what your melee stack will need to use to clear their dark touched stacks. Standing in fire is bad, so your tank will need to move the boss around.
Alythess will also periodically buff herself with Pyrogenics, which pumps up her fire damage. This needs to be dispelled on the spot (hunters, mages and shamans) as any spells cast (noting that most of Alythess' spells are instant cast) before it's dispelled will gain the benefit for the duration, even if the buff is removed.
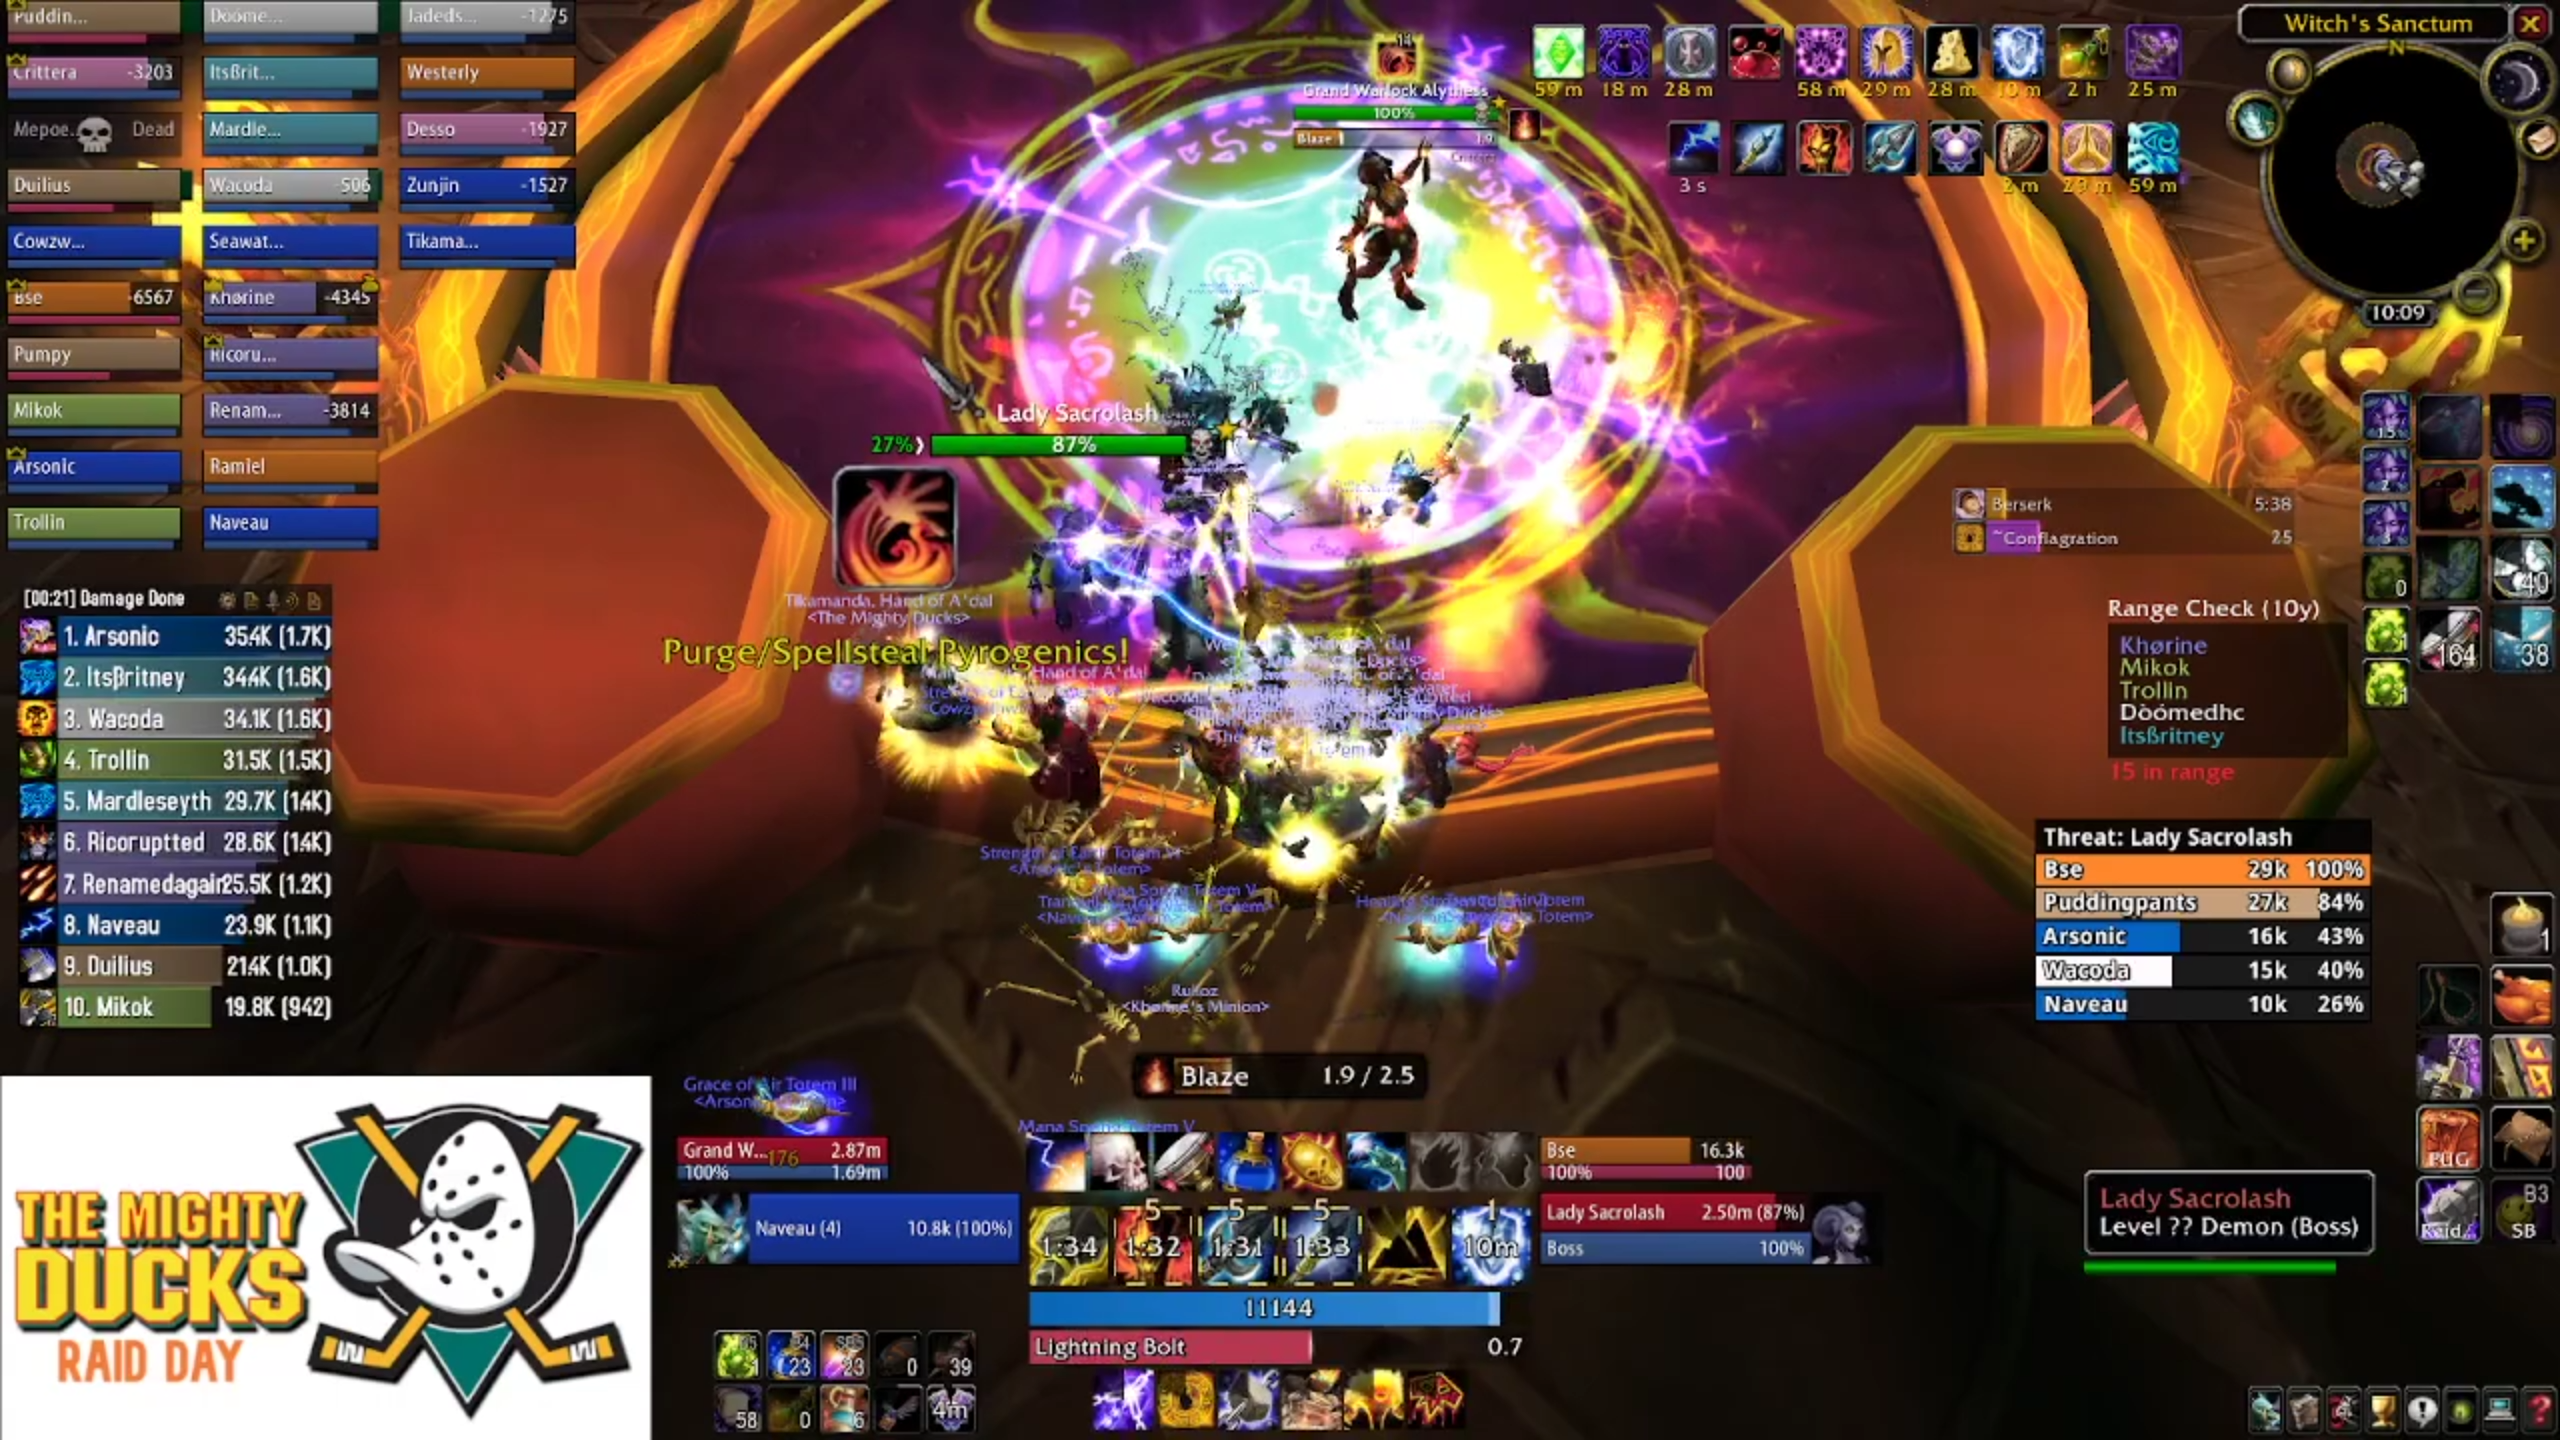
Lastly, Alythess will target four players with with Flame Sear. This is the second big damaging ability, and it's a doozy. It's a large amount of fire damage, but it also adds a stack of flame touched with every tick. This means the damage ramps up in a hurry. Apart from instant death from conflags, shadow novas and everything else, the amount of damage this will pump out will overload your healers very quickly.
This encounter is an absolute nightmare for your healer team. You'll want to use healthstones and even health potions to try individually, to keep ahead of the damage. Even then you may just get unlucky and keel over anyway. Those who can offheal should, and ranged DPS (and healers) need to pay close attention to their flame touched stacks and be prepared to clear them early and often.
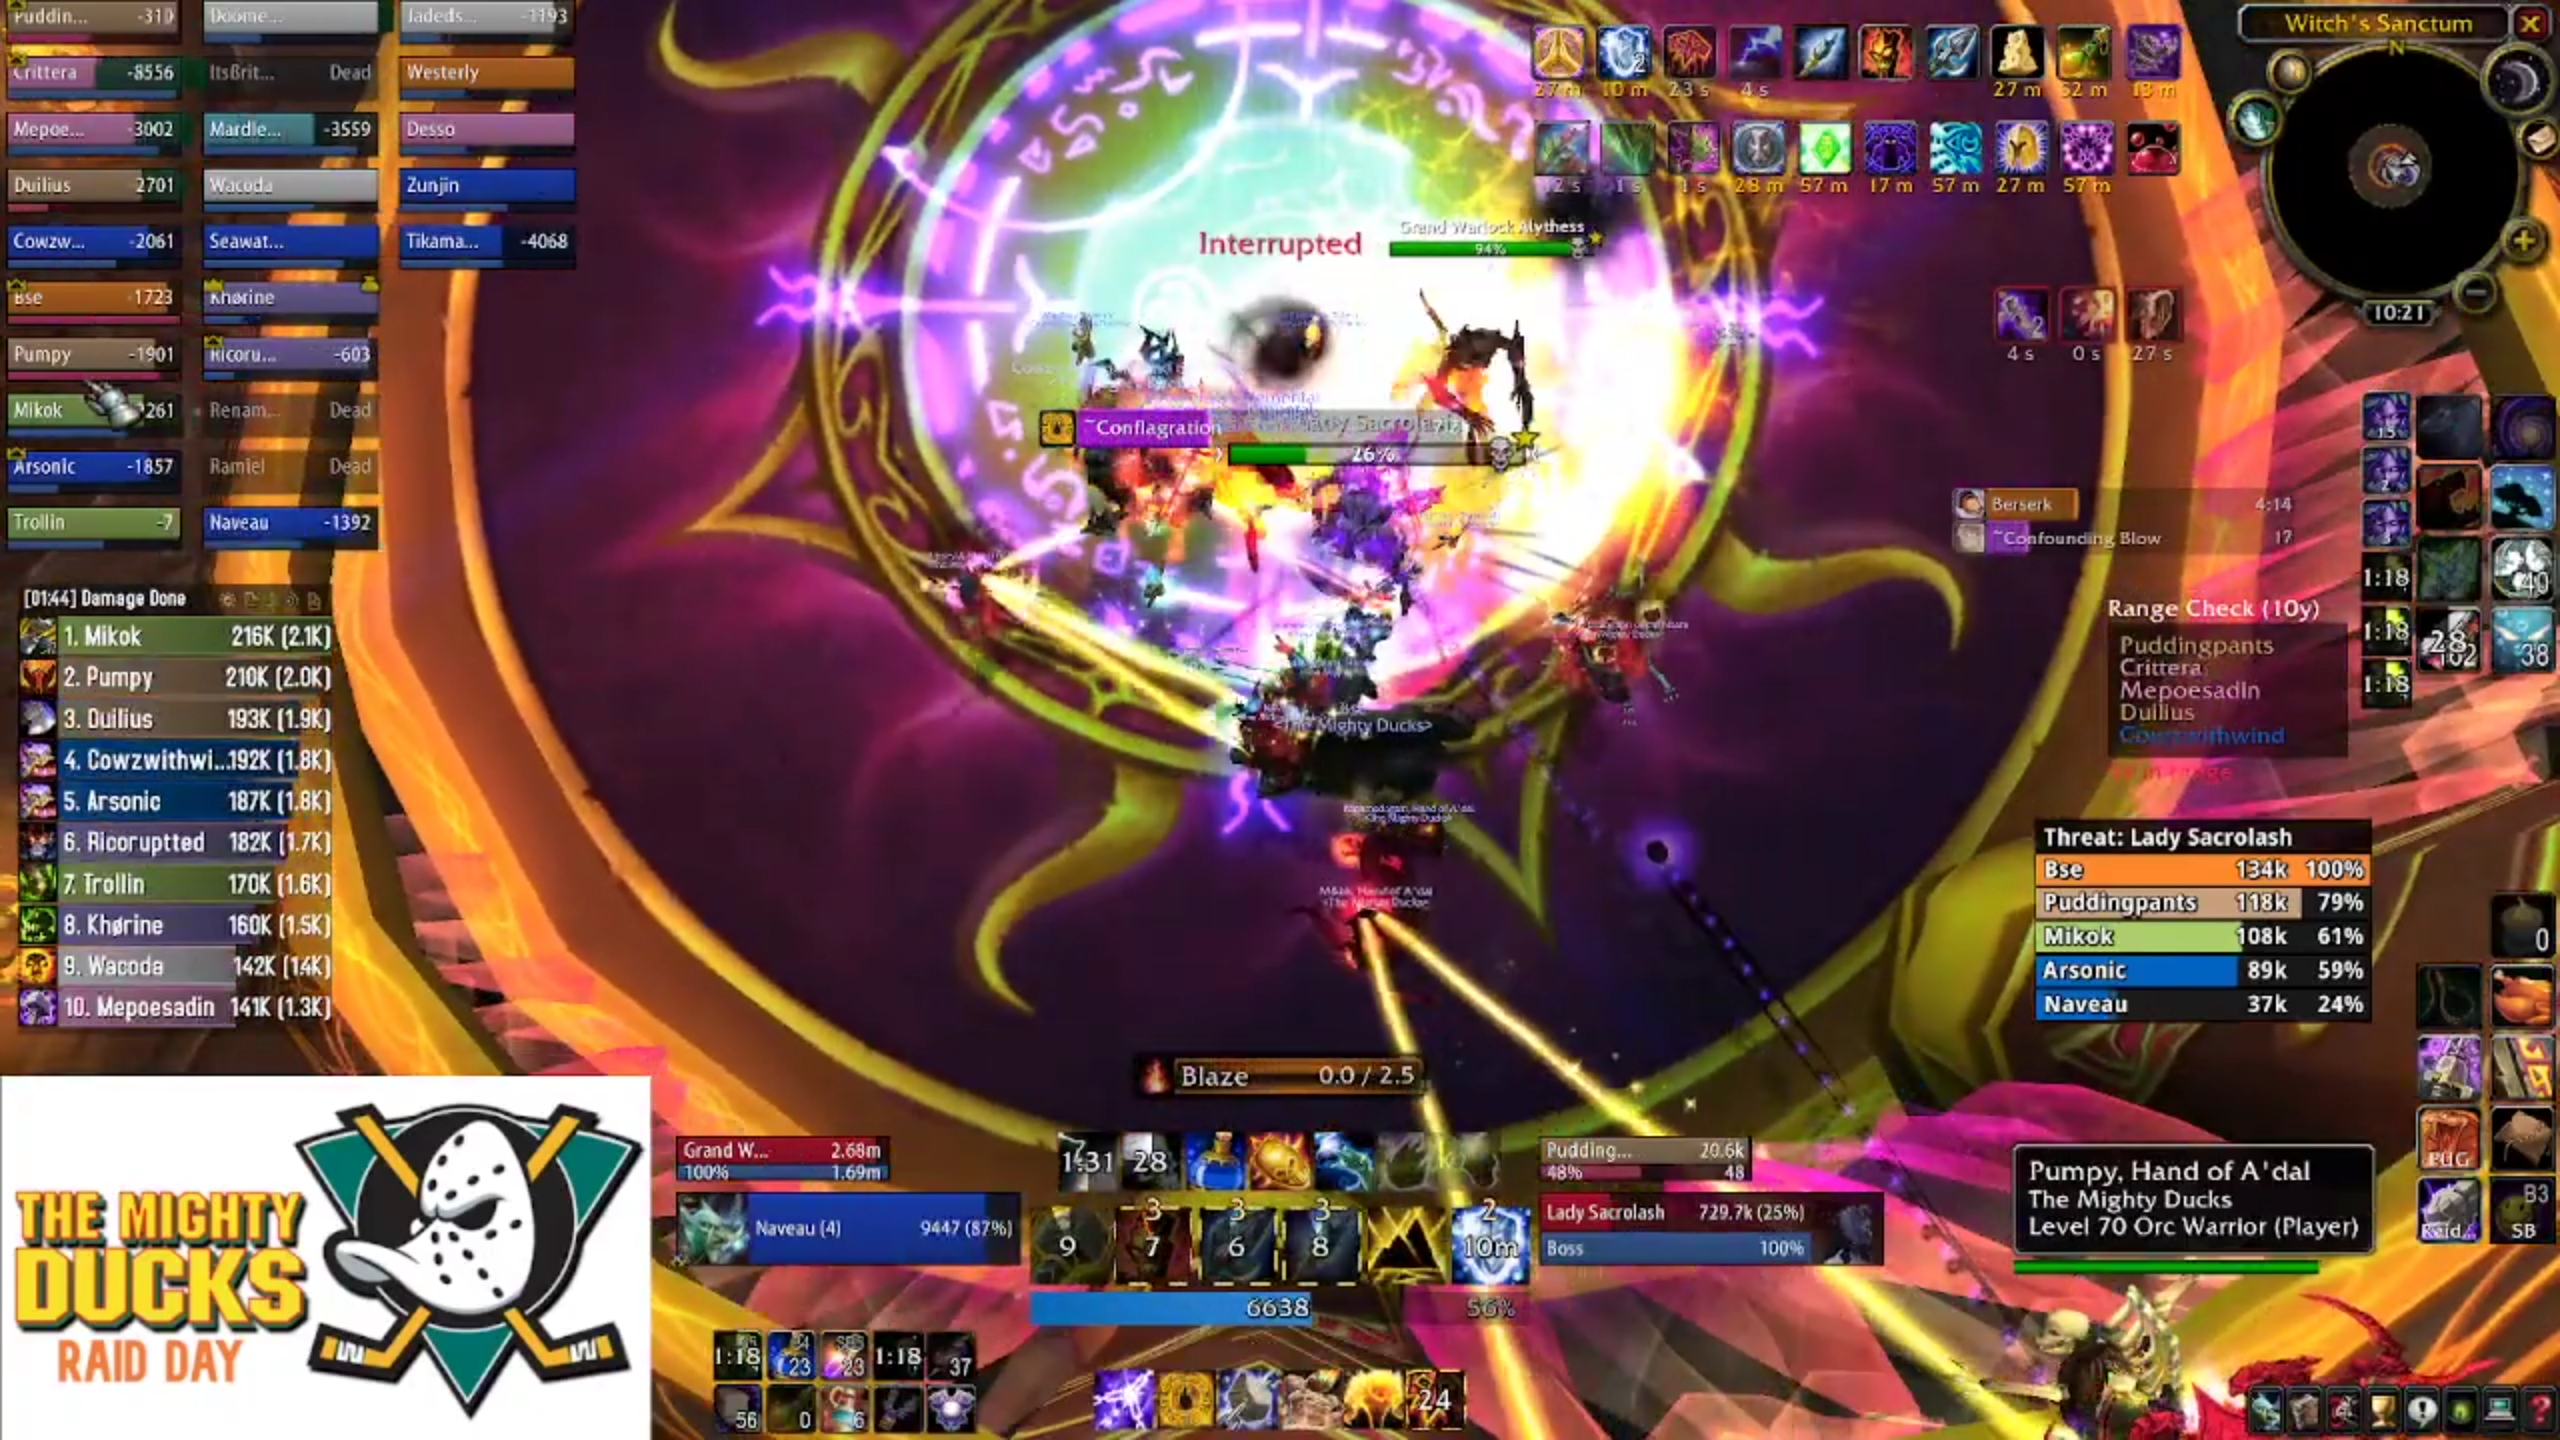
Because of confounding blow, you can't simply blow bloodlust and melt Sacrolash, either. If you do, your second tank will be swallowed up by the DPS and then the boss will yo-yo up and down the ramp looking for DPS to kill - which is absolutely a wipe. It's probably safe to use Bloodlust around the 60% mark - and for a change you'll want to use Bloodlust on your healing group to help them with their output.
Once you kill Sacrolash, Alythess heals to full and it's mostly downhill, unless half or more of your raid is dead, in which case it'll be a grinding, slow wipe. The worst kind.
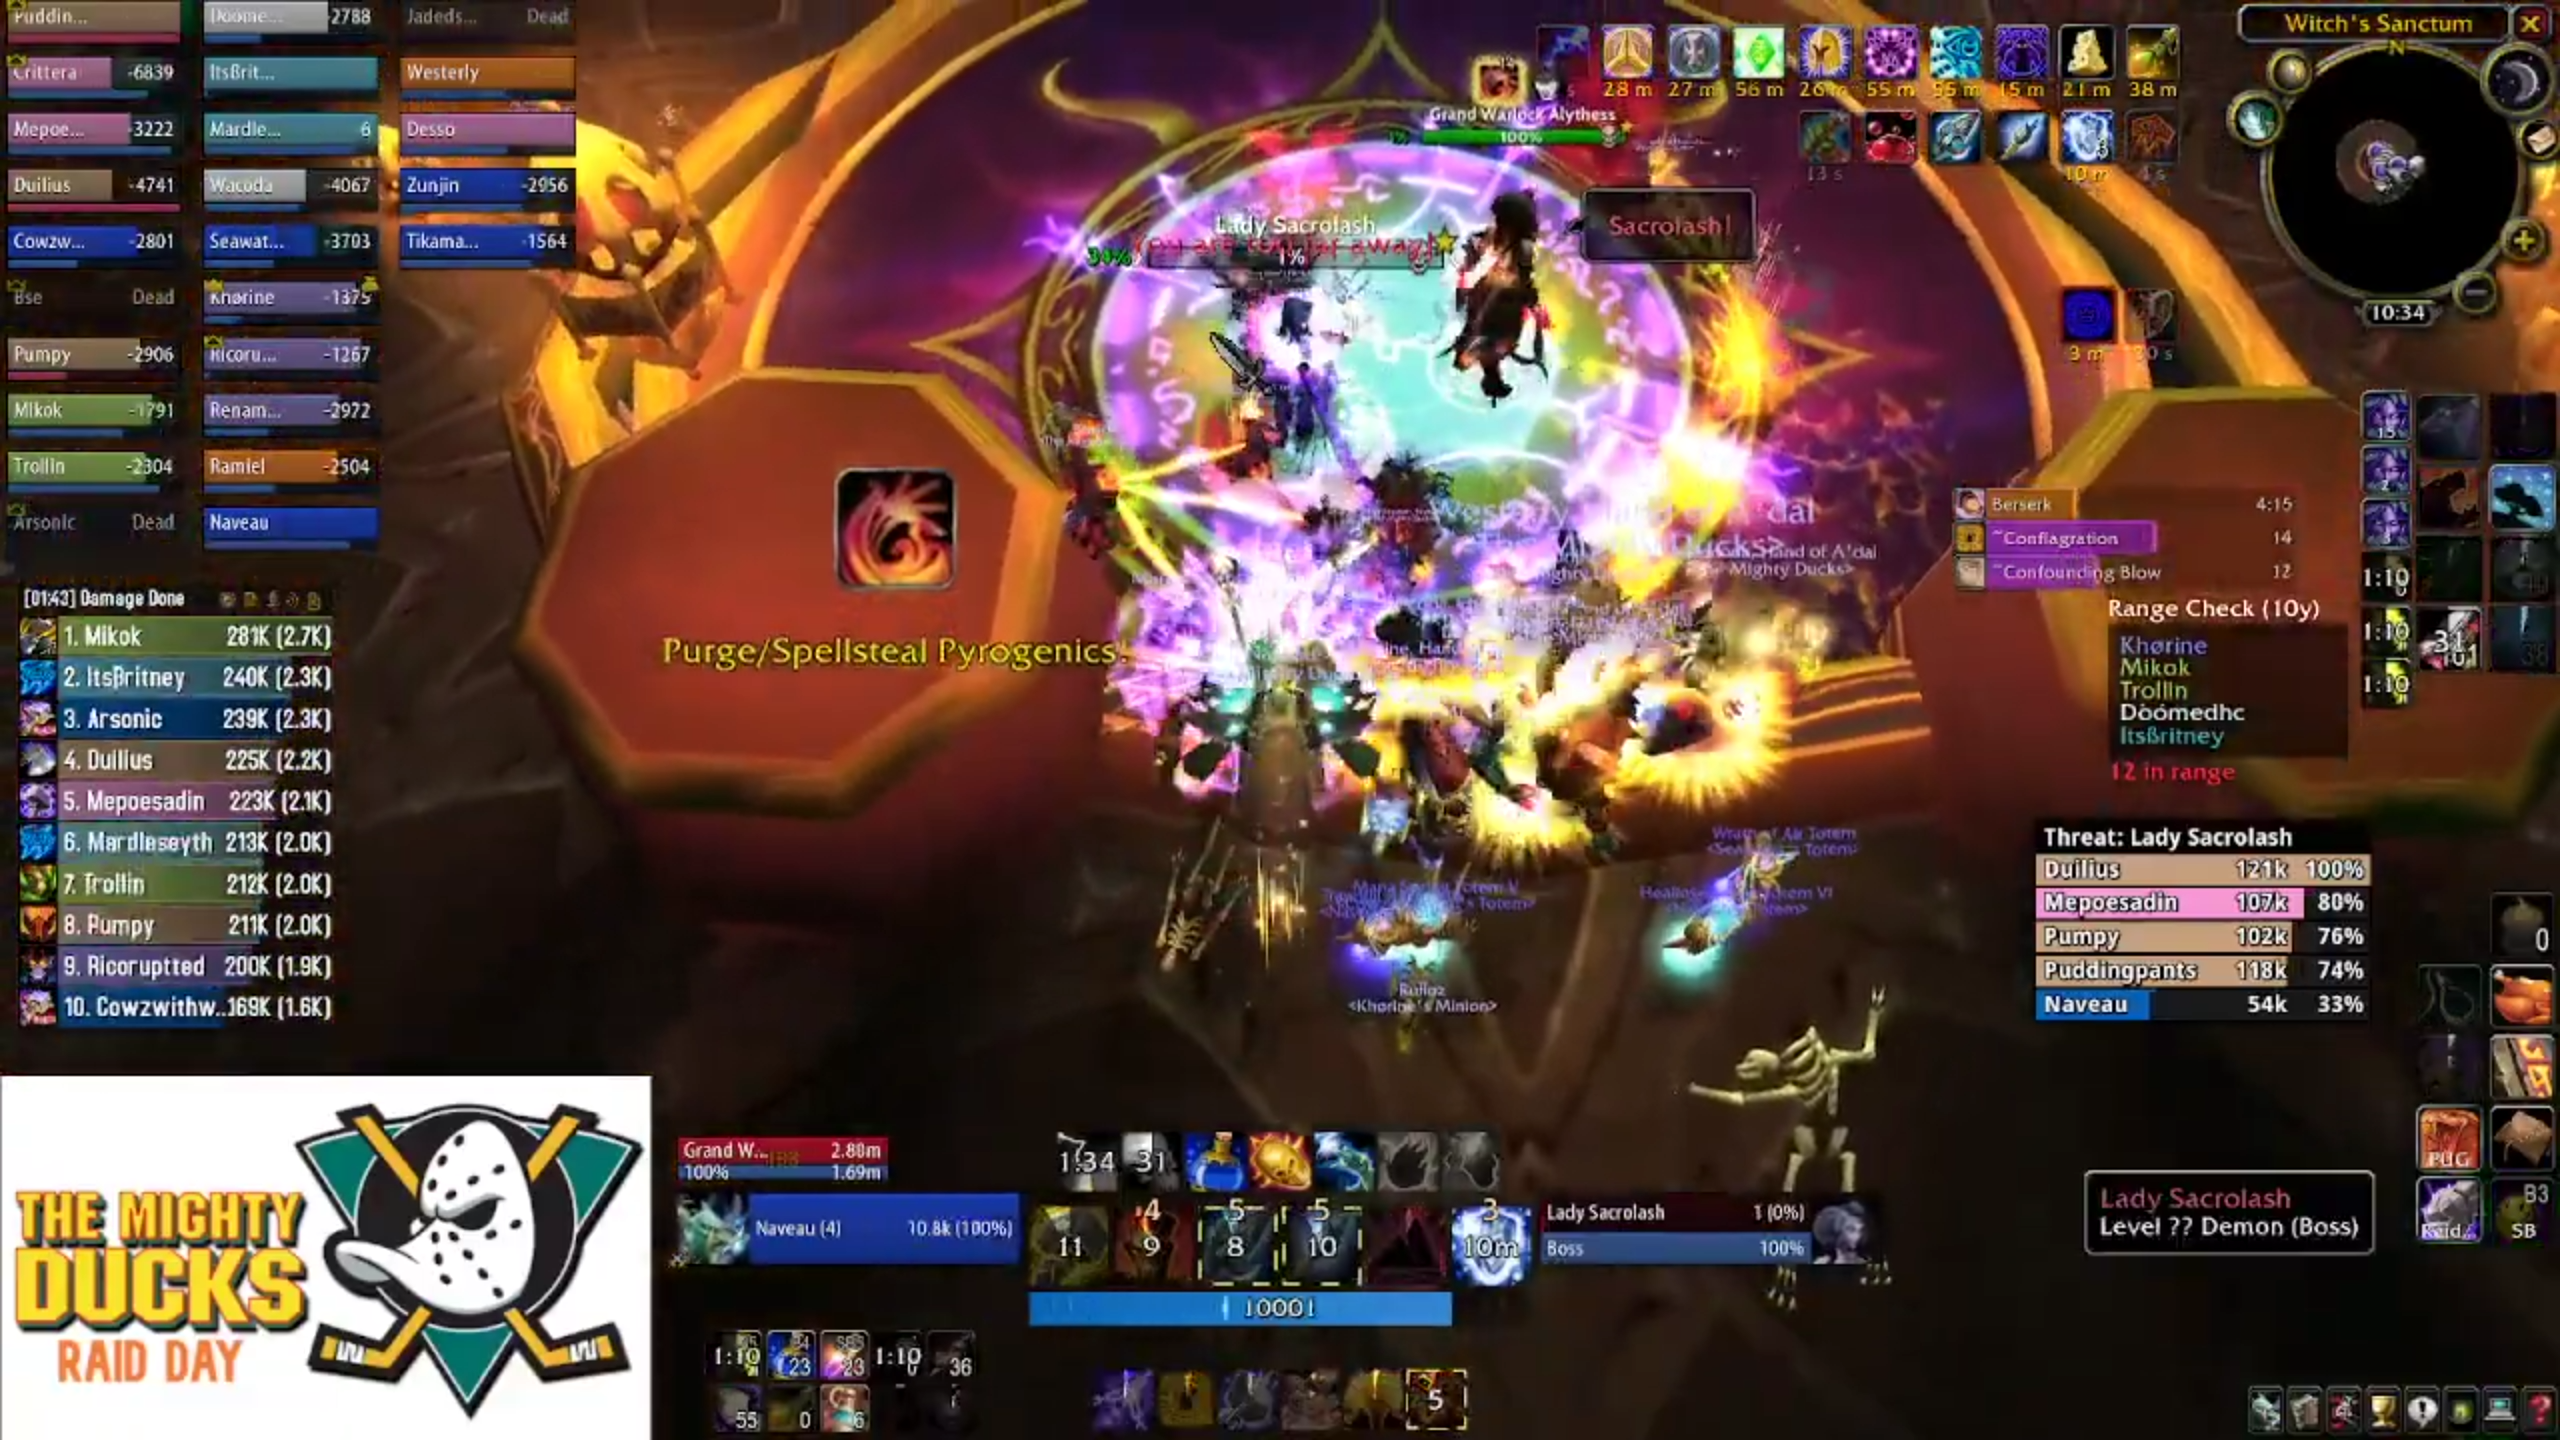
Your raid should walk, not jump, off the ledge and stack behind the boss with the melee, as tightly as possible.
Alythess now casts Shadow Nova, which is the only way to clear your flame touched stacks now. This is the reason your raid now needs to stack. There's little else to do at this point but maximum attack - smash the boss with damage and finish the job.
Provided you can get past the first hurdle (which is a pretty big bloody hurdle) and can survive the obscene raid damage in phase one, you're a good shot to clear this boss. But make no mistake, it's a whole raid test of clearing stacks, using cooldowns, and making efficient use of healthstones and healing items.
After the boss dies, you'll need to sit tight and let the flame-touched stacks clear off of your raid before pressing on with more trash.
At this point when (not if) you wipe, you can teleport to the Twins room.
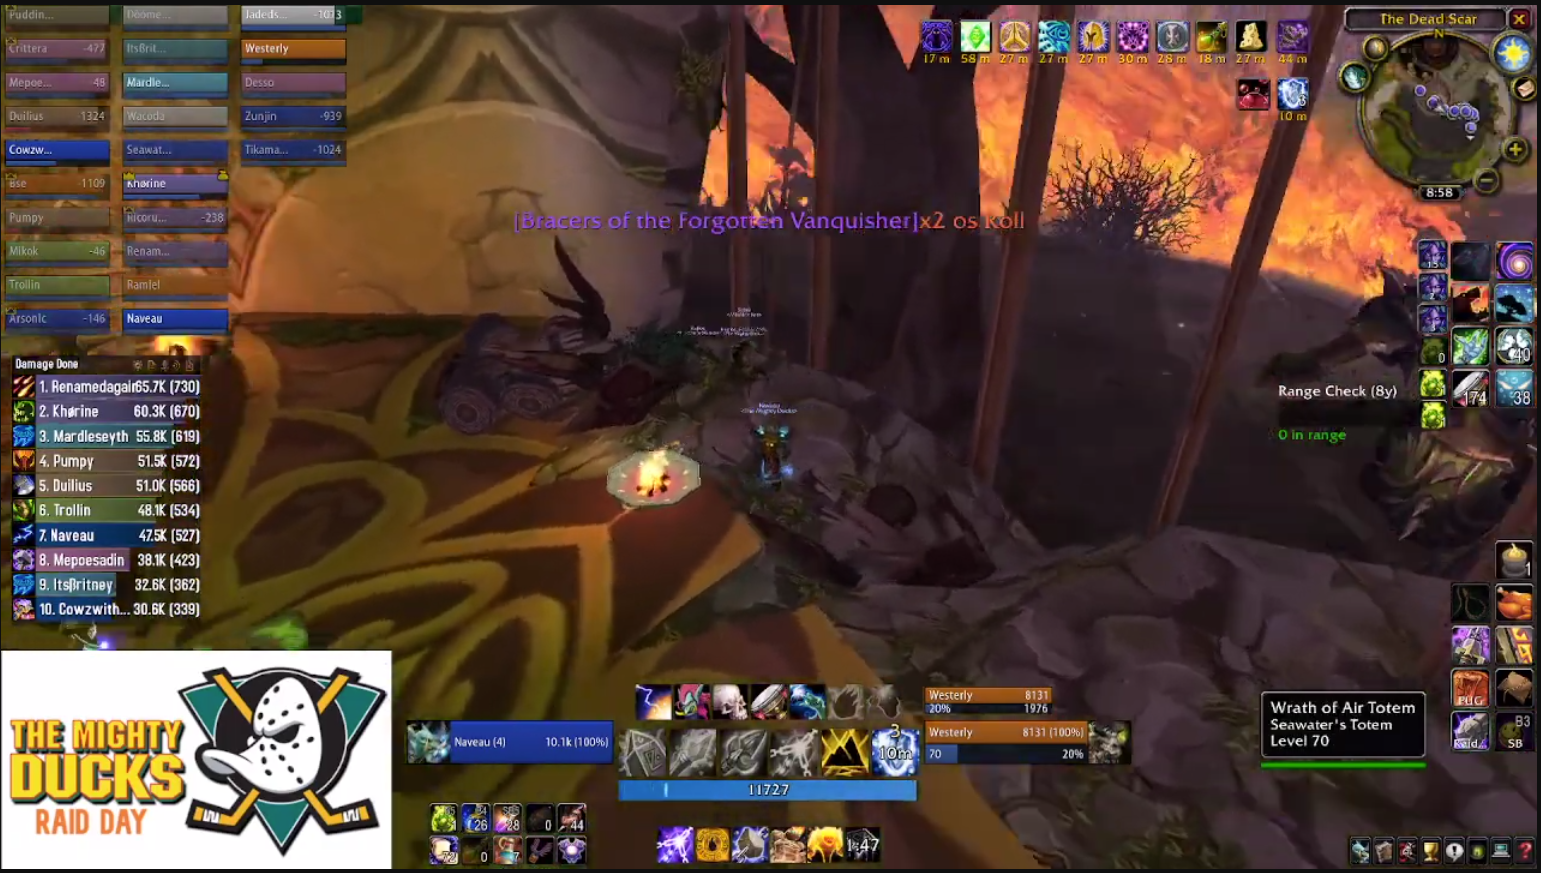
We're very much travelling downhill as far as trash is concerned. The first pack is tied to the Eredar Twins, whom you just killed, so good job there. It consists of a Doomfire Destroyer, who spawns additional smaller adds until he dies, and two Oblivion Mages, who cast Flame Buffet and should be interrupted and killed.
Head and to the right and you'll meet your next minor hurdle - a flock of Volatile fiends who explode when they die - so try to stagger your AoE somehow (or just have your healers do what they do) so your melee corps doesn't eat dirt.
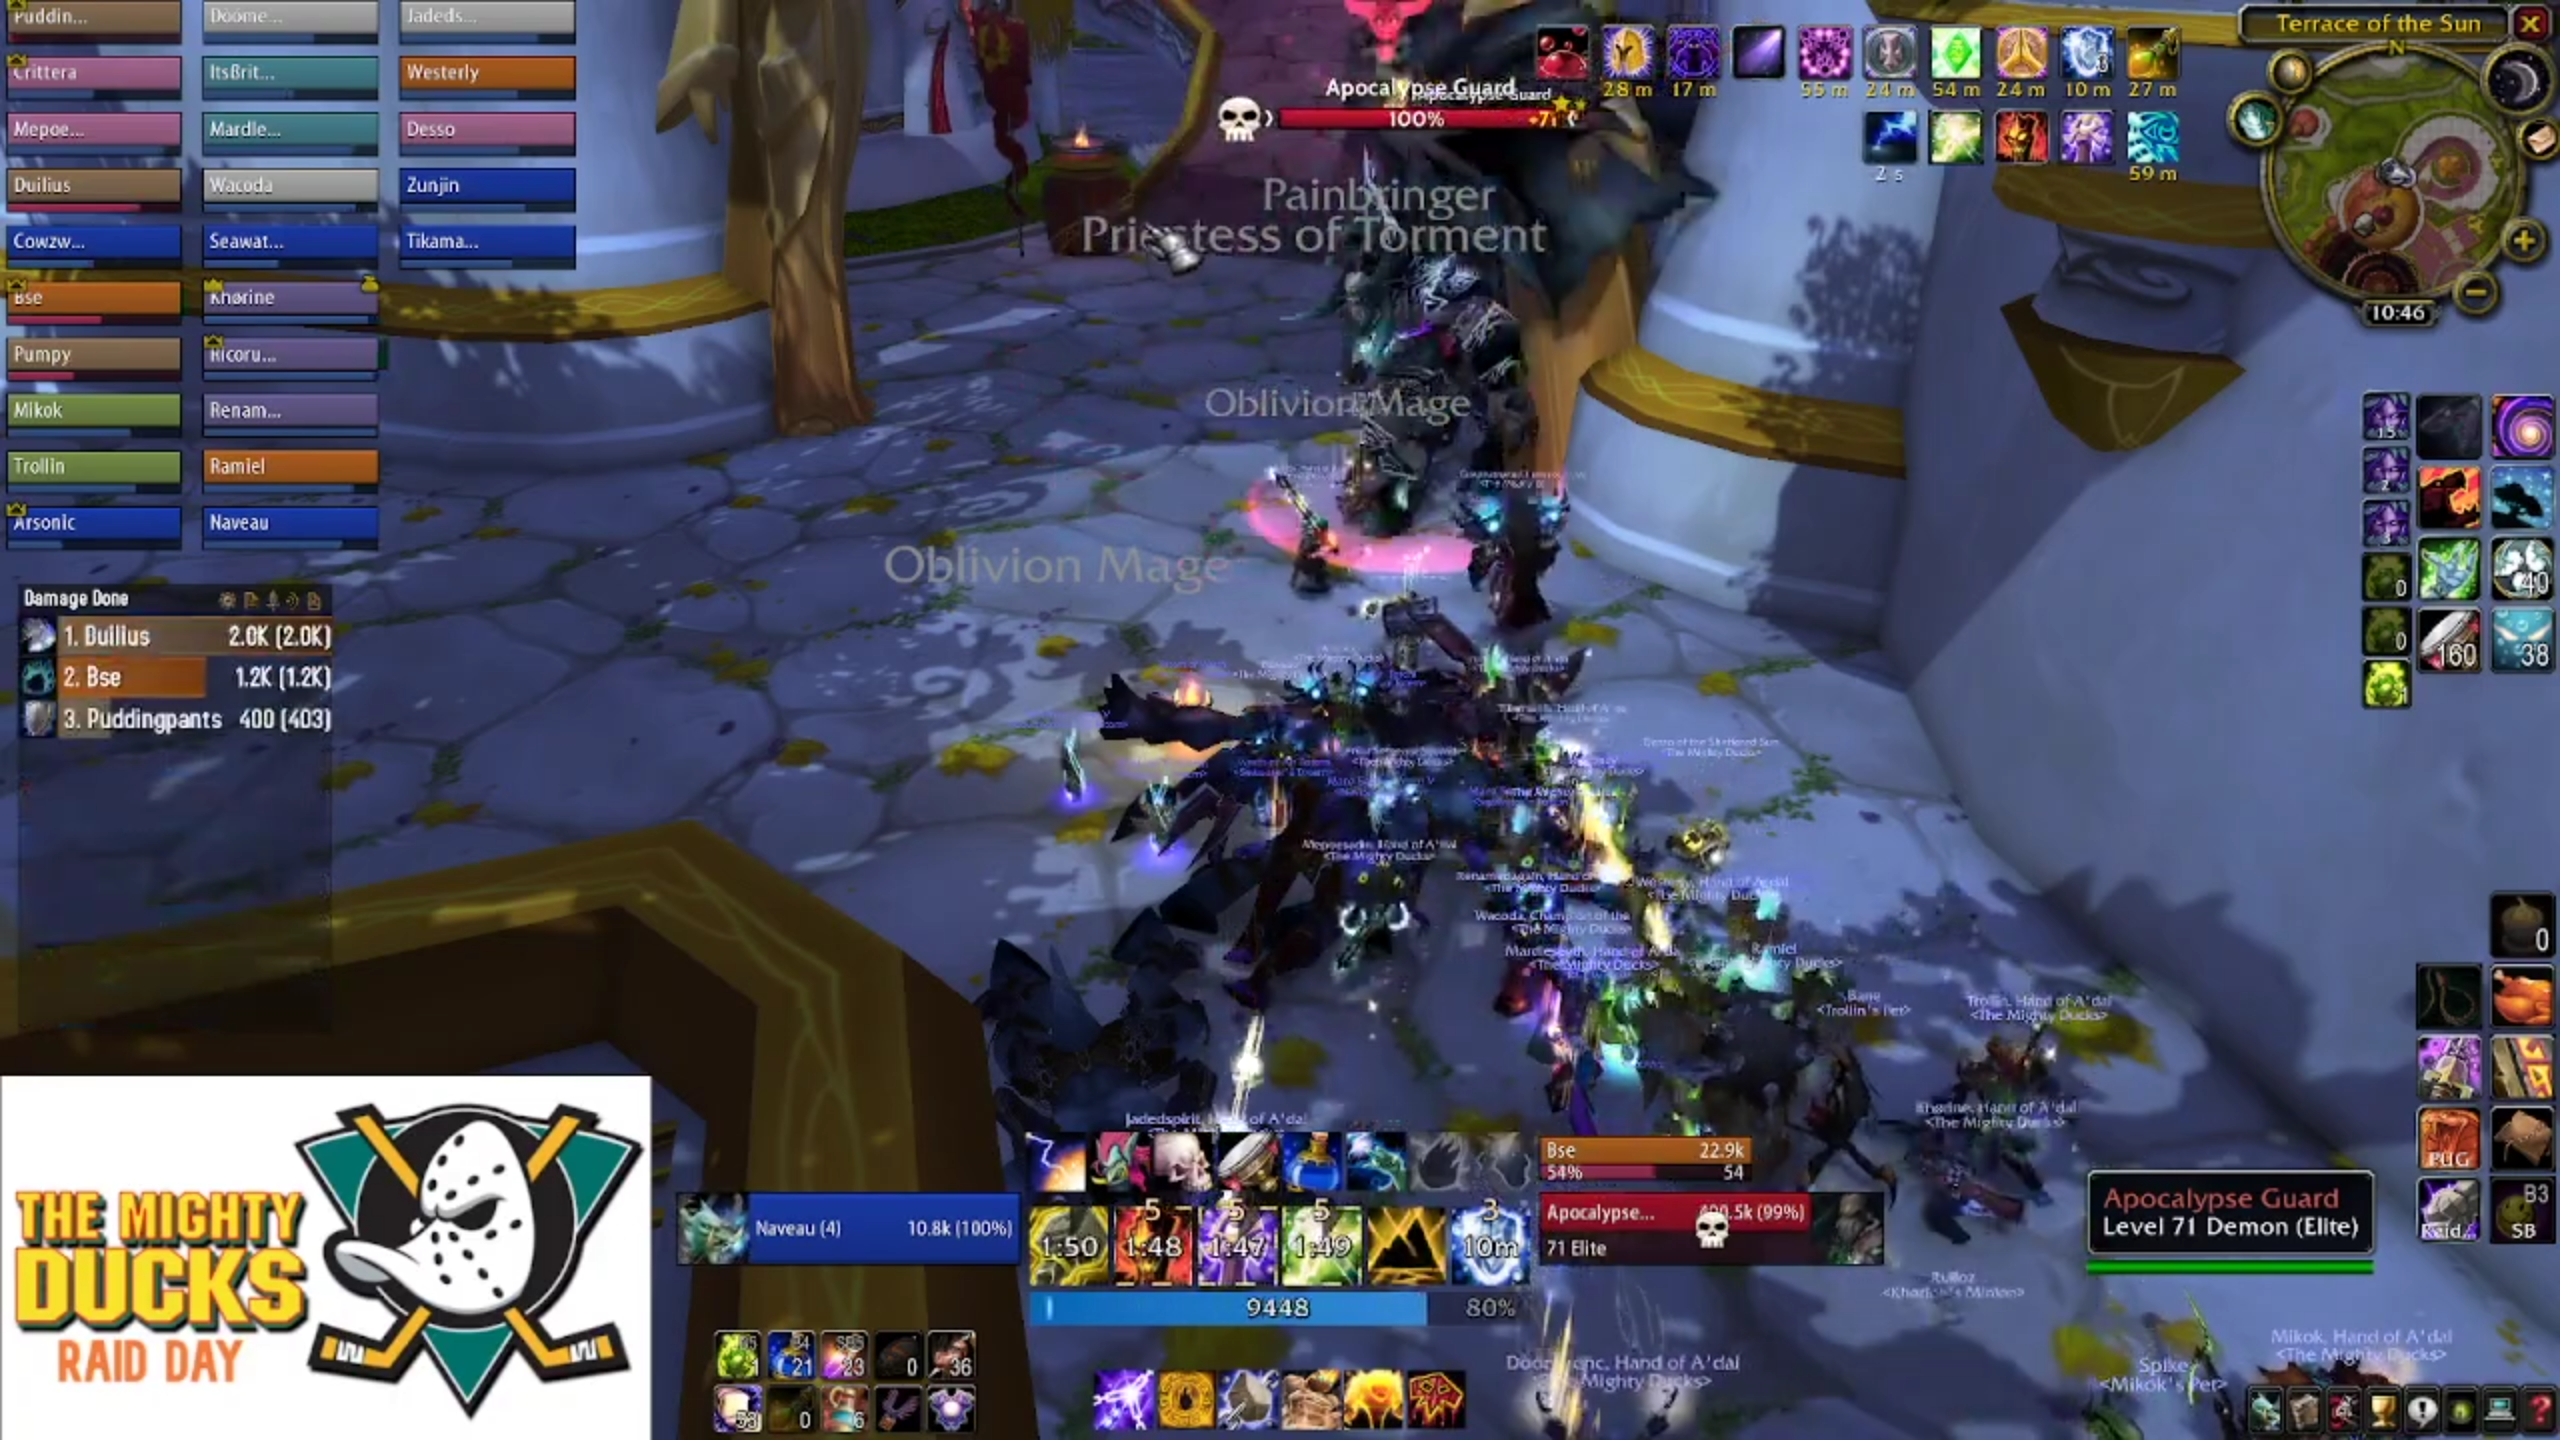
The next pack consists of two more mages, a Priestess of Torment and a Painbringer. The only thing to be concerned about here is the Priestess' whirlwinds, which will hurt your melee. But they should be used to it by now, as they've been getting killed by random whirlwind mechanics since phase 2.
Head to the right at the junction - at the base of the ramp are two Apocalypse Guards, which aren't particularly threatening. However, once they get to 5% health, they'll turn invulnerable to any source of damage except holy attacks. So paladins and holy priests will need to pull double duty here.
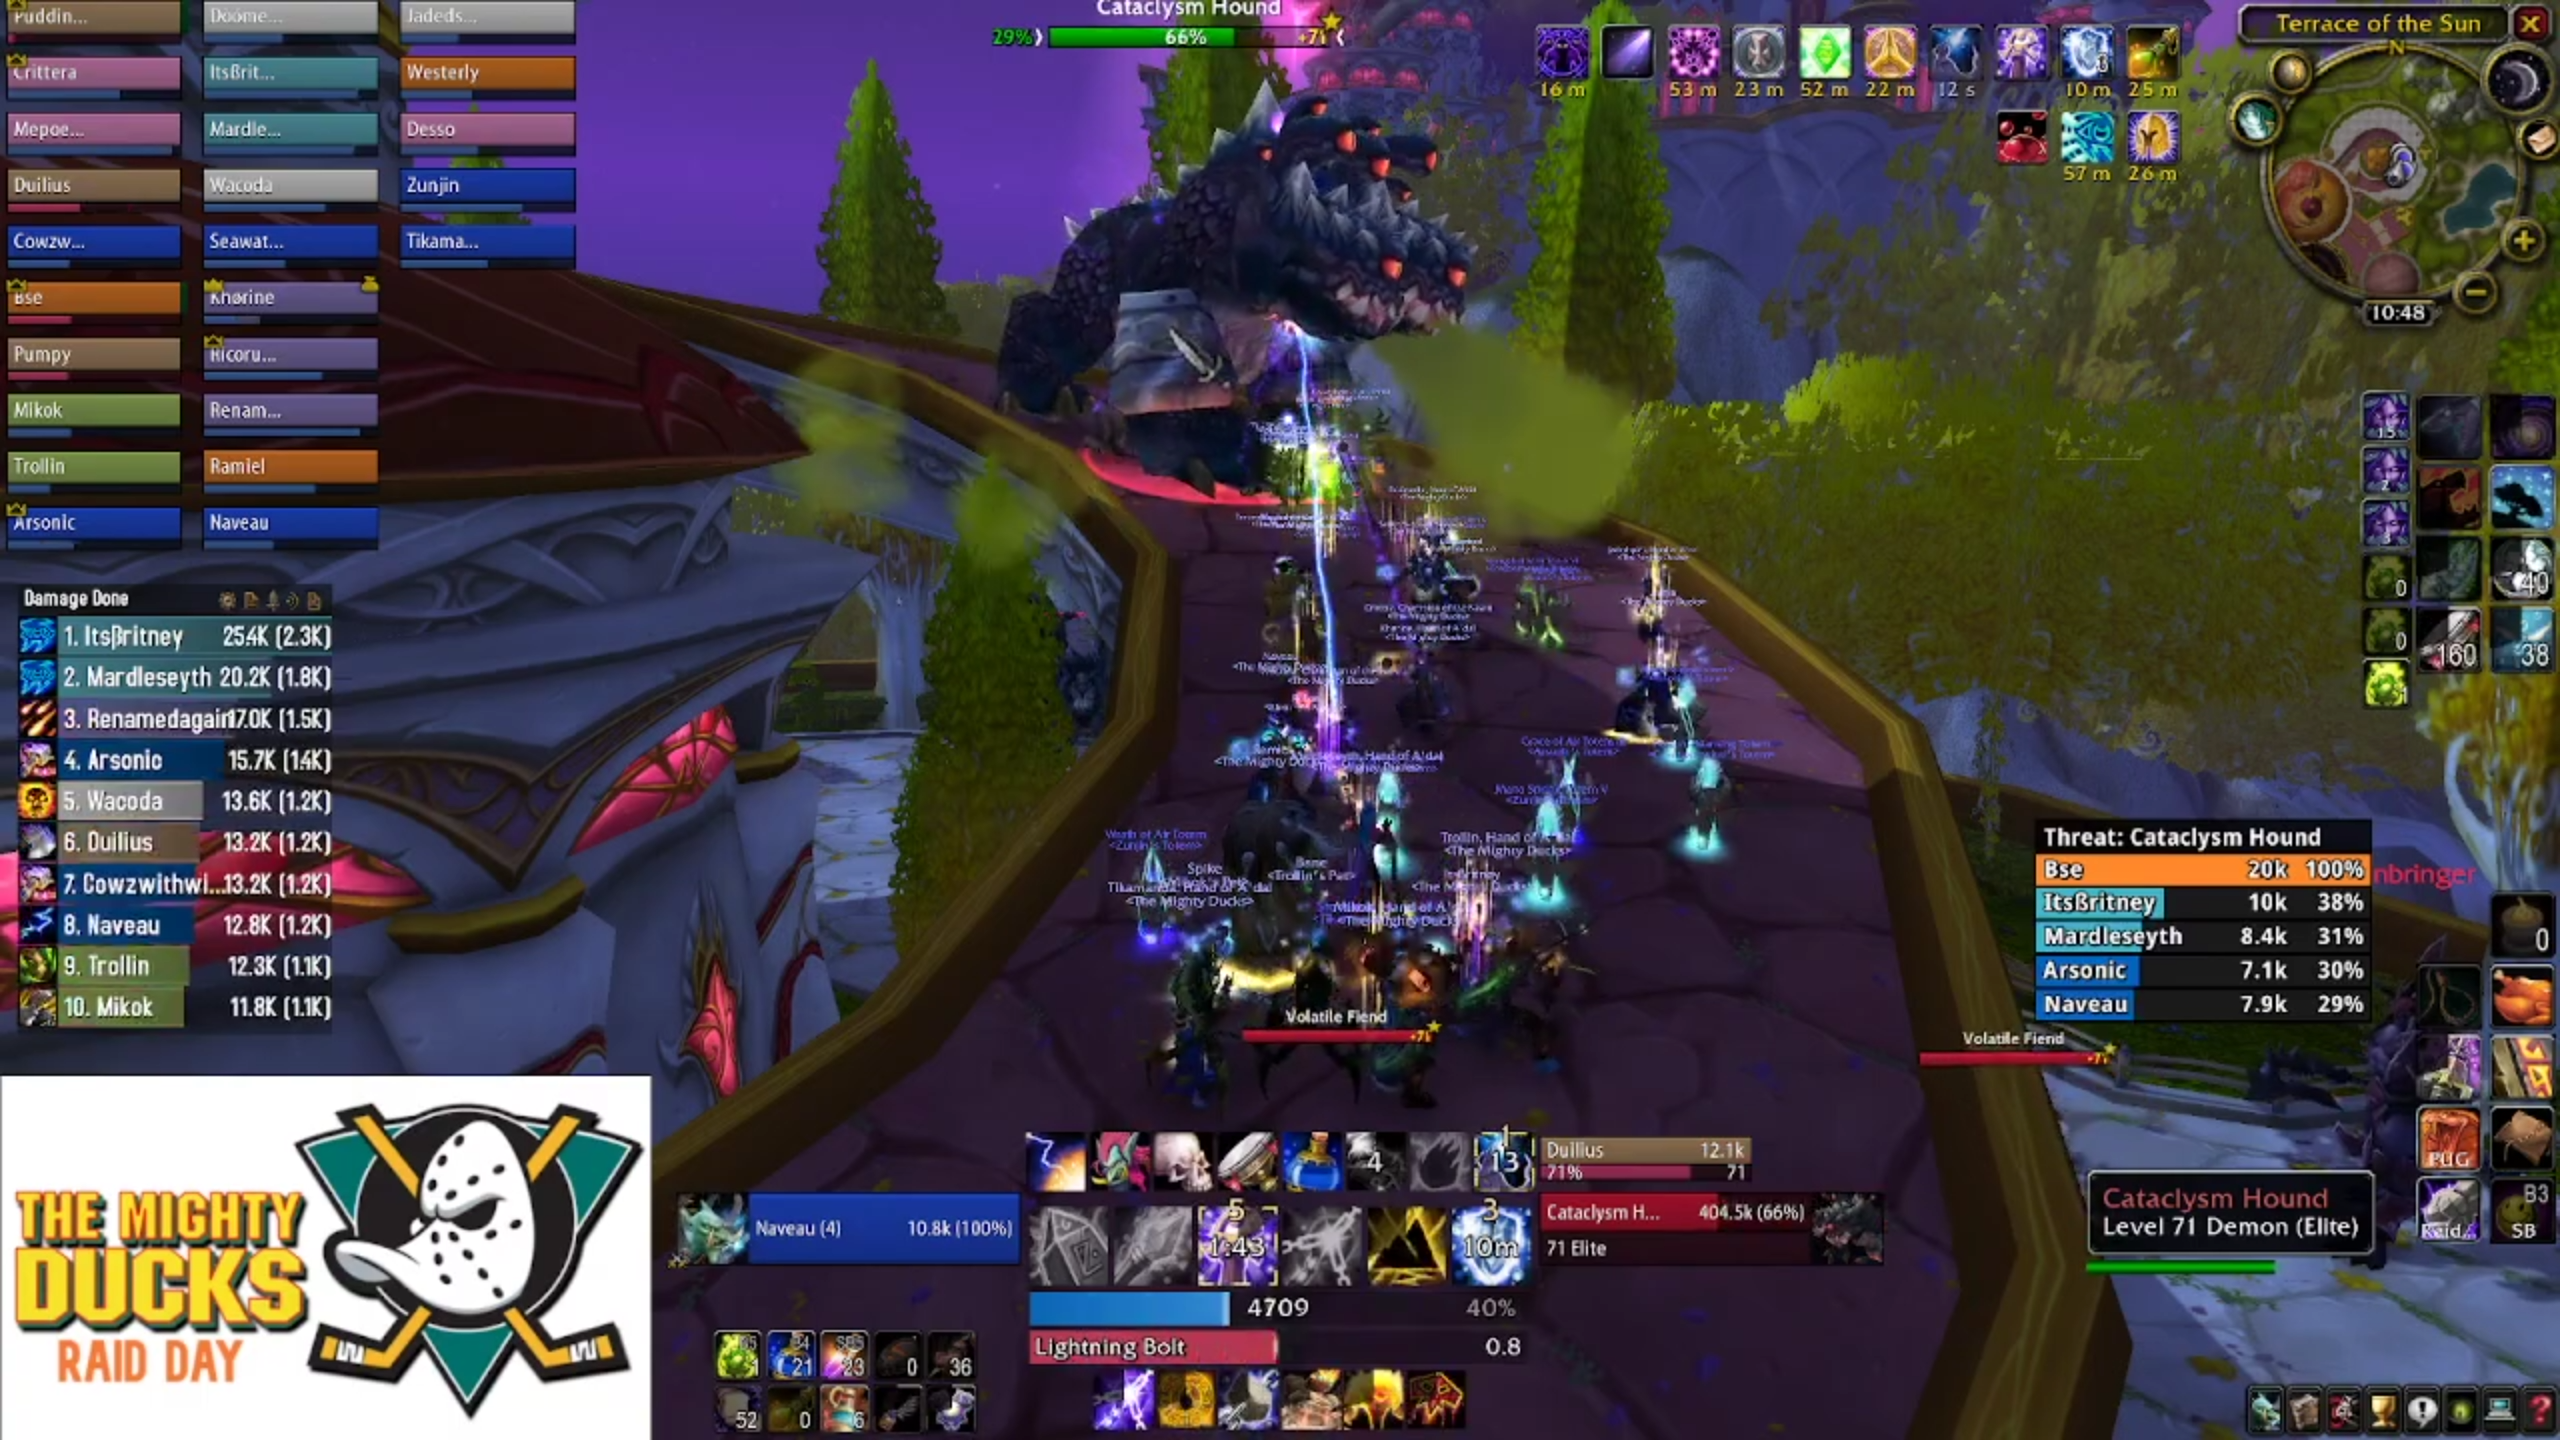
Halfway up the ramp you'll find two Cataclysm Hounds, encountered one after the other. They have a breath attack, so spin them around, they will enrage, and every so often, a member of the raid will be hit with one of each debuff - curse, disease, poison and magic effect. Your dispellers should conspire to clean these off of the affected person, but it is at best a mild inconvenience.
At the top of the ramp you'll find another pack of exploding imps, then two more Apocalypse Guards. Clean them all up quickly, and then it's time for things to get real.
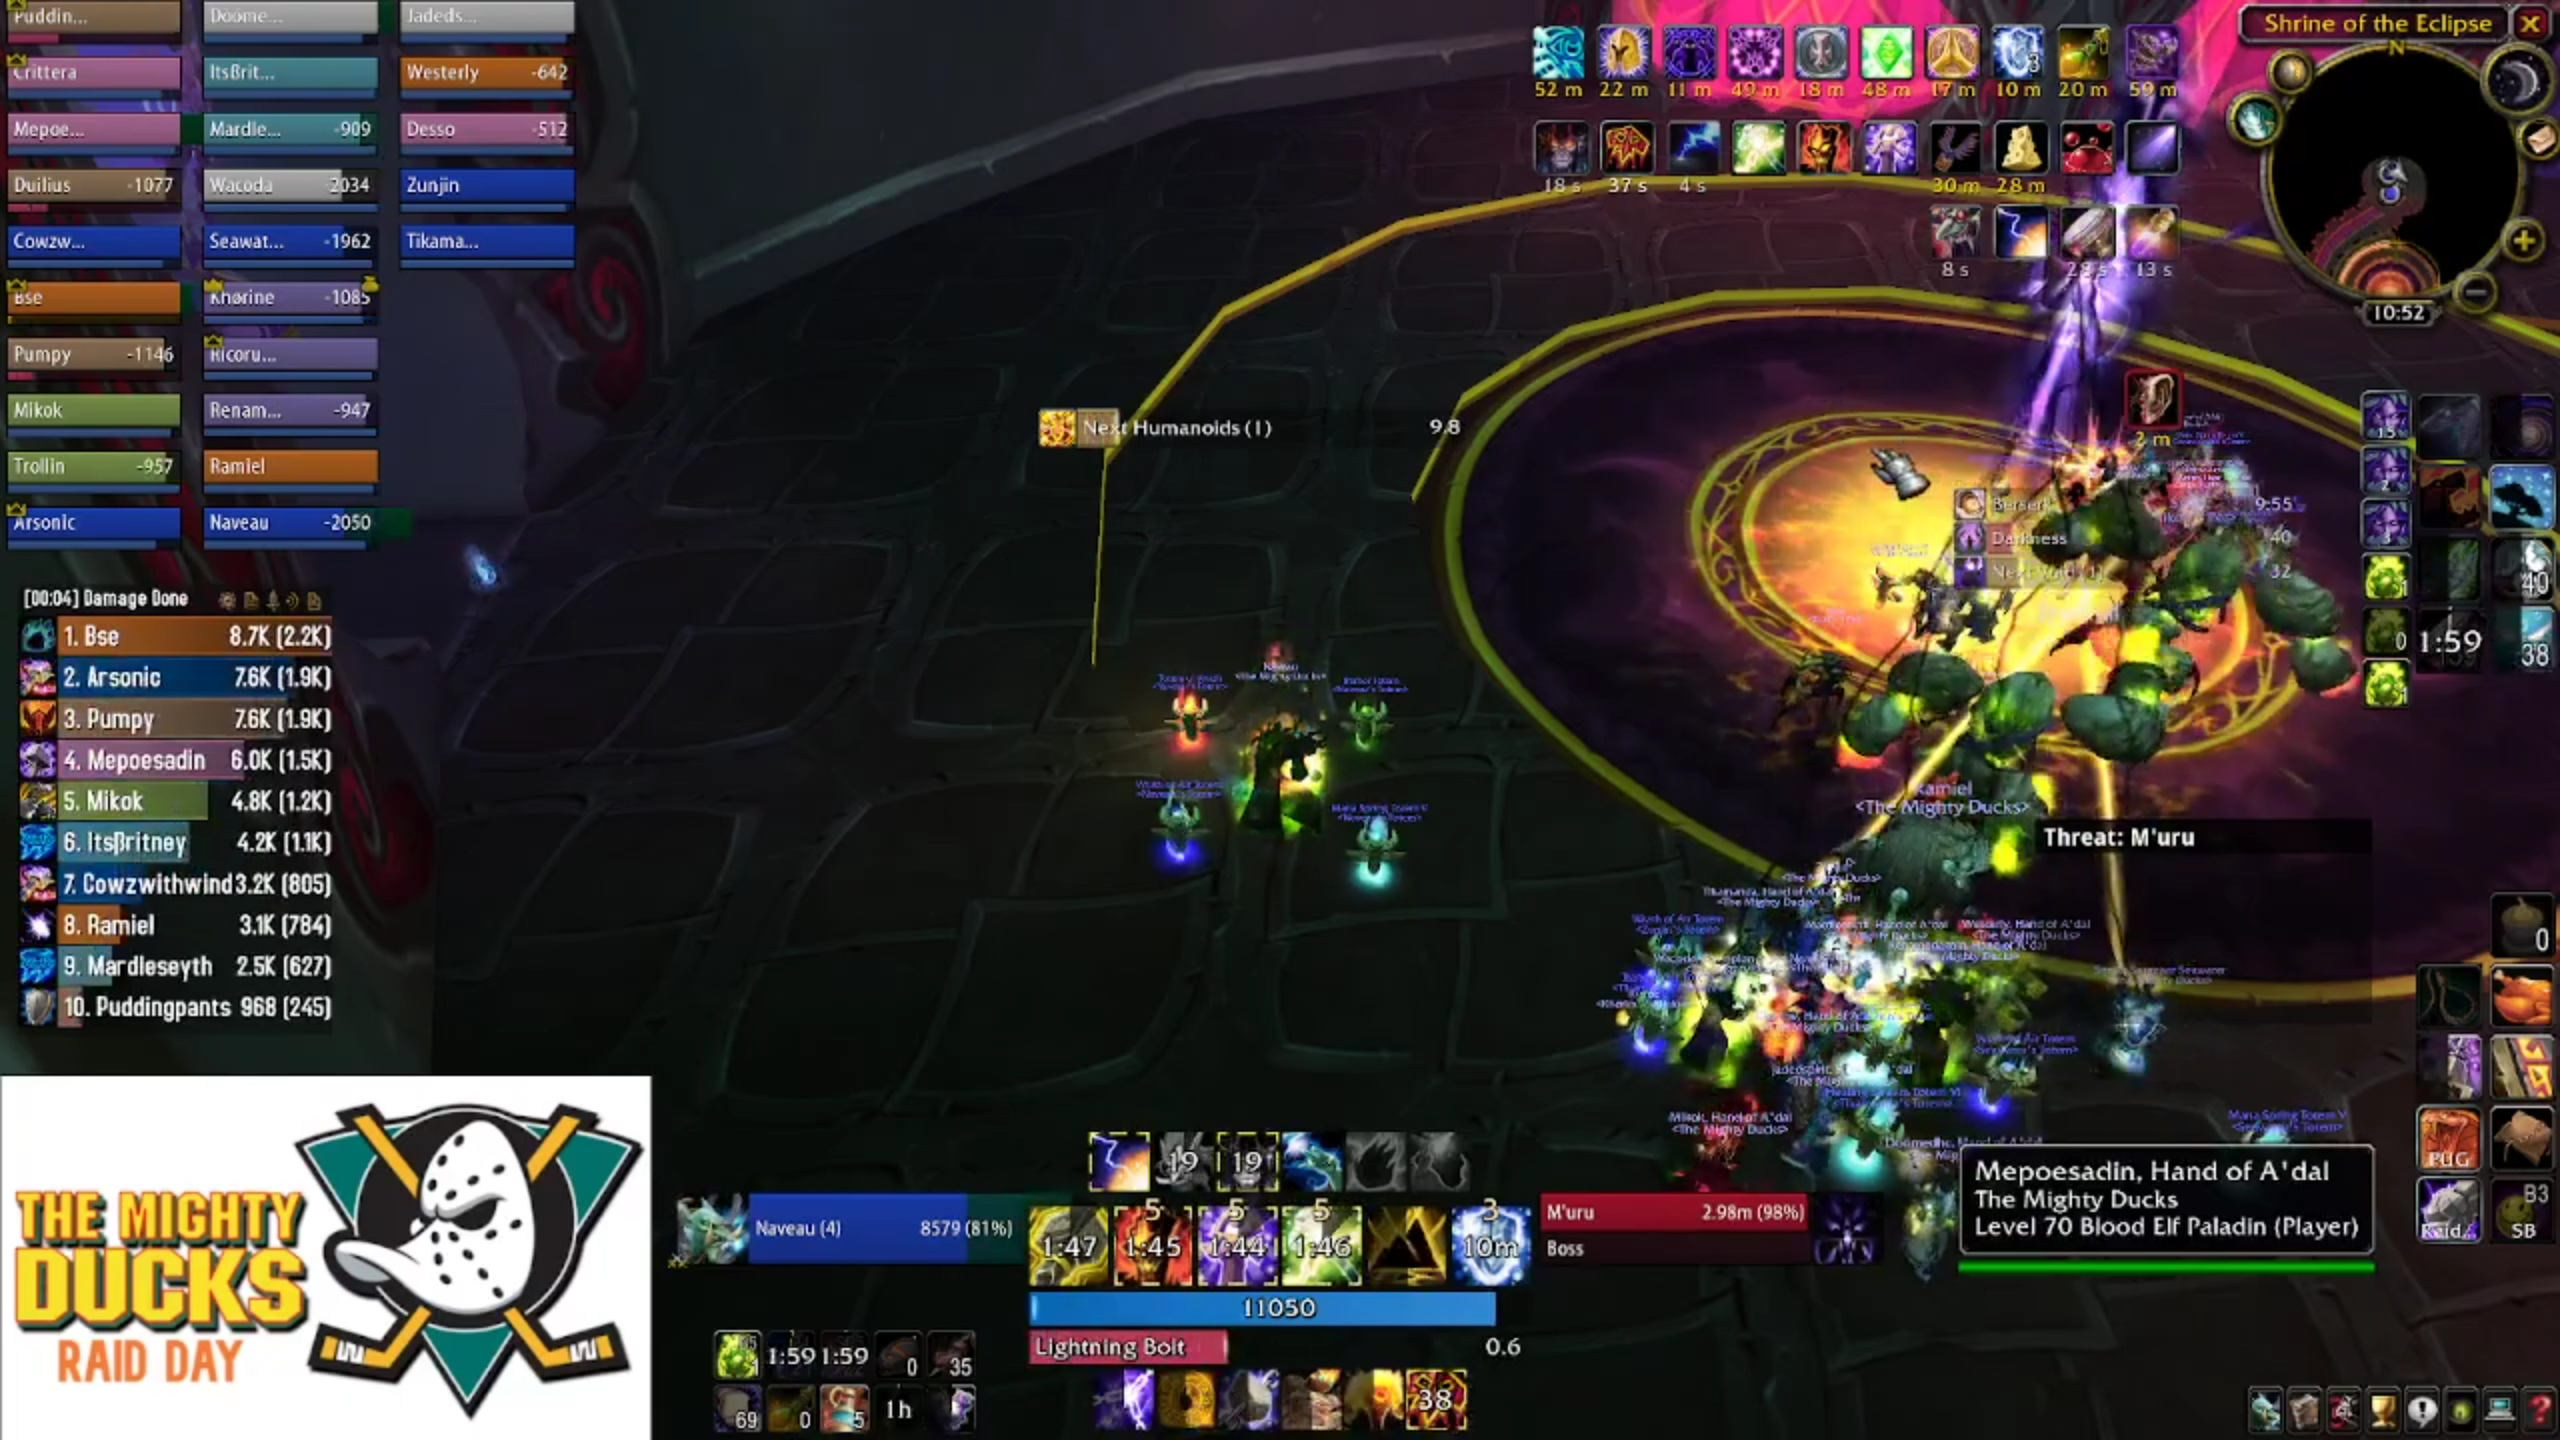
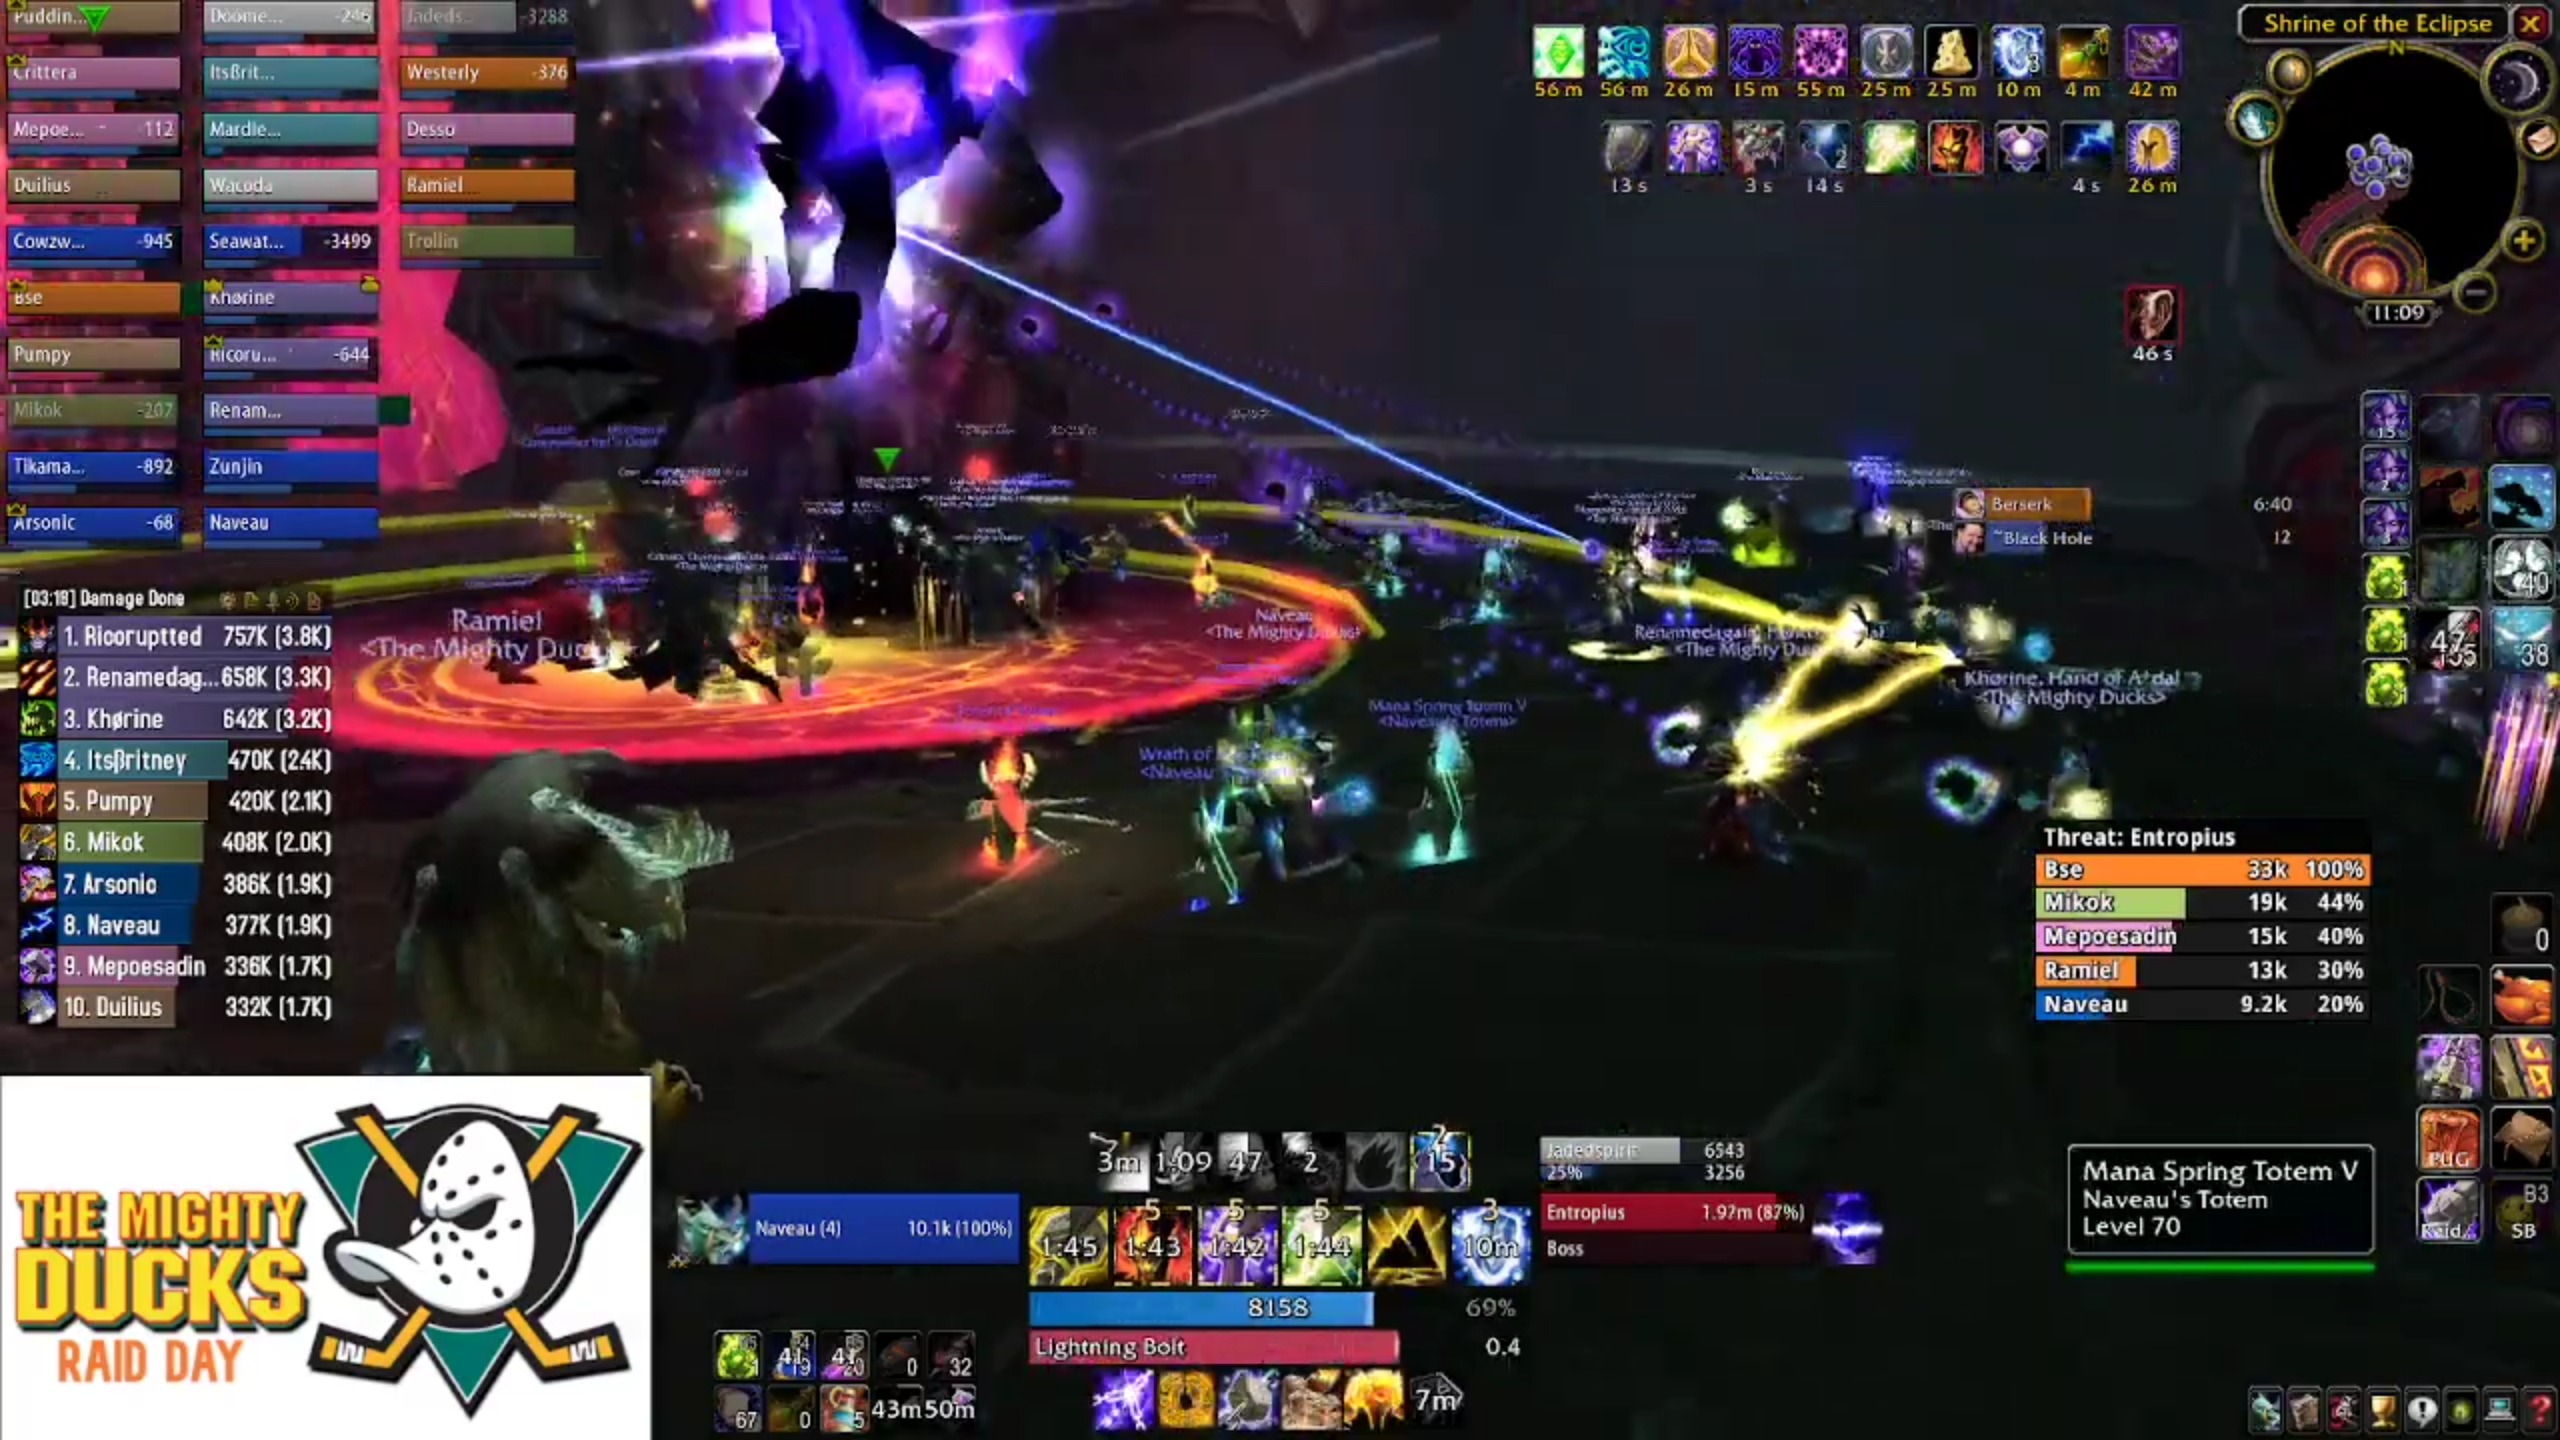
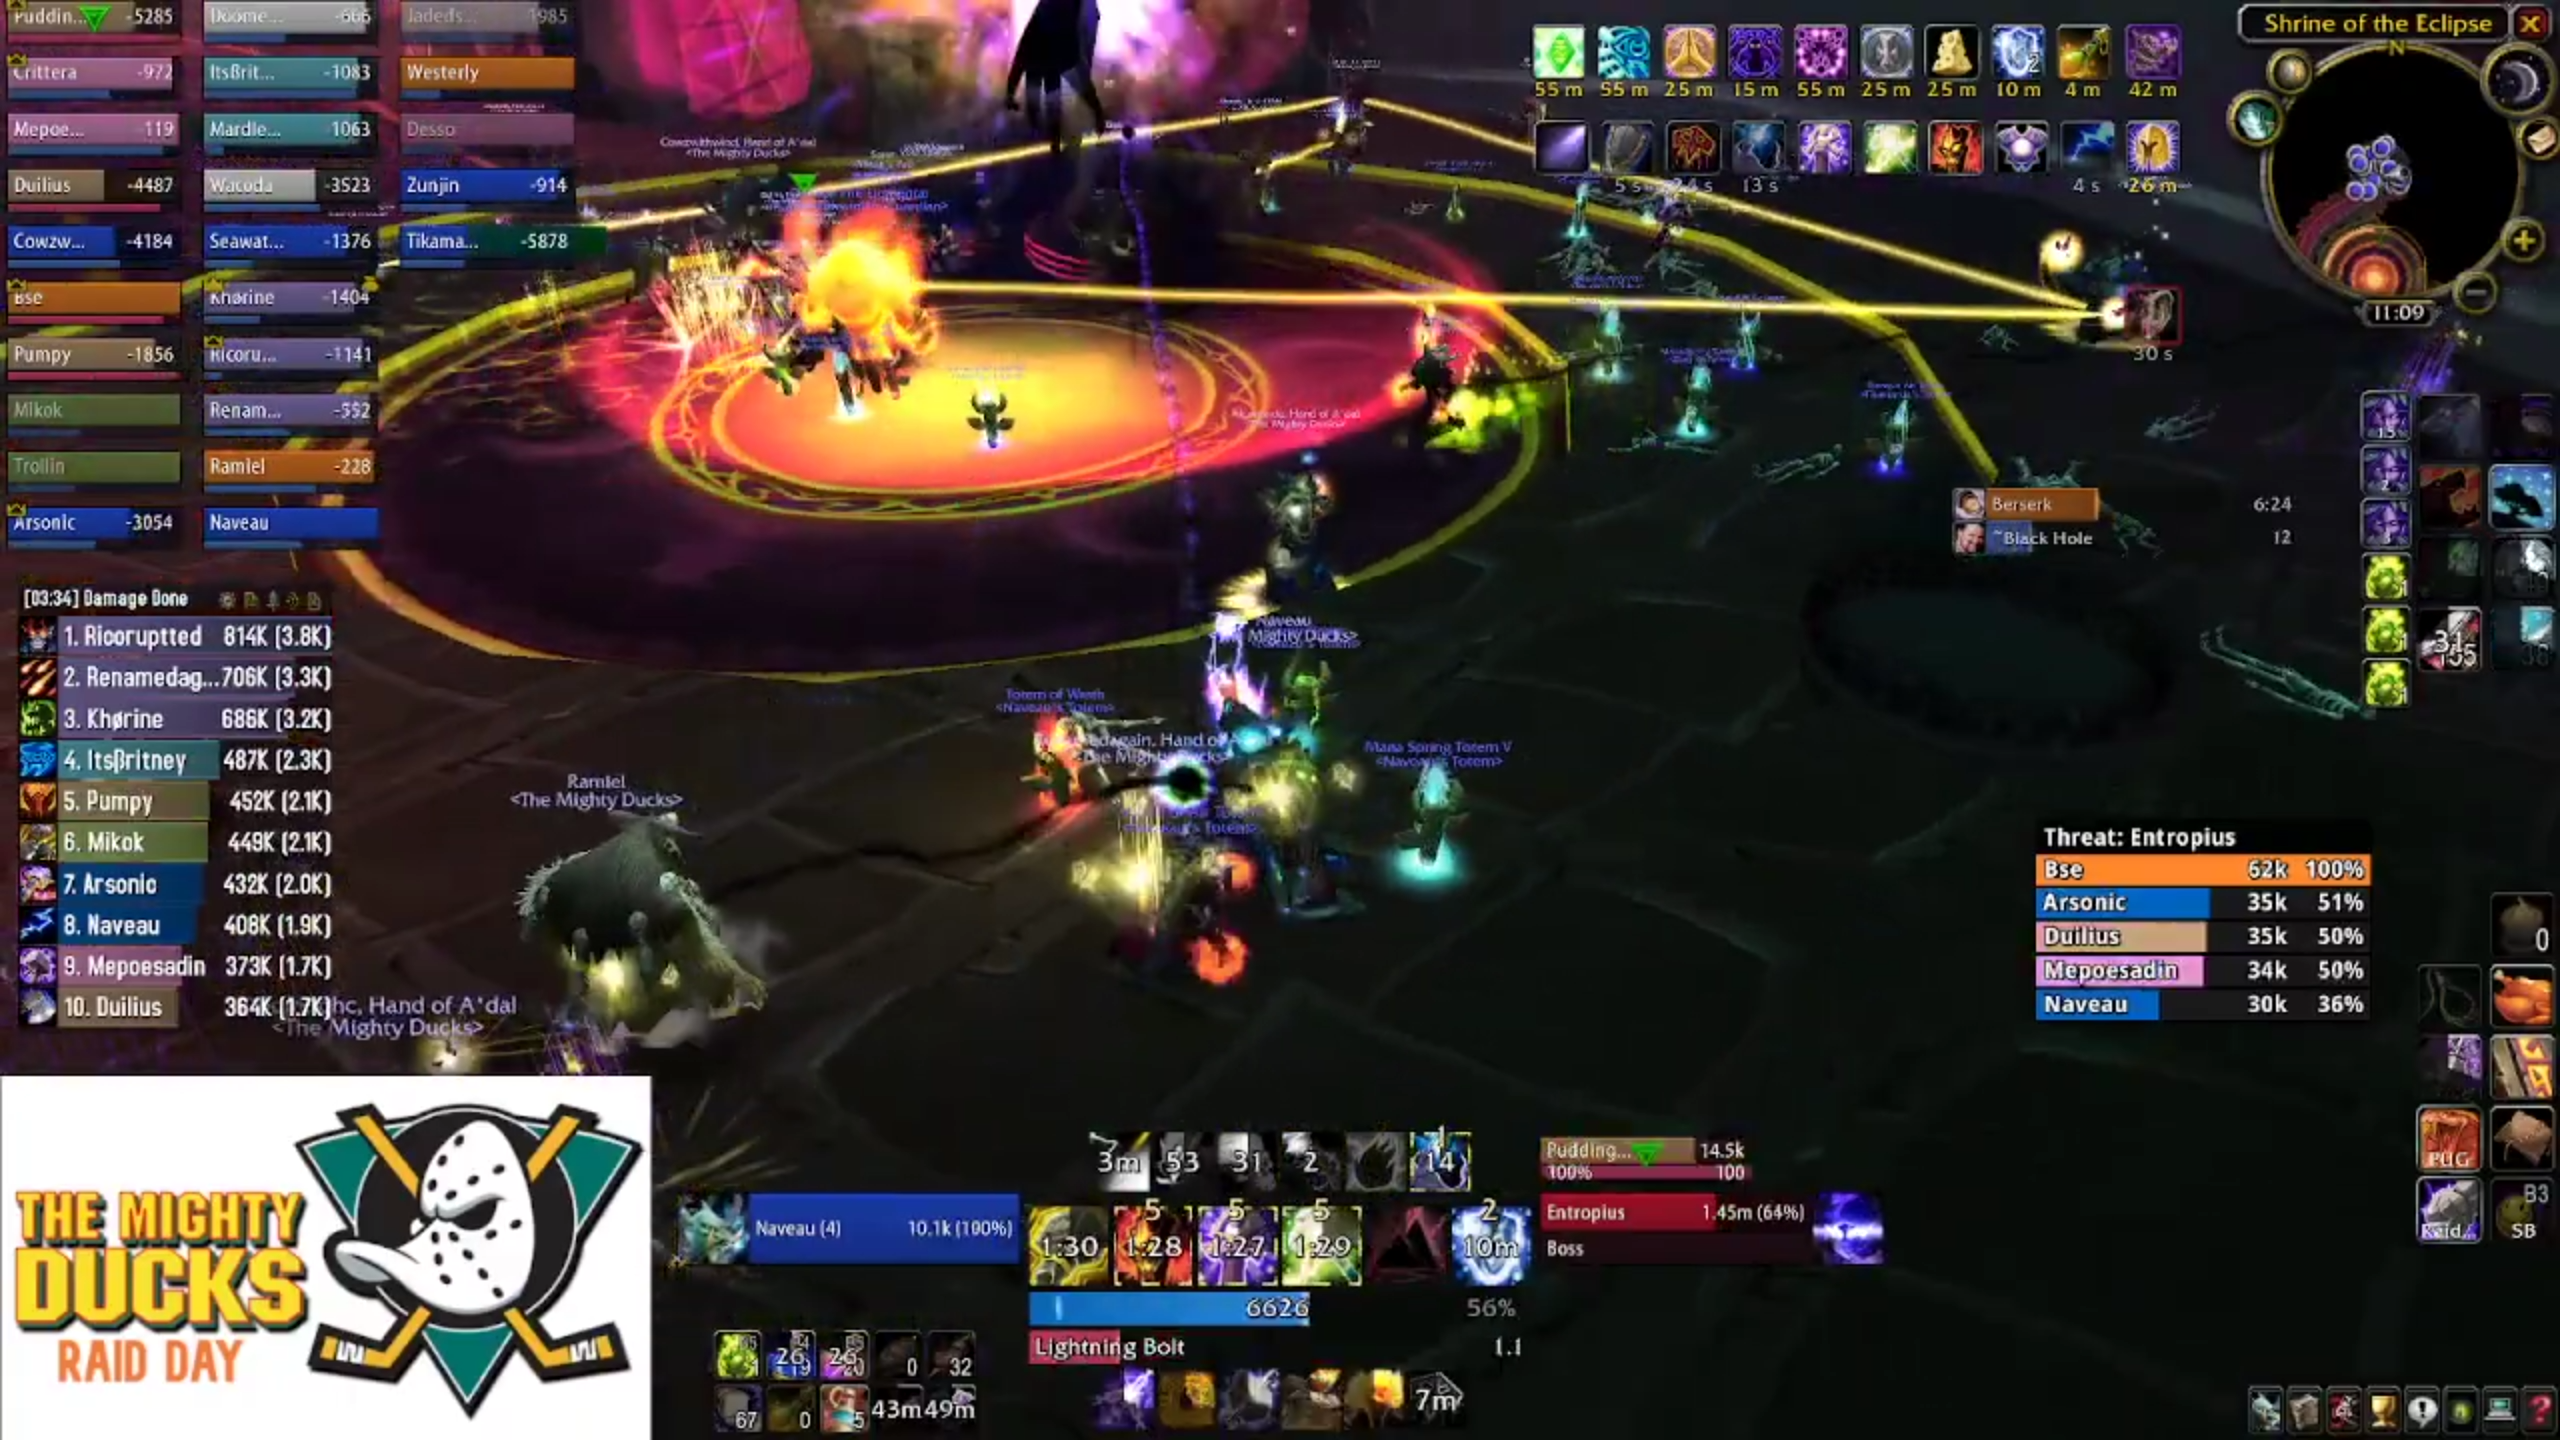
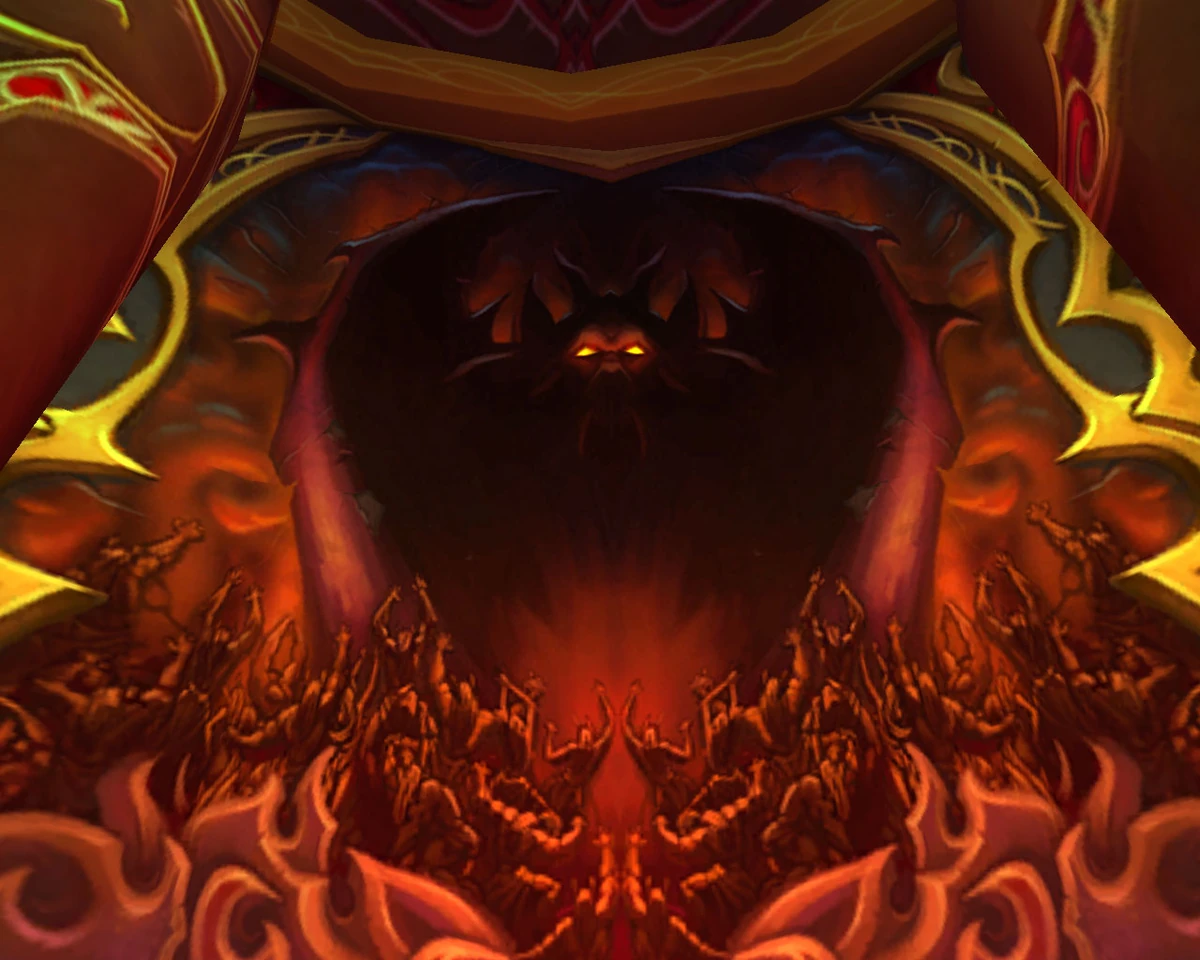
Boss Five - M'uru
M'uru, M'uwu, that purple asshole, whatever you call him, is a monster of a boss. There's a juxtaposition of the boss model (at least in phase one) being so harmless and unassuming, and yet as soon as you start the encounter, it becomes obvious that this boss will be an absolute assblast.
Much like Brutallus and Twins before it, M'uru is a healing, dps and composition check all rolled into one, dialled to eleven. Every member of the raid will be tested on the skillset of their class. Your raid will also benefit from having a player who is able to quickly rotate players in and out of groups to cycle bloodlusts.
You must leave nothing on the table here.
Before you pull the boss, positioning is important. There's a lot of stuff flying around so knowing where you need to be is important. You'll want your raid stacked just outside the carpeted area in the middle of the room, at either the 5 or 7o'clock in the room. This is because there will be miniboss adds that spawn in on the walls, which will wipe the raid with a short ranged AoE.
It's recommended that you pull this boss with a Feign Death reset similar to Kalecgos, so your raid has time to get set prior to the encounter.
When everyone's ready and buffed, let's begin.
Tactics - Phase One
The key objective in Phase One is to empty M'uru's health bar to zero and force the boss to transition. It's important to remember that objective, because it's easy to lose sight in the chaos. Every spare moment (which will be few and far between) needs to be spent on the boss, and it's recommended that you have a handful of ranged DPS (hunters are ideal) constantly blasting.
As the fight starts, you'll get a window of time where your entire raid can pump the boss. You'll want to use spare bloodlusts now, and light M'uwu up. The goal is around 45-50%. Don't get ahead of yourself, because that's the last time you'll get a window like that.
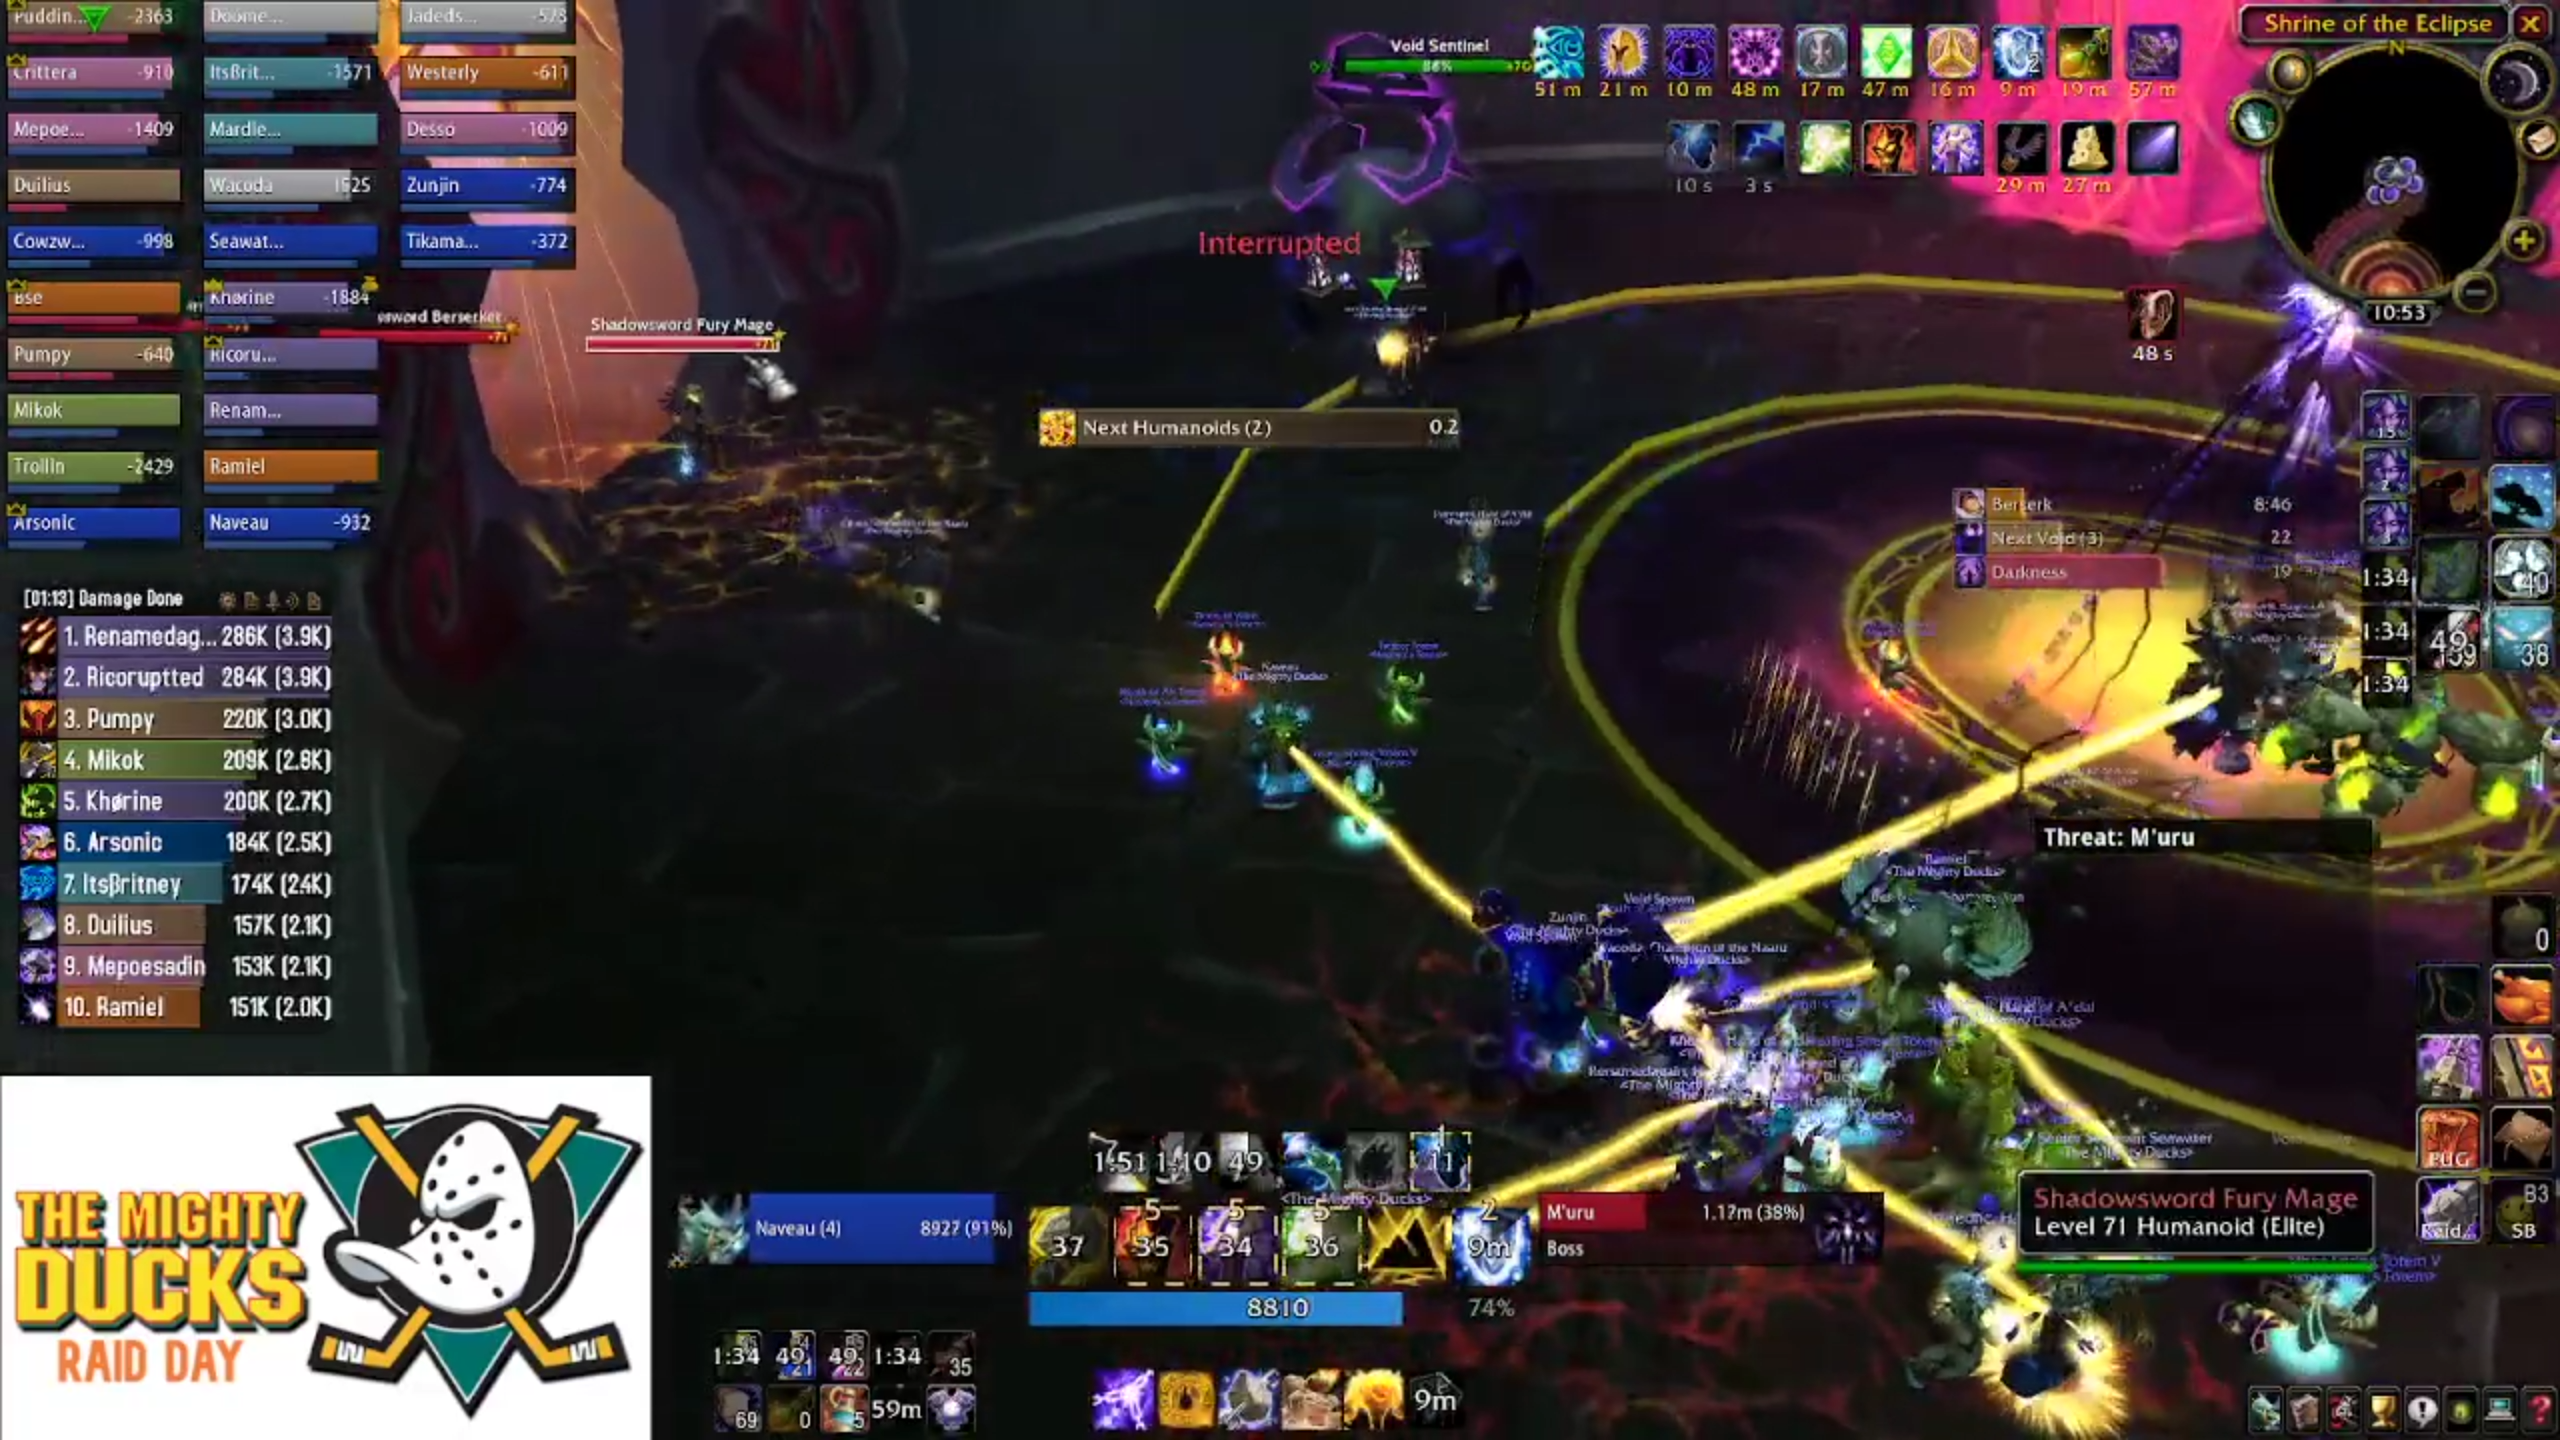
After fifteen seconds, two waves of adds will spawn at either end of the room - two Shadowsword Berserkers, and a Shadowsword Fury Mage. These mobs have high health pools, and need to be totally cleaned up before the next wave of elf bastards shows up, after approximately 60 seconds.
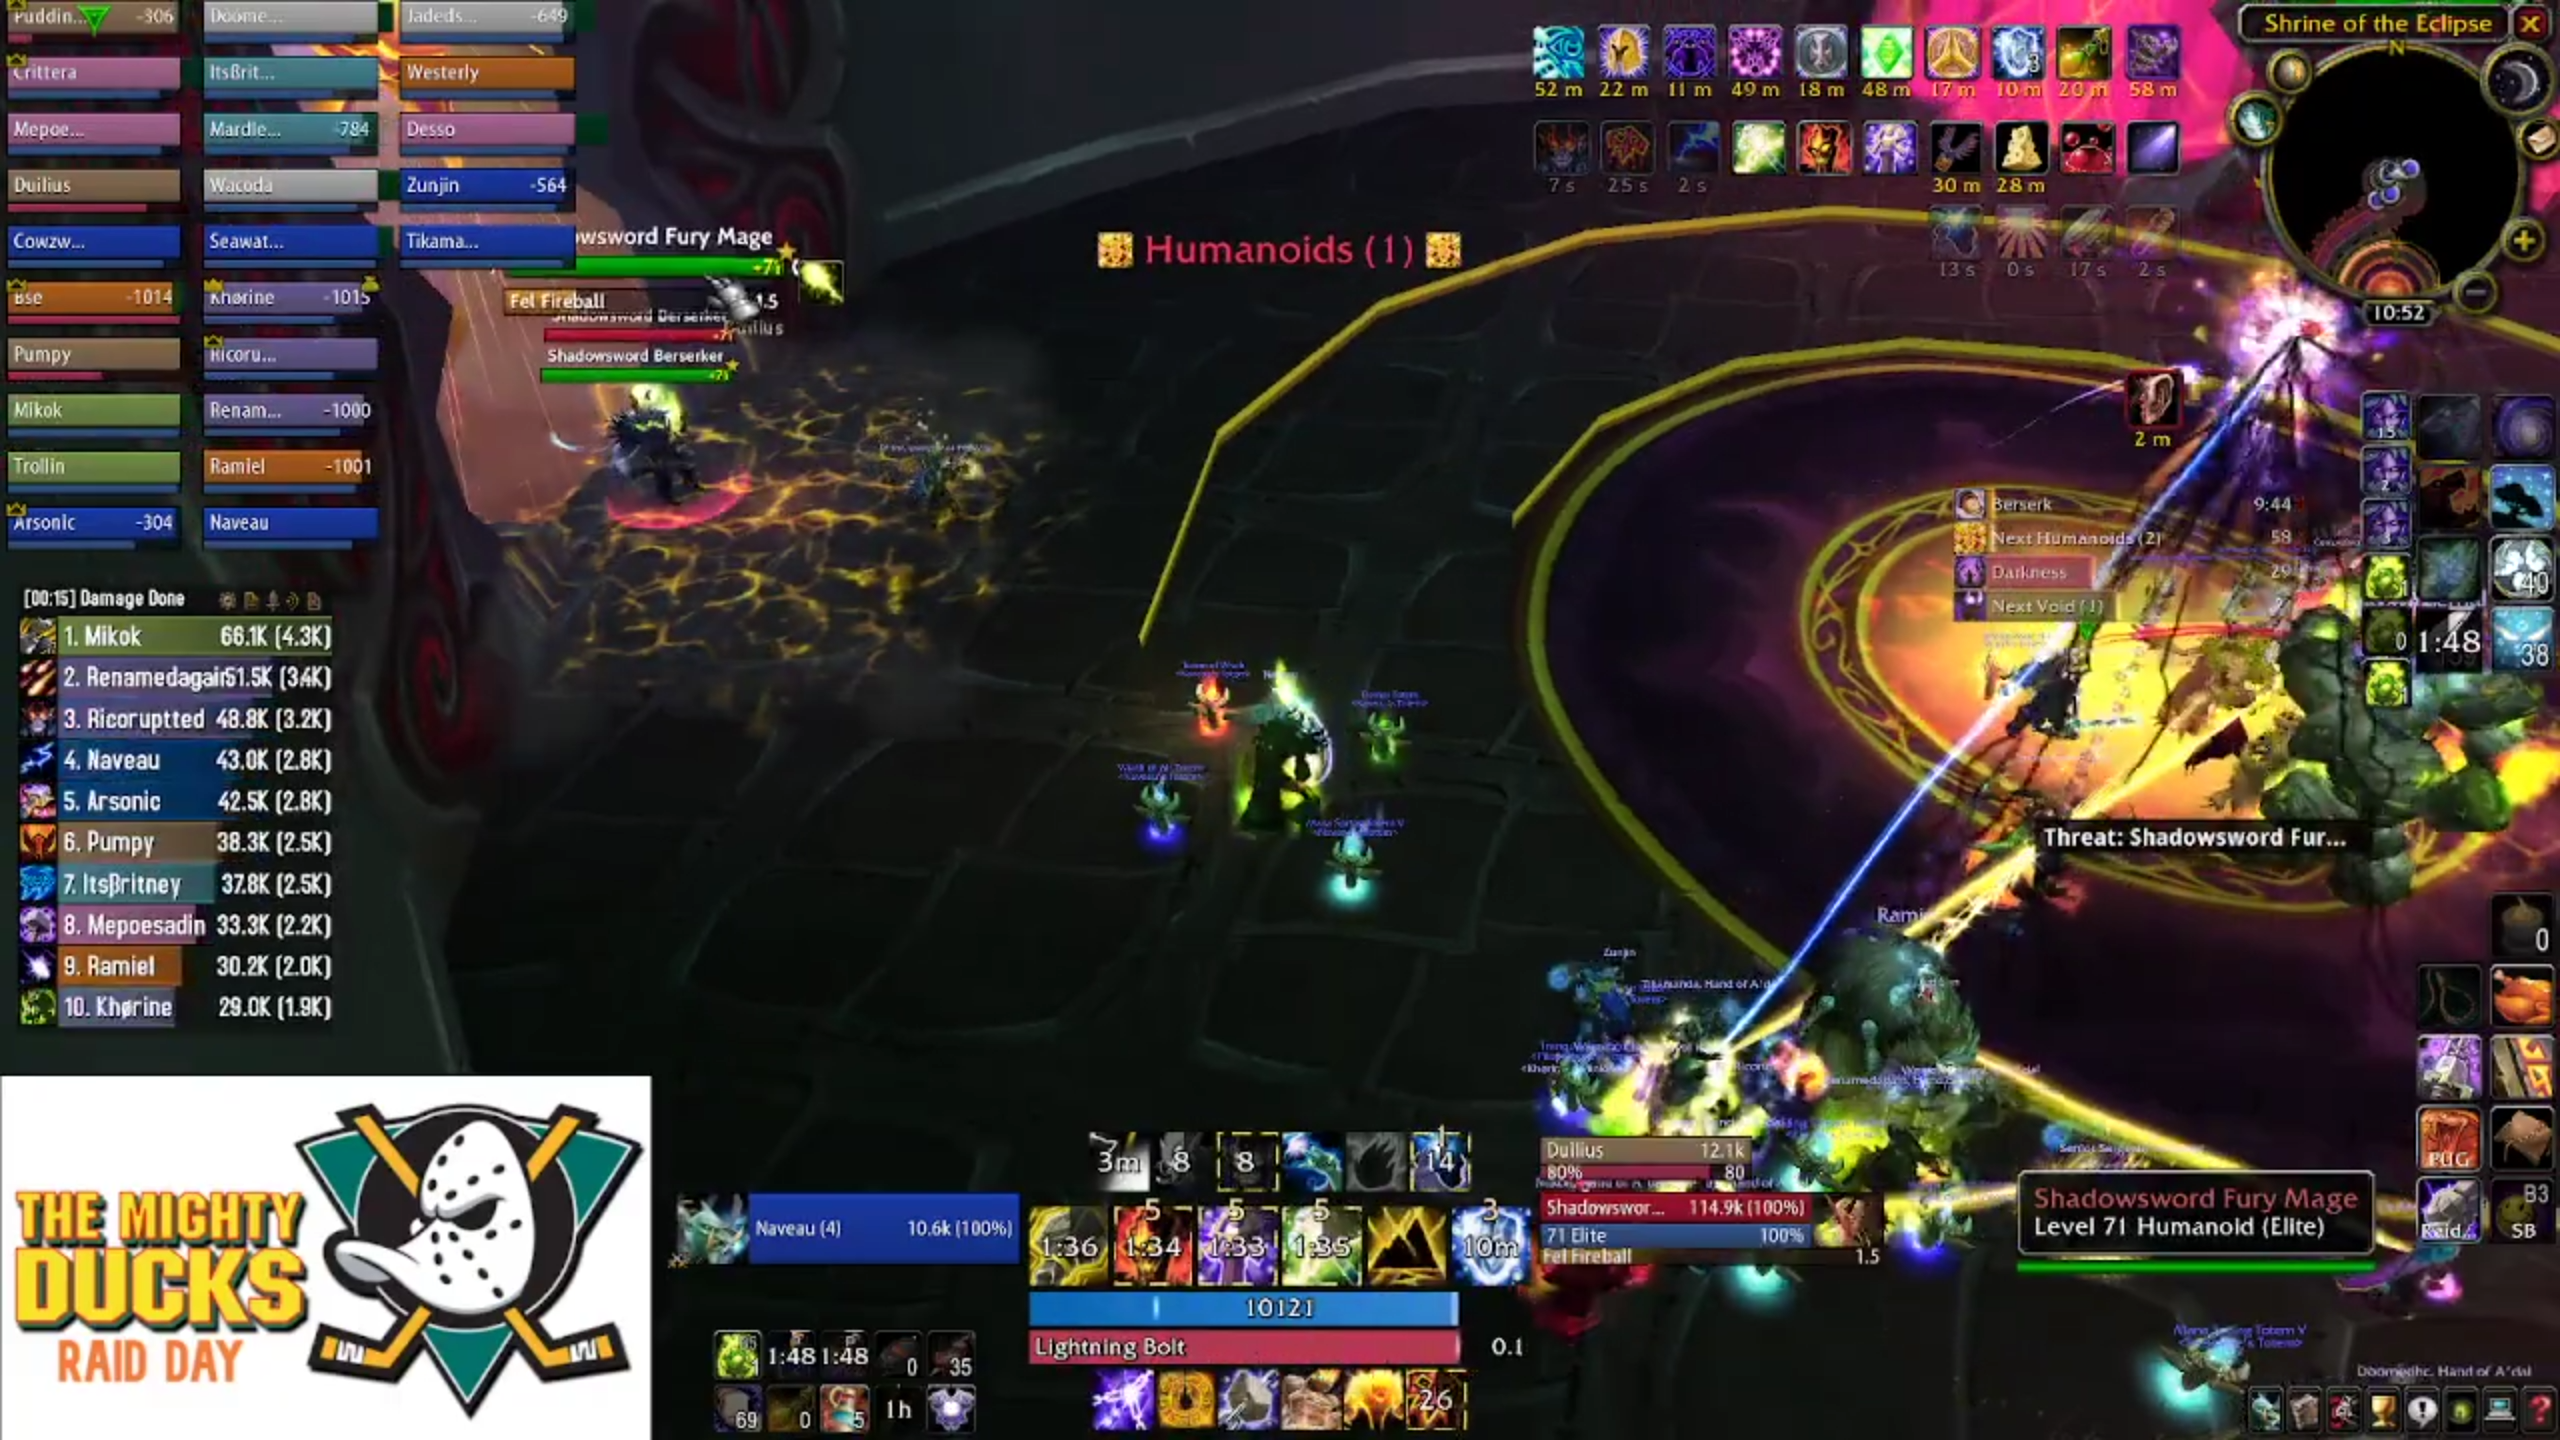
You should aim to transition M'uwu in four or fewer waves of Shadowsword elves - for those of you who are bad at Math, that means you have around four minutes to empty out M'uwu's health pool.
The fury mages are a big pain in the ass - you'll want your interrupting classes, like Shamans, Mages, Warriors and Rogues to be on point with regard to keeping these guys under control. If they're allowed to stand off to the side and freecast, you'll never be rid of them. A good idea is for interrupts to be assigned in teams - two Shamans on the entrance side (one of them can be resto) and a mage and melee classes handling the hallway side.
The fury mages will also apply a self-buff which roots them in place but increases their casting power. This can be purged, spellstolen, dispelled, whatever. It needs to be removed at top priority, so they can be grouped up with the Berserkers (and sometimes M'uru) and cleaved down.
Berserkers hit like freight trains and will pressure both of your tanks. However they can be fully crowd controlled. They have an ability, flurry, which increases their single target damage - it's recommended that any engineers in your raid use Adamantite Grenades to stun them and somewhat control the outgoing damage.
Melee DPS will also need to be very careful about their threat, too. Both of your main tanks are having to move the packs of Elves around the room, which limits their threat generation significantly. It's a fine balancing act of pumping out as much damage as possible, whilst not having a melee mob turn around and punch your lights out. It will happen a lot.
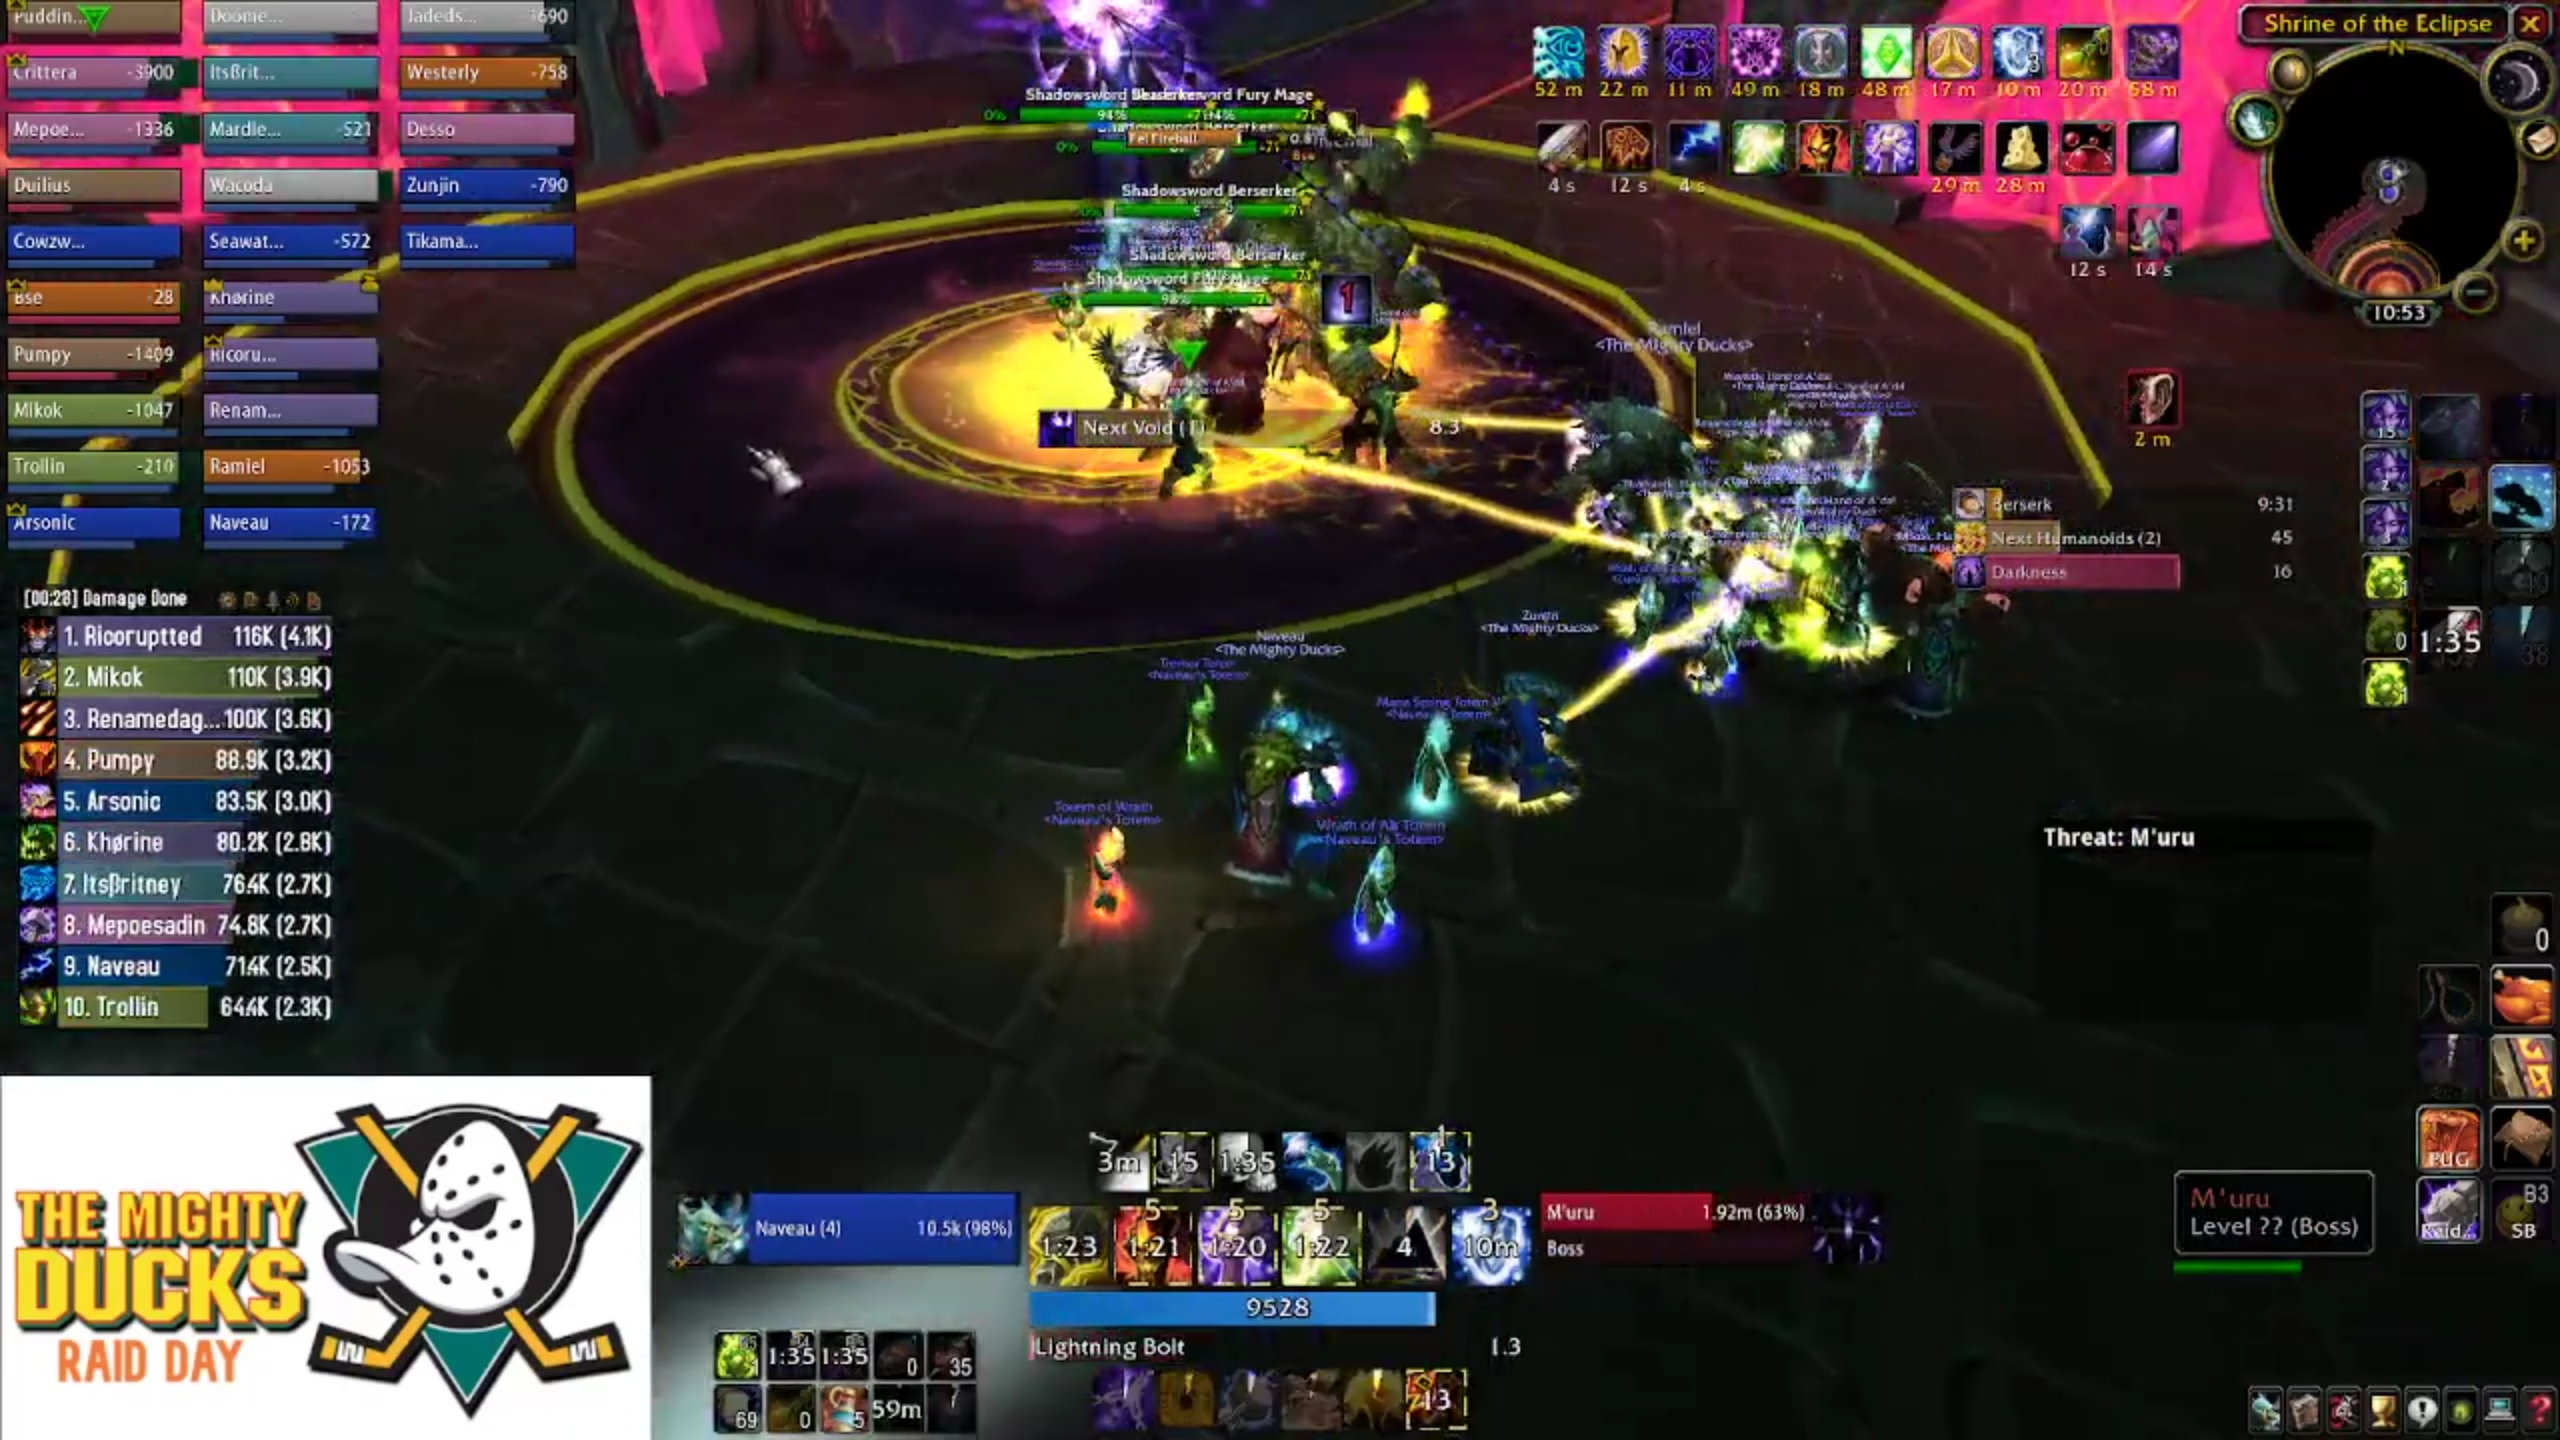
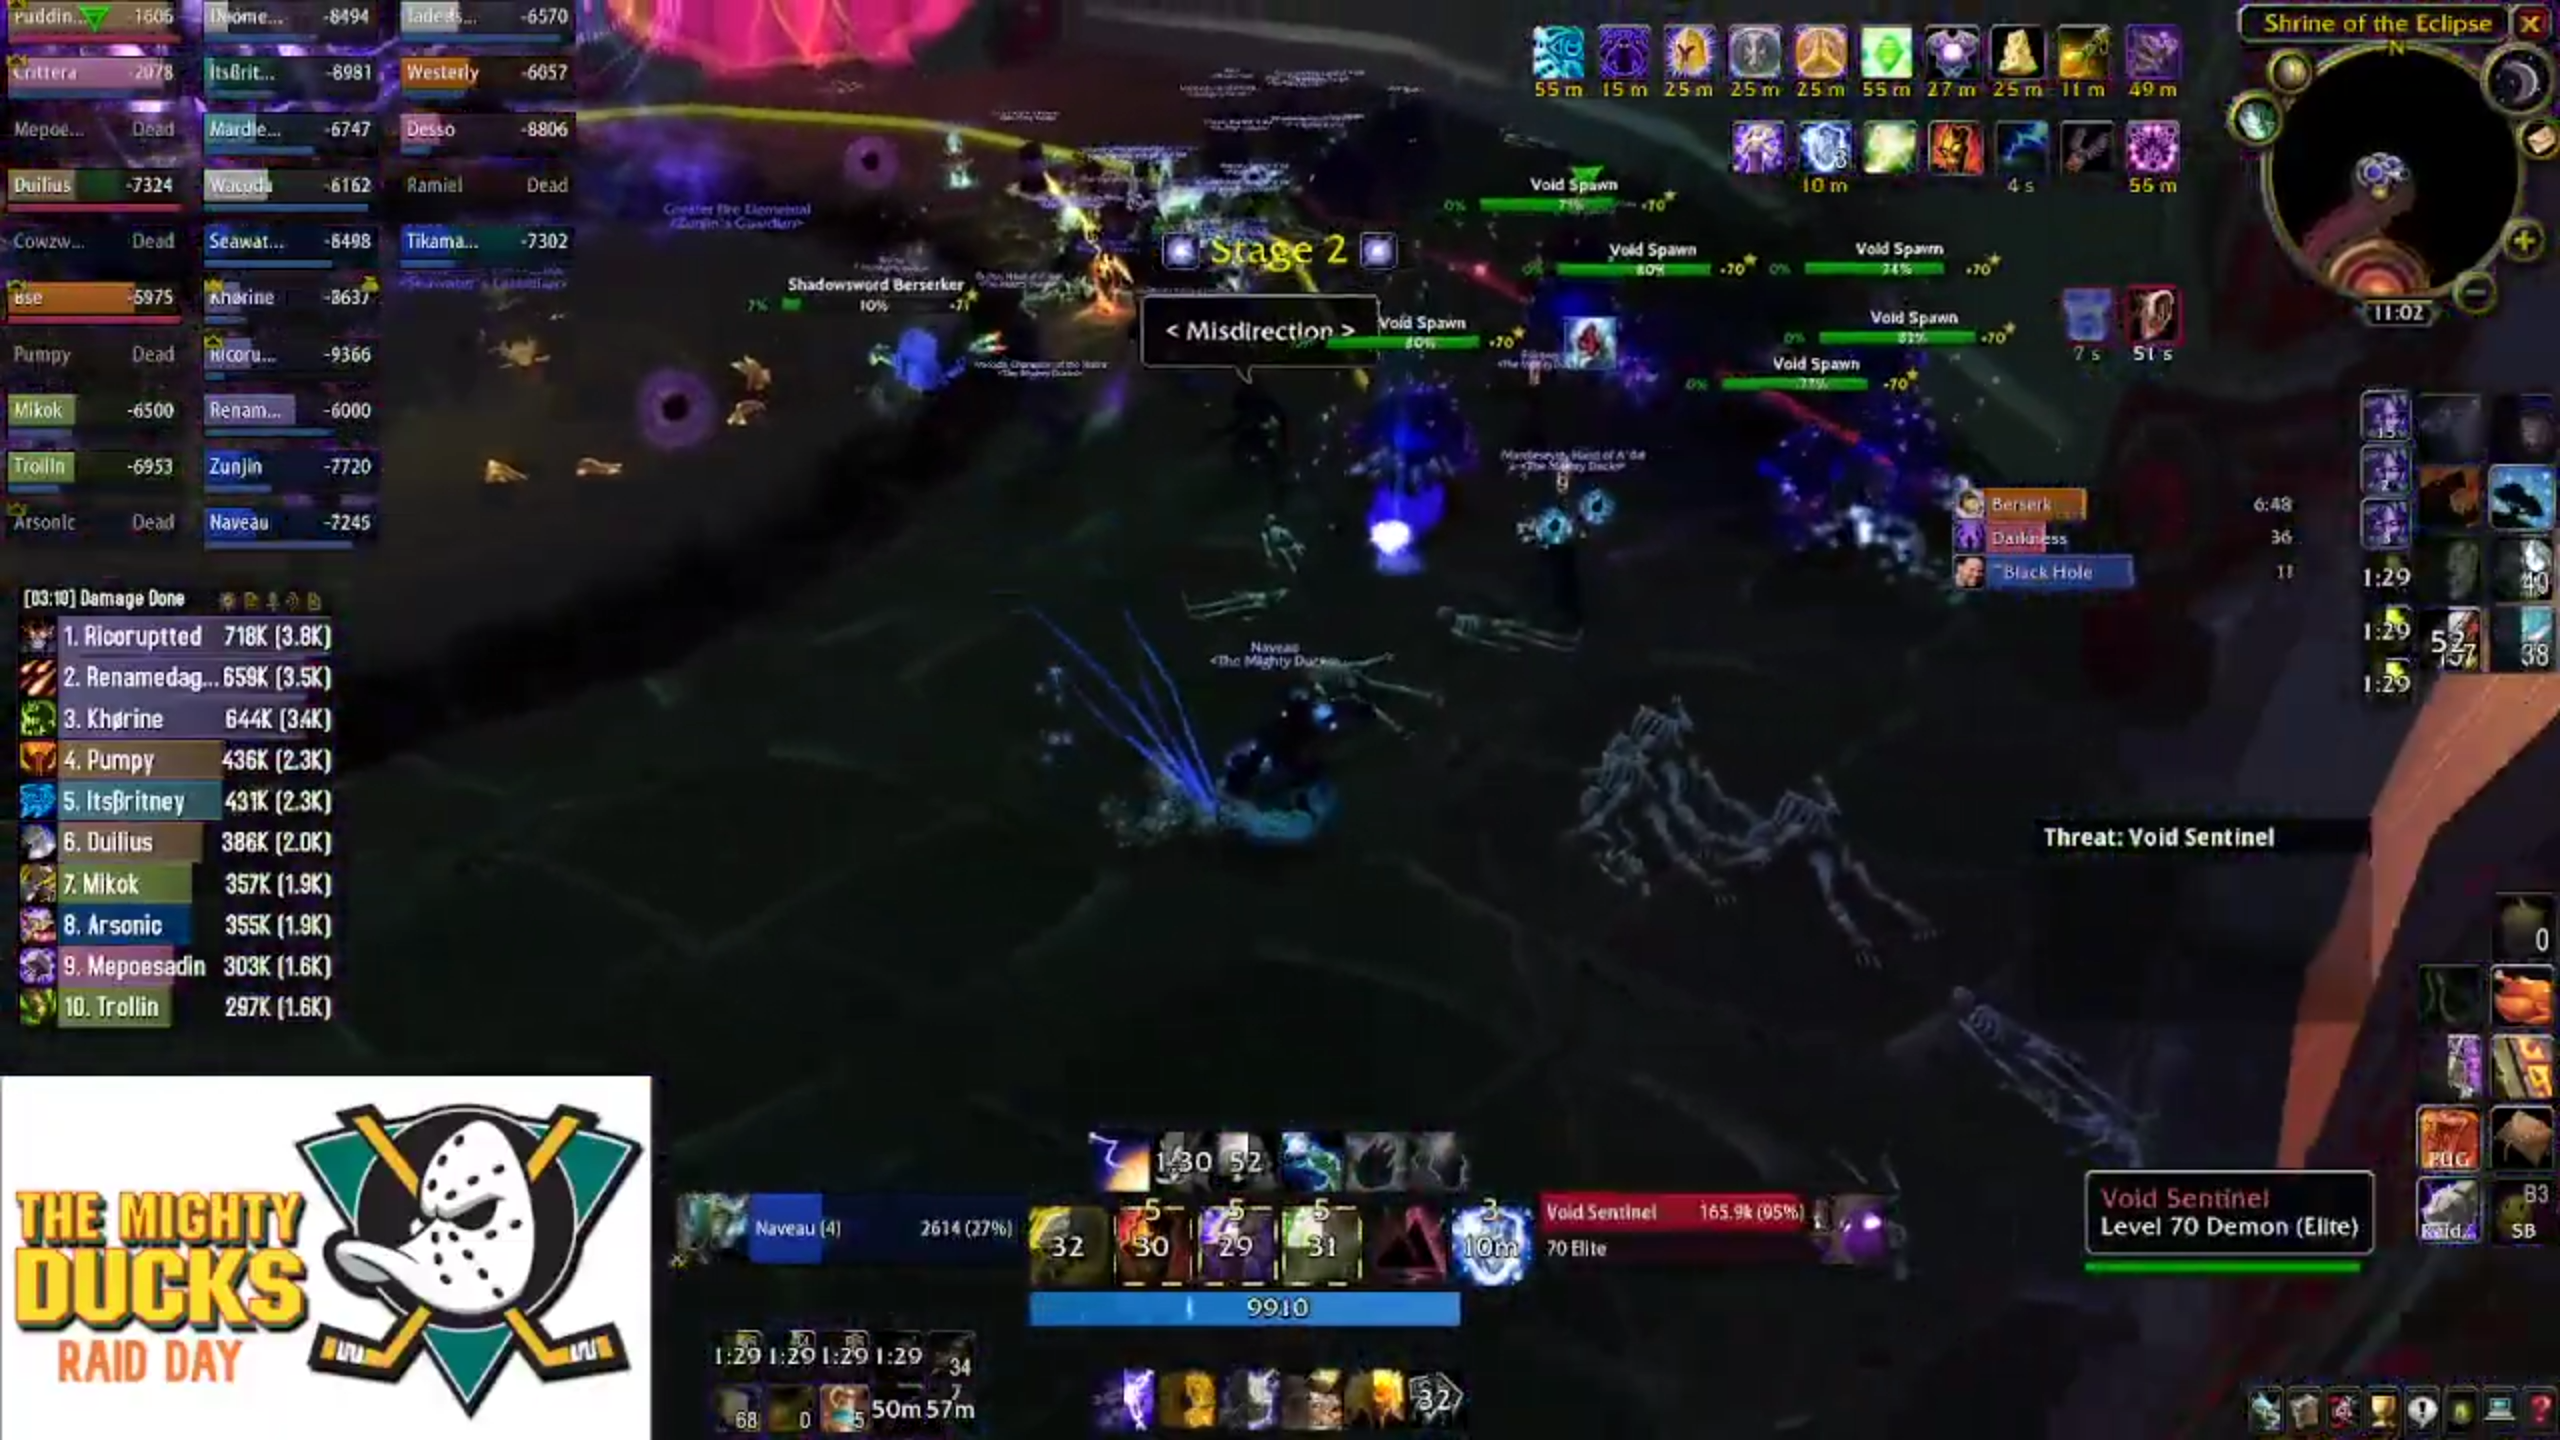
The second set of adds (yep, that's right - two sets of interweaving adds - have fun.) are Void Sentinels and Void Spawns.
There are six preset spawn points for Sentinels. They have a nasty (but short ranged) shadow damage AoE. Your third tank, ideally a warrior, needs to pick the sentinel up, and drag it off to where it's just in range of the raid, and then it should be killed.
In addition to a chunky melee swing and rough AoE, they also cast a single-target spell, Void Blast. Void Blast can be spell reflected, which is why a warrior tank is so important - mostly to prevent your third tank from being instantly deleted out of nowhere.
When the sentinel dies, it leaves behind six void spawns. This is where your Warlocks shine. Void Spawns can be enslaved, and they absolutely should be, as they have a Shadow Bolt Volley ability, which does a ton of heavy lifting when trying to clean up the Shadowsword Elves.
You'll normally have one pack of Spawns that can be enslaved, but each second pack will need to be wiped out with AoE. Mages can help a lot here with access to Blizzard and Frost Nova. It's pretty important that all six spawns never reach the stacked raid group, as six simultaneously cast Shadow Bolt Volleys is a guaranteed wipe.
The last significant mechanic to talk about in this phase is Darkness. Every thirty seconds, M'uru will cast Darkness, which turns the innermost lit up area into an instant-death AoE. Tanks and Melee DPS will need to keep one eye on the timer, to make sure they're moving in and out, whilst trying to maximise uptime on the boss and the adds.
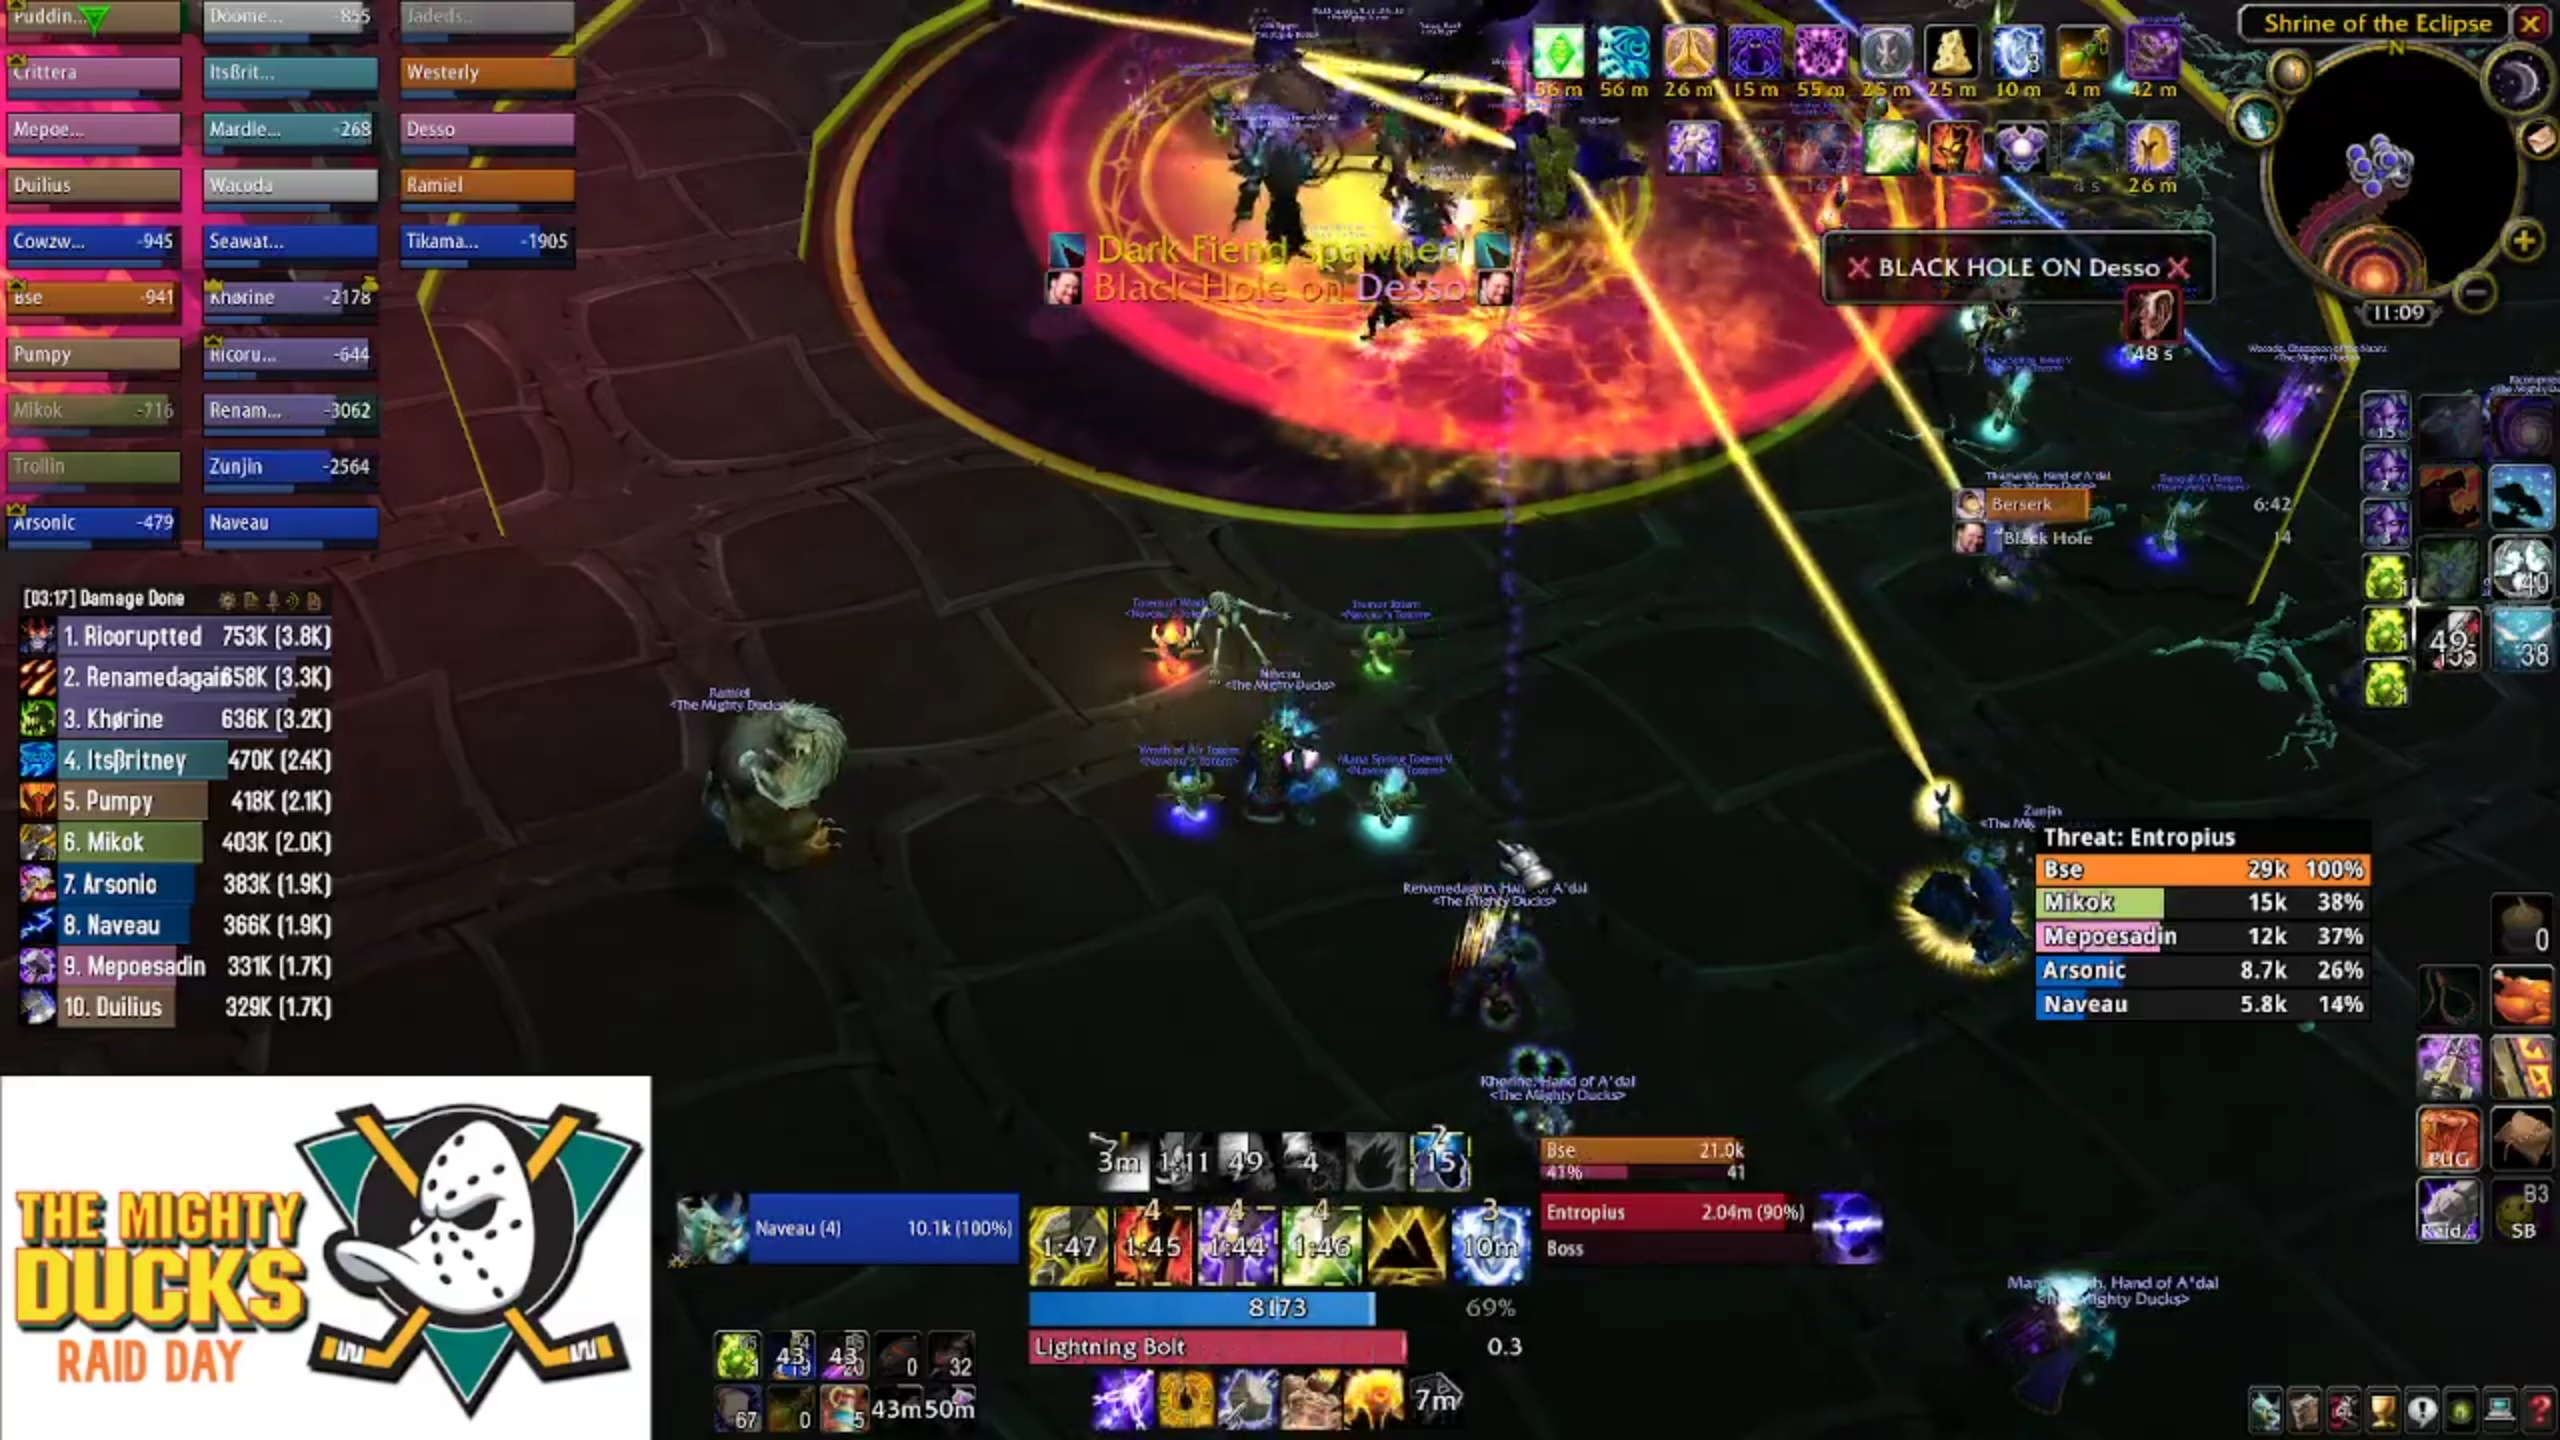
In addition to a large and deadly AoE, Darkness also spawns six Dark Fiends. When one of these hits the group it'll explode and kill everyone in a short radius around the point of detonation. Having one of these explode is an instant wipe. Fortunately, they can be instantly removed with a dispel. A Shadow Priest can mass-dispel the fiends when they spawn, and remove most, if not all of them in one shot. Other classes should be on high alert to pick up stragglers with dispels - mostly hunters and shamans.
The goal is to transition the boss as the last of the Shadowsword Elves die from the fourth wave. It's ok to have a Void Sentinel up as you transition, as you can clean it up as the boss turns from M'uru into Entropius, and phase two begins.
Tactics - Phase Two
Entropius is a straight DPS race. You'll want everyone to spread out, ideally keeping groups as coherent as possible to help with healing from chain heal and circle of healing.
Entropius also has a threat table - so you'll want to start with a misdirect and give the tank a few seconds to pick the boss up. Don't be that player who immediately pops off and has their head punched in.
Once your tank has a threat lead, you're off to the races. All told, you have probably about a minute and a half to kill Entropius. This is because, aside from the boss' melee swings, he also casts an ability which deals increasing damage and chains to more members as the fight goes on. It doesn't take long for the first target to get one-shot and for the remaining players to get slowly cleaned up, leading to a sub-10% wipe.
Past a certain point, approximately 45-60 seconds into phase two, a battle resurrection is not advised because the chances of you standing up and getting killed instantly are so high, you may as well not bother.
The boss will continue to cast Darkness, however instead of being a huge AoE around Entropius, instead it will take the form of a small particle effect placed under the feet of players. It will still spawn a Dark Fiend, which will still wipe the raid. Move and dispel them when they spawn. Unlike the first phase, this is a raid-wide responsibility. Arcane Shots, Purges, and priest Dispels will all do it.
The last ability the boss uses is Black Hole. A small black sphere that travels around the room, anyone caught in the area of effect will be stunned and tossed up in the air, before being thrown a short distance. This ability doesn't deal any damage, but the amount of time it disorients you and the tightness of the DPS race means getting too many players caught in it over the course of the fight will wipe the raid.
You'll want to use Bloodlust - it's maximum attack here. You will lose players, and don't be surprised if your M'uru attempt looks something like this:
It's very difficult for me to convey the difficulty of M'uru through the medium of text. But whilst everything looks wrapped up in a neat little package, there's so many little things that can go wrong.
Your tank can be one-shot by void blast, or killed by Shadowsword Berserkers. You can end up with a second wave of elves before you're done with the previous wave. The raid can be wiped by the tank losing threat on a Void Sentinel, which then plows into the raid stack and kills everyone.
Void Spawns can live until they make contact with the raid and overwhelm the group with Shadow Bolt Volleys. Don't be shocked if in the second phase, the damage just isn't there and you wipe at sub-10%. Endless Fury, the best guild on the server (Alliance side, it must be said, blue losers) had several wipes on M'uwu at 1% which cost them literal hours on launch day. I know the Ducks had at least five or six sub-10 wipes.
In total it took most guilds between 50-60 wipes (Ducks took 100) to get past M'uru. Beating this boss takes more than individual brilliance. It takes a stoic attitude, a stiff upper lip, and a willingness to go in, night after night, and die. A lot.
But if you can remember that your goal is to transition M'uru into Entropius, instead of keeping the waves under total control, and you can stay alive for as long as you can against the big shadowy death machine, you'll be able to do it.
Well done. You have defeated one of the toughest bosses in SWP, it is arguable that M'uru is in fact, the hardest boss in the Sunwell. Give yourself a pat on the back, celebrate with your raid and enjoy the good chemicals.
There is, however, one final test.
Again, when you wipe, you can teleport out to just before the M'uwu boss room.
But first, there's the last two packs of trash in all of TBC. I say packs, but in reality it's two Shadowsword Guardians.

These aren't dangerous, just annoying. They have a raid-wide debuff which does damage and reduces cast time, and will charge (and instantly kill) a member of the raid every so often, normally two members. You can save the member in question with a blessing of protection, but it's often better to just let the person die and resurrect them.
Once you get to the bottom floor, as you peer through the thin, delicate curtains, you'll be able to see the reinigted Sunwell - and three individuals preparing to summon the last boss, and finish the job Kael'thas started.
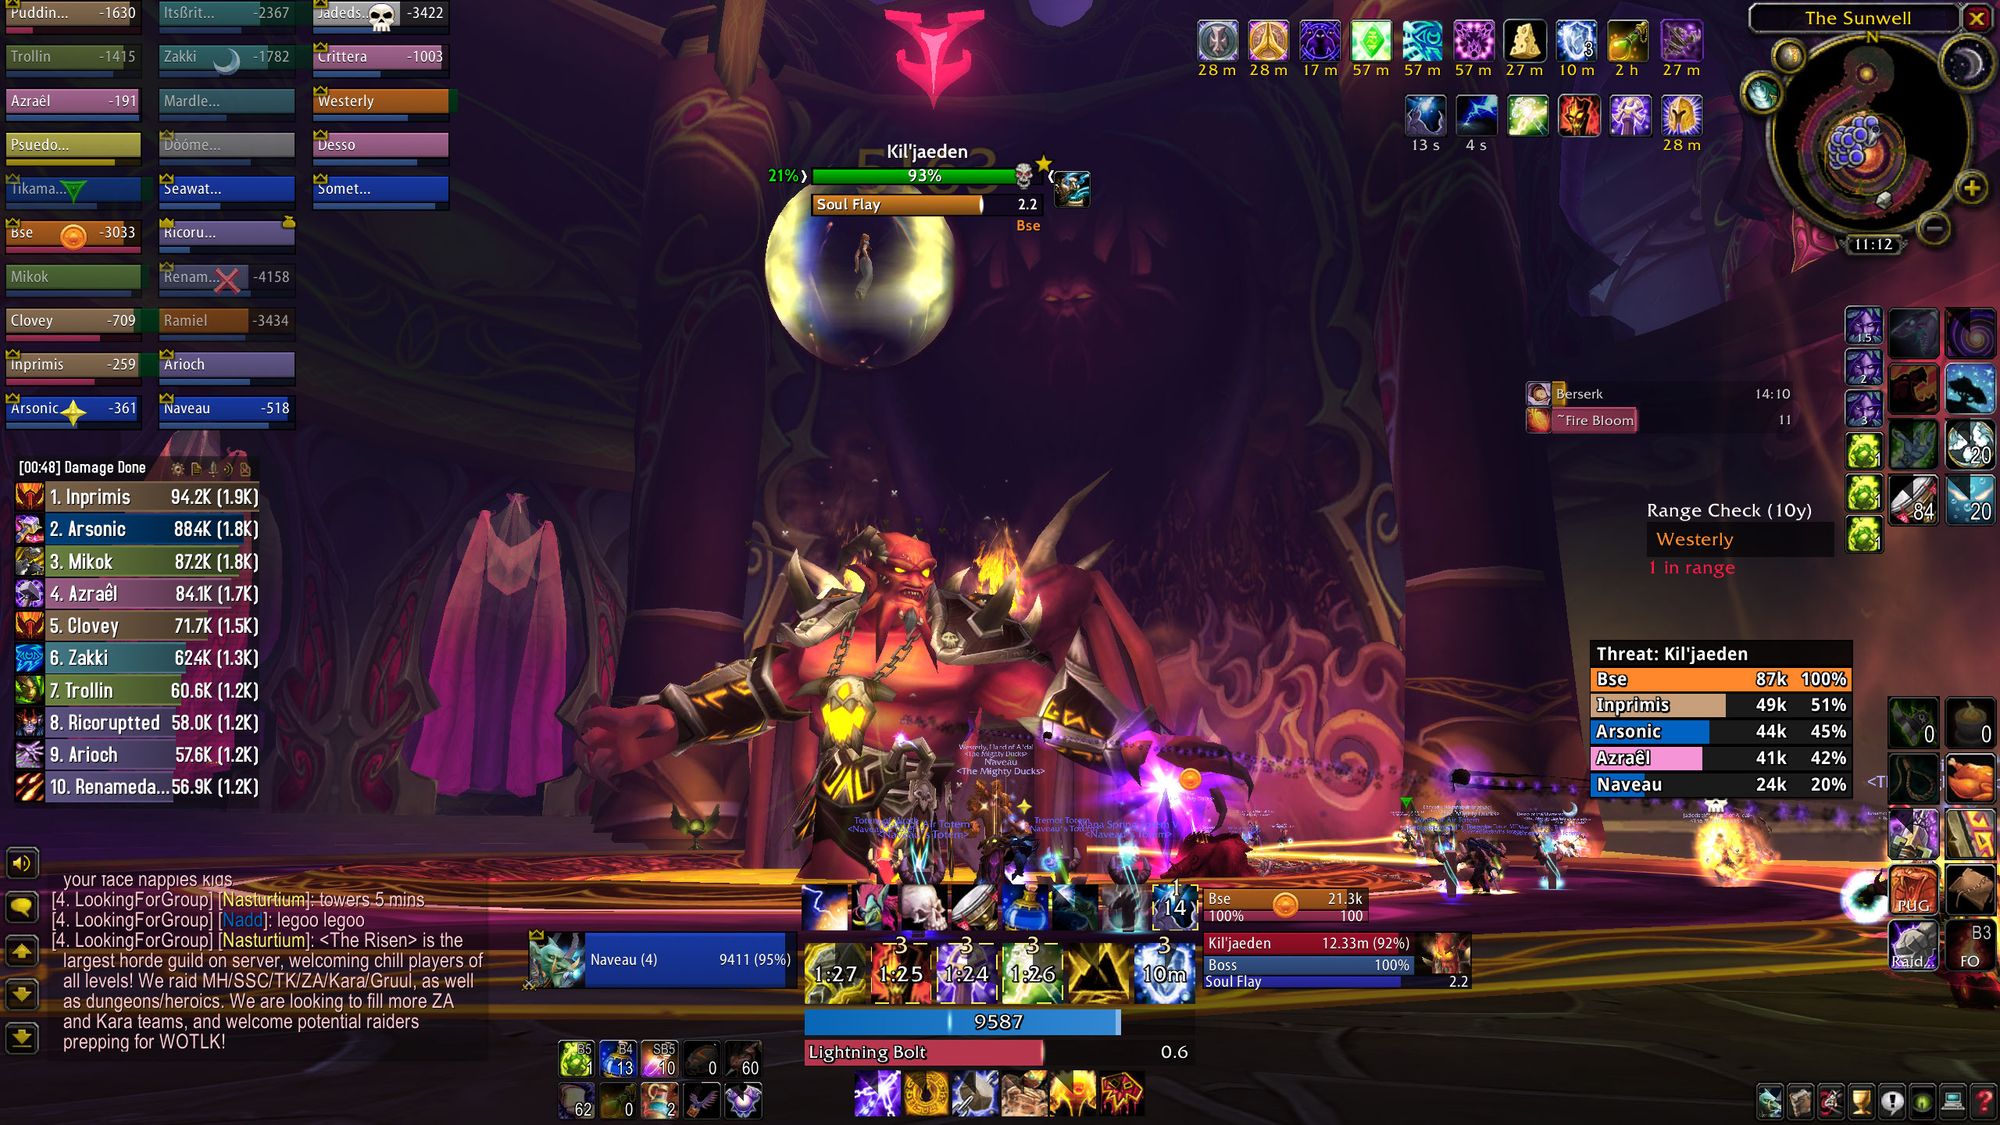
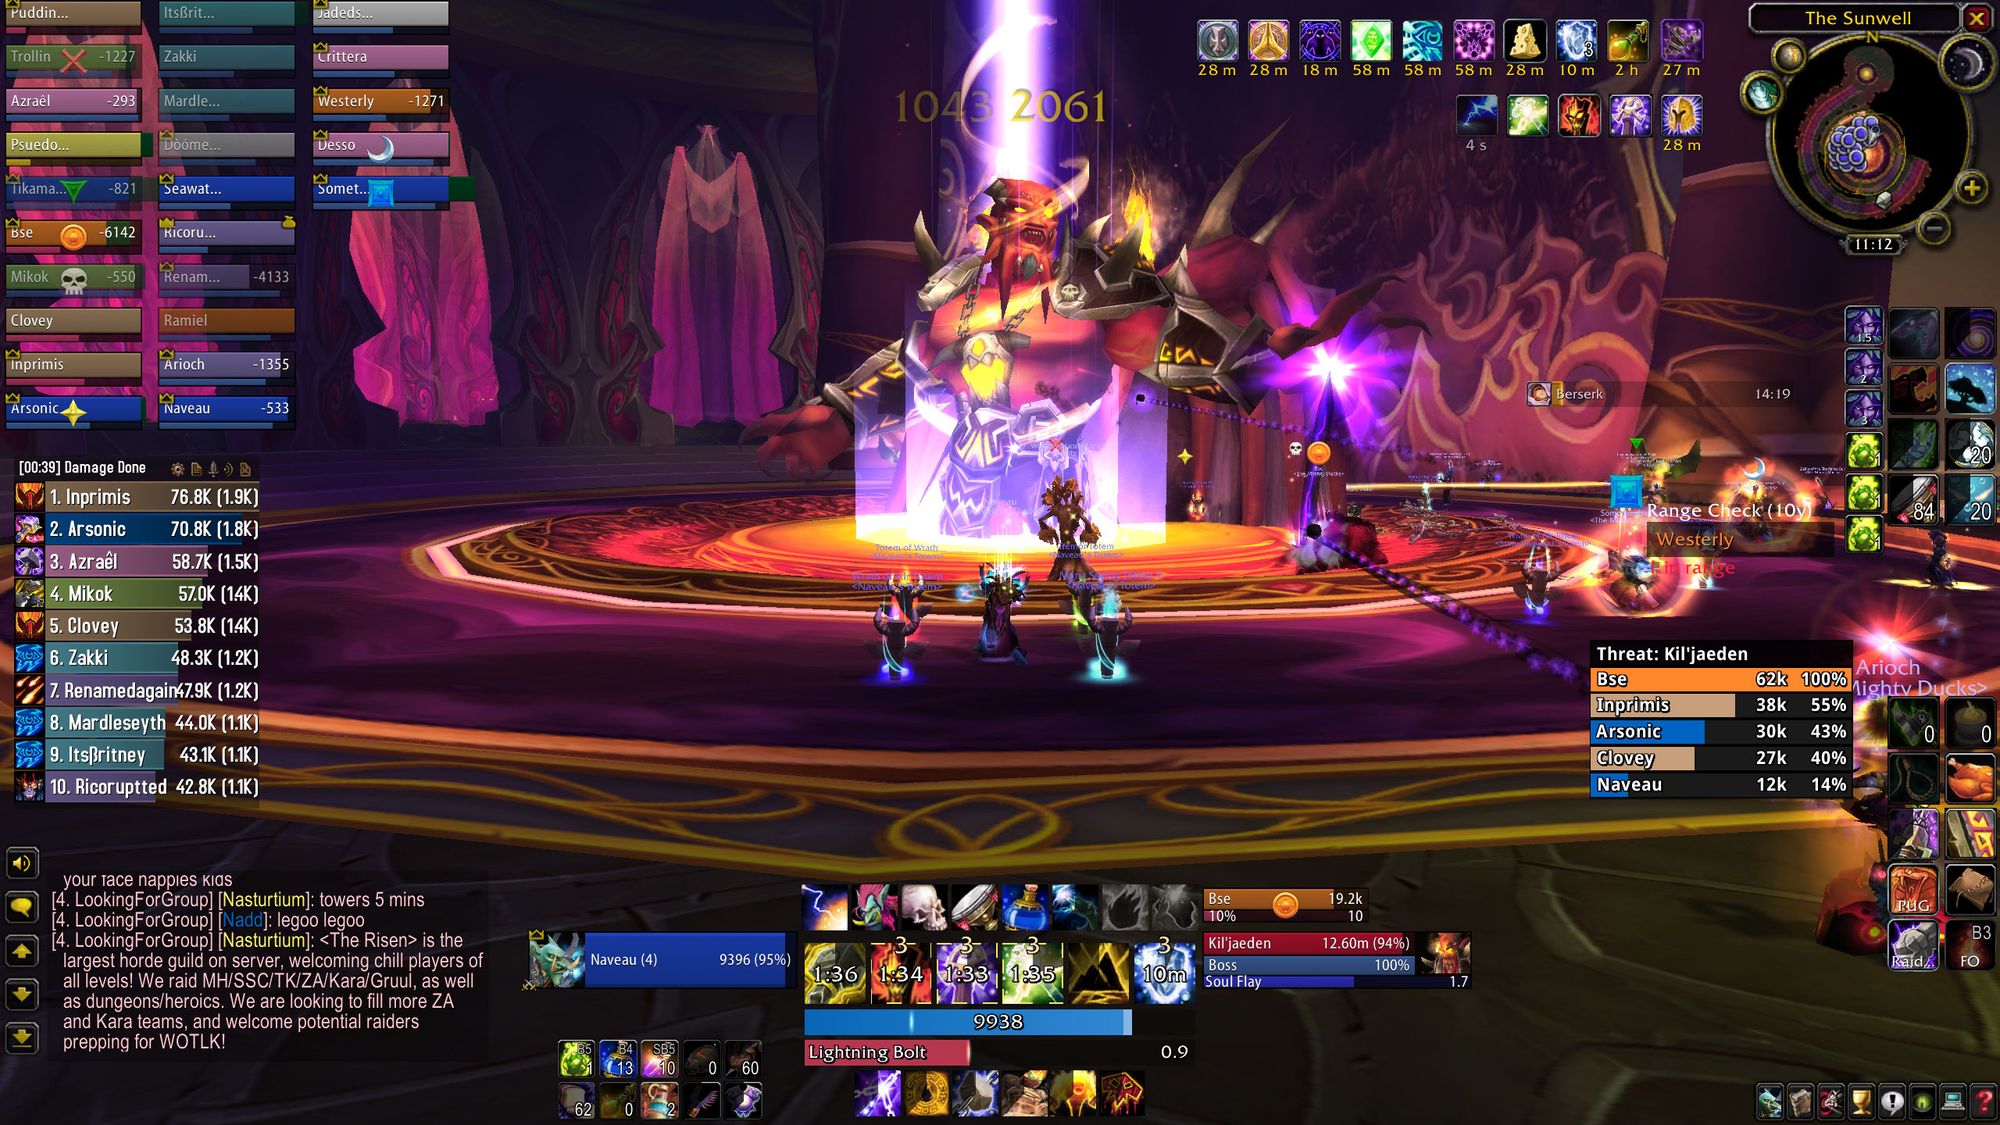
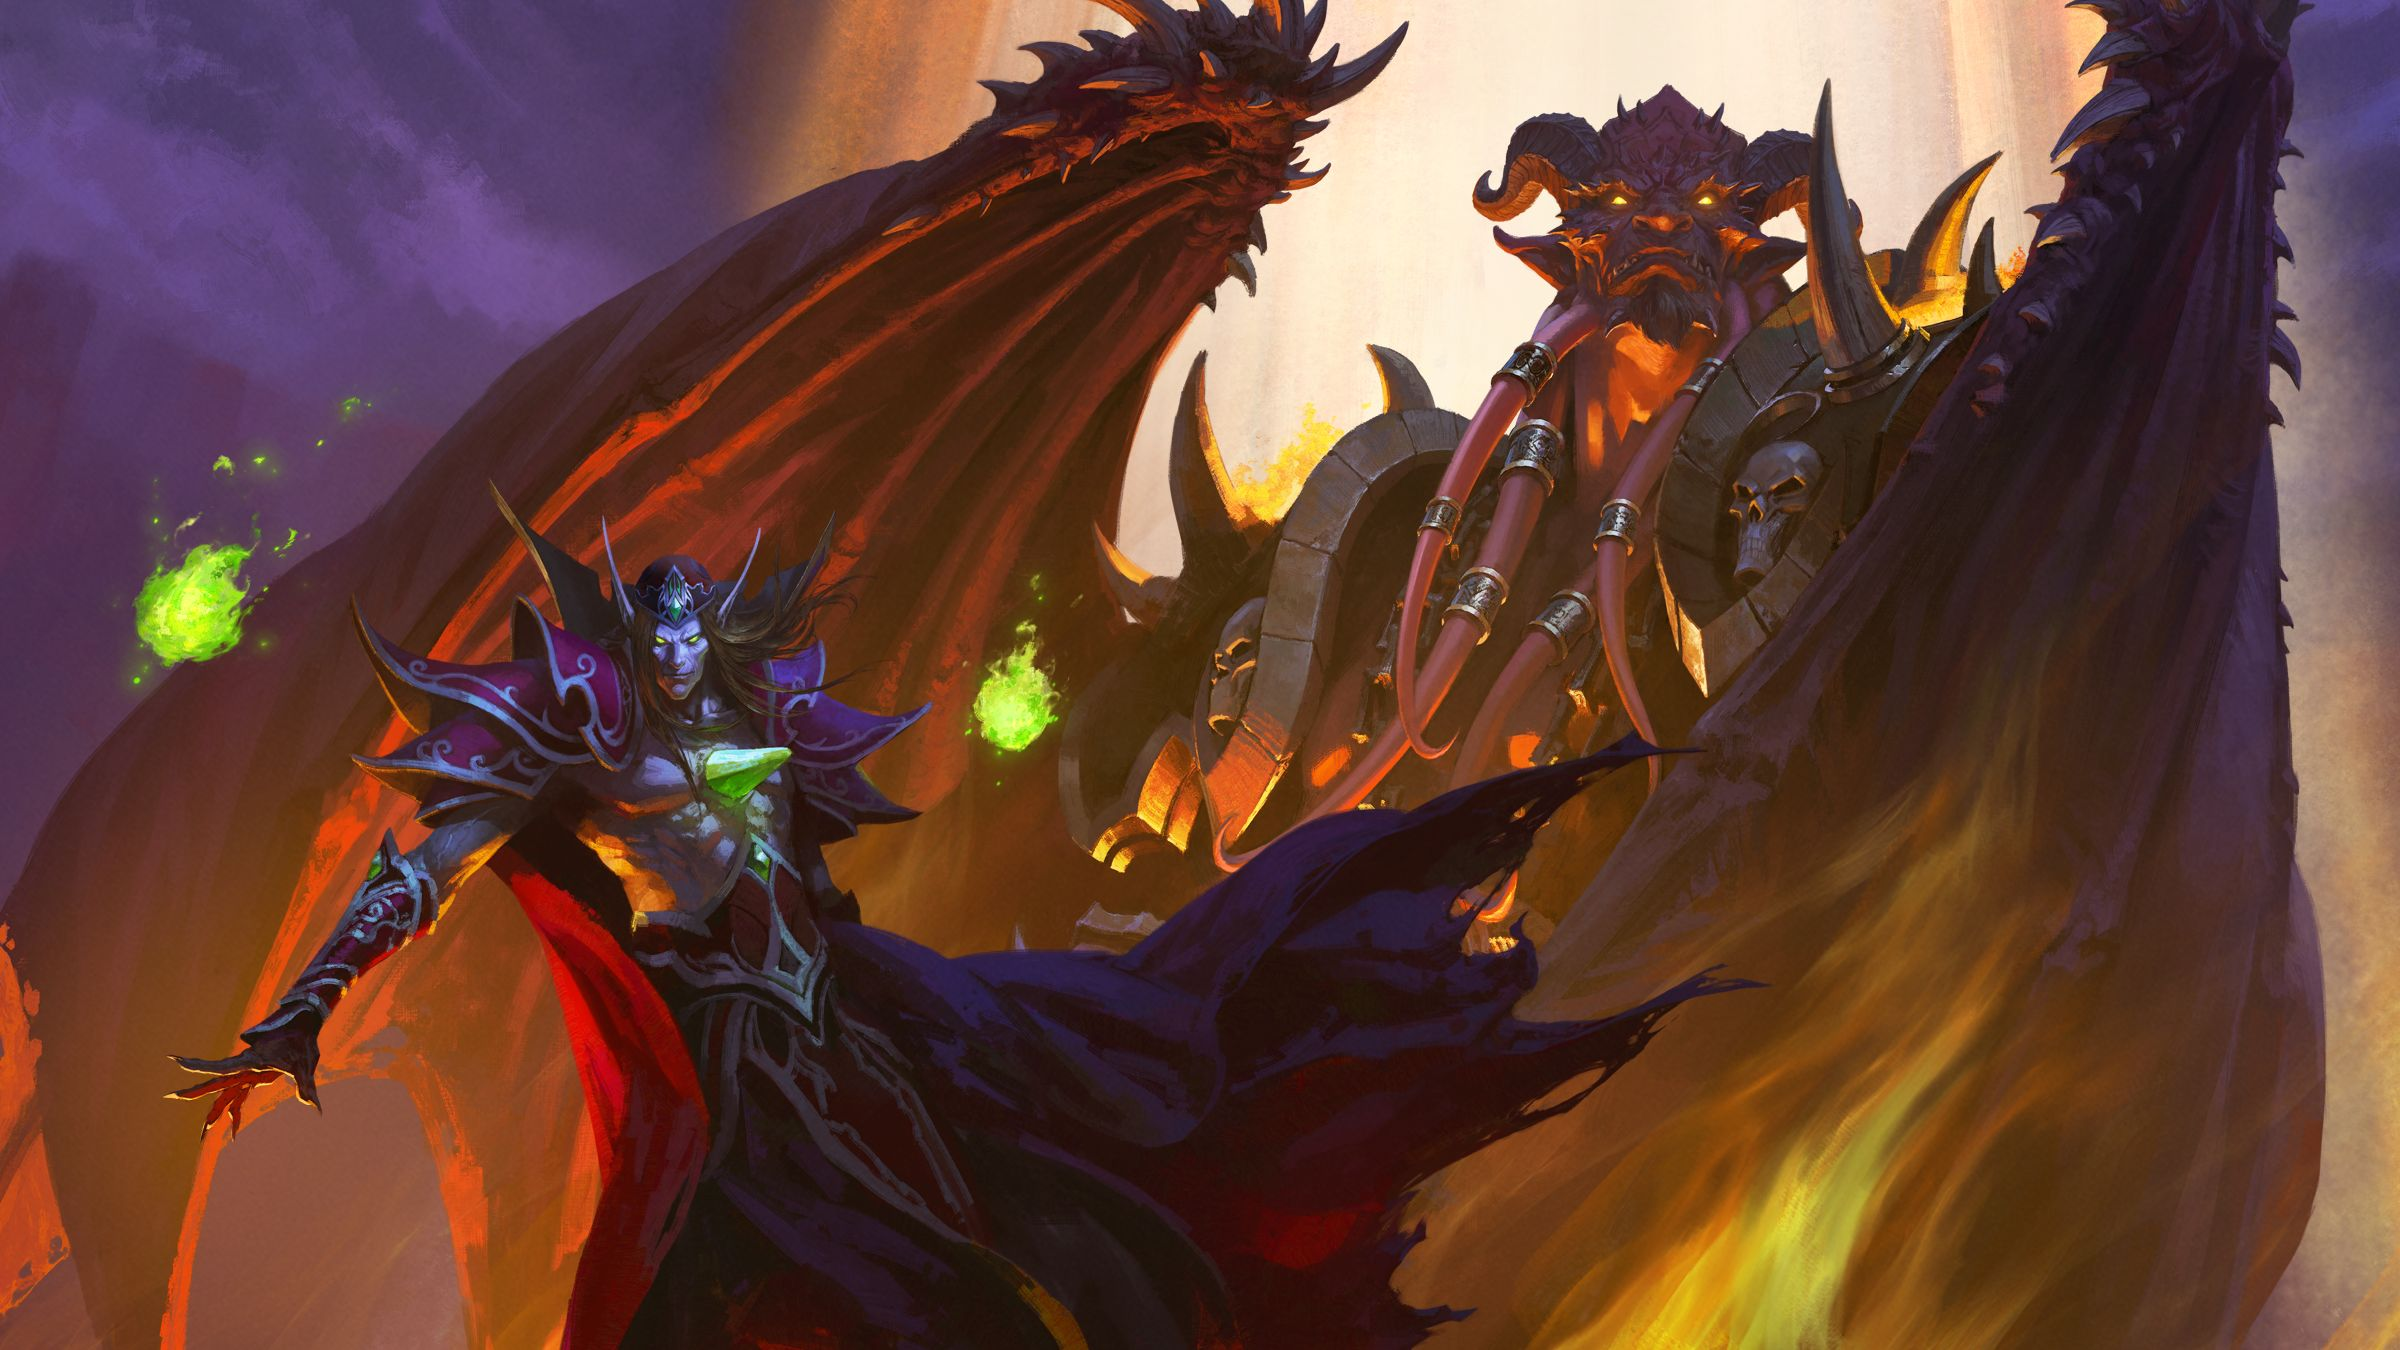
Boss Six - Kil'Jaden
Kil'jaden is, as is befitting the final boss of an expansion, proper hard. He's not a ballistic-nutso DPS race and healing check like M'uwu, or a tank-smearing chad like Brutallus. His difficulty lies in his complexity.
Much like Twins, KJ requires players to have situational awareness and be responsible at an individual level for where they are at any point in the fight. It's also a test of endurance - even the shortest Kil'Jaden kills are nine and a half to ten minutes in length, with the average near eleven. Managing cooldowns, resource pools and target priority for that period of time is mentally draining.
Before you have your first few pulls, your raid leaders should sit down and draw up a raid plan that shows the precise position of every raider. This is important for one of Kil'Jaden's key abilities, Fire Blossom, which functions very similar to Brutallus' burn. It does less damage, but in a wider area, and will be a big part of your early wipes, particularly for your melee, whom will often end up accidentally drifting out of range of healing, and die.
Next, you will want to have your two off-tanks, normally your paladin and warrior, become familiar with the Blue Dragonflight mechanics. Kalecgos, whom you bested at boss slot one, spawns dragon orbs around the room. Picking one of these up will allow you to use a Blue Drake, which gives the raid a number of abilities which are crucial to the fight. In the final phase, both players will be required to use them and talk to each other, lest you cause a wipe by double-bluffing the other Drake Controller.
It can also help to have another senior member in your raid, preferably a DPS class, act as a backup during the first three phases. Kil'Jaden's arena is big, so covering it with one person who isn't an engineer is very difficult.
With roles assigned and players (hopefully) familiar with the dragon orbs, it's time to take on the boss - kind of.
One final tidbit before you get started, too. Because the boss is almost constantly casting, he is unable to block, dodge or parry any melee attacks. This means that melee classes are able to swap any expertise gear they may have, and instead wear gear with extra critical, attack power, or strength. This is particularly relevant for Retribution Paladins, who have saved their best boss for last.
Before you can fight Kil'Jaden properly, you must defeat his three hench-demons, the Hands of the Deceiver.
These guys spawn exploding fiends, identical to those encountered after M'uru. They explode, they need to be cleaved down, but not single-targeted. The hands also cast Shadow Bolt Volley, which applies a stacking debuff increasing shadow damage. You need to interrupt as many of these casts as you can, but they cannot be interrupted, only stunned. This means you need to rely on classes with single-target stuns and Tauren war-stomps to get you over the line.
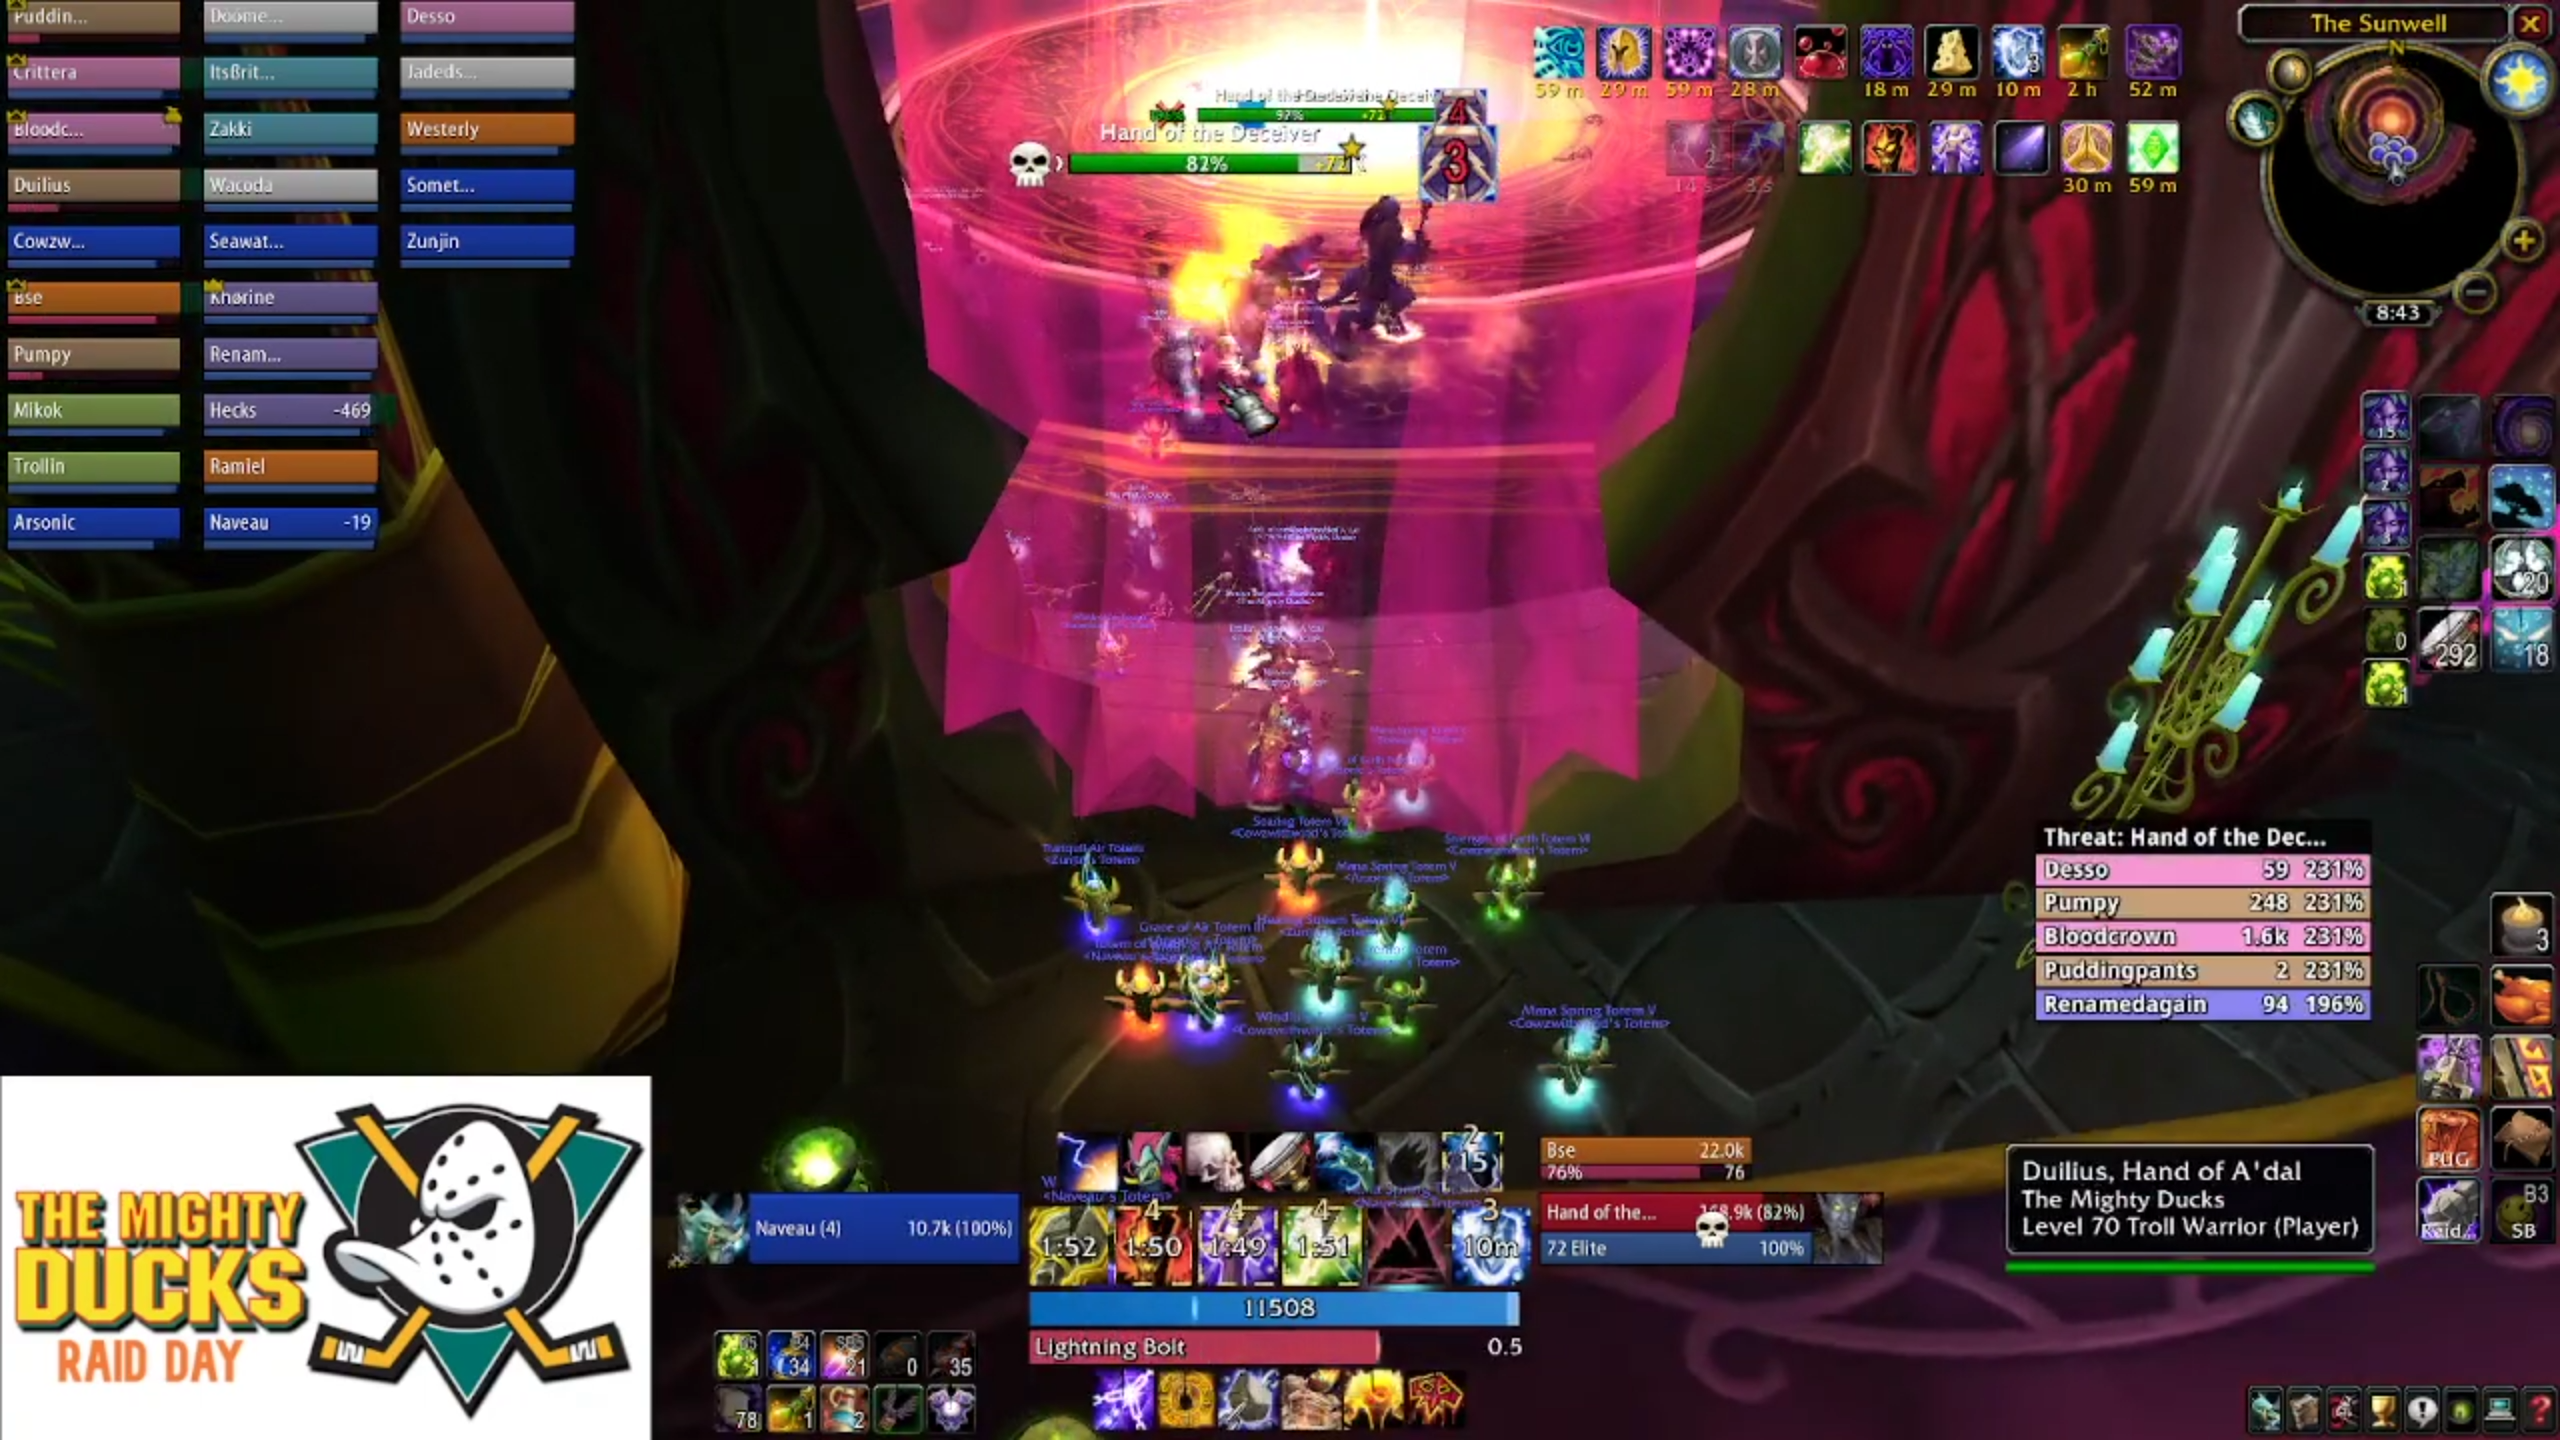
You can't afford to lose anyone here, so it's imperative that your raid has a stun rotation, to make sure that from the start of the pull until they die, all the hands stay crowd-controlled for as long as possible.
Assuming your raid didn't screw this part up (it is possible to wipe or lose too many members before getting to take a look at KJ), it's now time to talk about the big man in the hole, for real.
Tactics - Phase One
You have a little bit of time to get in position from when the last enemy dies, so take your time, double-check you are in the correct position, and far enough away from everyone else. Once the Fire Blooms start to hit, you'll want to make sure you've given yourself enough room to shift around.
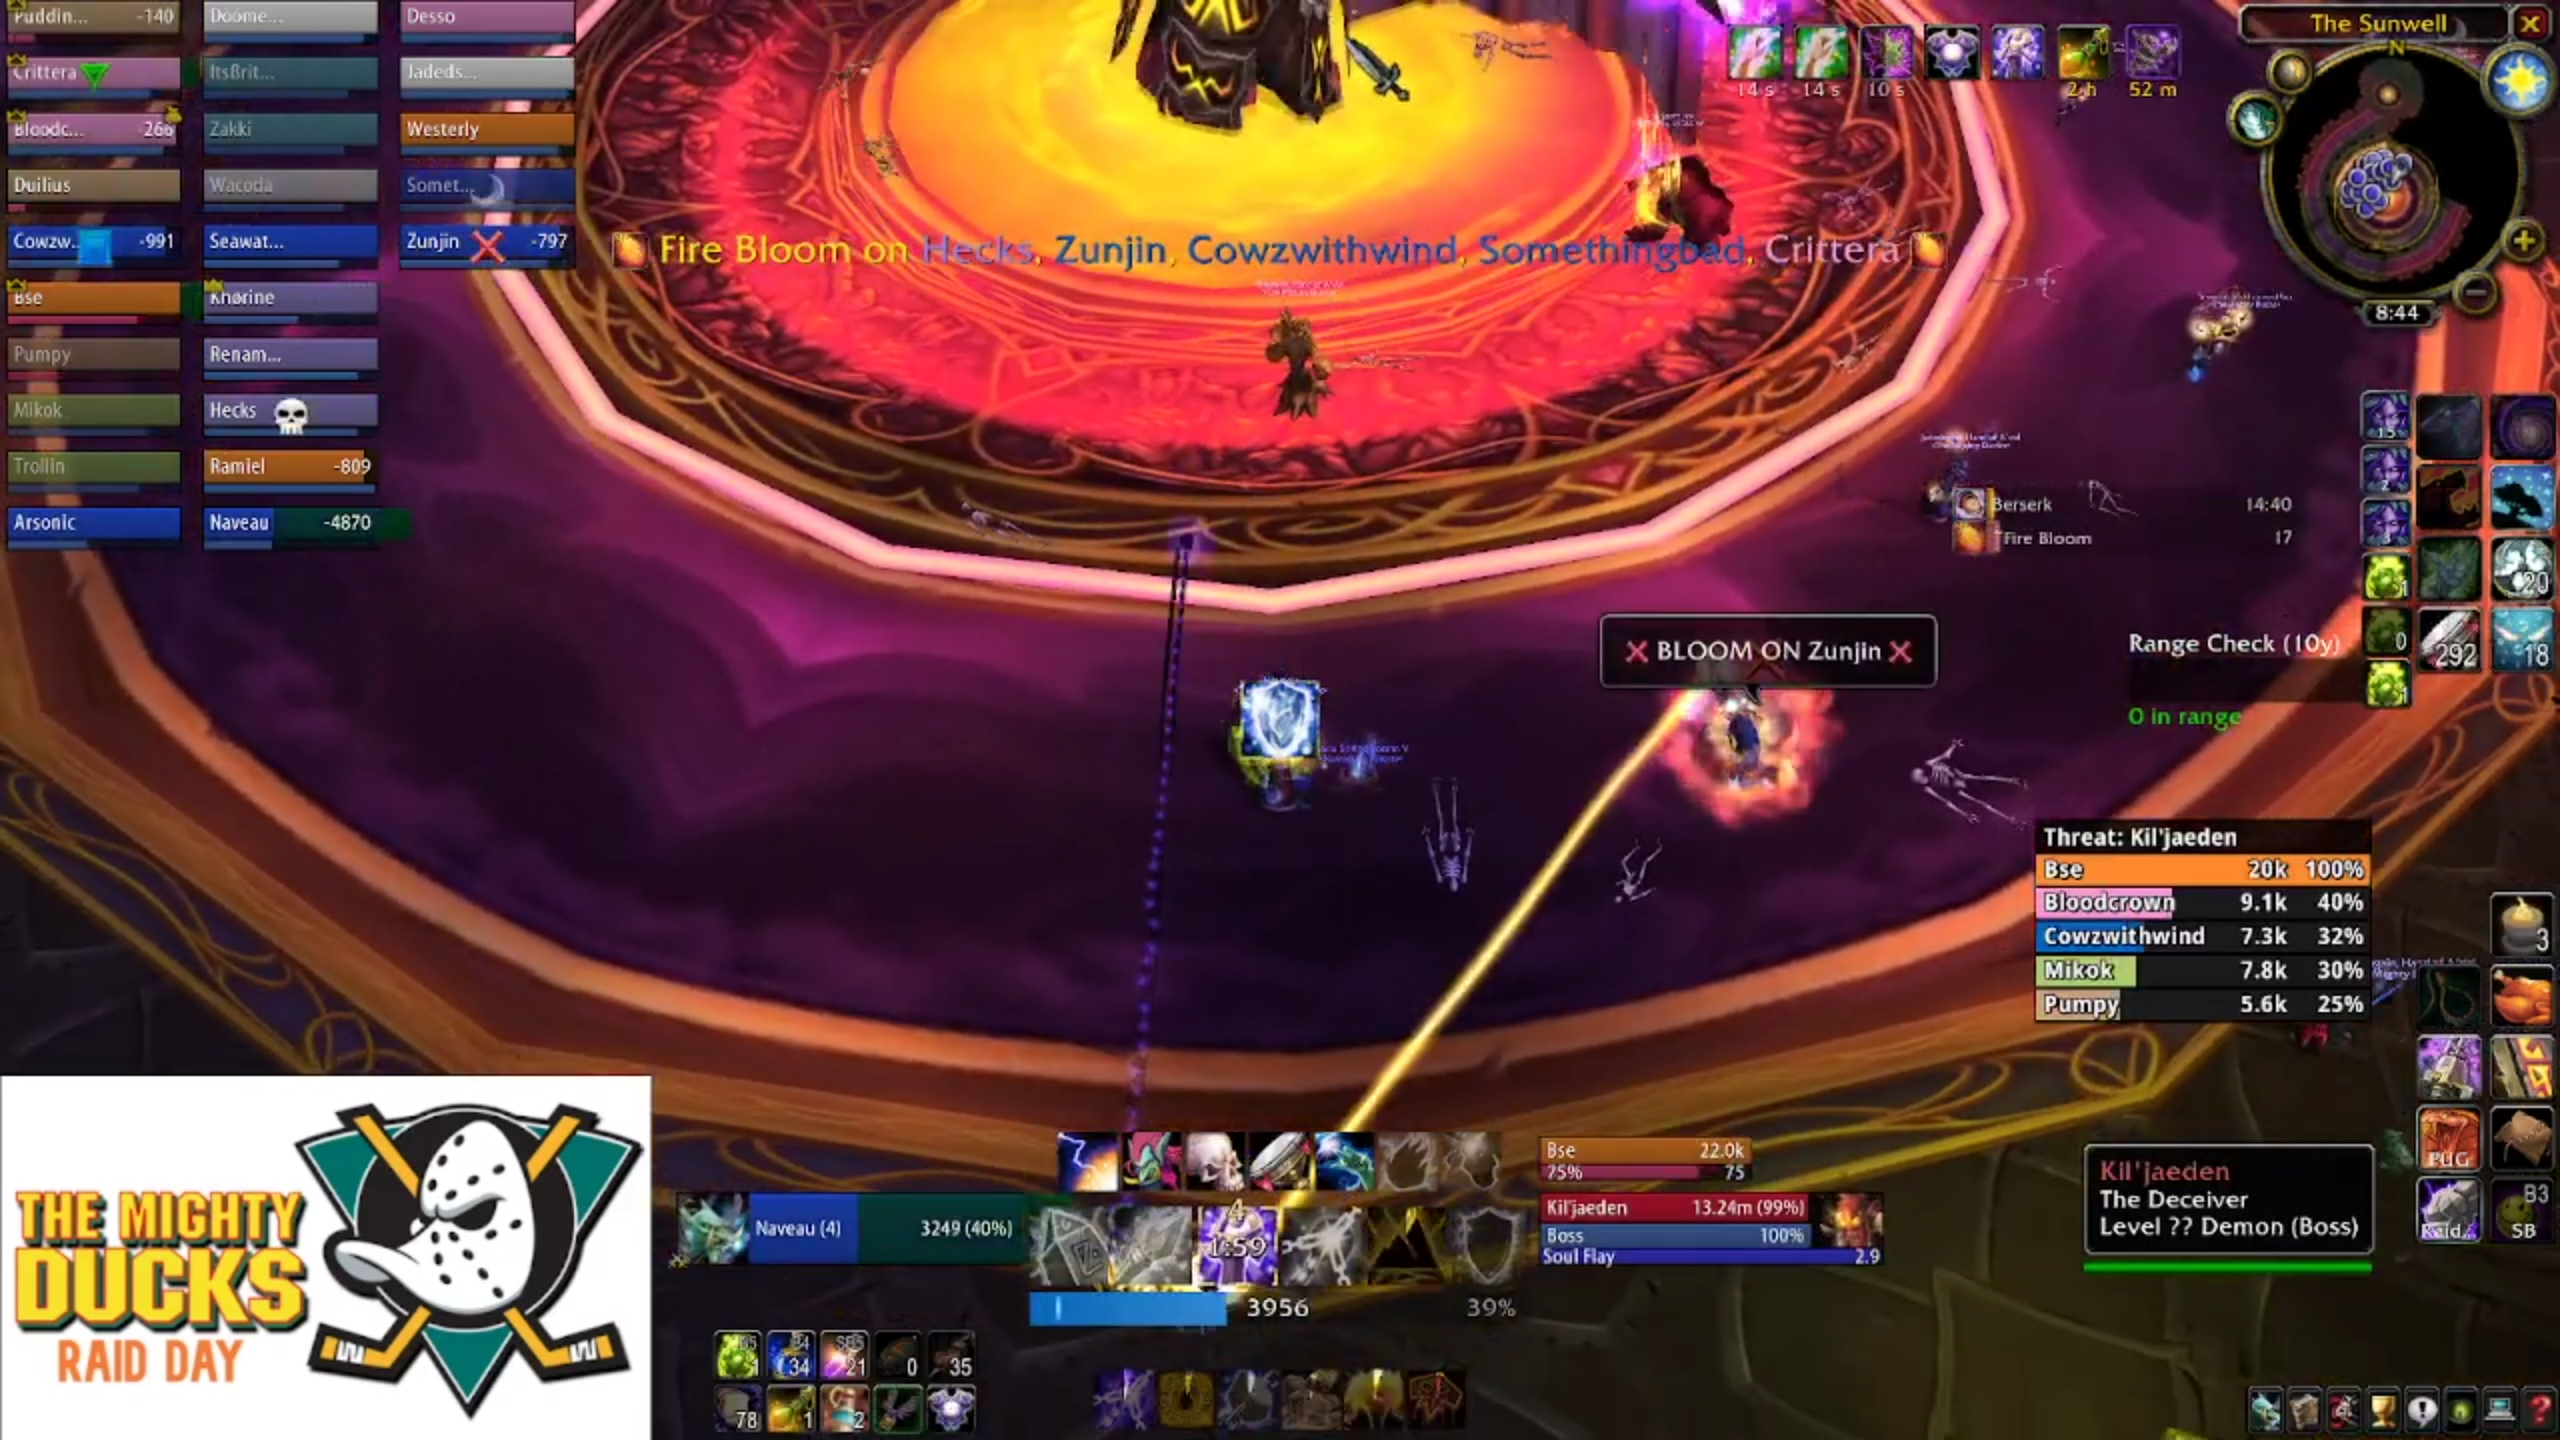
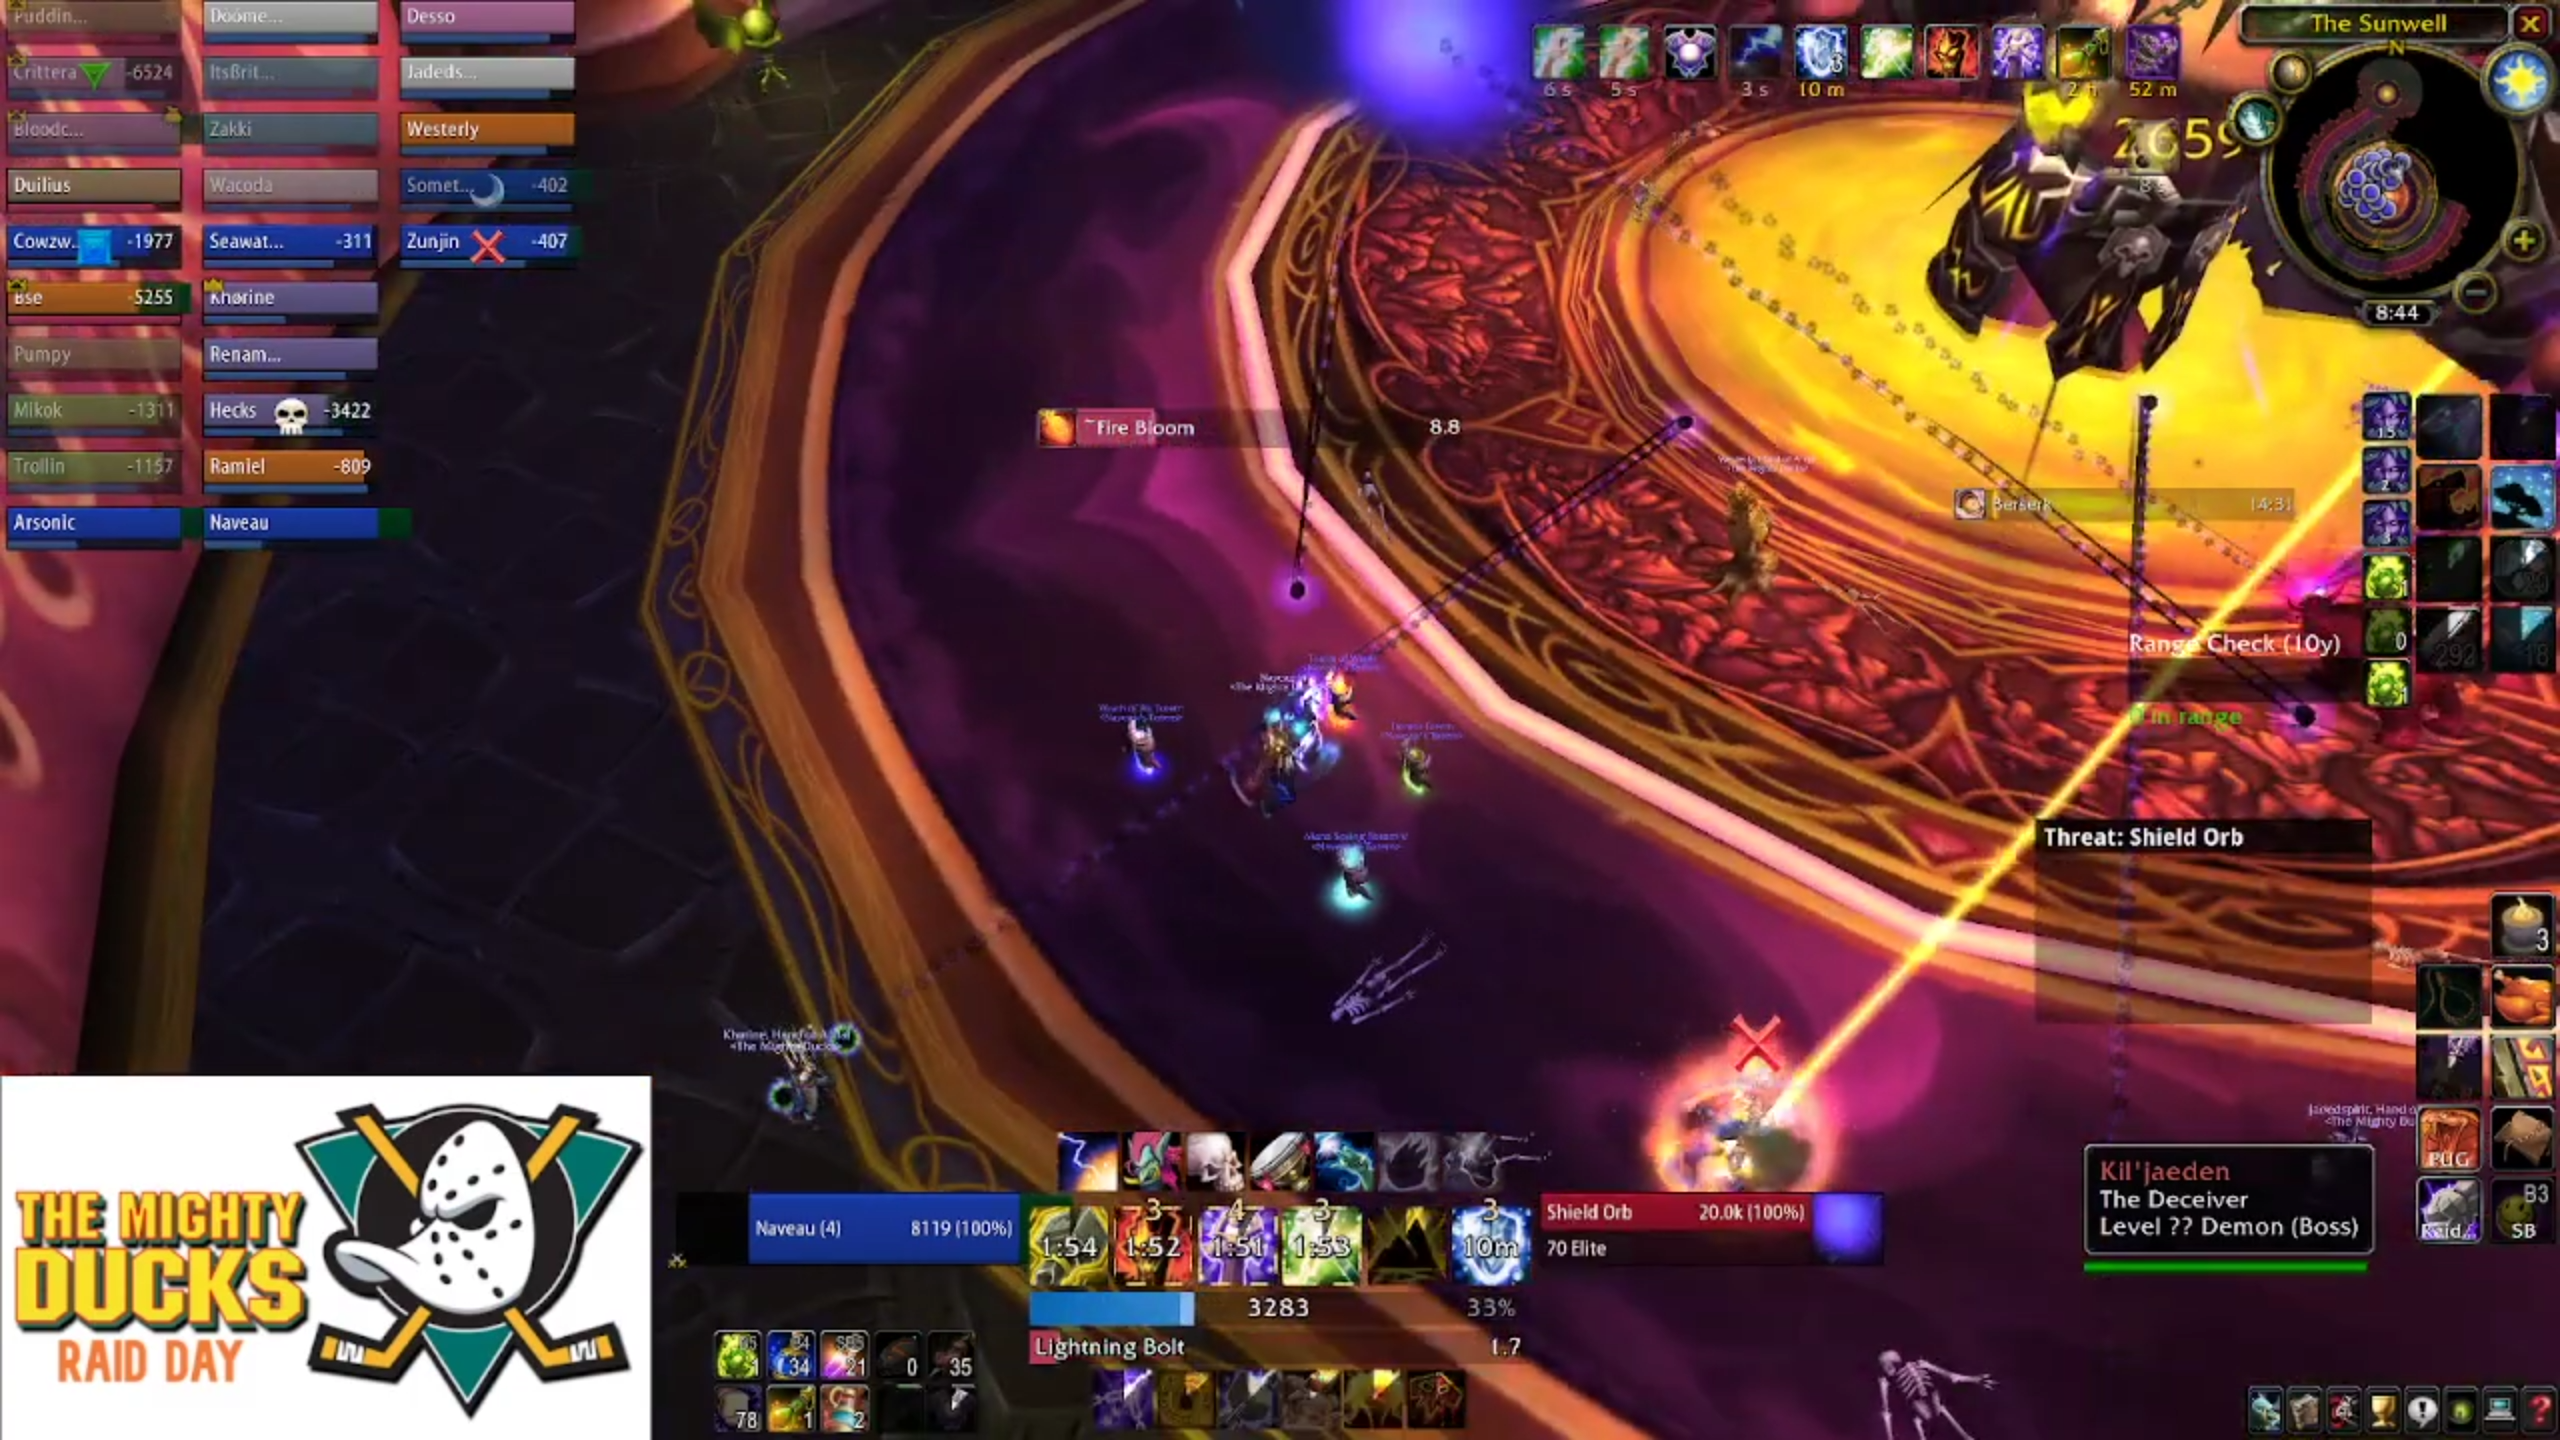
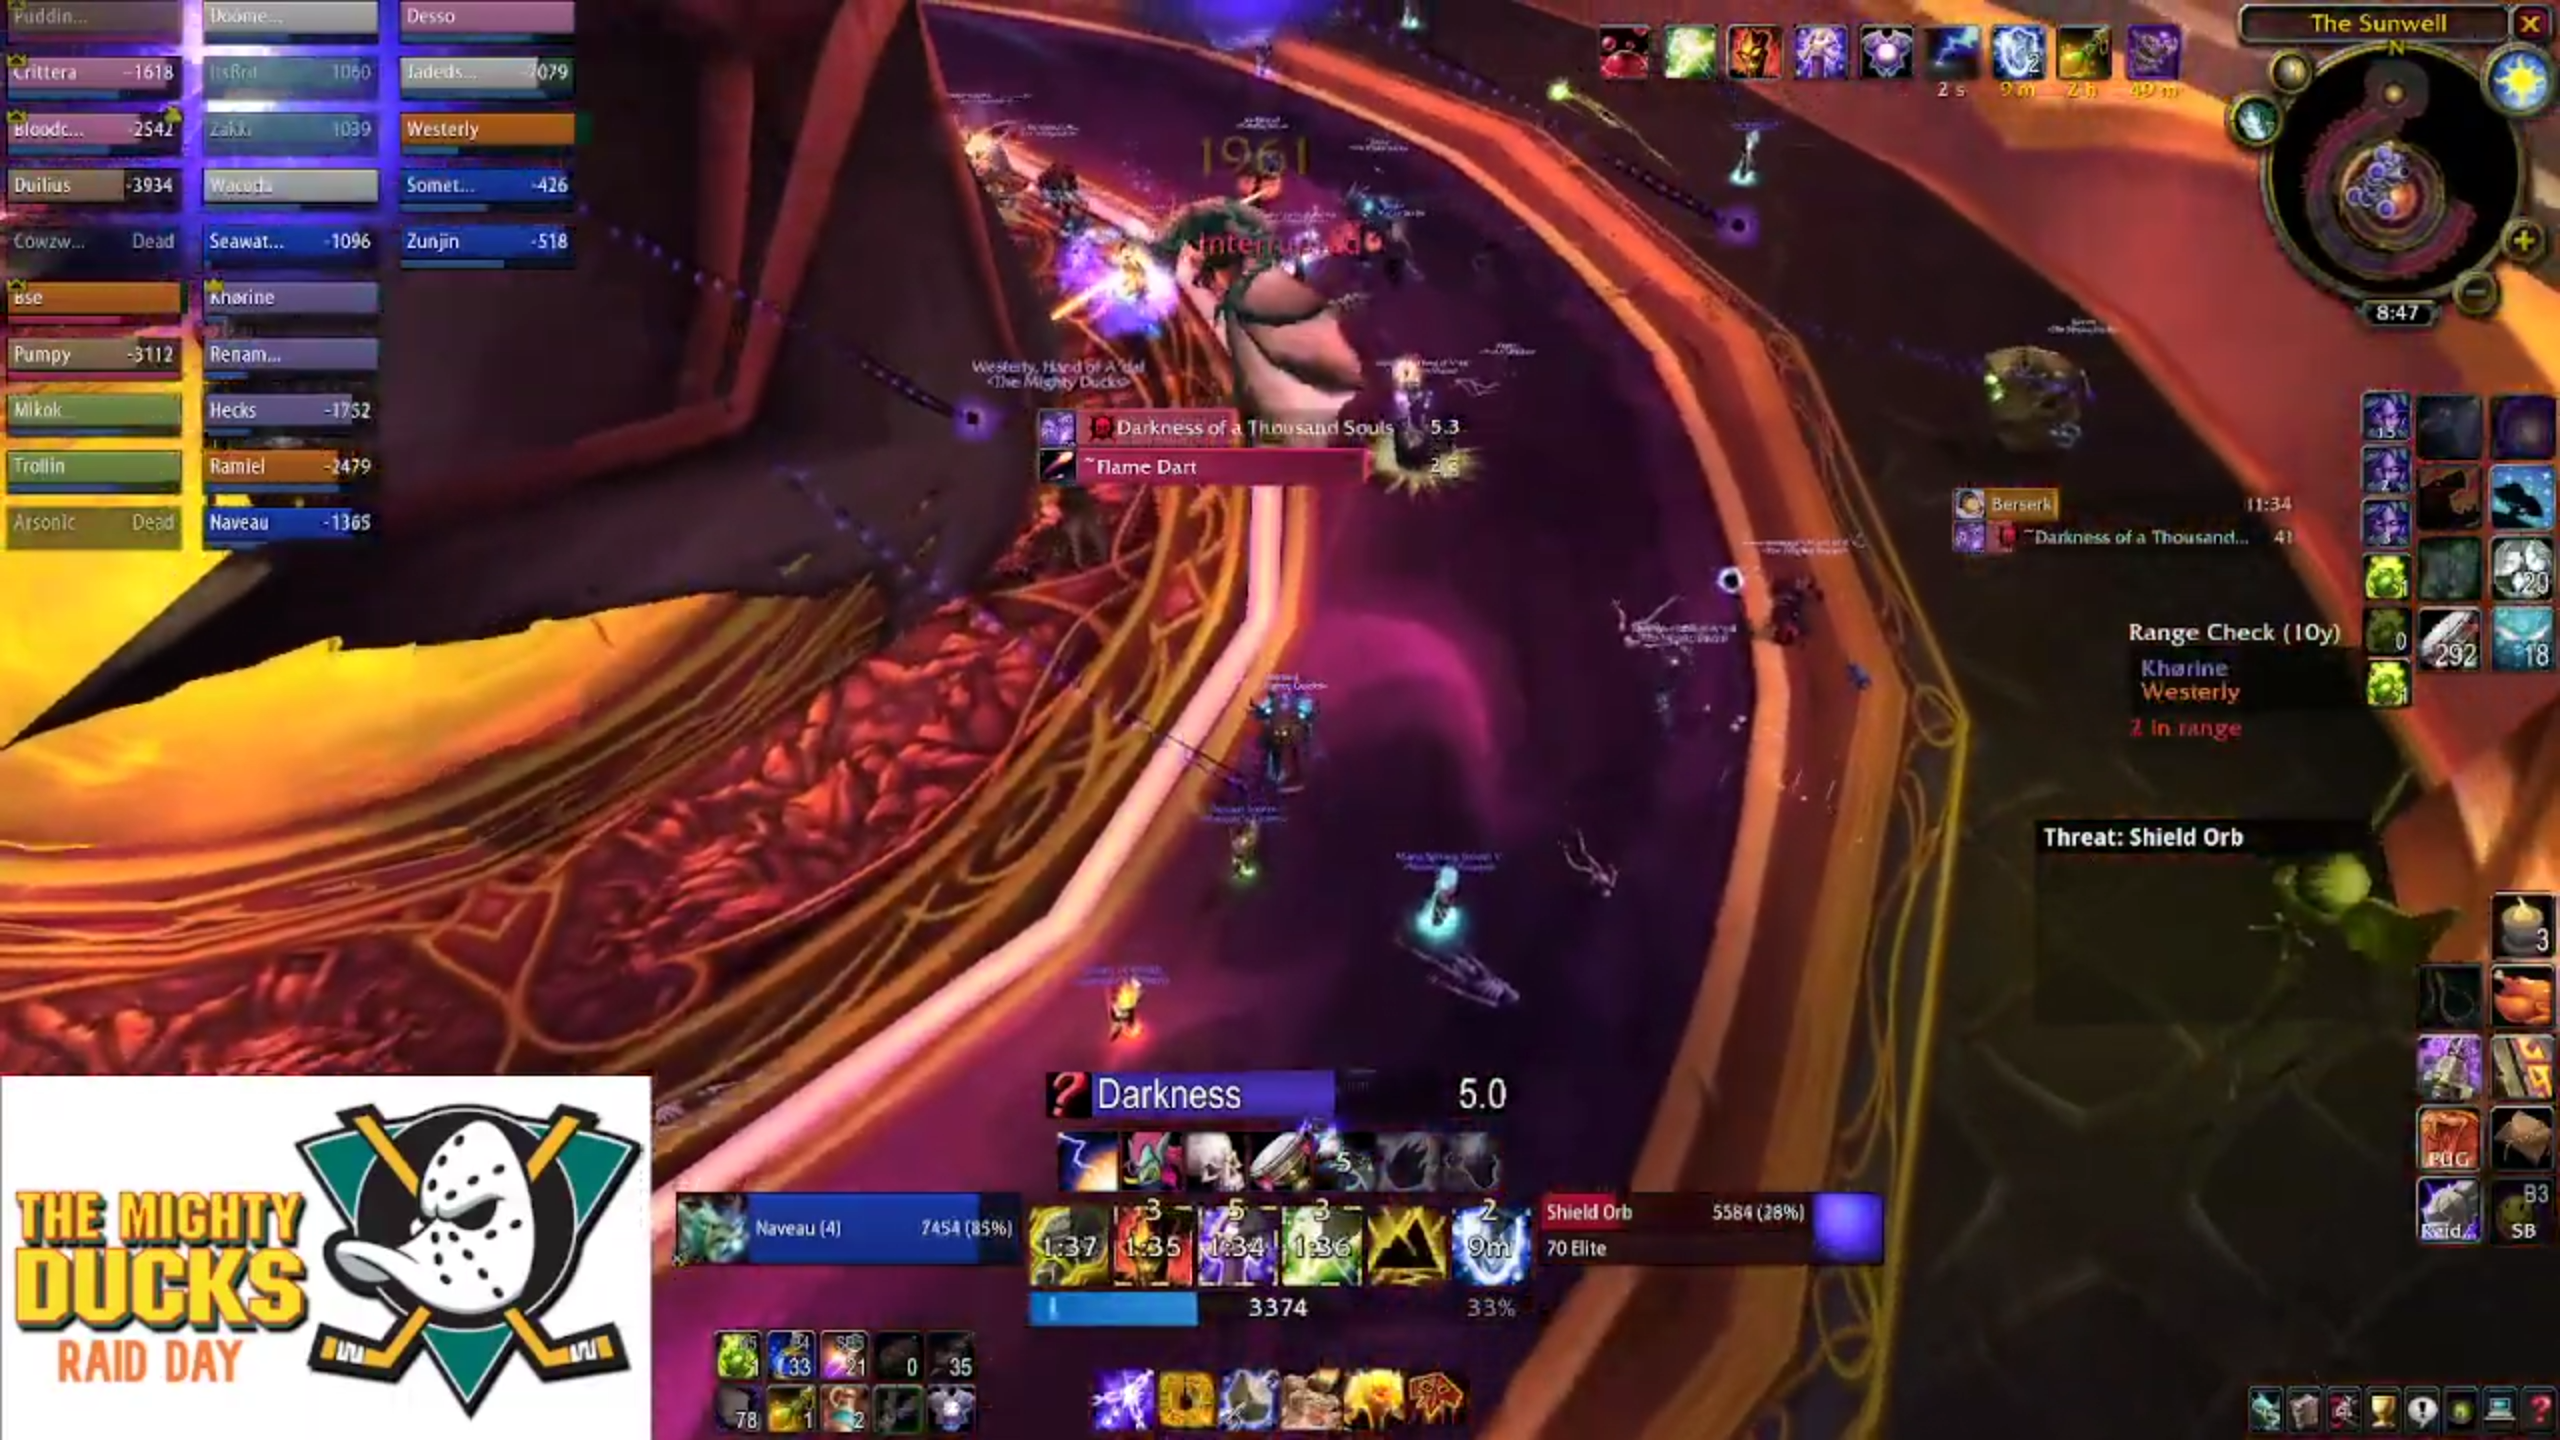
This first phase is pretty cruisey - you need to make sure to kill the Shield Orbs that Kil'Jaden spawns, which will also cast uninterruptible Shadow Bolts at nearby players and reduce the damage he takes. They have low health and so the ranged DPS can (and should) kill them quickly.
For the entire fight, the player highest on threat (i.e, your main tank) will be targeted by soul flay, but the boss doesn't have a melee swing to speak of.
Kil'Jaden will also cast Legion Lightning, a chain-lightning type ability (duh) that does damage and drains mana. Don't be scared of the mana drain effect, as you will be given plenty of opportunity to regenerate mana over the course of the fight.

At 85%, the boss will transition into phase two. I hope you didn't get comfortable, because now it's going to get sweaty.
Tactics - Phase Two
At the transition into phase two, and every subsequent transition, the boss will pick a random raid member and spawn four copies of that player. They are identical copies of that player, right down to their gear, and will have one or two key abilities based on that player's class.
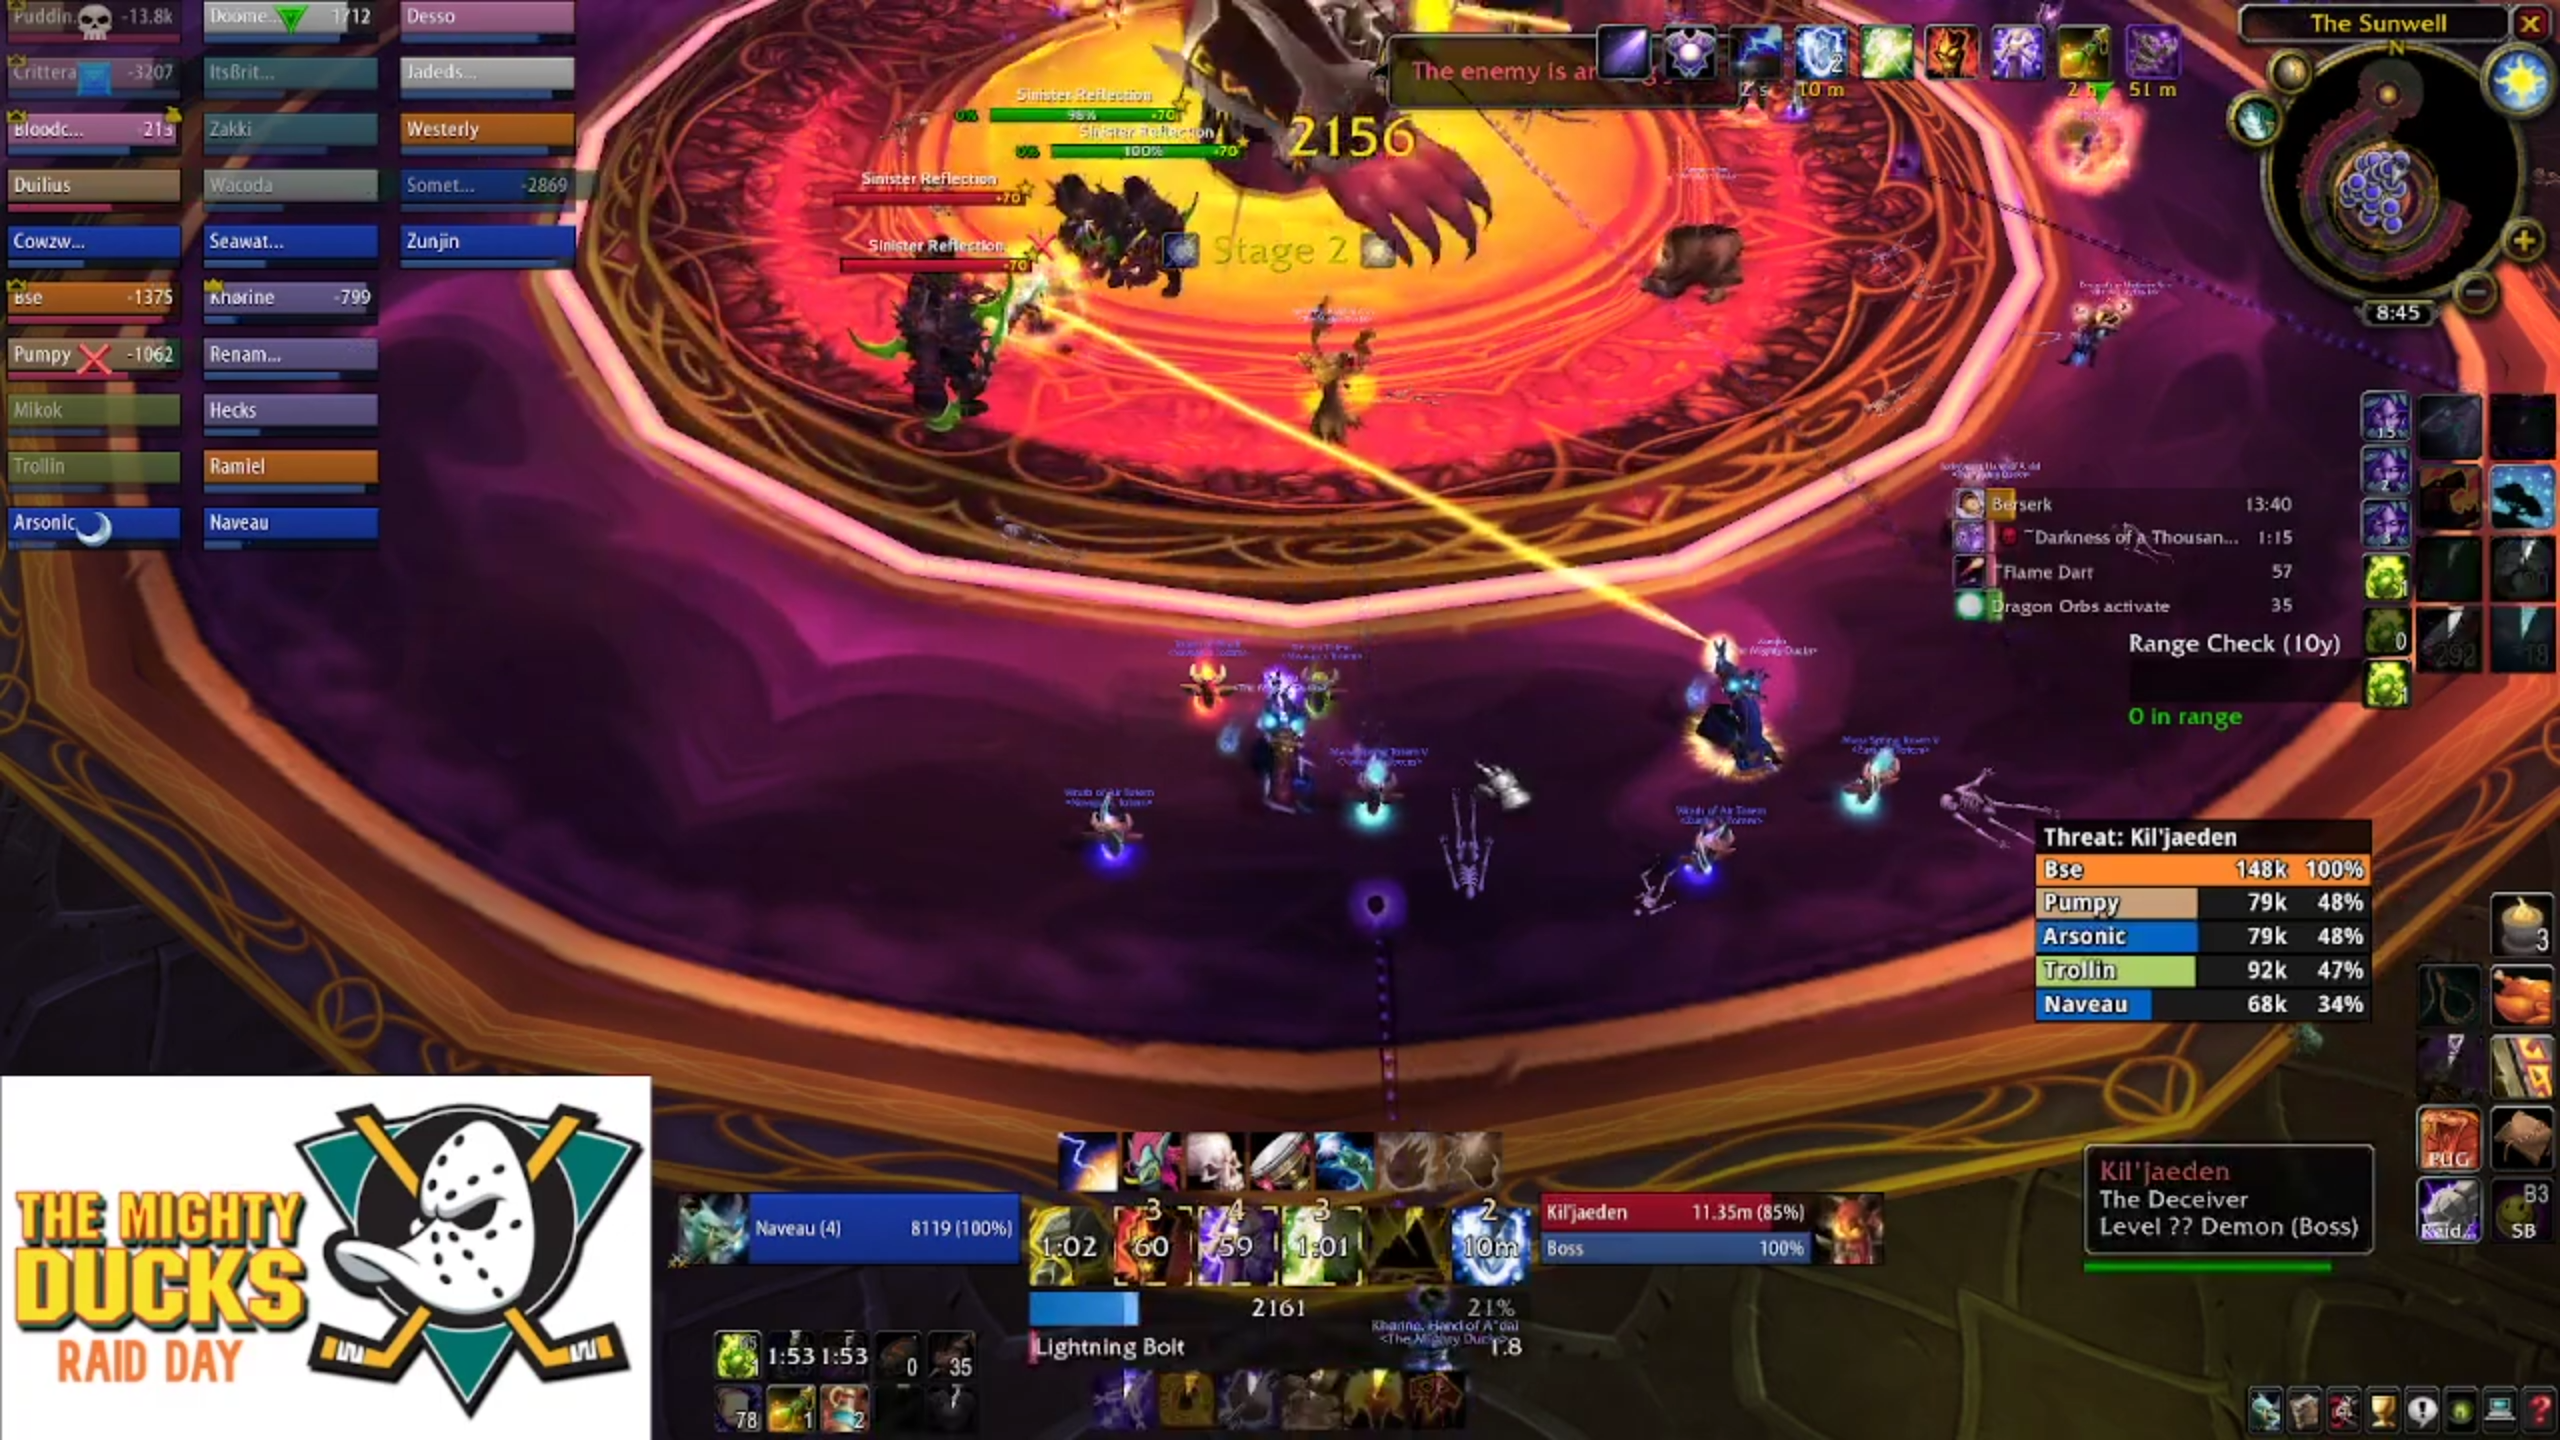
The only really dangerous classes are Warriors, who have a nasty whirlwind and make it impossible for your melee core to help in cleaning up the images. Priests aren't much fun either, as they pump out healing and tend to survive a lot longer than other clones as a result.
Players should call out when they're targeted, to allow time for your Paladin to hustle over and pick them up. Without moving, nearby players and melee classes should help to cleave them all down. Classes who have poor AoE cleave need to keep on the boss, as uptime is important here.
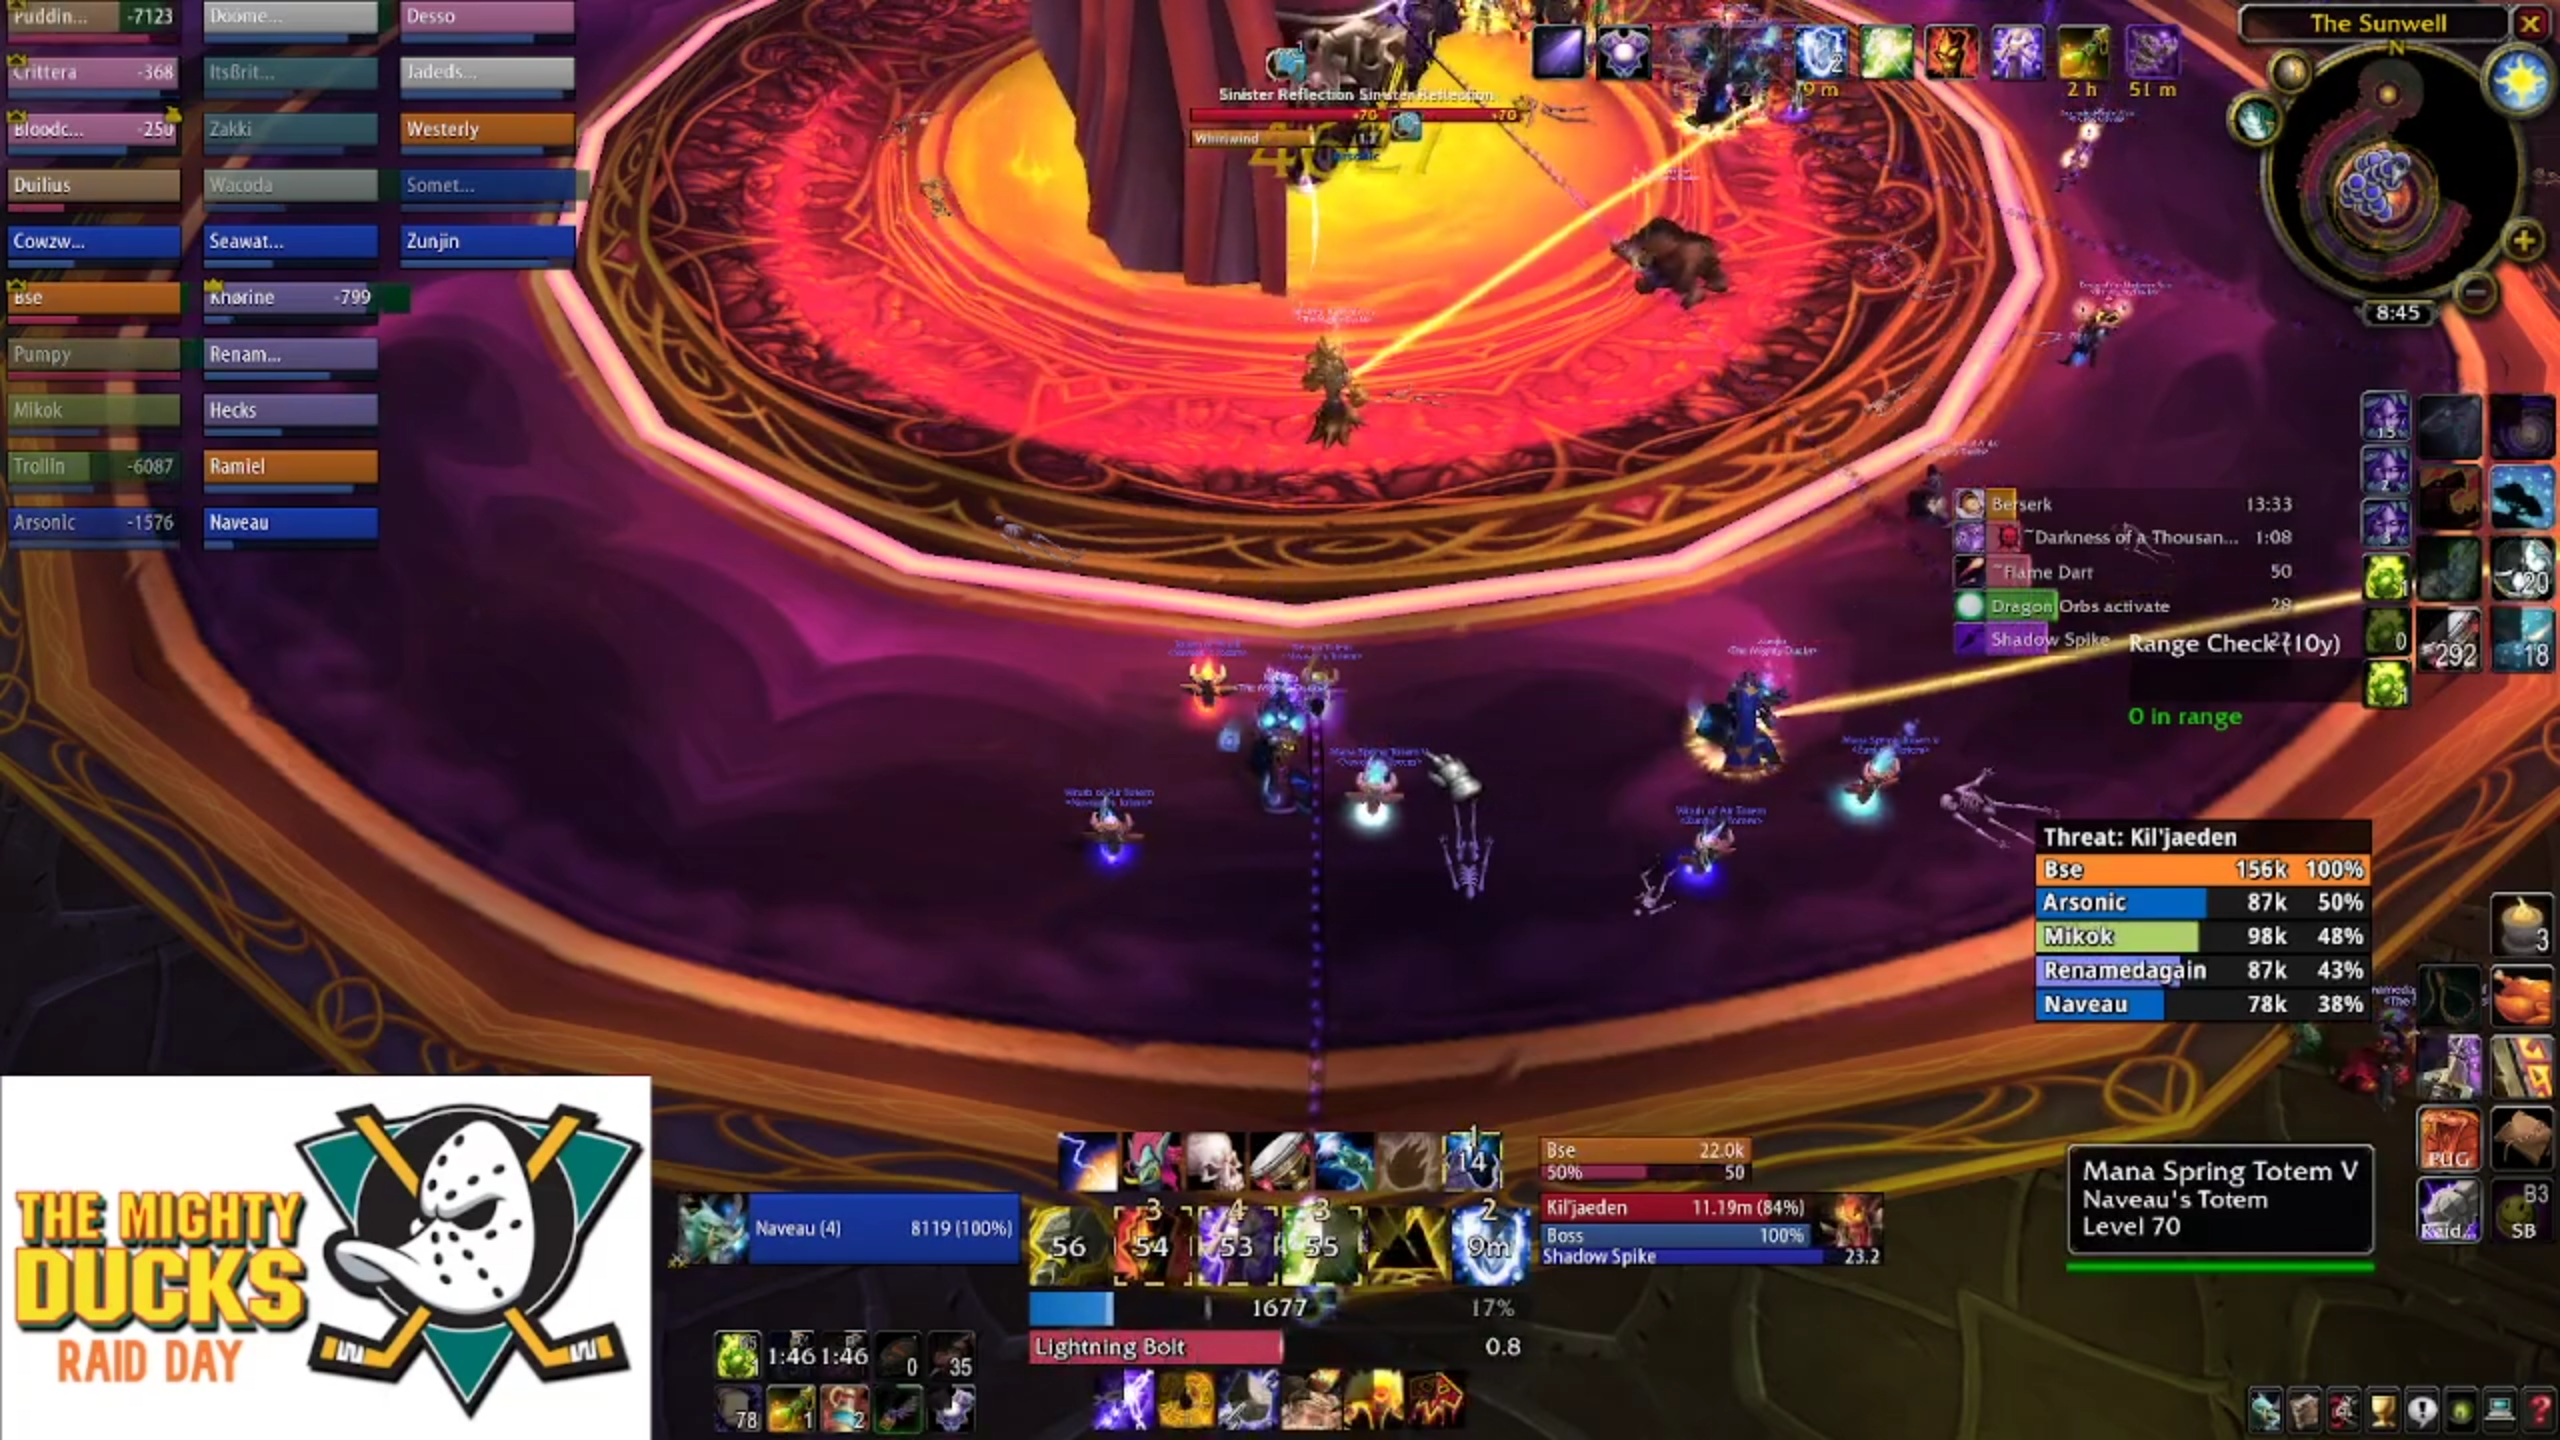
Whilst he's turning your comrades against you, he'll also channel yet another ability, Shadow Spikes. These are weird slow-moving projectiles that deal a chunk of shadow damage and reduce incoming healing. If you're ranged and therefore not stacked, it's pretty easy to just tank them as you won't get hit by another one. It's really bad if the melee get hit by one, though, because they'll be bunched up and very vulnerable to getting instantly killed by the second one.
The trick to avoiding this ability is to try and angle your camera up to see where the spikes are headed. They always come out from Kil'Jaeden's hand, but the angle of the camera combined with all of the particle effects can make it troublesome to spot.
Also, during this phase, the number of Shadow Orbs spawned by KJ increases from one to two. It's still just as important to target these down, so don't slack. The outgoing shadow bolt damage and damage reduction ability will quickly become oppressive and put the brakes on your DPS check.
Now we start to get into the fun stuff. Kalecgos, who you will remember as the first boss of SWP, now cured of his madness after you killed Sathrovarr (put on your robes and wizard hats folks) sends the Blue Dragonflight to aid you.
He does this by spawning a finite number of dragon orbs in each phase, which, when used by a player, grants them control of a blue drake. The drake has a haste buff, a frontal cone which restores health and mana, and the most important thing, a shield which reduces all damage taken by players.
The haste buff is very important for being able to handle a key damaging abiliy of the boss - Flame Dart. If you are not affected by the haste buff when you get hit by Flame Dart, you will be afflicted with a 50% move speed slow which can be fatal when mixed with other mechanics in the fight.
A good idea to make sure everyone gets the haste buff they need, is to immediately stack on the main tank after Shadow Spikes ends. Then, have your drake controller apply the haste and restoration buffs, before having the raid return to their original positions.

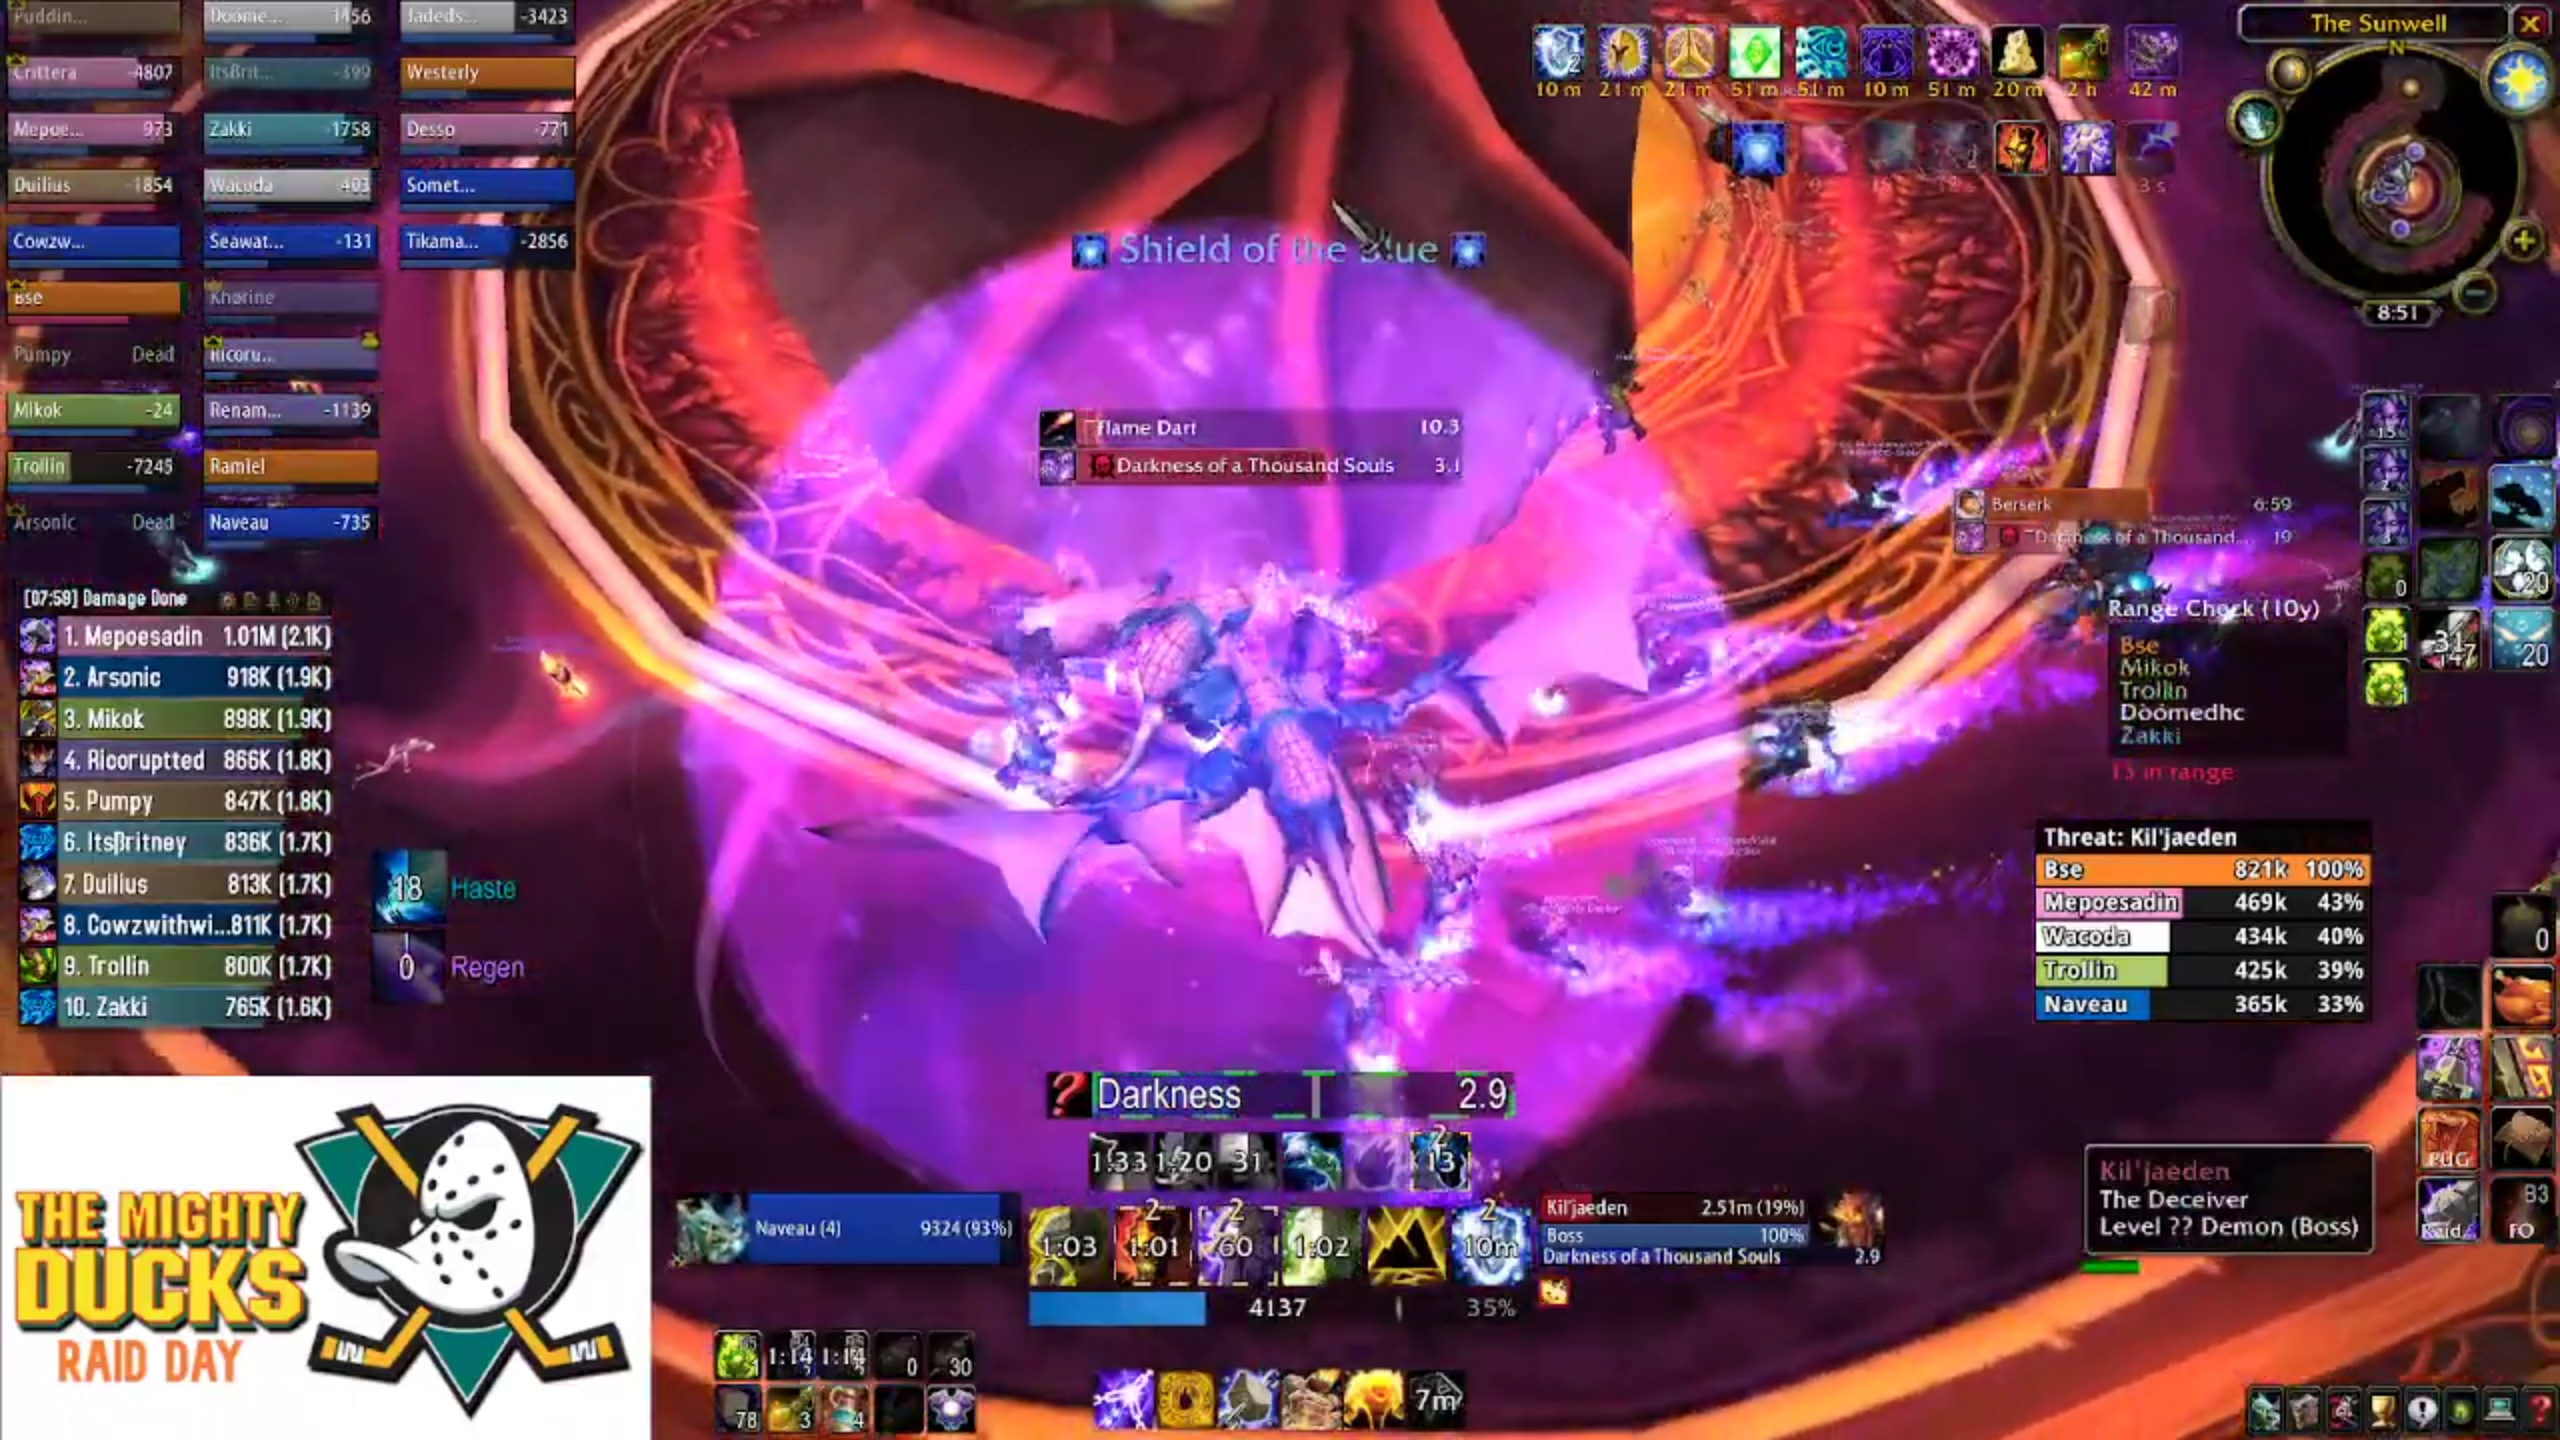
The last ability that gets introduced here is Darkness of a Thousand Souls. This is a one-shot mechanic, so getting it right is important.
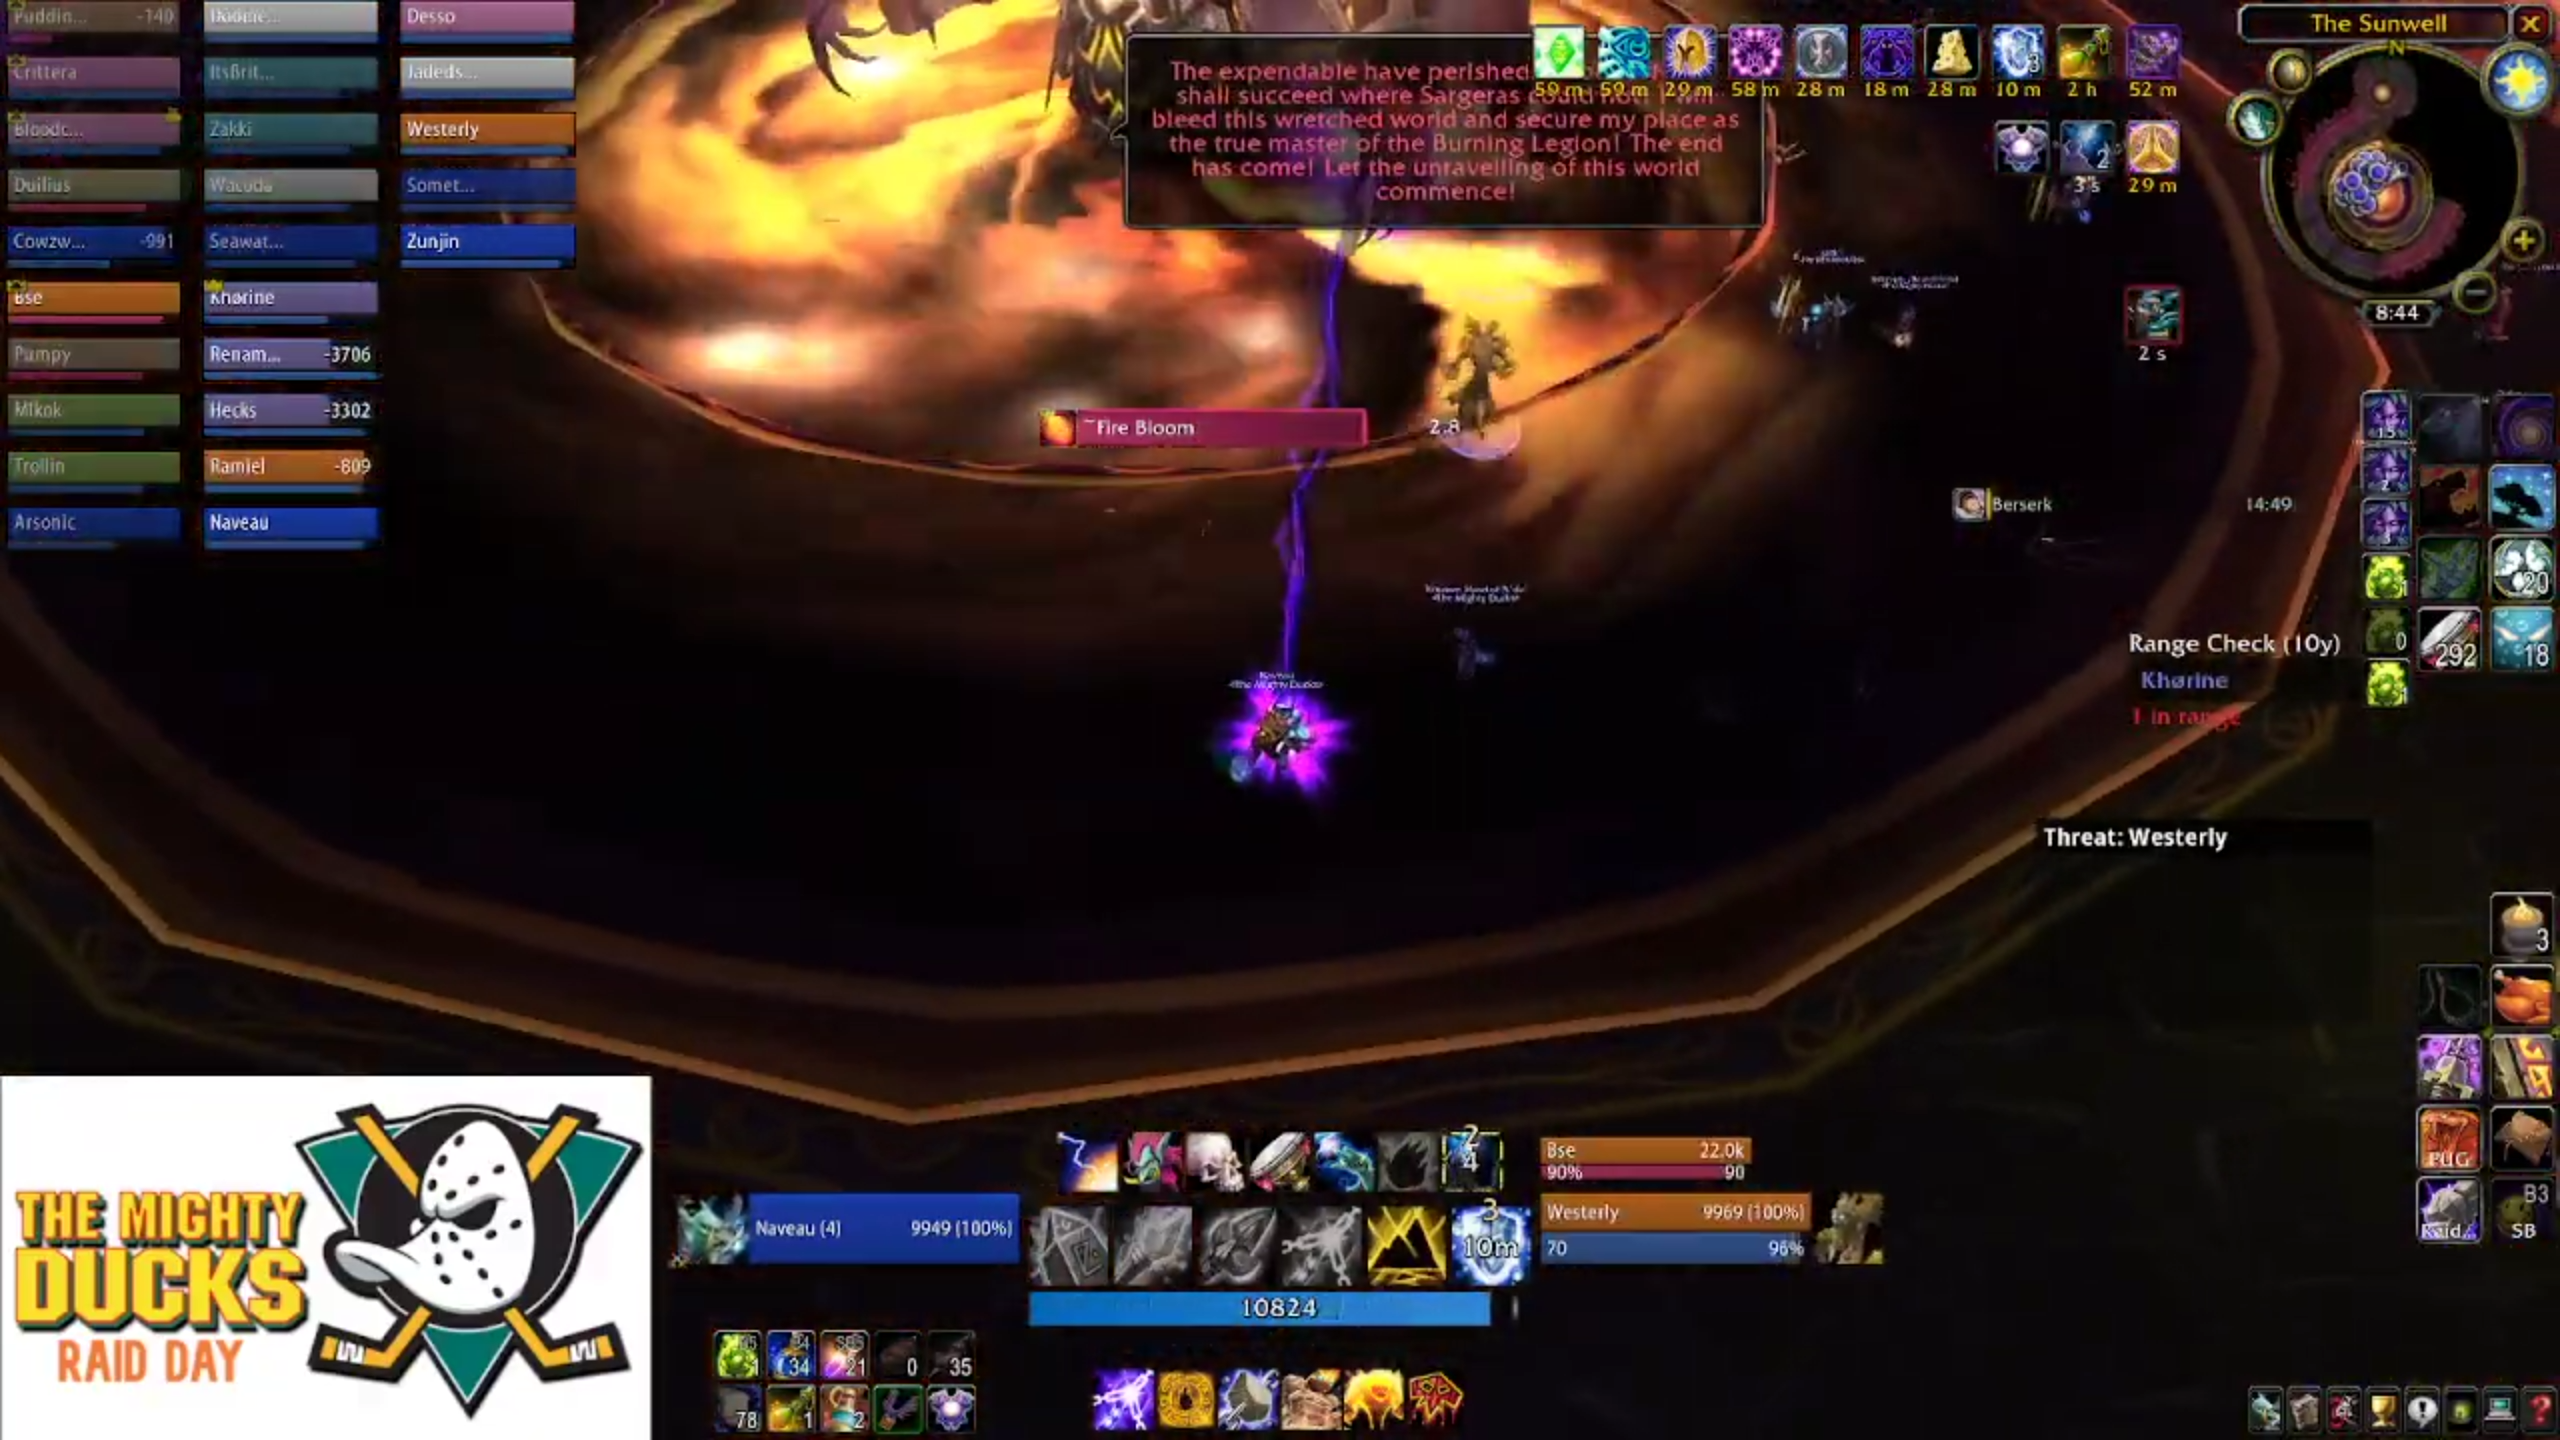
After sixty seconds, Kil'jaden will fold his wings around him and begin casting this spell. It has a long cast time, so you have plenty of time to react. The key is not to panic, as often the darkness cast will coincide with a Fire Bloom cast. This means if you run straight to the designated stack point, you'll kill everyone with AoE fire damage before KJ even has a chance to kill you all.
What you'll need to do is have the player controlling the drake cast "Shield of the Blue" - it's important not to cast this spell too early, or the shield will disappear before Kil'Jaden finishes casting.
The way it protects players is also a bit strange. When a player enters the shield, approximately .5 seconds afterward, a debuff which reduces all incoming damage is applied. This means if you wait too long to get under the shield, you'll die anyway. So don't panic and run in early, but also know you need to get there with about a second to spare.
Once the cast is finished, the raid should wait to receive both buffs before dispersing. It can help to have someone make the call to move back so players don't have to think about it.
When Darkness finishes casting, Shadow Orbs will spawn again, so ranged DPS need to switch and kill them.
The time between the first darkness and second darkness is variable, but normally around 45 seconds - meaning there will be more overlap between Fire Blooms and trying to get in under the shield, and some of the raid will be affected by the slow from Flame Dart. The raid will need to adjust their travel time as a result. Paladins can use blessing of freedom to assist slow players coming in from the edges.
At this point, it's time to explain why KJ is a DPS race. The short answer is you get a limited number of shields per phase.
The long answer is that every time a Drake uses its shield, it loses 50% of its health. This means it can only use a shield twice. The number of dragon orbs you get per phase is limited by Kalecgos - you get one in each phase except the last, therefore, you only get access to one drake.
That means you need to push from 85 - 55, then from 55 - 25 with two shields and one set of buffs. It's not a nightmarish DPS race, but it's certainly difficult.
It's also worth mentioning that you have until Kil'Jaeden starts casting to push through damage. Once the channel starts, his wings will reduce damage taken by 99%, and even if he reaches a transition threshold (55 or 25) he will finish his cast first, wiping the raid.
Once you've hit 55%, the boss moves into the next phase.
Tactics - Phase Three
Phase three is almost identical to phase two. The boss will start by creating four clones of a player, channel shadow spikes, and spawn shadow orbs, increasing in quantity to three. In addition, the timer will immediately start on Darkness of a Thousand Souls.
The new mechanic in this phase is Armageddon. Over the course of this phase, Kil'jaden will target a player's location and cast this ability, causing a huge flaming meteor to arrive after a delay. It's very clear where this ability is landing, and the player has plenty of time to move out of the way. As a result, this ability will normally instantly kill any player who gets hit.
In a vacuum, this ability is not tricky. However when you have to deal with Fireblooms, Shadow Spikes, Flame Darts and stacking for Shield of the Blue, it's very easy for players to get mixed up and hit by Armageddon.
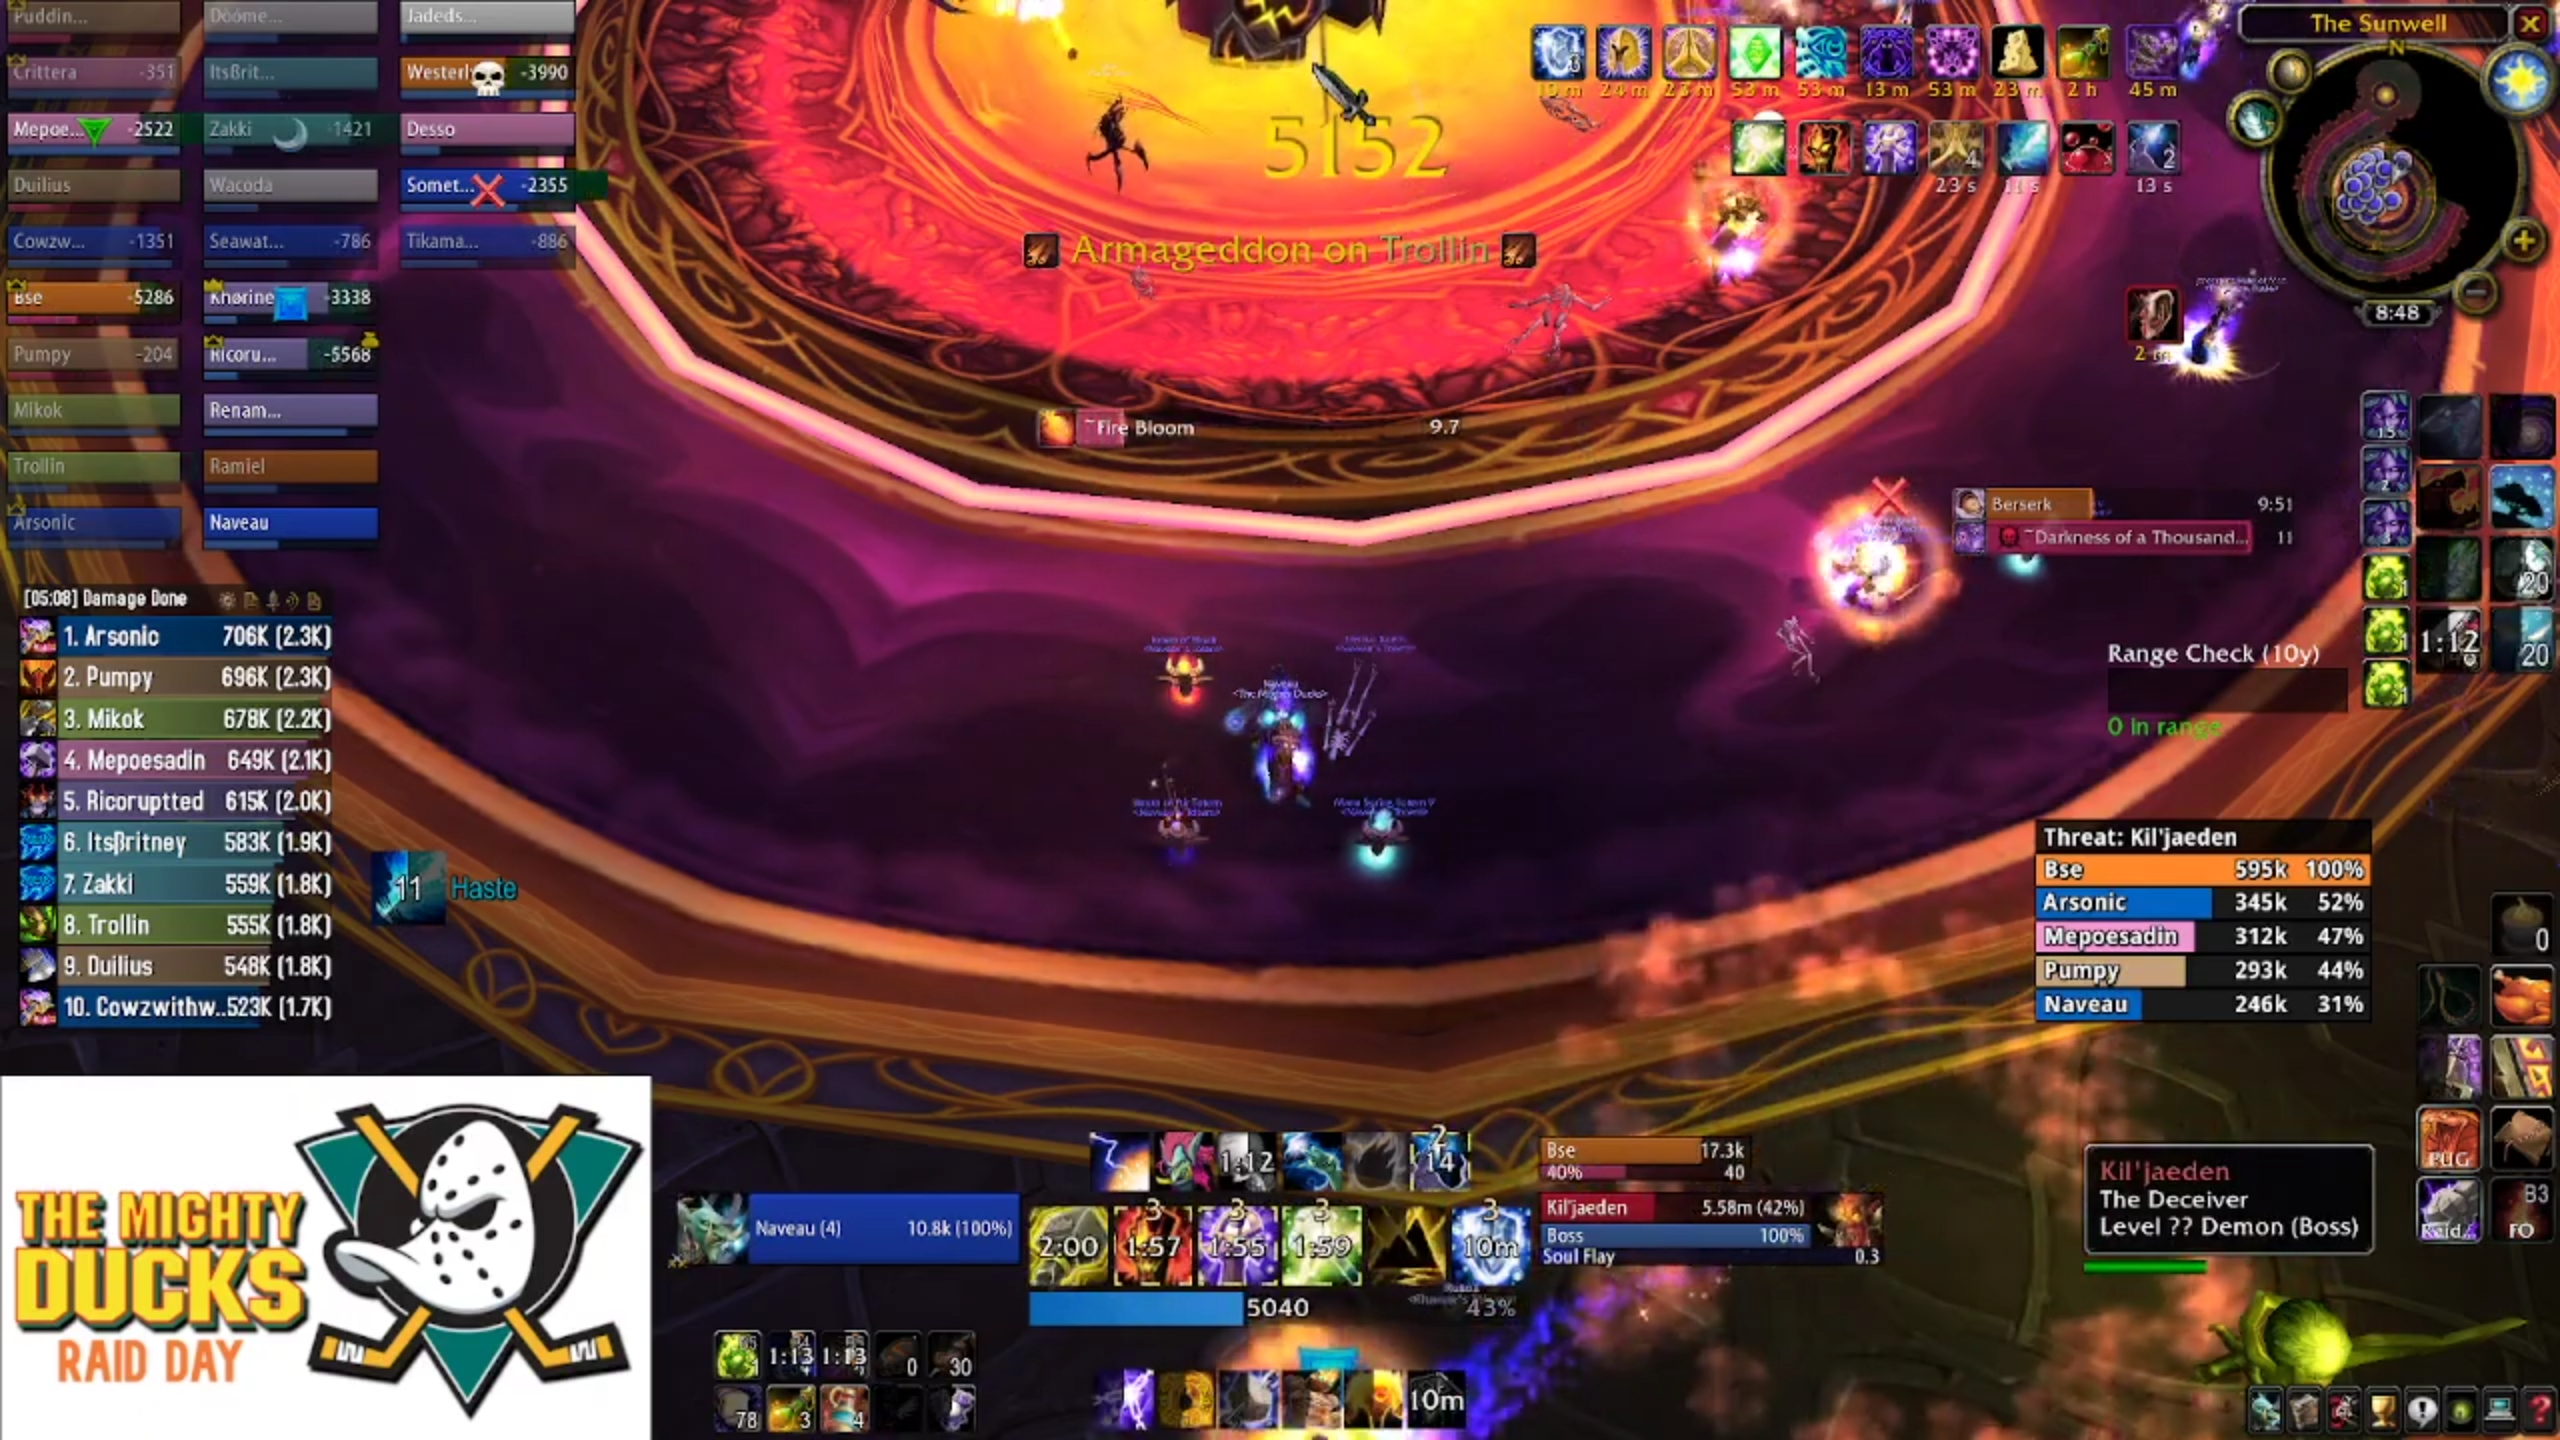
The key here is communication and situational awareness. The raid needs to keep its eyes open and individual players should stay on their toes, particularly when stacking and dispersing.
Otherwise the gameplan is identical to phase two. You need to push the boss to 25%, making use of the haste and restoration buffs from the Blue Drake.
You'll want to use Bloodlust in this phase to offset the reduction in uptime caused by avoiding Armageddons. Stick to your process, communicate well, and you'll get through it. These two phases will be responsible for the lion's share of your wipes until players adjust to the frenetic pace of move, wait, disperse.
Once you finally push to 25%, it's time to put an end to this nonsense.
Tactics - Phase Four
In this phase, Anveena, the physical manifestation of the Sunwell who has been whining about being lost over the course of the fight, recovers consciousness. She immediately sacrifices herself, stunning Kil'Jaeden and starting the final DPS race. As a side note, he also takes 300% increased Holy Damage, so your Retribution Paladins are going to absolutely hammer the boss.
As in previous phases, the boss will spawn copies of a player and channel Shadow Spikes. In addition, KJ will retain his Armageddon, Flame Dart and Firebloom abilities.
In this phase, the frequency of Darkness of a Thousand Souls increases dramatically. To compensate, the raid is given access to four dragon orbs. It is ideal to have both off-tanks pilot two drakes at once to keep the buffs going.
I cannot stress this enough, however. If you are an offtank taking control of a Blue Drake, make sure you are familiar with its operation, and you communicate effectively with the other drake controller to raise a shield. This is the only real way to wipe in phase five.
This is the point where awareness of where you are is important. Because players are constantly getting the haste buff, Flame Dart ceases to become a factor. Therefore the key is standing out when you need to for Fireblooms, moving out of Armageddons, and stacking when Darkness goes off.
If you've spent time wiping in phase two and three, you'll know what you need to do for phase four. Listen to the calls, maximise your uptime, and with a little bit of luck, and a lot of hard work, the Deceiver (no, not that one) will be sent back from whence he came.
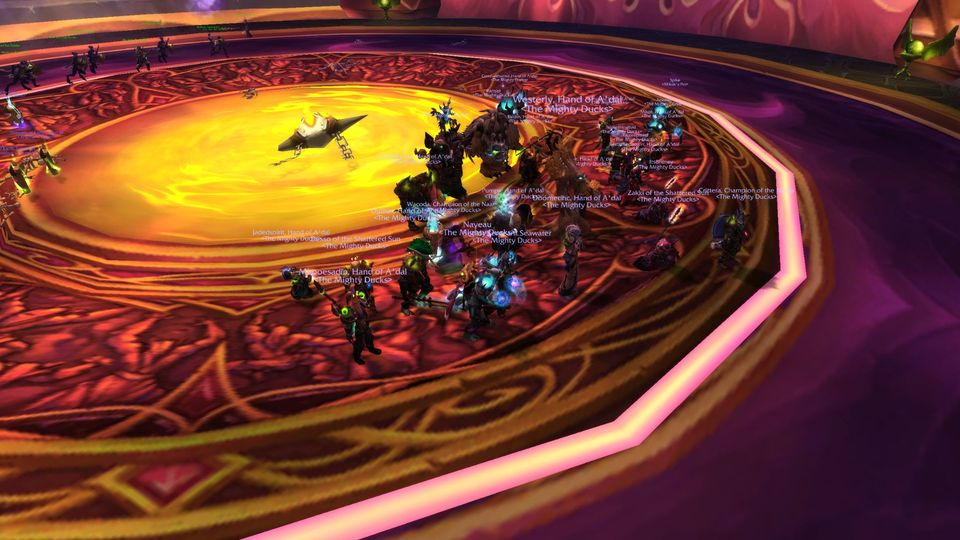
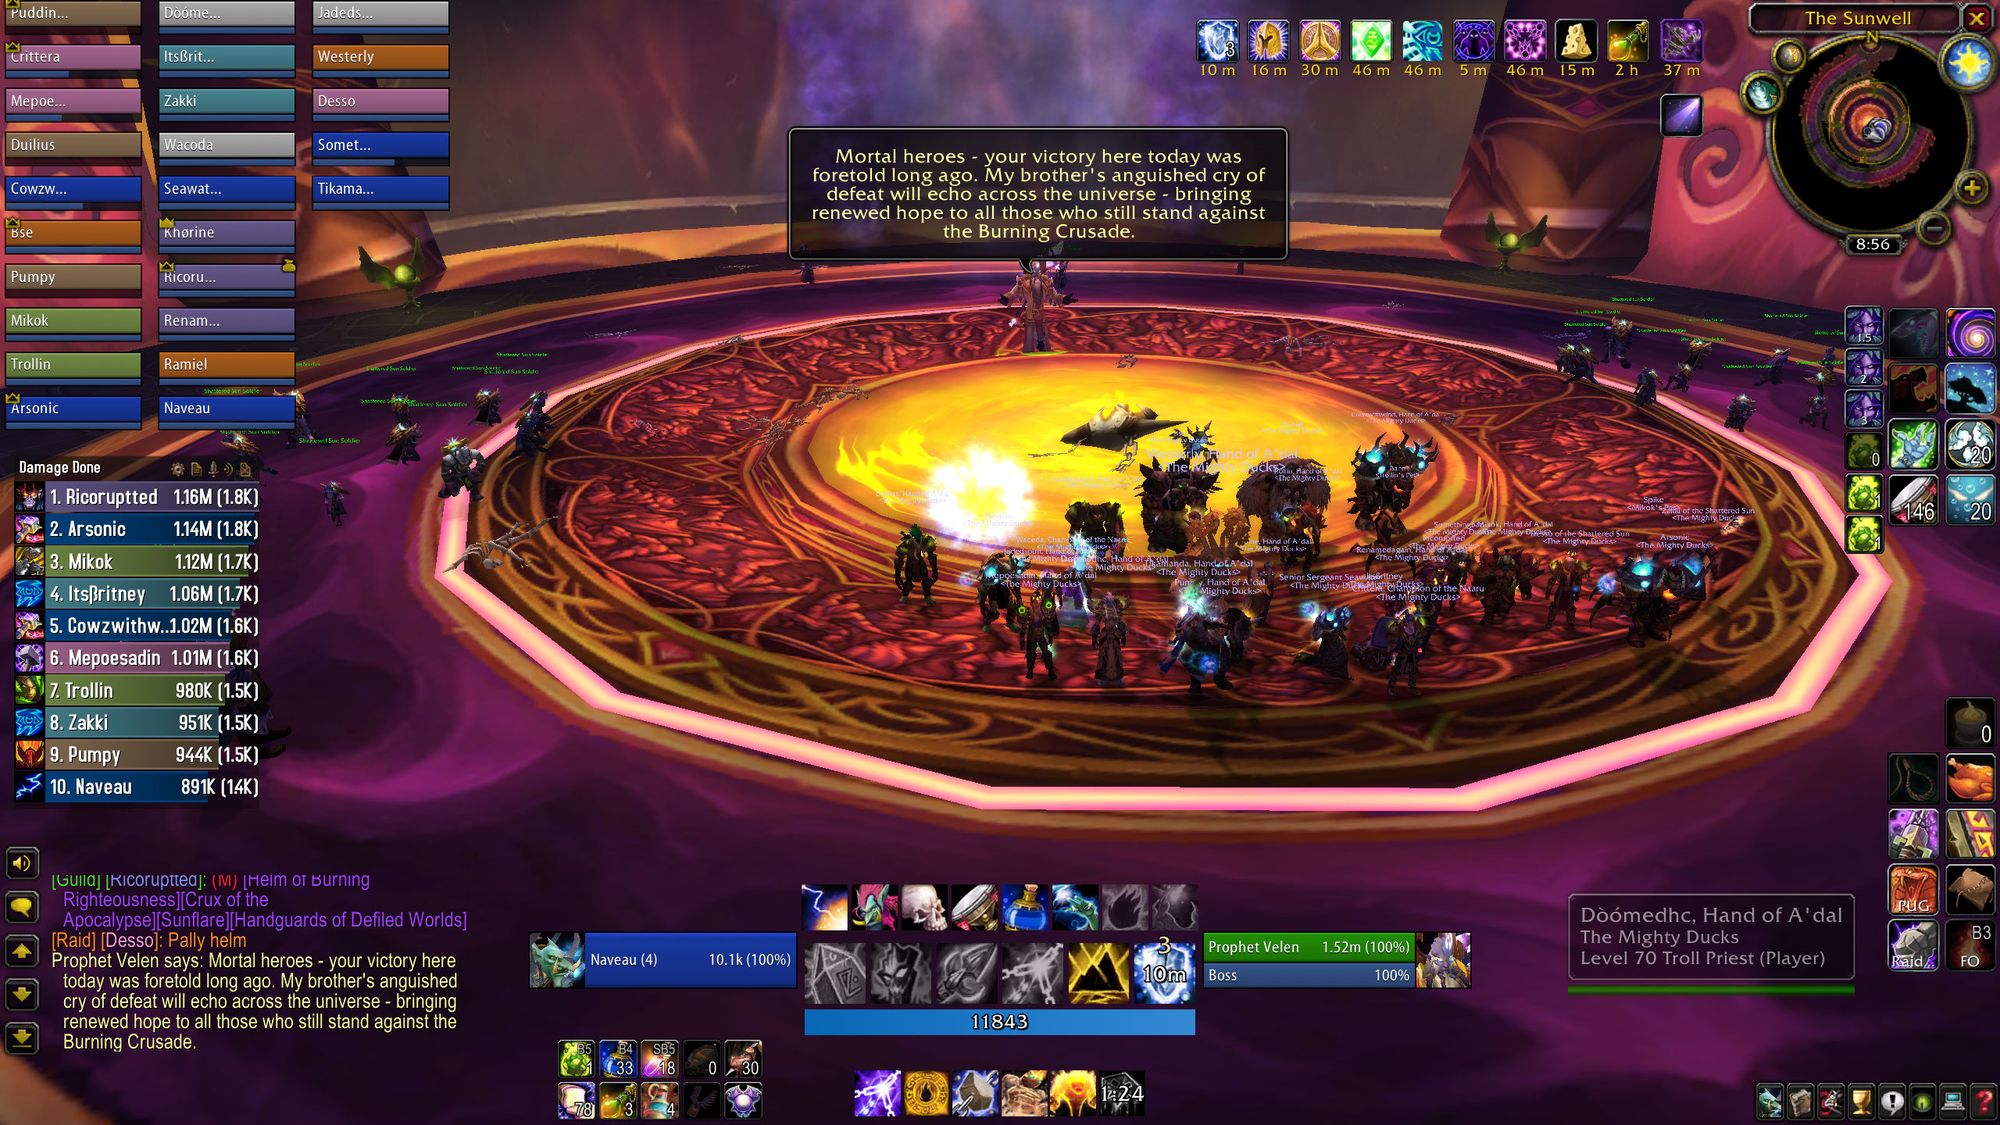
And with that, ends the last raid of TBC. There is nothing left to conquer, you have proven your mettle against the strength of the Burning Legion and its allies. In doing so, you have cleared some of the hardest, highly tuned content Blizzard has ever produced.
You are a champion.
Conclusion
It's funny how you remember things differently. Or not at all, looking at content through the glass pane of recorded content. The Sunwell never factored into my list of things to explore, or experience.
Always the enigmatic raid at the periphery - the last part of TBC. This mystical, almost impossible raid tucked away in the back corner. To me, anyway. When daydreaming about playing TBC again I always considered the Black Temple to be the ultimate raid. How little I knew.
We cleared Black Temple in a fortnight. The Sunwell took two months.
Looking back, I now remember the hardships of the Sunwell so much more. The endless nights of wipes. Building relationships as we suffered in the trenches together. Pushing myself to my absolute limit in a way I hadn't done for a long time.
It's a story for another time, but at the very end of the expansion, after KJ went down, I remember crying. Knowing there was nothing more, and that this was the end of the journey. I'll always remember the last months of my TBC journey and the friends I made along the way.
Additional Resources
Because of the difficulty of SWP, I don't have a complete run of the raid pre-nerf.
What I do have is footage of several runs to 5/6, setting up a long night of KJ progression later in the week.
I recorded our first KJ kill, but it is the only prenerf kill I have recorded. It also ends with a BT run and me tearfully bidding farewell.
...only for me to show up and do a post-nerf run to see how easy it became in the end.
Catch you next time,
Vulkan
Did you like this article? Did you hate it? Go over and keep the discussion going on the official Vulkan's Corner facebook page! - whilst you're at it, leave a like!
